
DIY Felt Home Banner
DIY Felt Home Banner
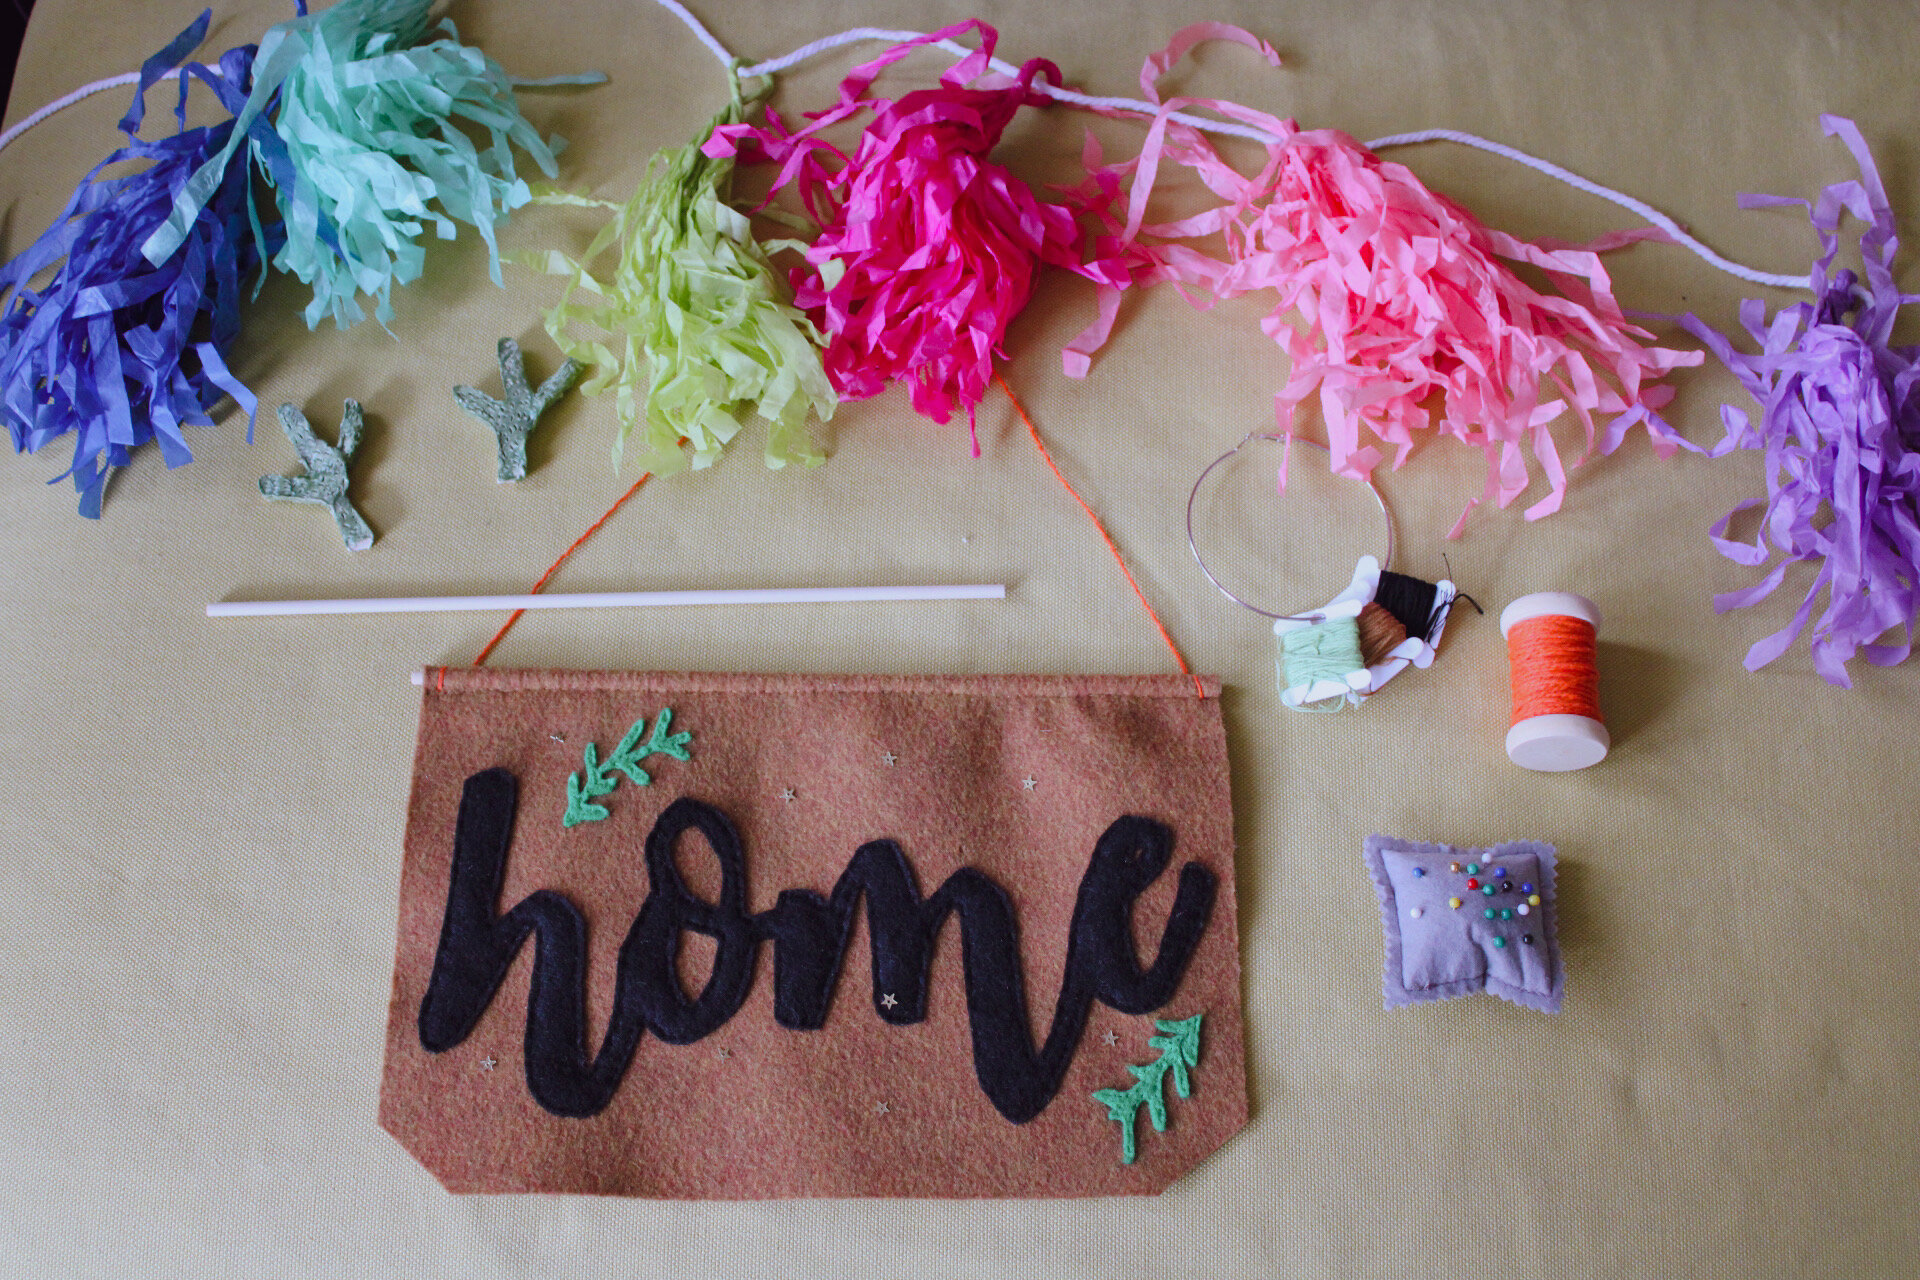
Making a felt banner is supe easy. Sewing with felt is like a dream. It is so durable and easy to just pin in place and sew it. It is super simple to cut as well. Perfect for anyone! I got all the felt for this project from Benzie Design, one of the greatest places to buy felt. They have every color and the felt is made of wool. That being said, buying felt from a craft store is just as good and will do the job!

I started by finding the font that I wanted to use for these banners. I remember from my many hours watching Fixer Upper that Joanna Gaines uses a home wooden wall piece in one of her houses. I searched the internet for the exact (or as close as I was going to get) image of the script I wanted to use. I then traced the lettering onto a piece of tracing paper. The rest is the creation of the DIY Home Banners.
Supplies:
One sheet of brown felt
One sheet of black felt
Half a sheet of green felt
Pen
Scissors or Xacto Knife
Sewing Needle and Thread (black, brown and green)
String
Pattern -- Here is the exact font! Just trace this and you are ready to go.
Optional: sequin stars

Step One: First you will trace the home letters onto tracing paper and cut the letters out using scissors or Xacto knife. The Xacto might be super helpful to get into those letters but the scissors work too.

Step Two: Next, place the tracing paper on top of black felt and pin into place so it does not shift when you are cutting.
Step Three: Now begin to cut the felt using scissors following the tracing paper as a guide.

Step Four: Next, draw on green fabric with a Sharpie or other felt tip pen leaves of any kind. I like to draw a curved line and draw multiple petals on each side. Remember the way you would when you would draw a flower in the 3rd grade and added a stem with leaves? Just like that. Then cut the leaves out. Pro Tip: When using marker on felt it will make it look a little bit less clean, after you cut the leaves out just flip them over so no one ever knows!
Step Five: Now take your brown felt and place it horizontally. Pin the black felt, now in the shape of the word “home” to the brown felt leaving at least 2’ inches of space at the top. Also pin the green leaves where-ever you feel they will look best.

Step Six: Next you will begin to sew the felt together. Using a needle and black thread use a running stitch (Take the needle in and out of the fabric up to your desired stitch length) to go around the edge of the word. Make sure to go back into the letter H, O and E to get the loops and secure everything down. Repeat this same stitch on the leaves using green thread.
Step Seven: Now that your letters are secure, flip the banner over and fold over towards you 1.5 inches and pin into place.

Step Eight: Using the same running stitch sew horizontally across the top. Make sure you go in a straight line through this process.
Step Nine: Slide the wooden dowel into the hole you just created. Sew string around the dowel, starting on one side and finishing on the other, tying knots in the back.
Optional Step Ten: Next you will glue using hot glue or even clear Elmer’s glue to glue sequin stars to the banner. You can glue them in any order or design you would like.
Now you can admire your amazing work of art. You can hang it anywhere in your house, you can make a bunch of them and hang them all in a gallery wall type of way. They also make great gifts! You can write anything in felt if you really want to!