
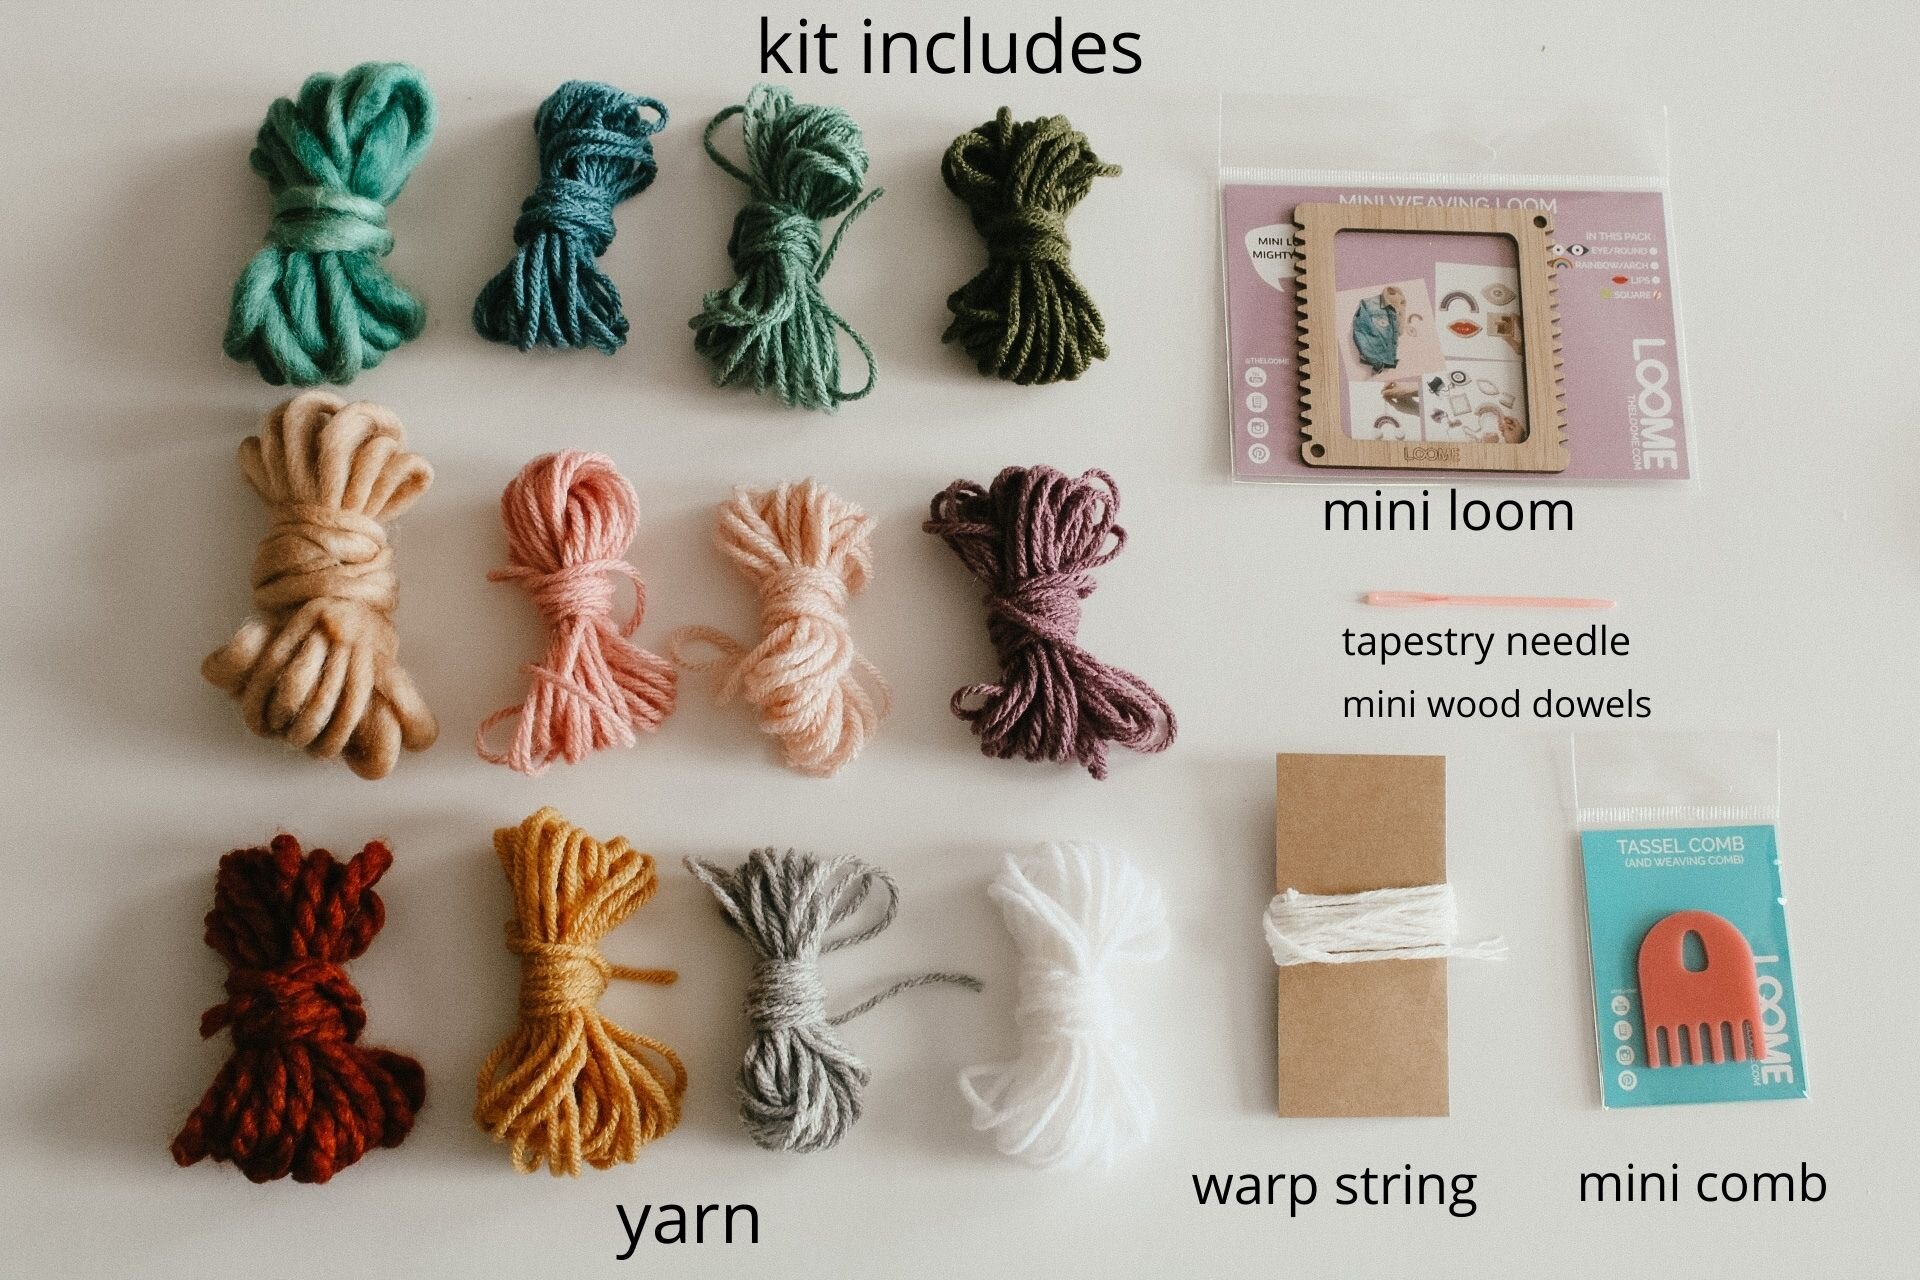
mini weaving
hello and welcome to your mini weaving kit, i am so happy you are here! get excited to learn how to use all the materials and make TONS of weavings. you will learn how to warp your loom, the tabby stitch, interlocking stitch, soumak stitch, rya knots, twining and how to hang your weaving on a stick.
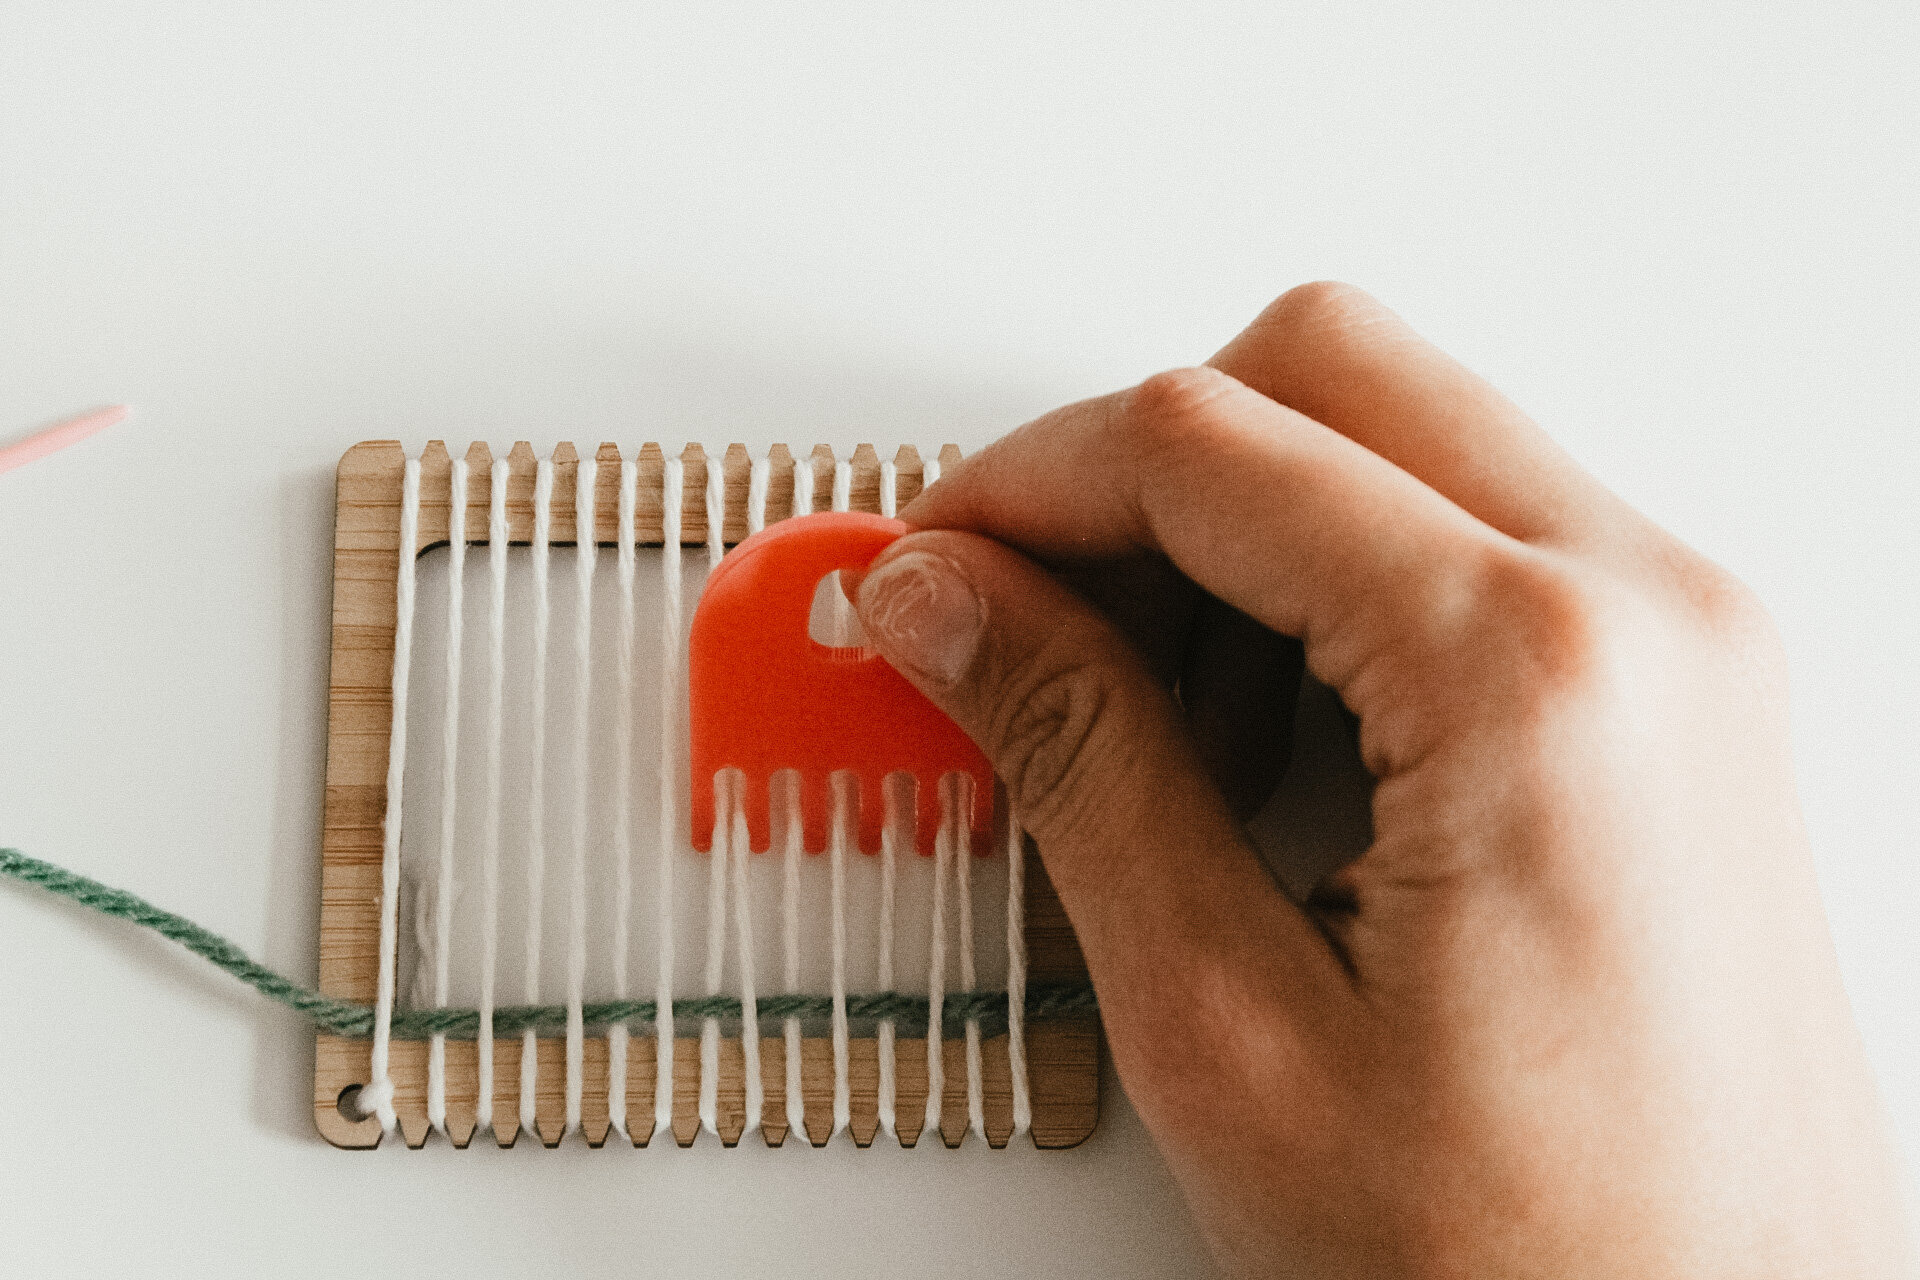
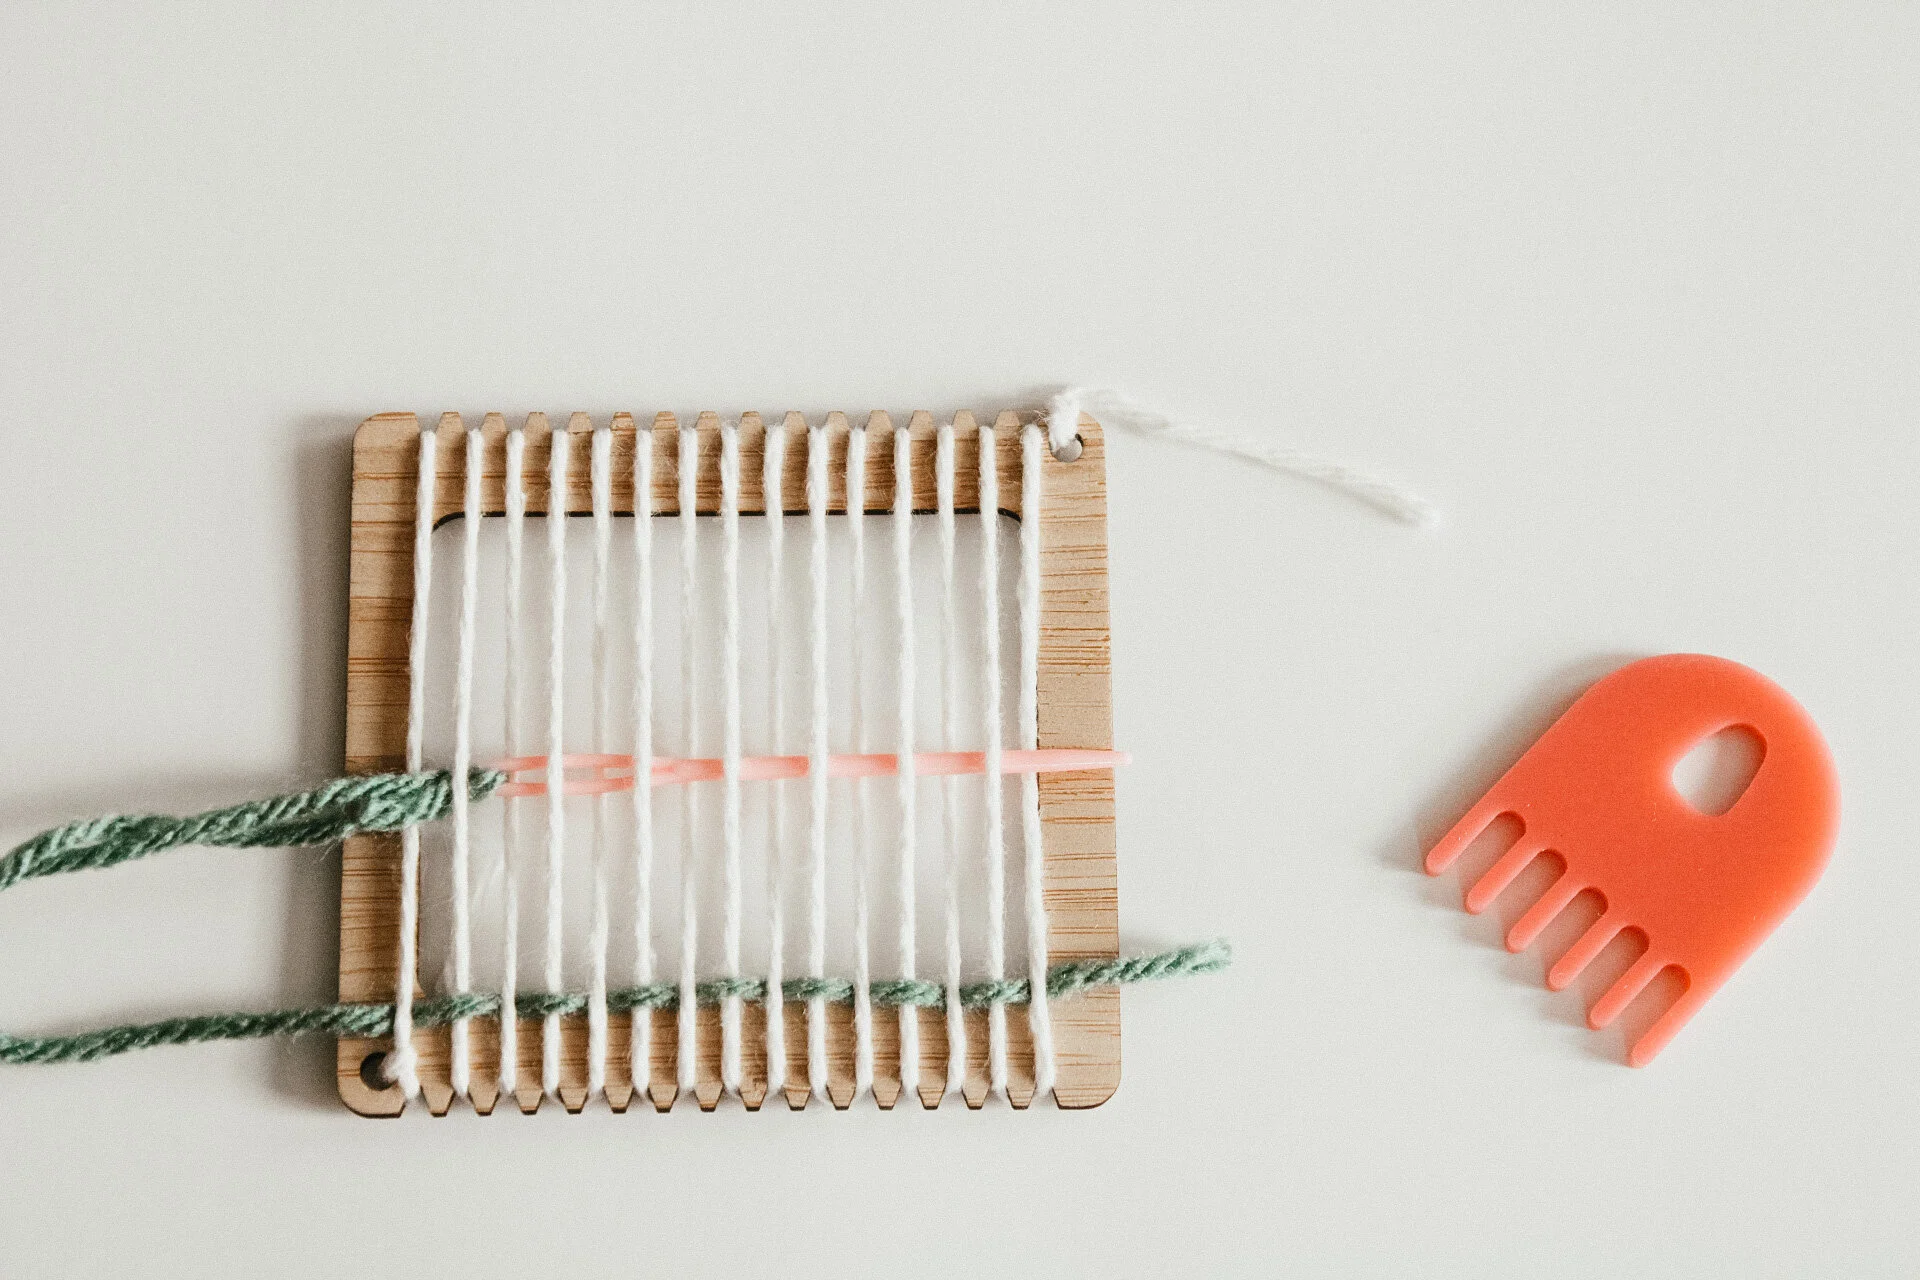
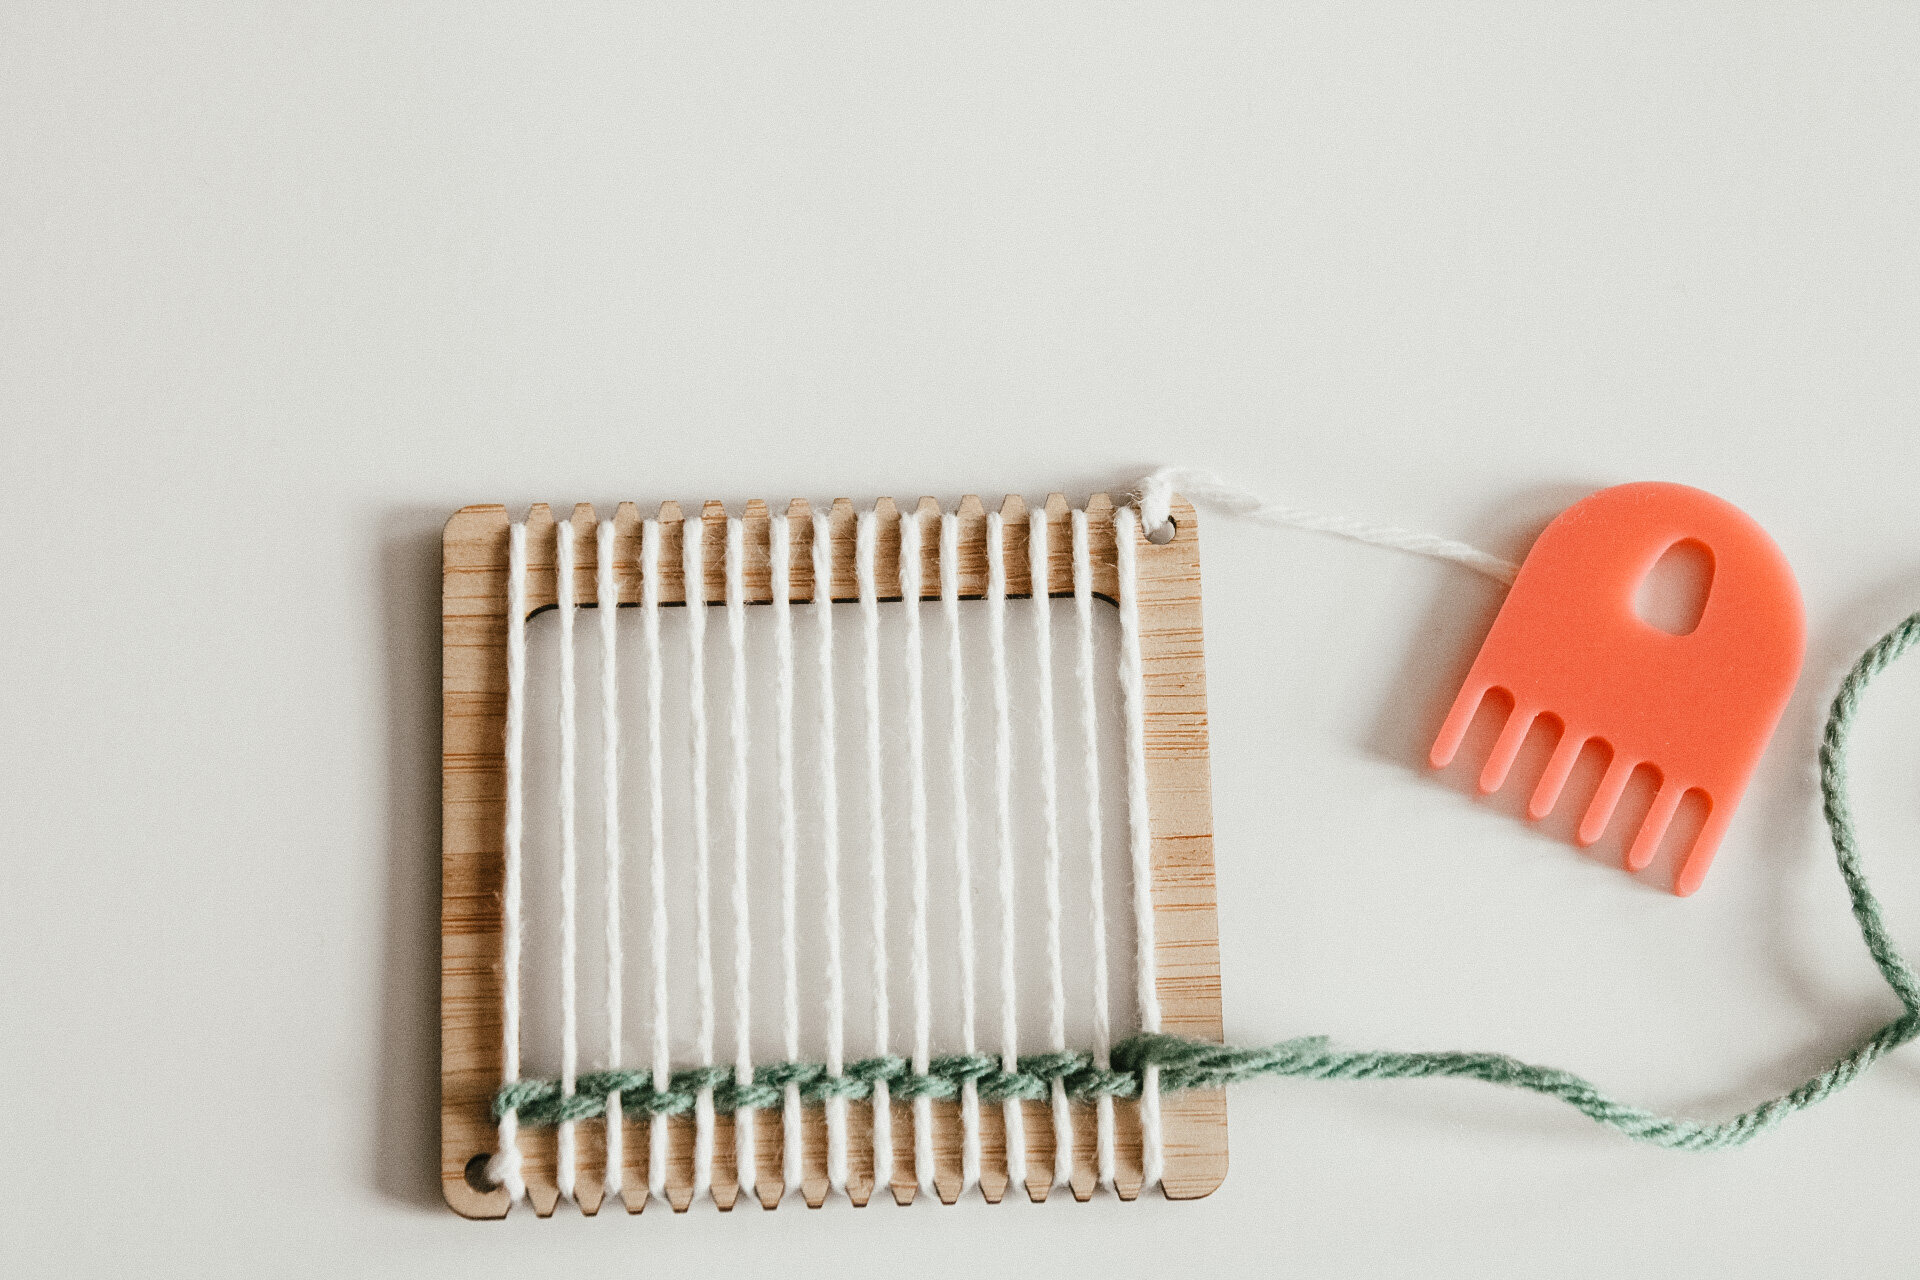
+warping your loom
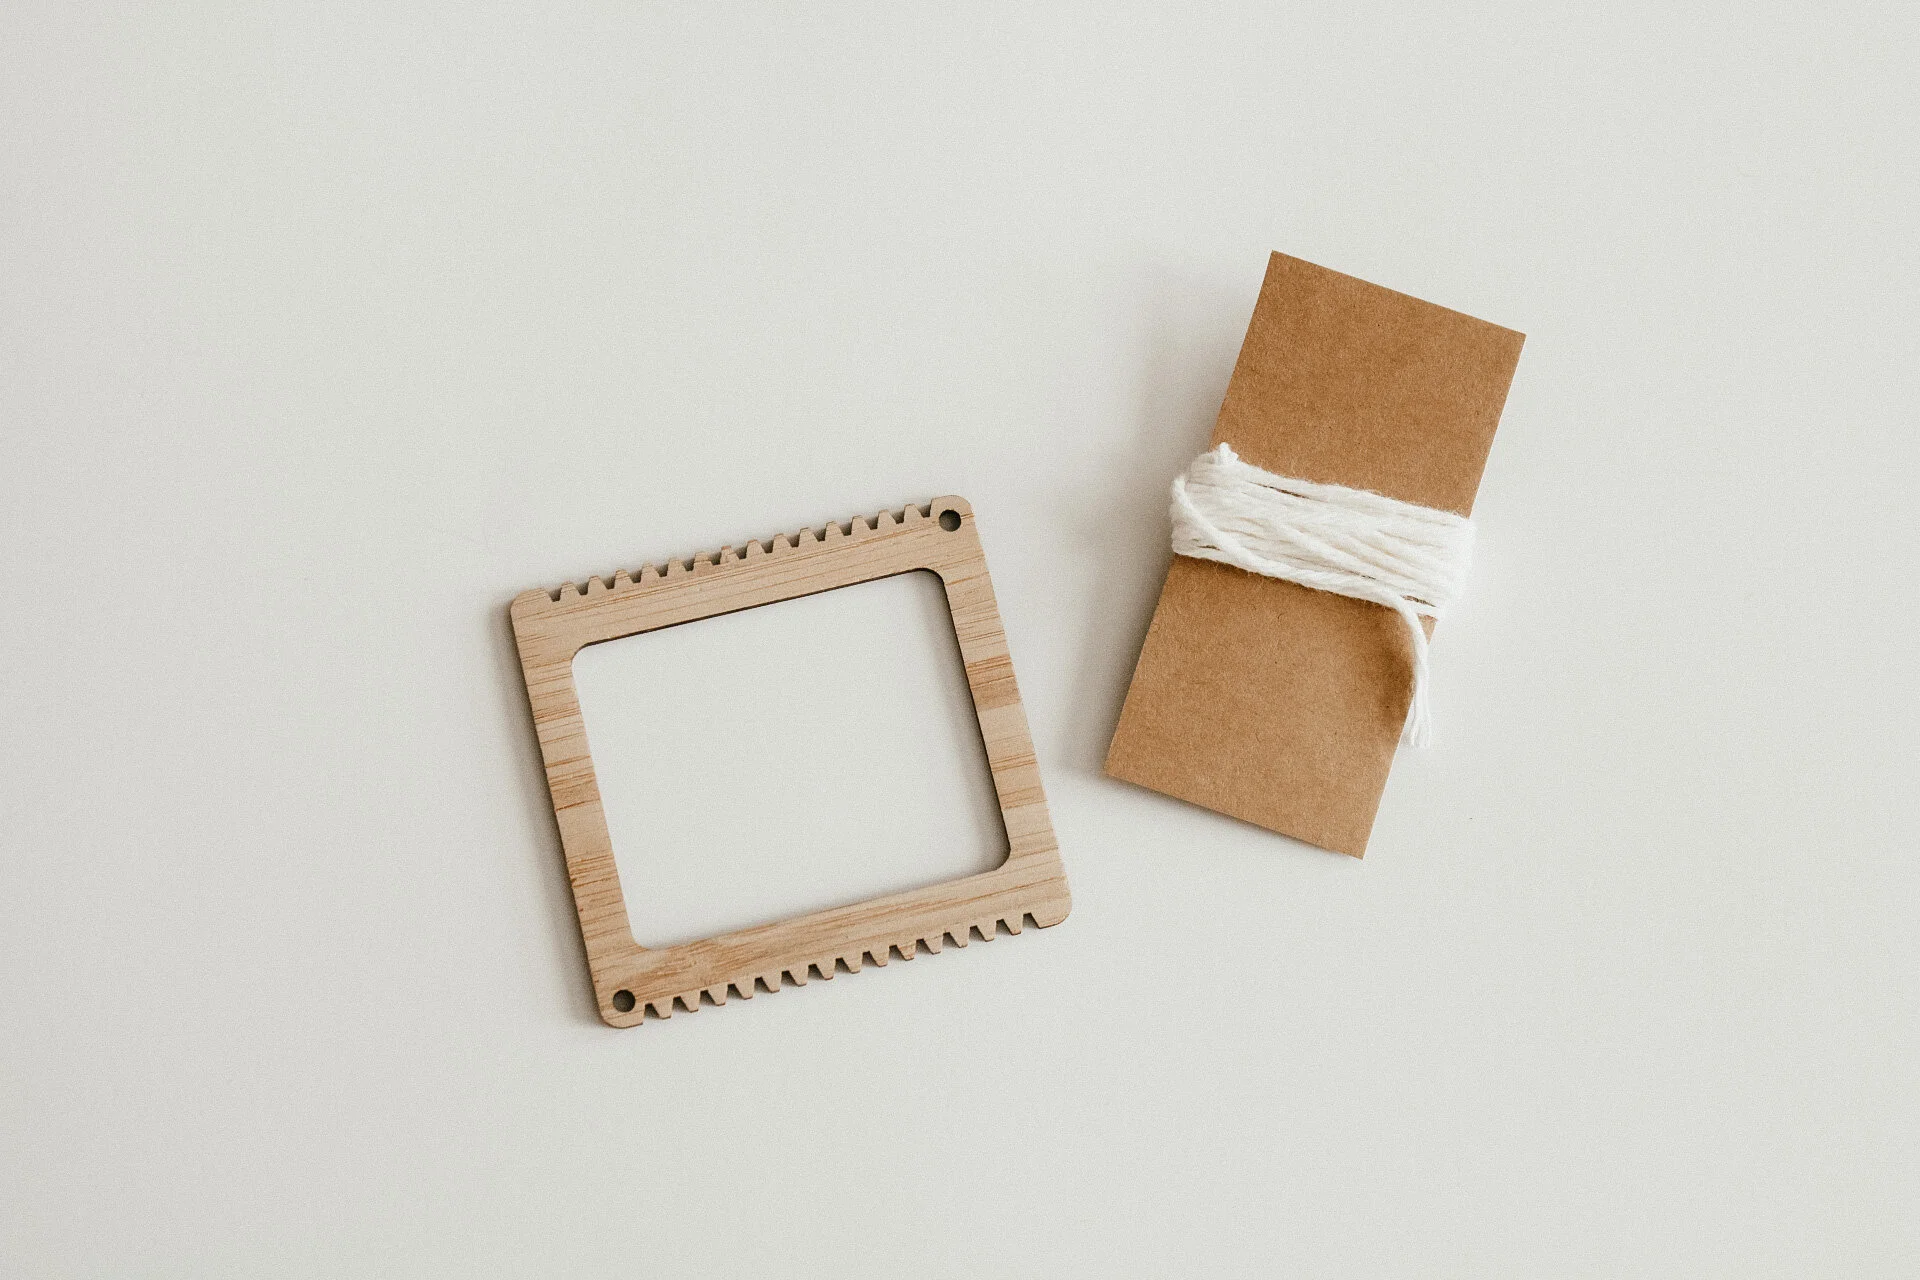

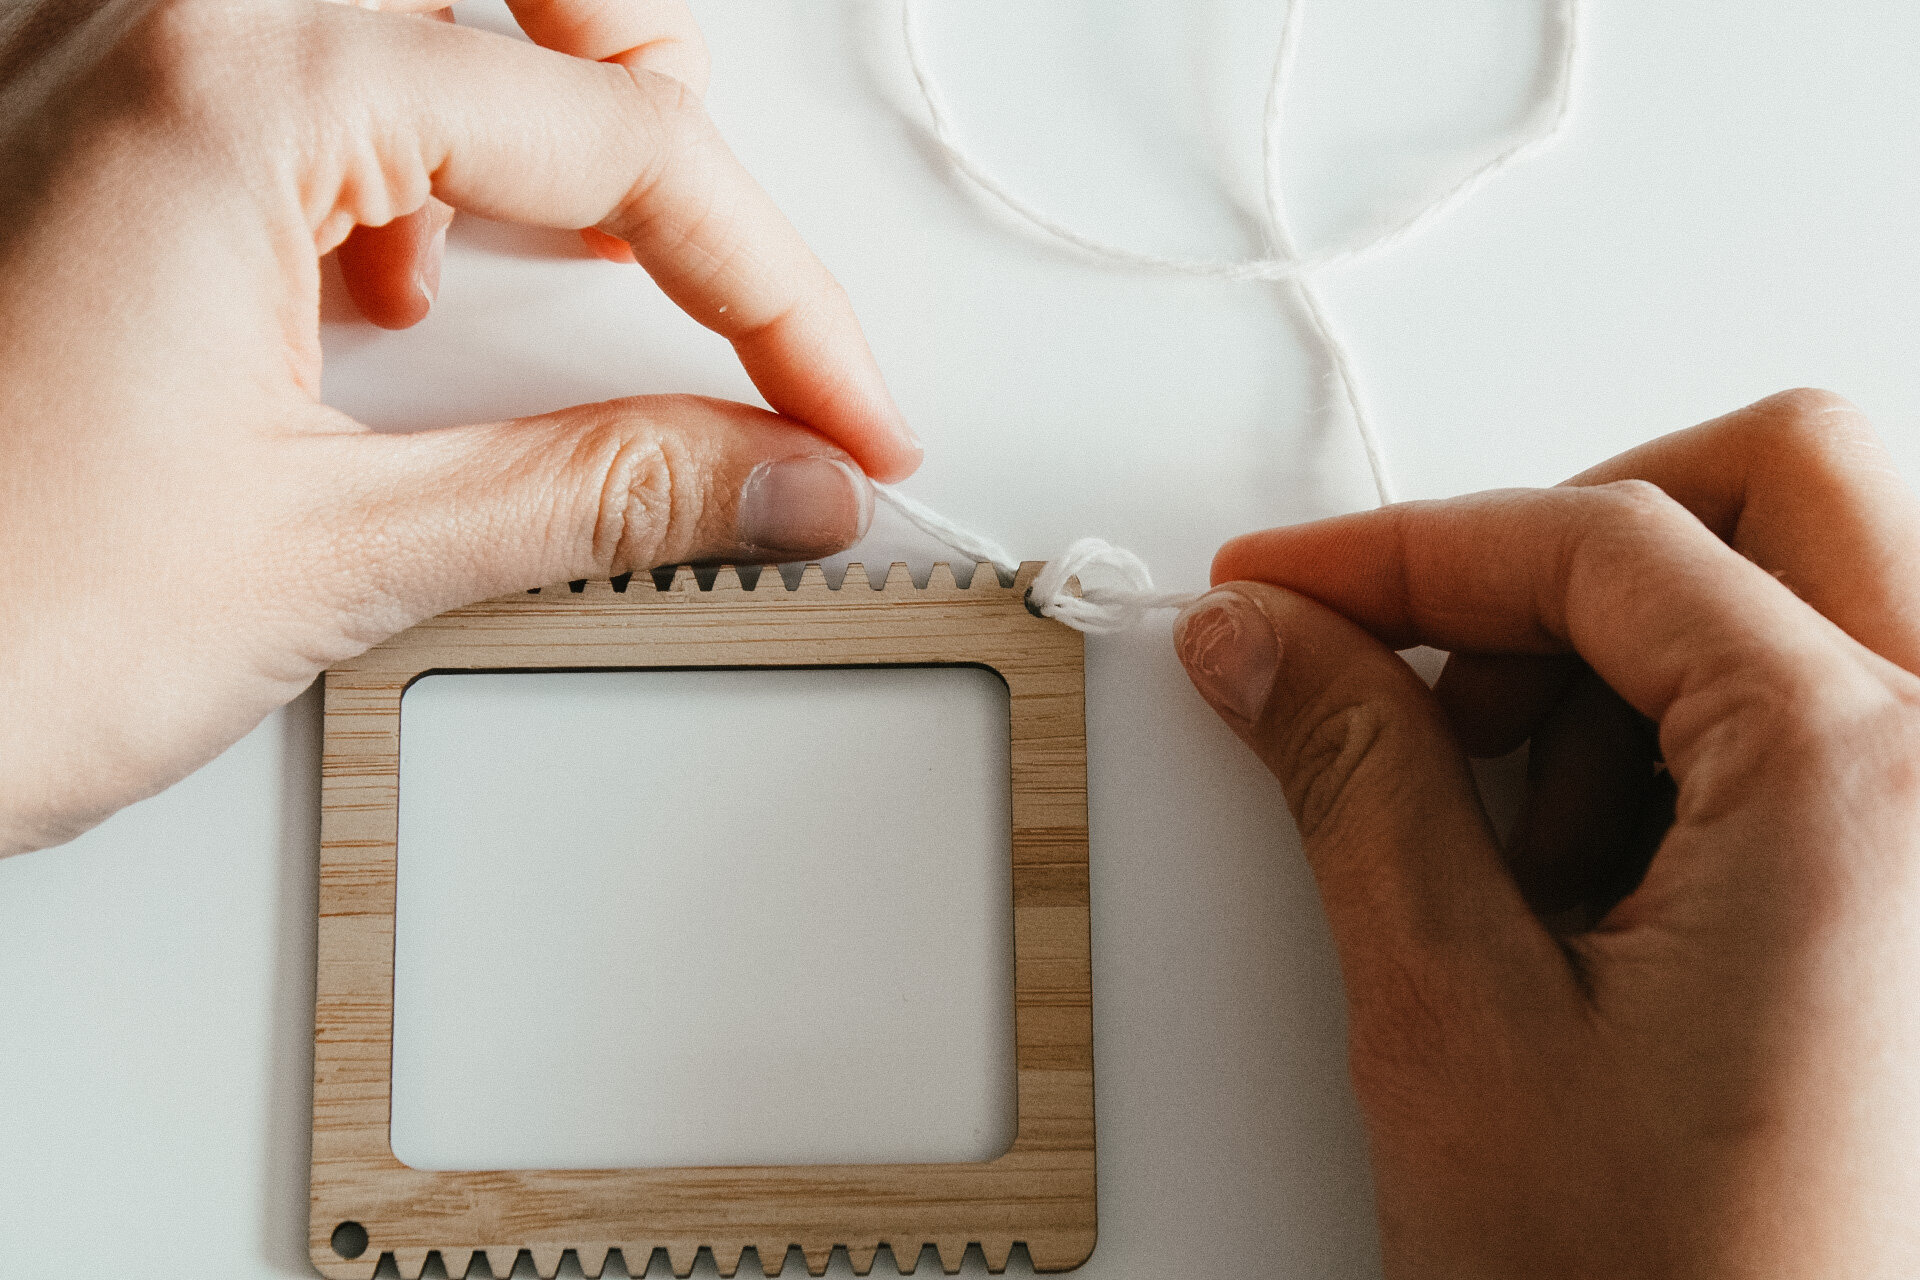
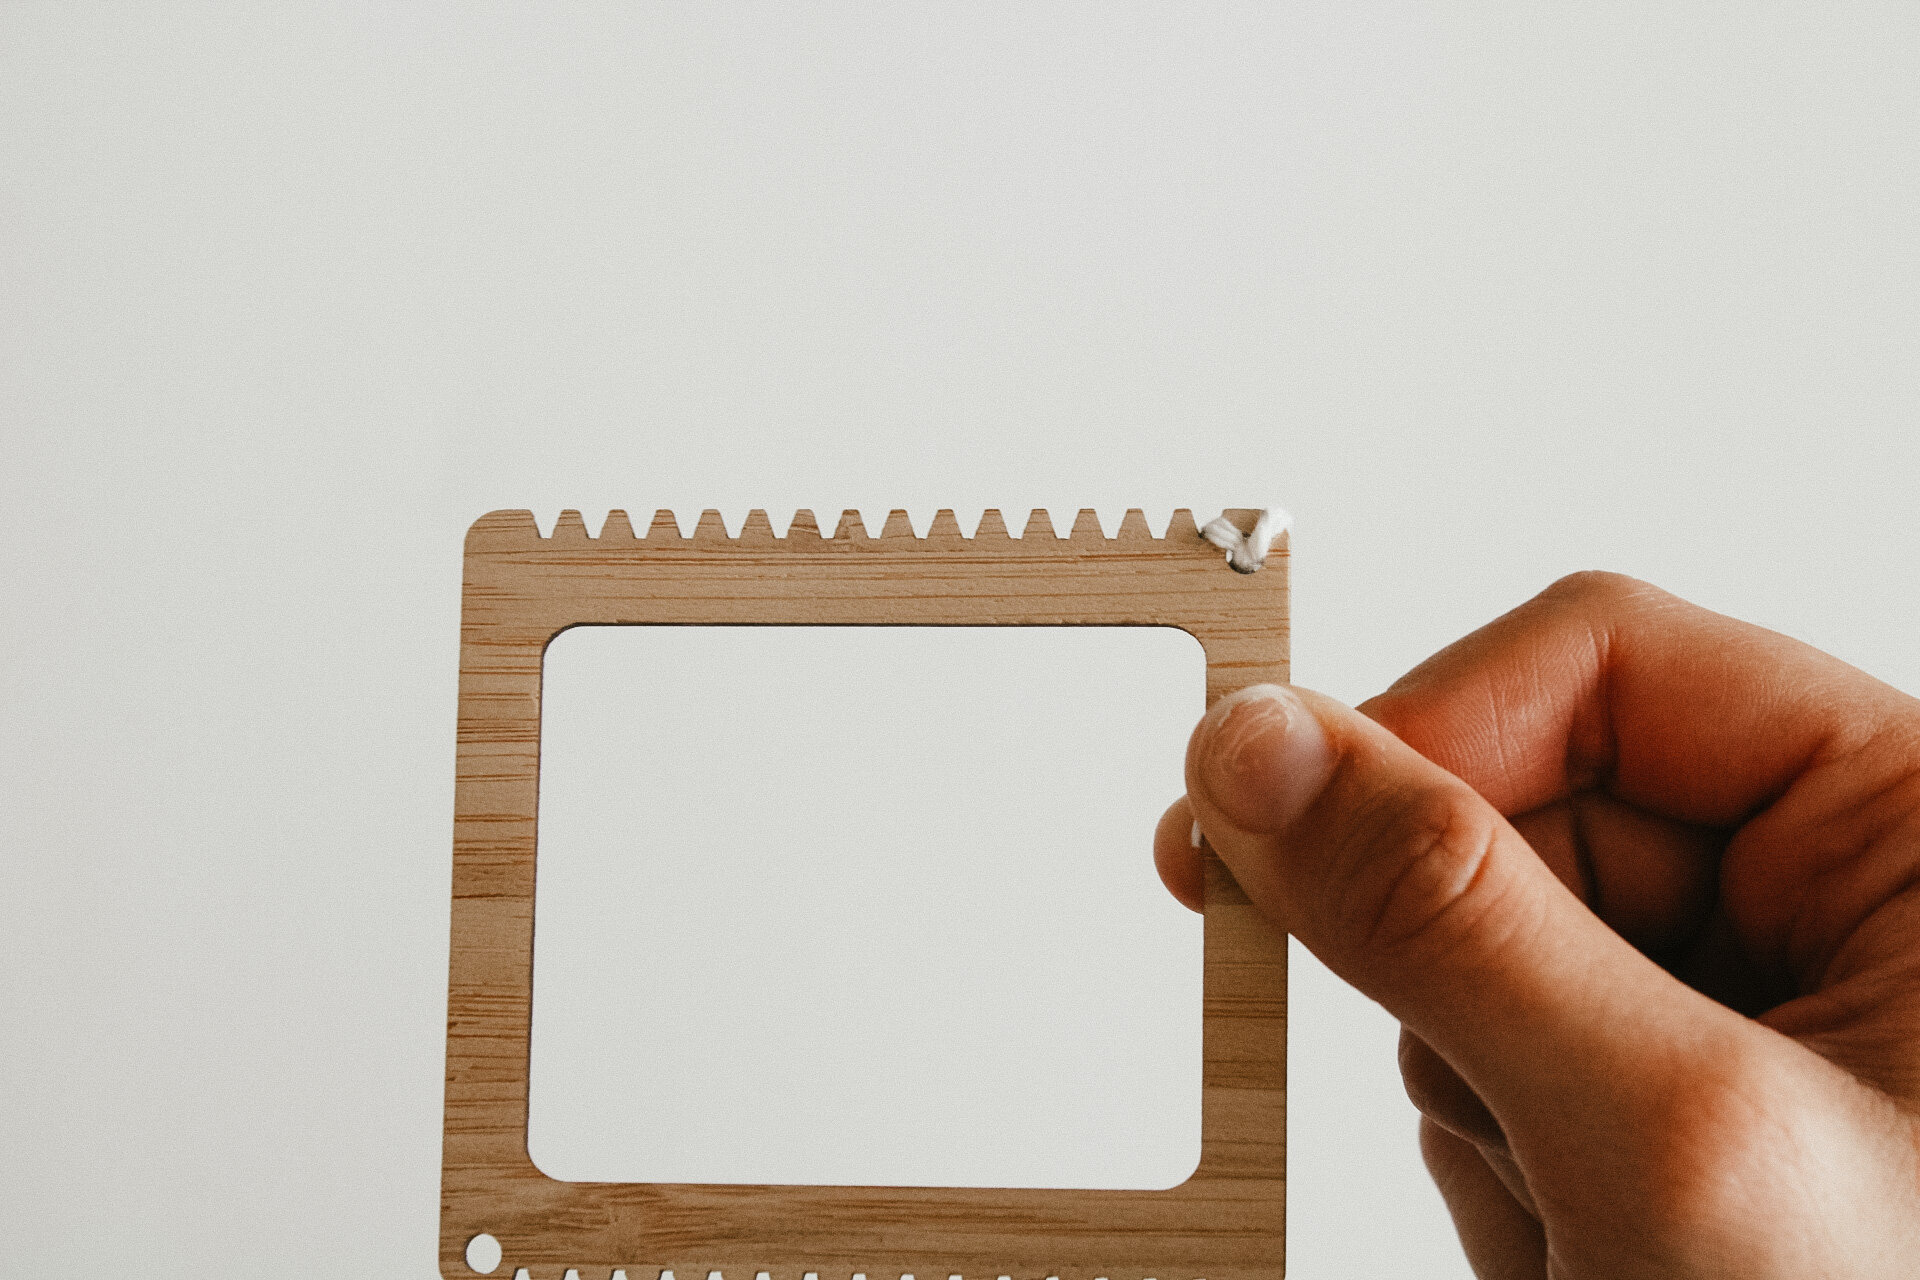
01. thread a 2” loop of warp yarn through the hole. put the long end of your warp thread through the hole and pull to tighten. you can tape the end to further secure, though not necessary.

02. pull the long end of your warp taut to the direct opposite notch. If the tie moves a bit, simply hold it down with your finger.
03. pull the warp around the back of the notch, looping from back to front.
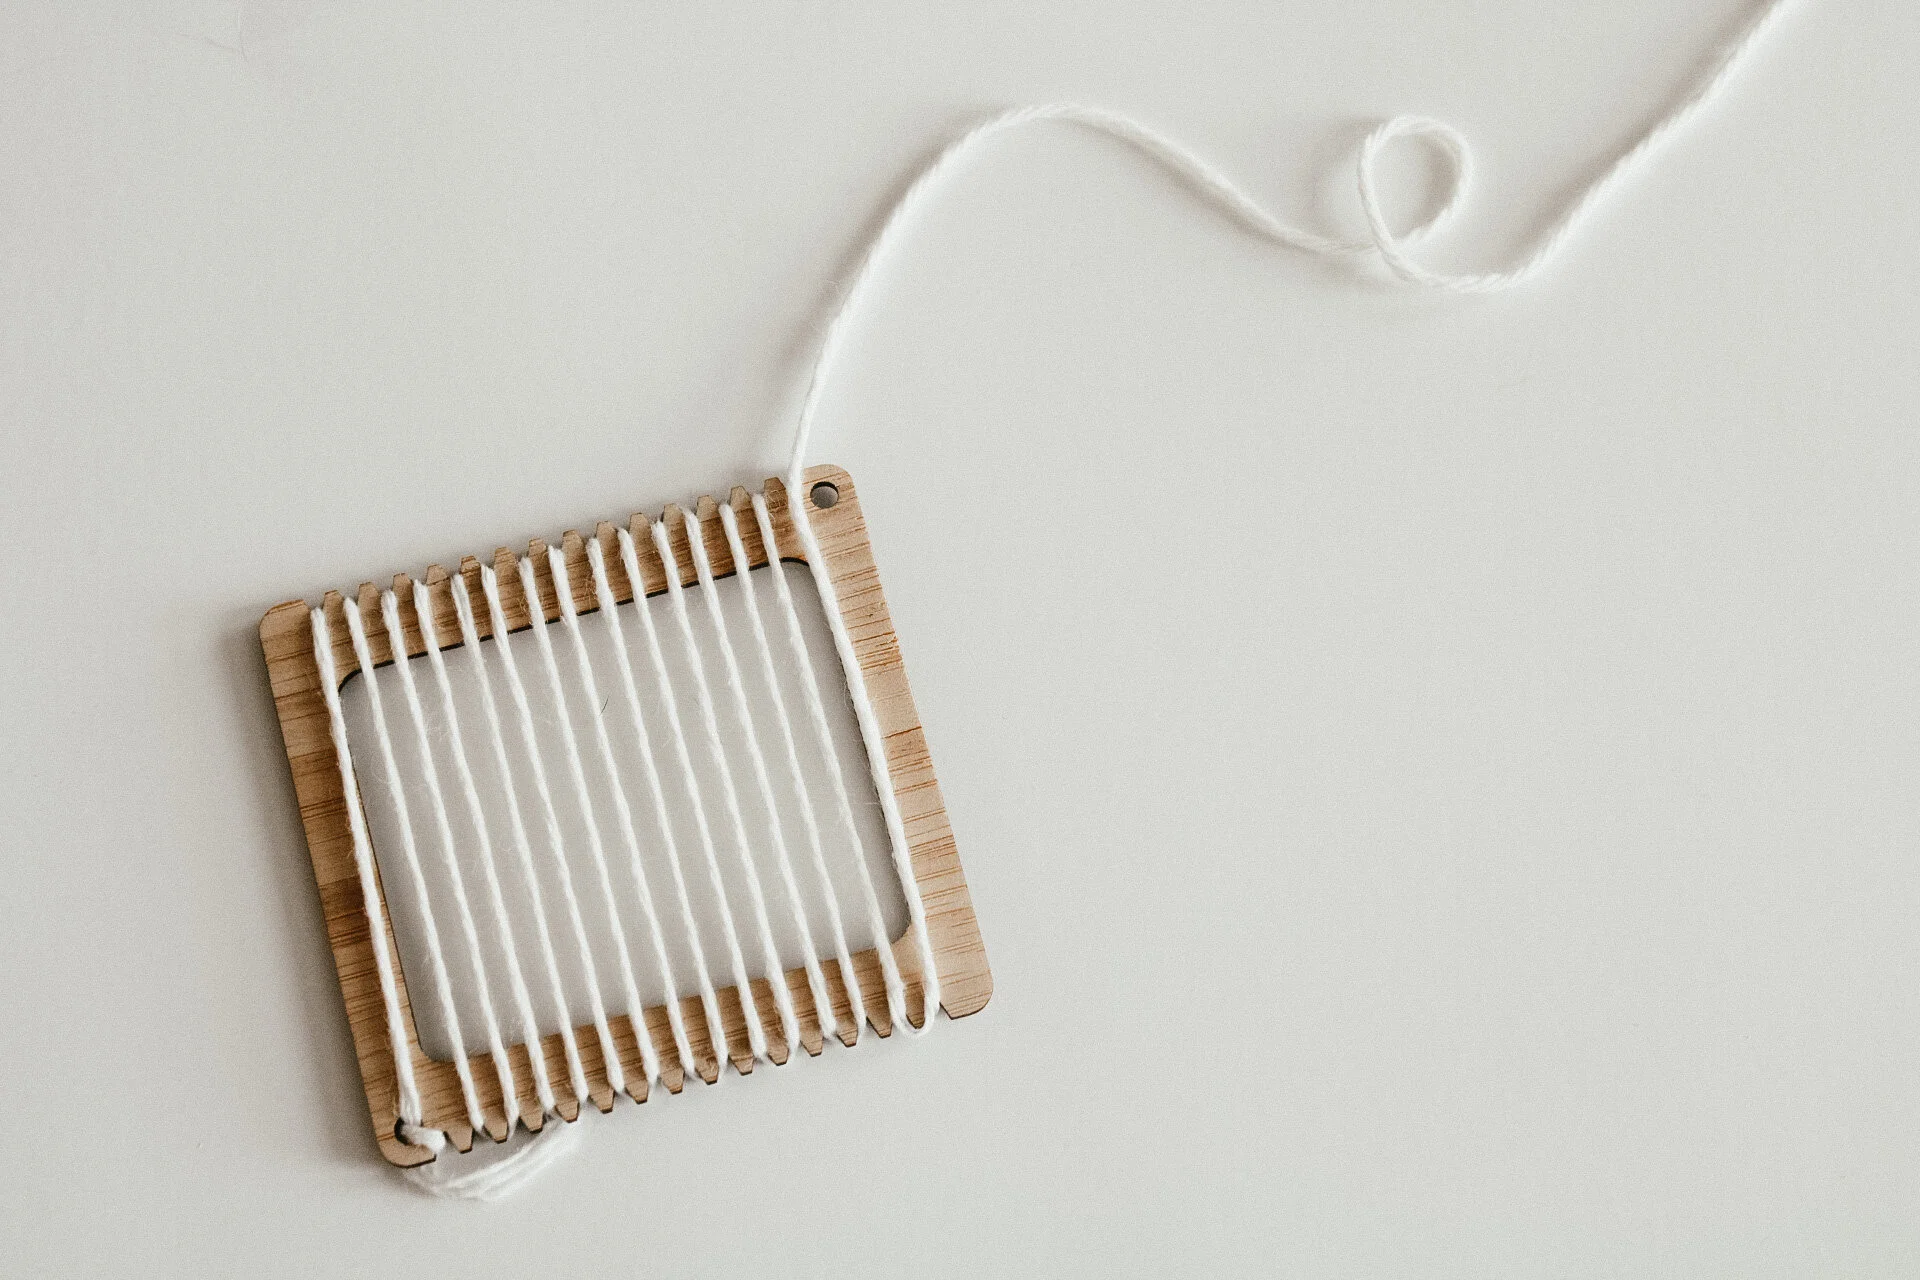
04. continue by repeating this warping pattern util the loom is completely warped.
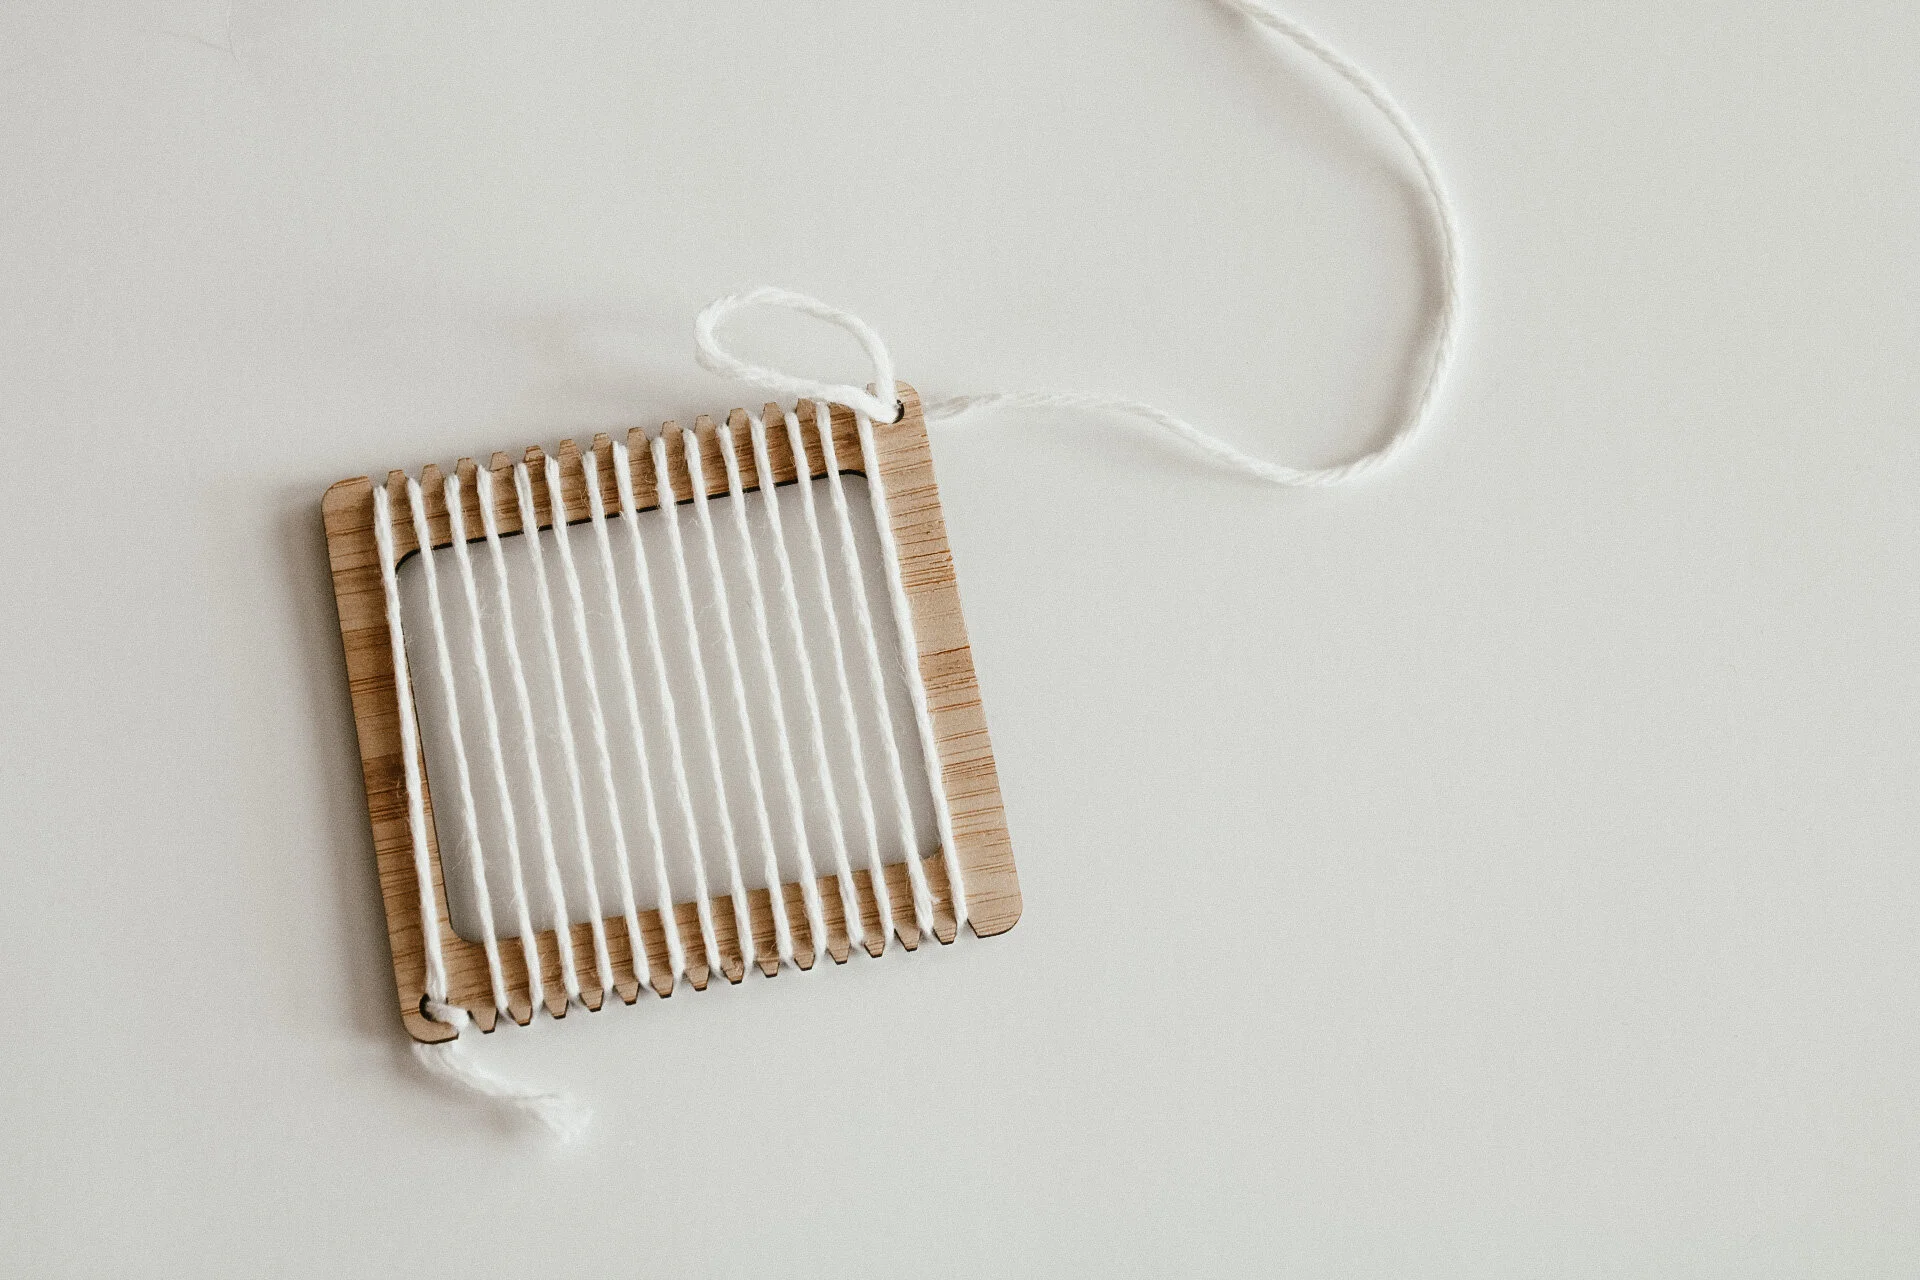
05. to finish warping, make another loop tie through the hole making sure to pull tight. the loom should be warped taught and feel like a guitar string ad your begin to weave.

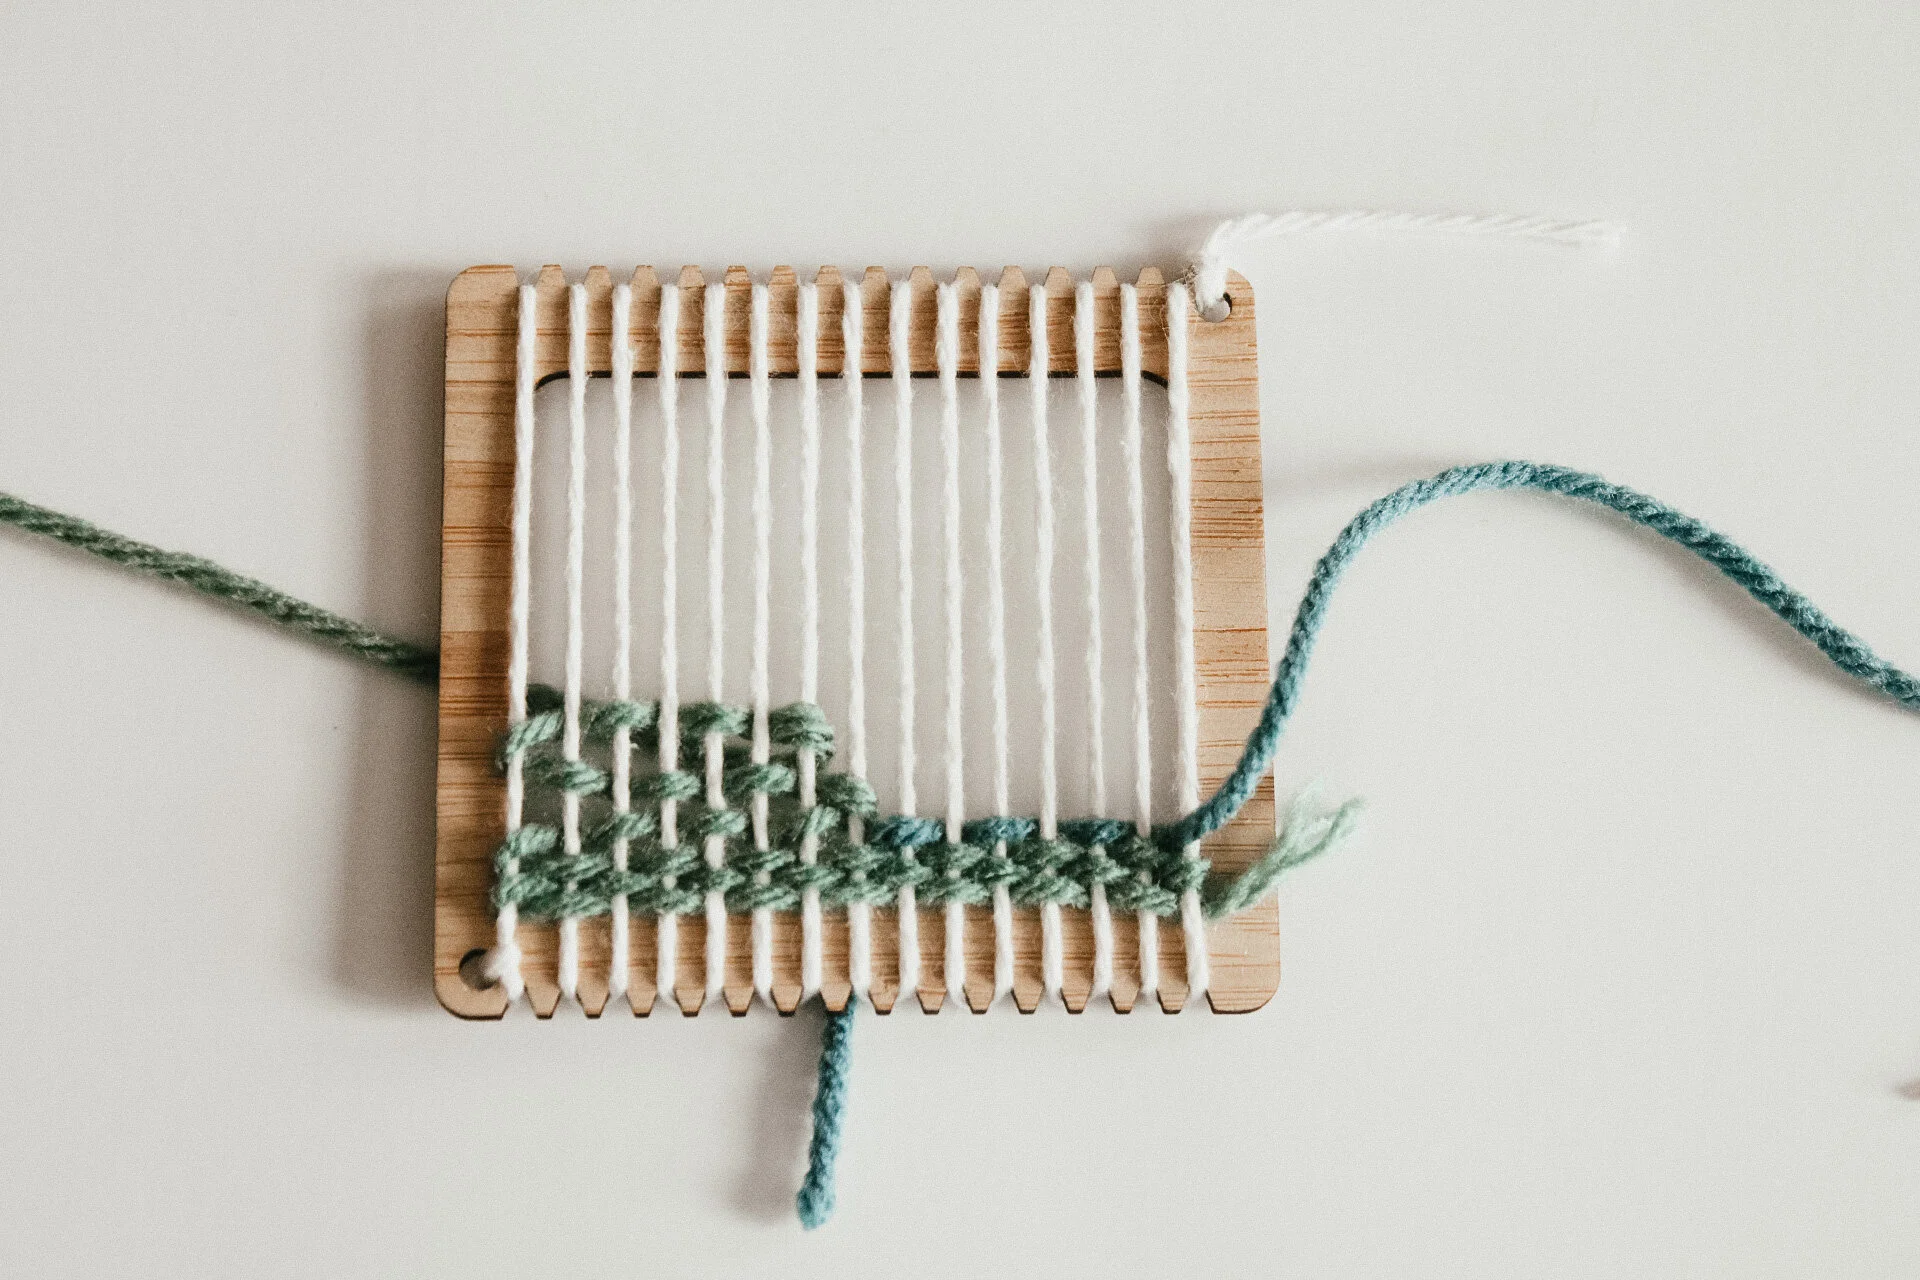
+tabby stitch

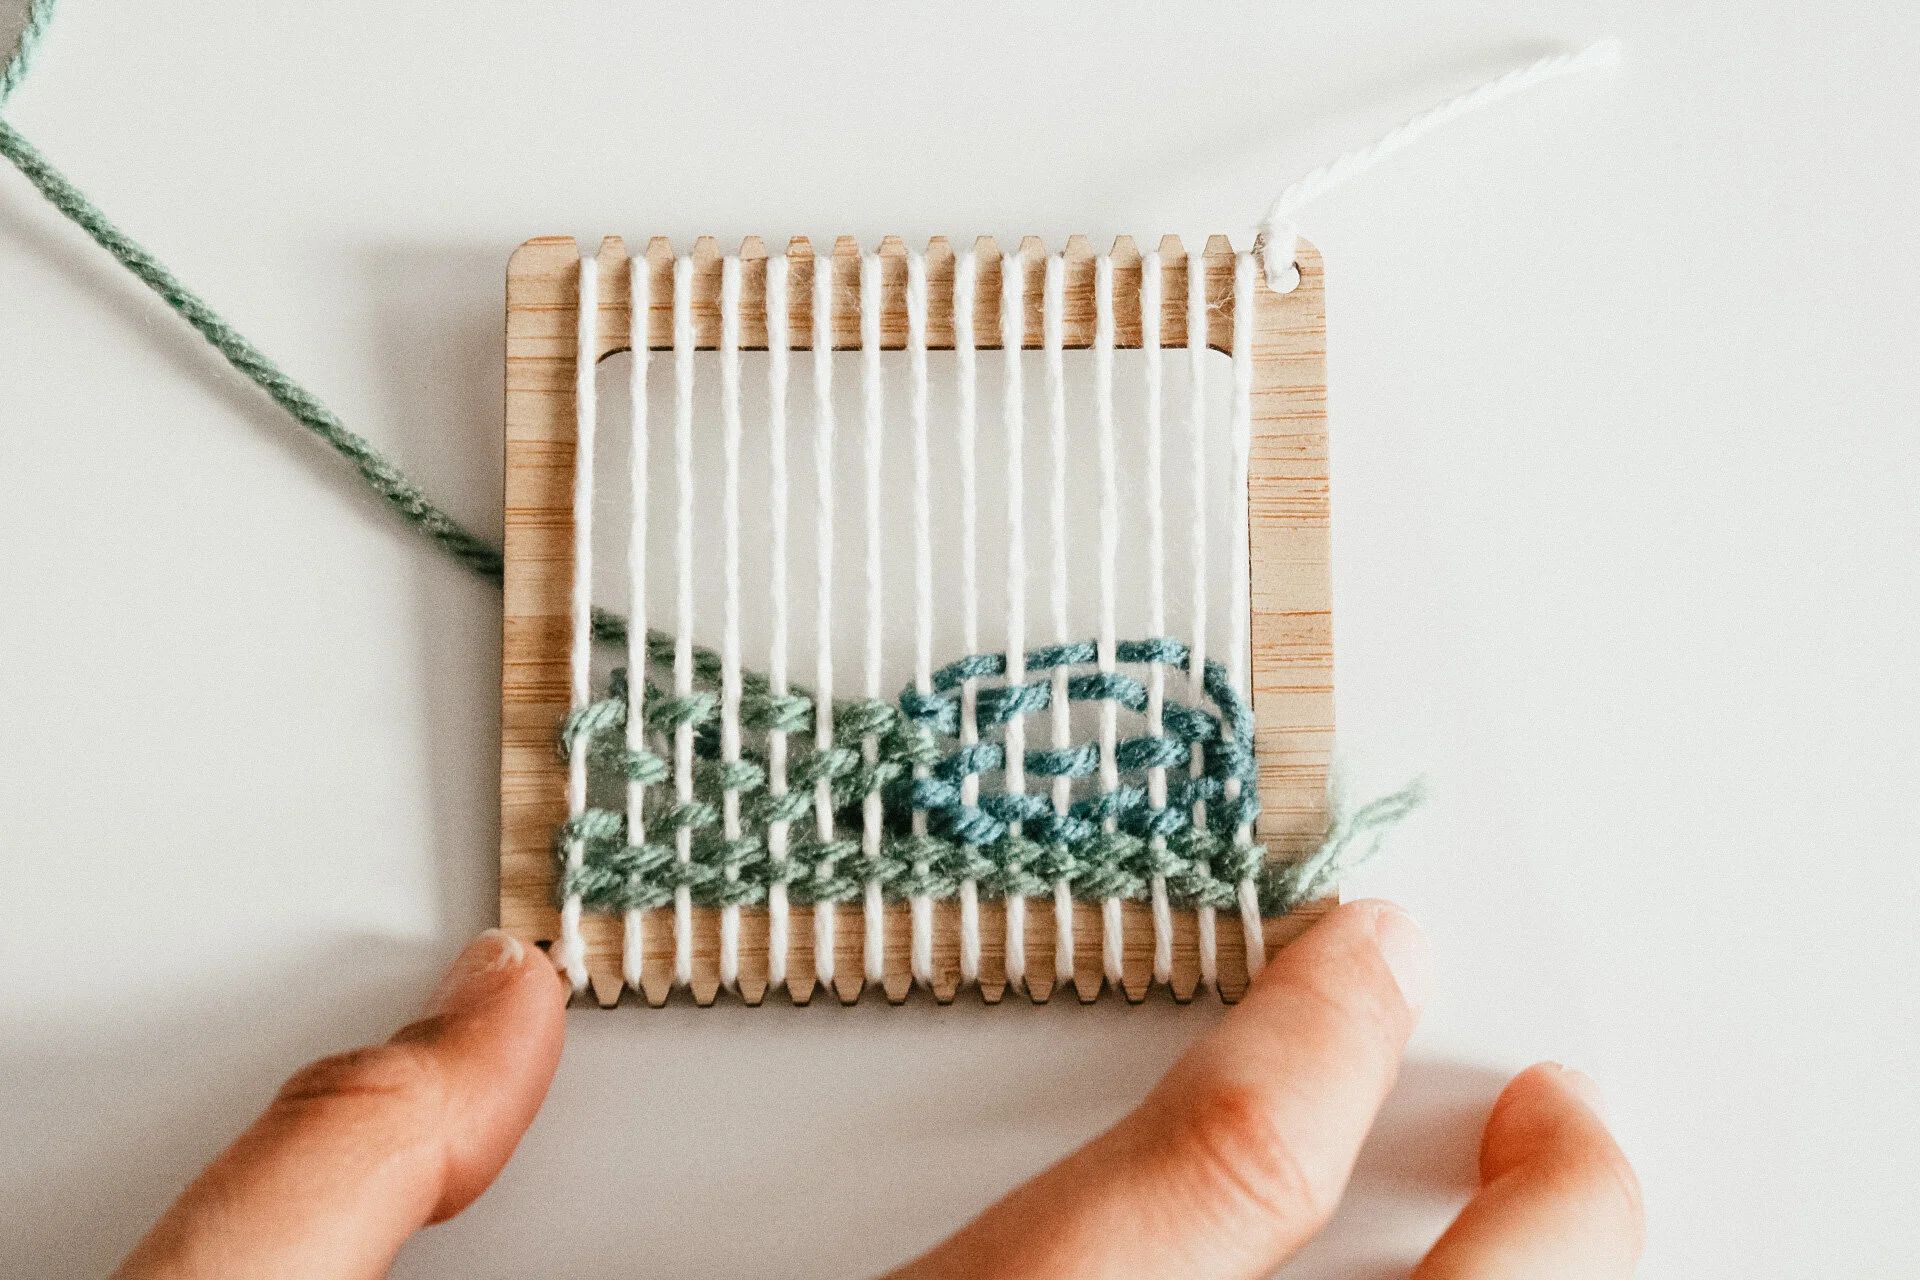
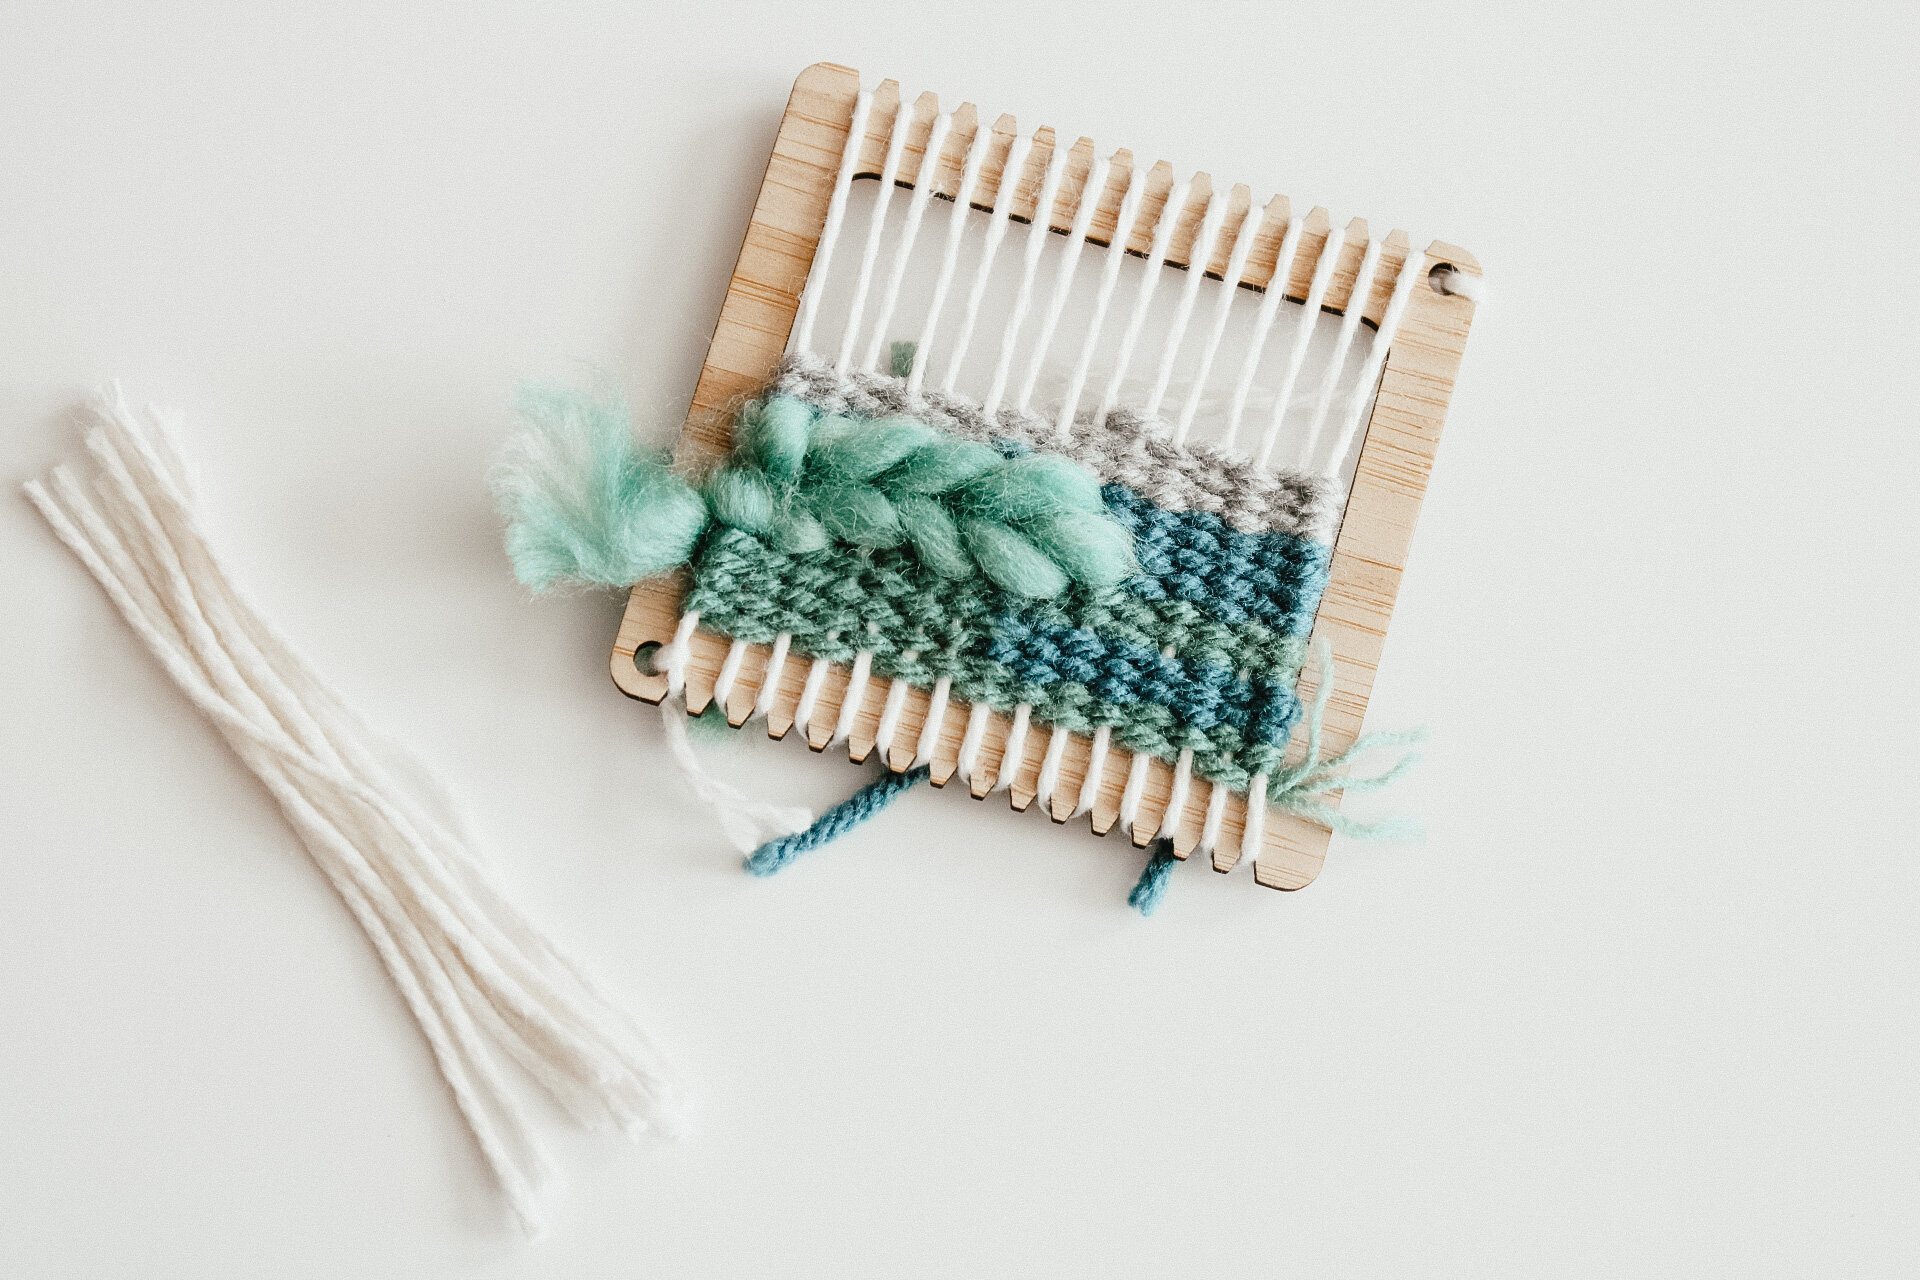
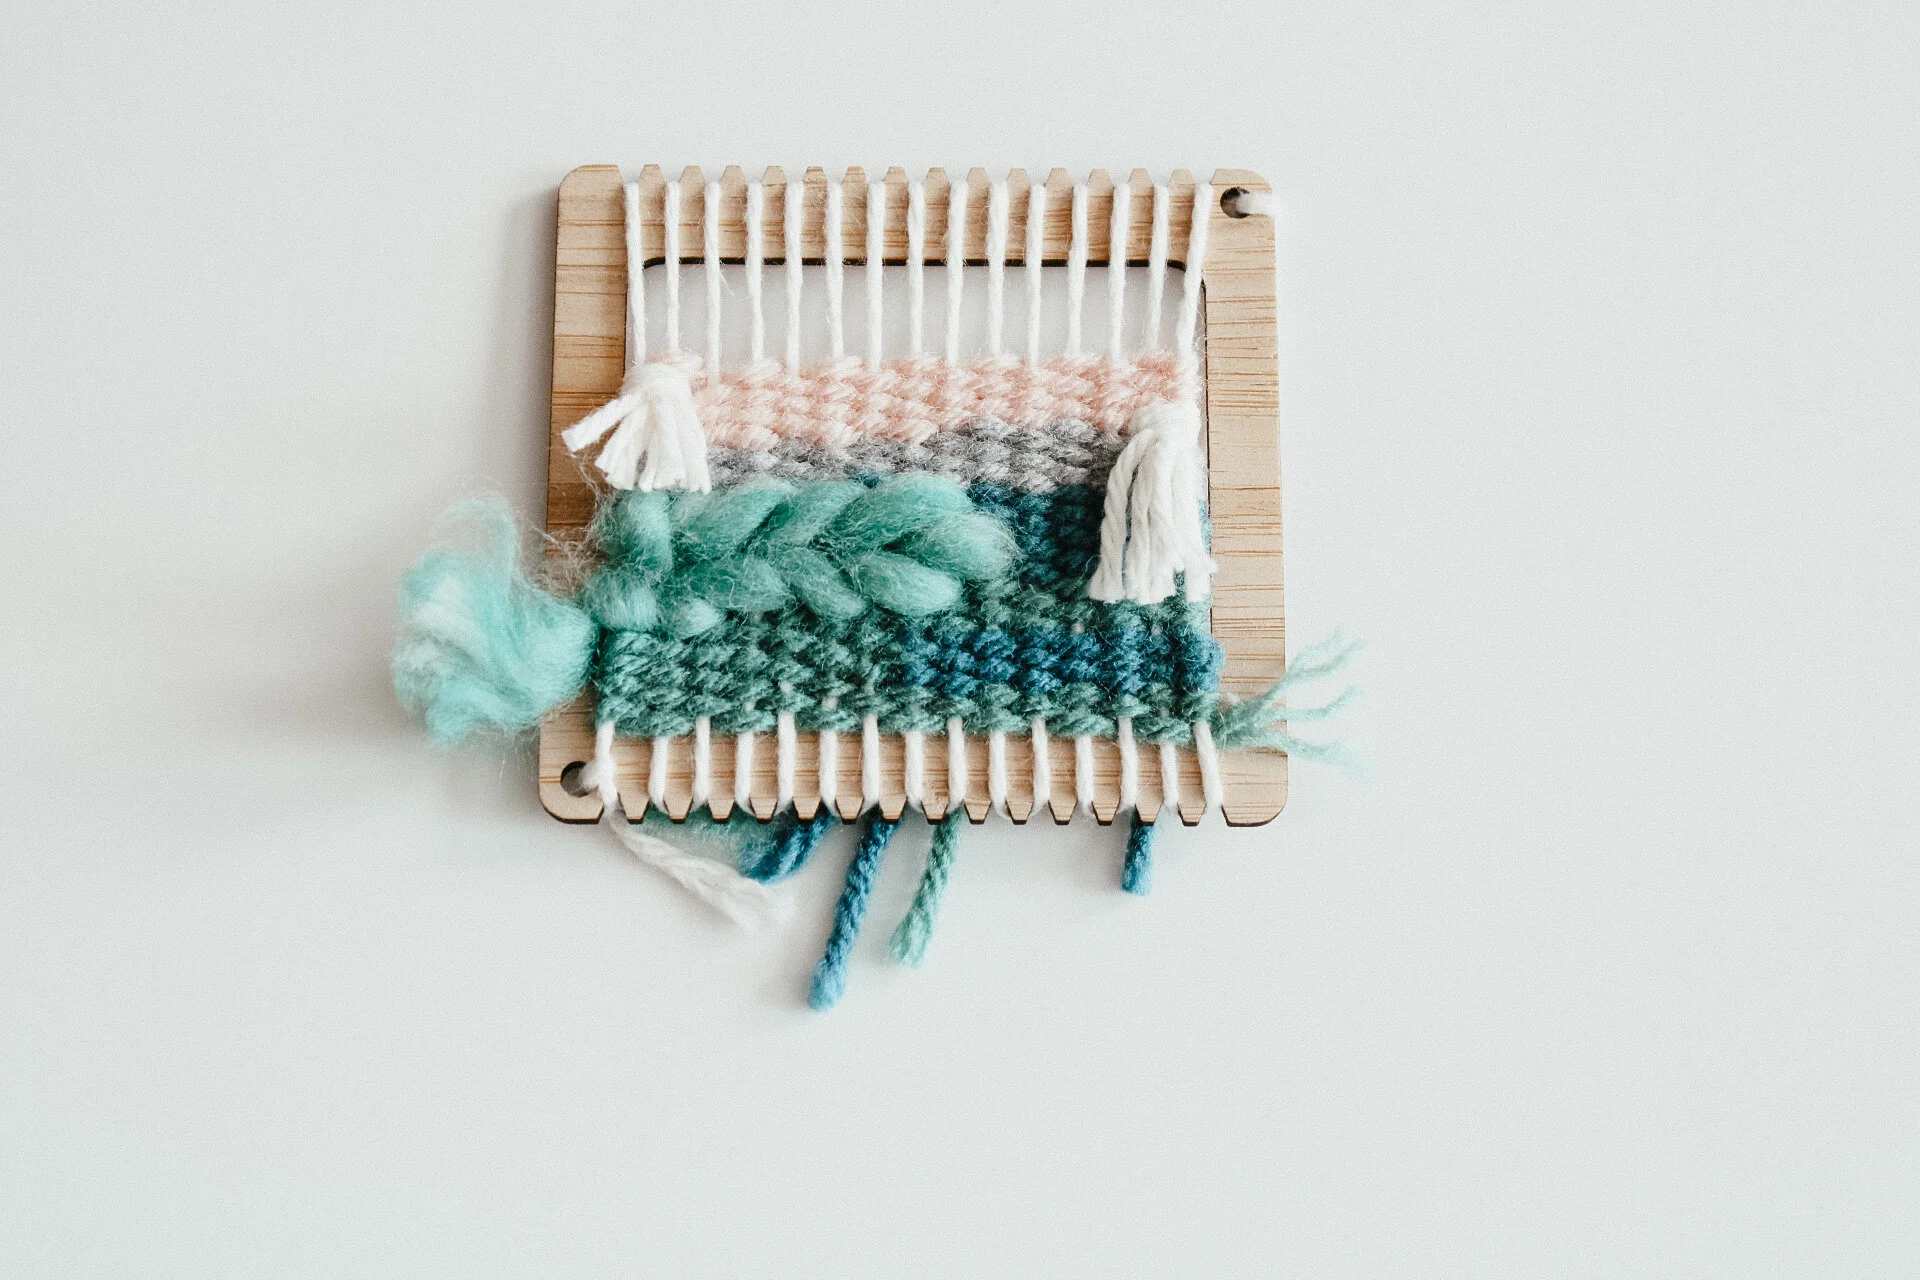
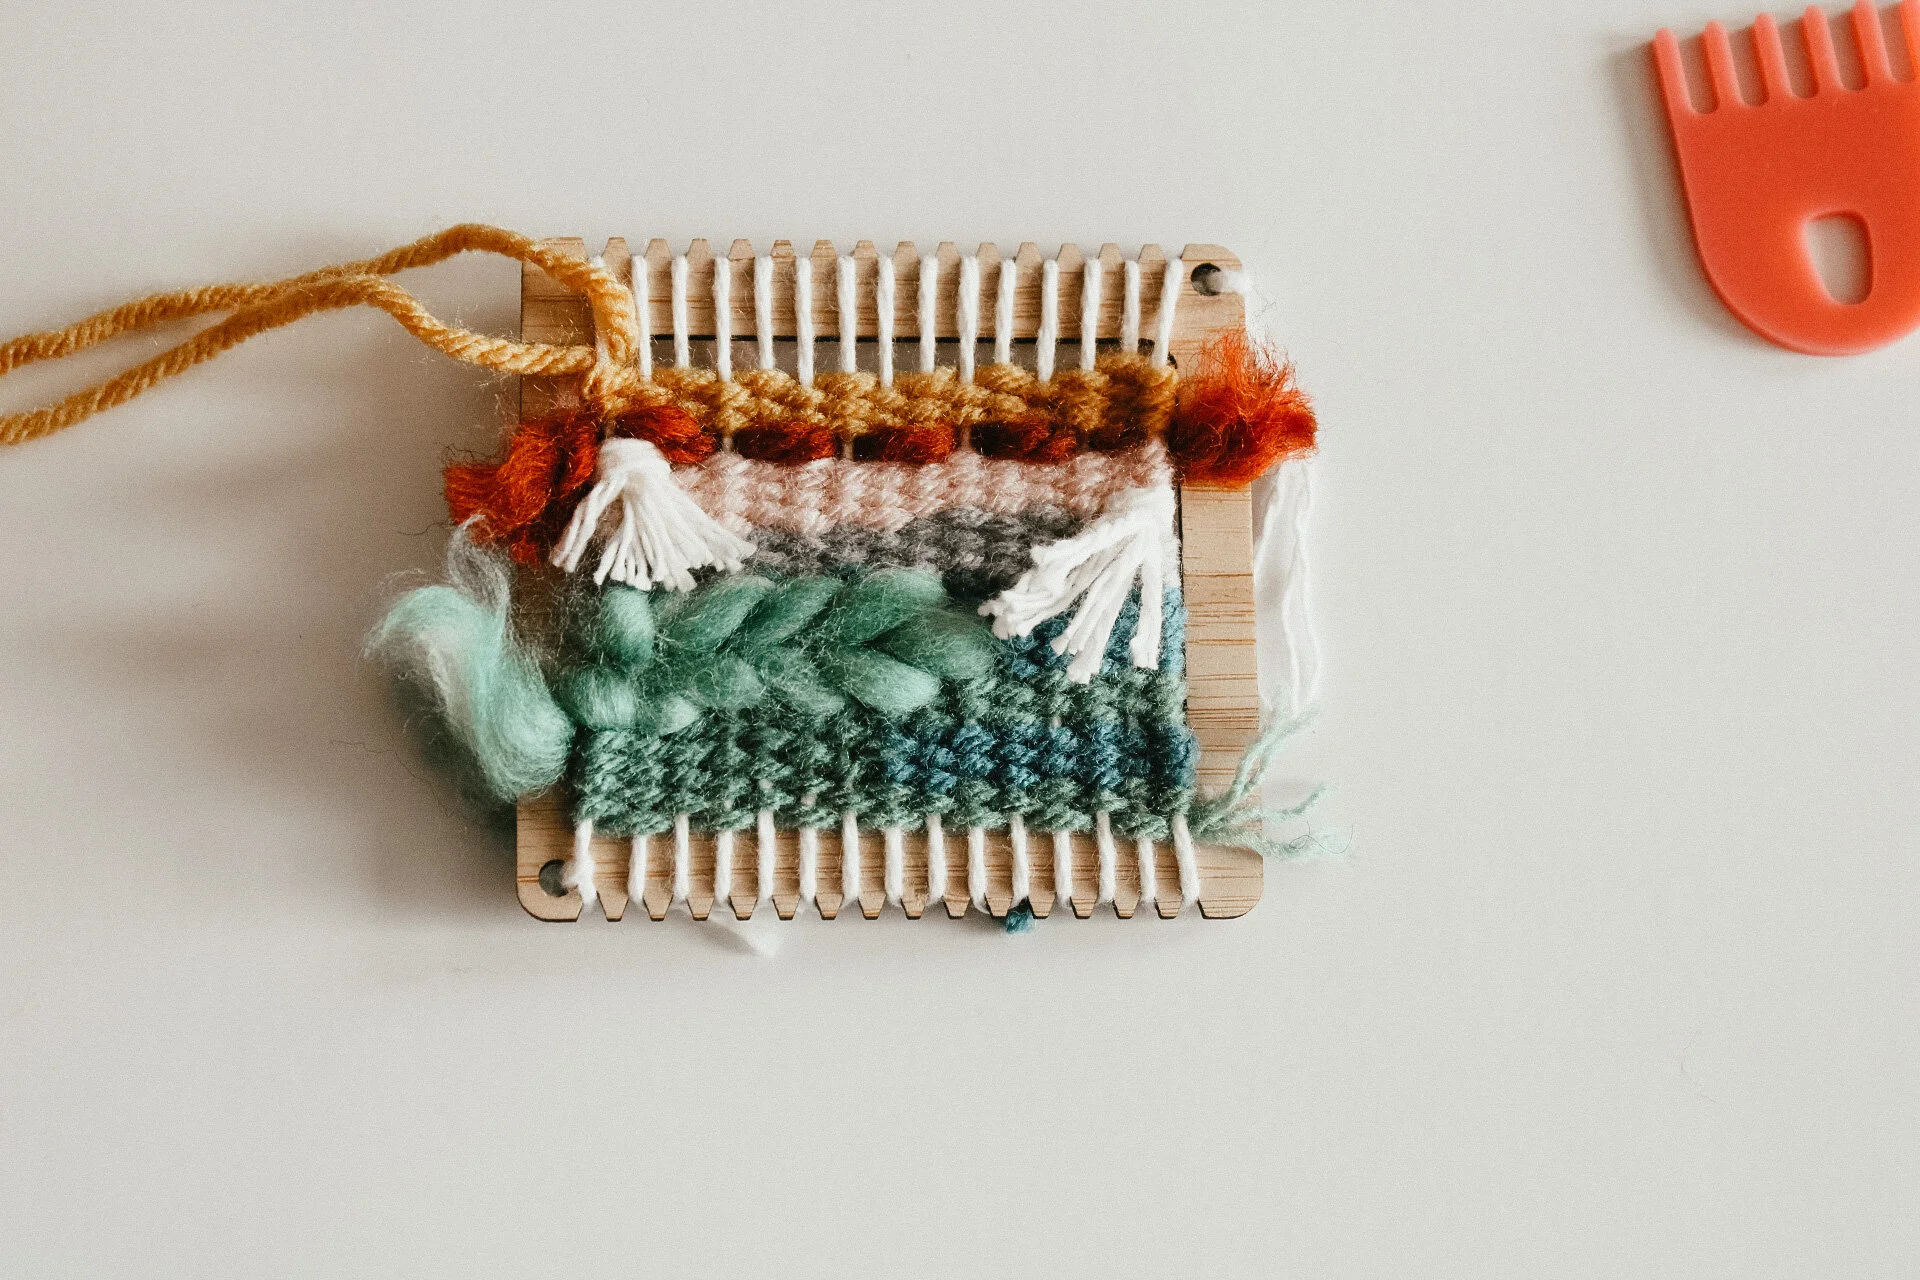
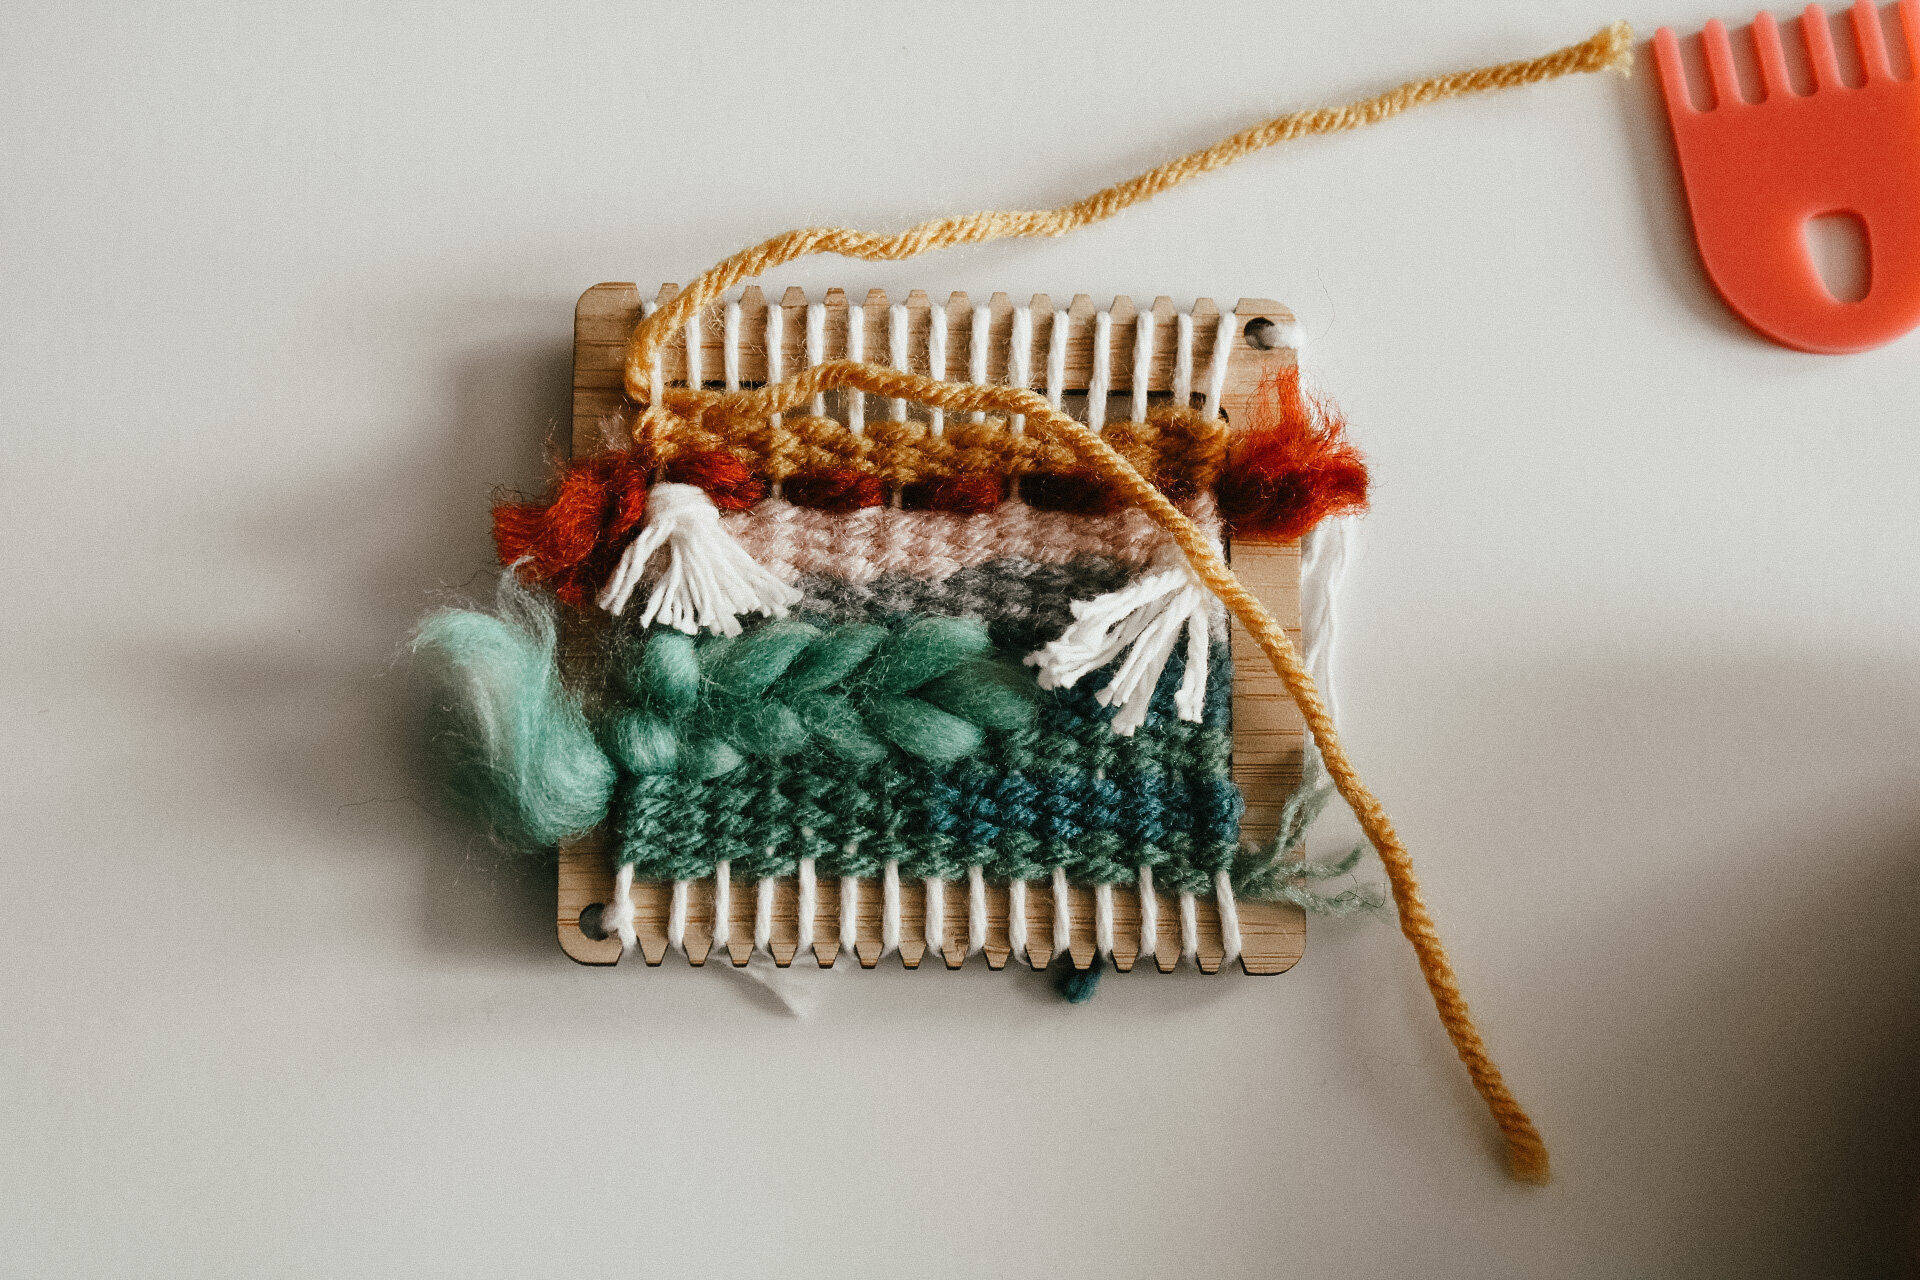
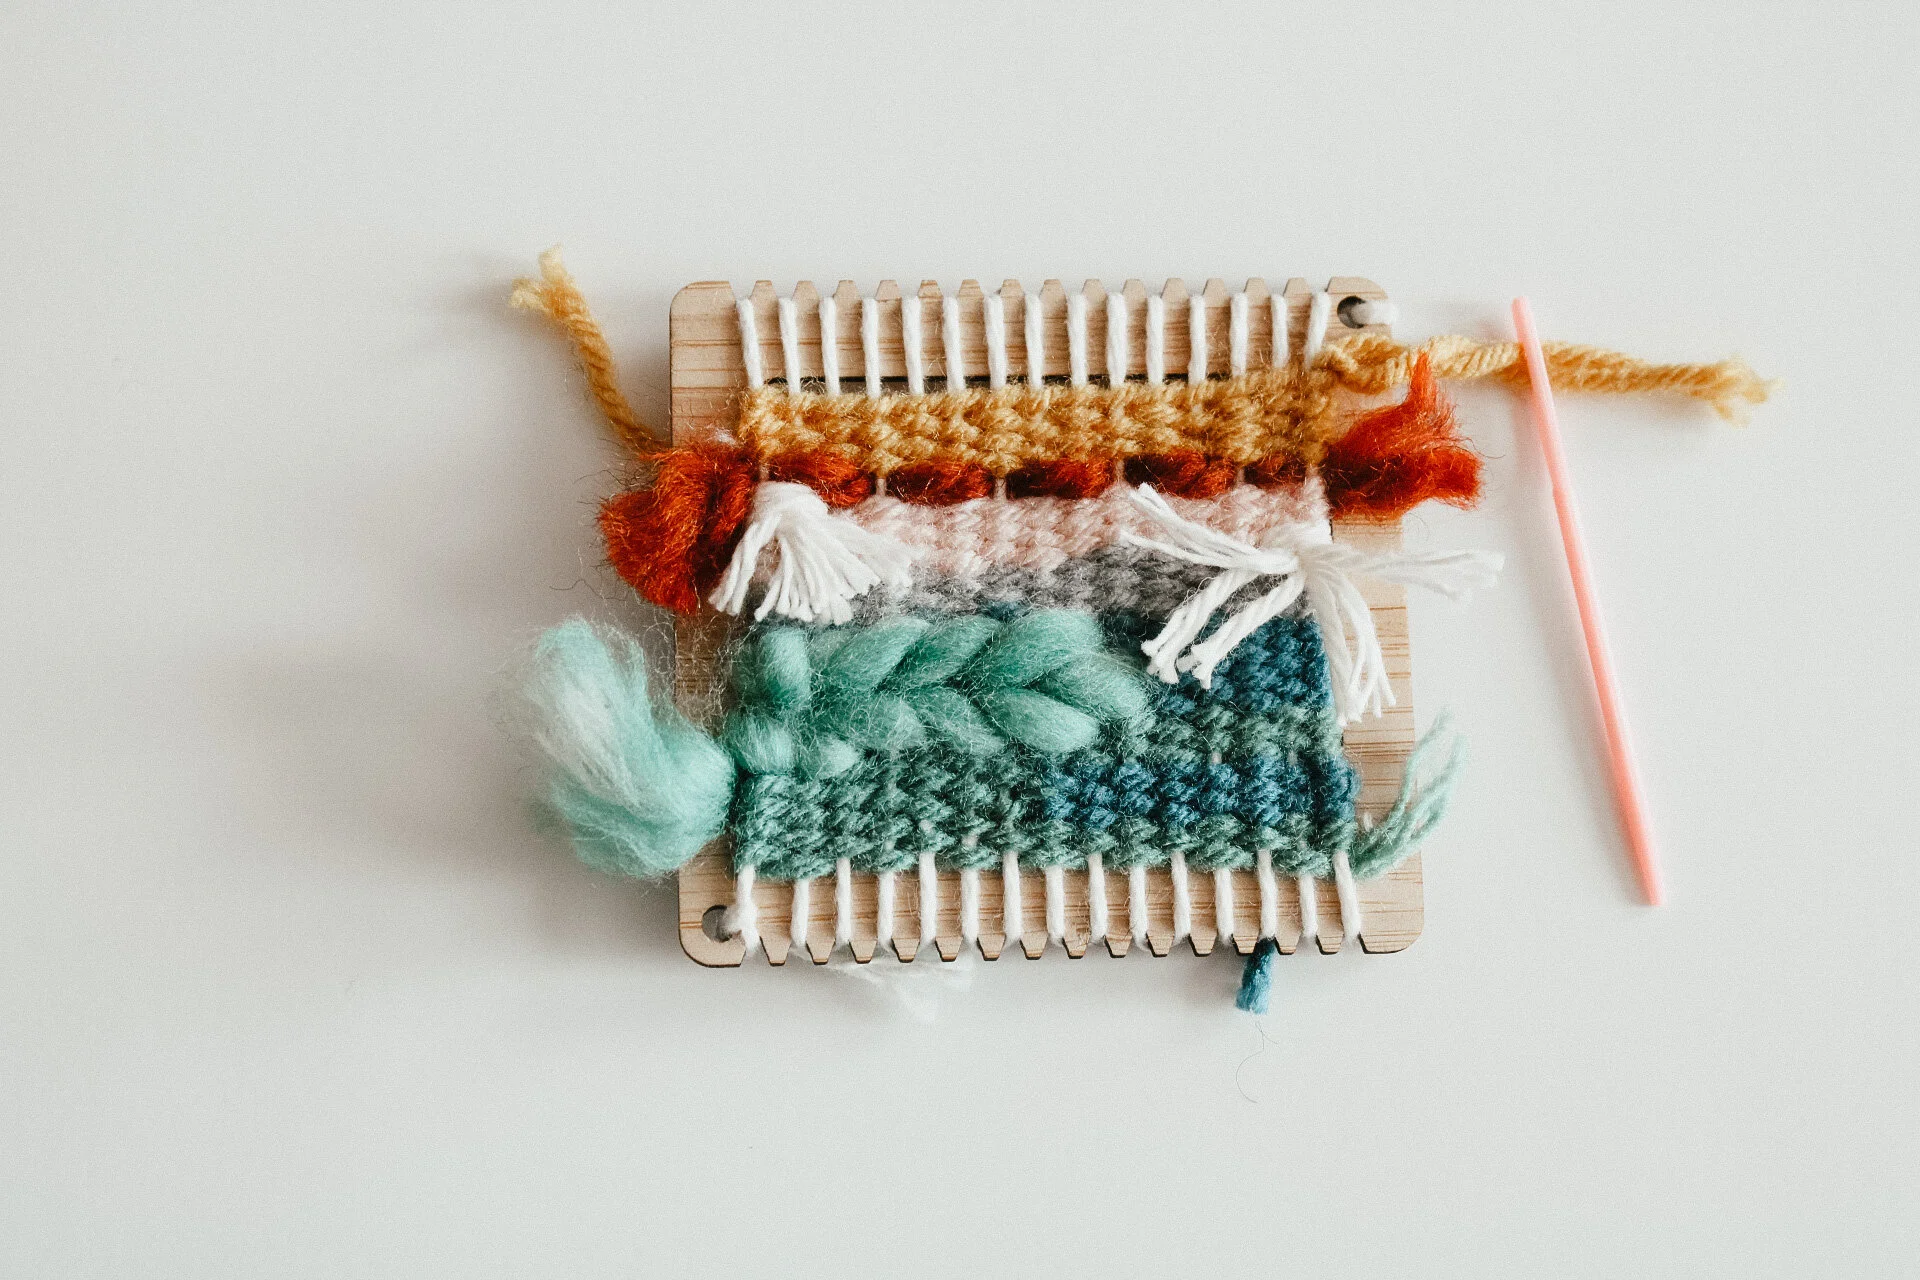
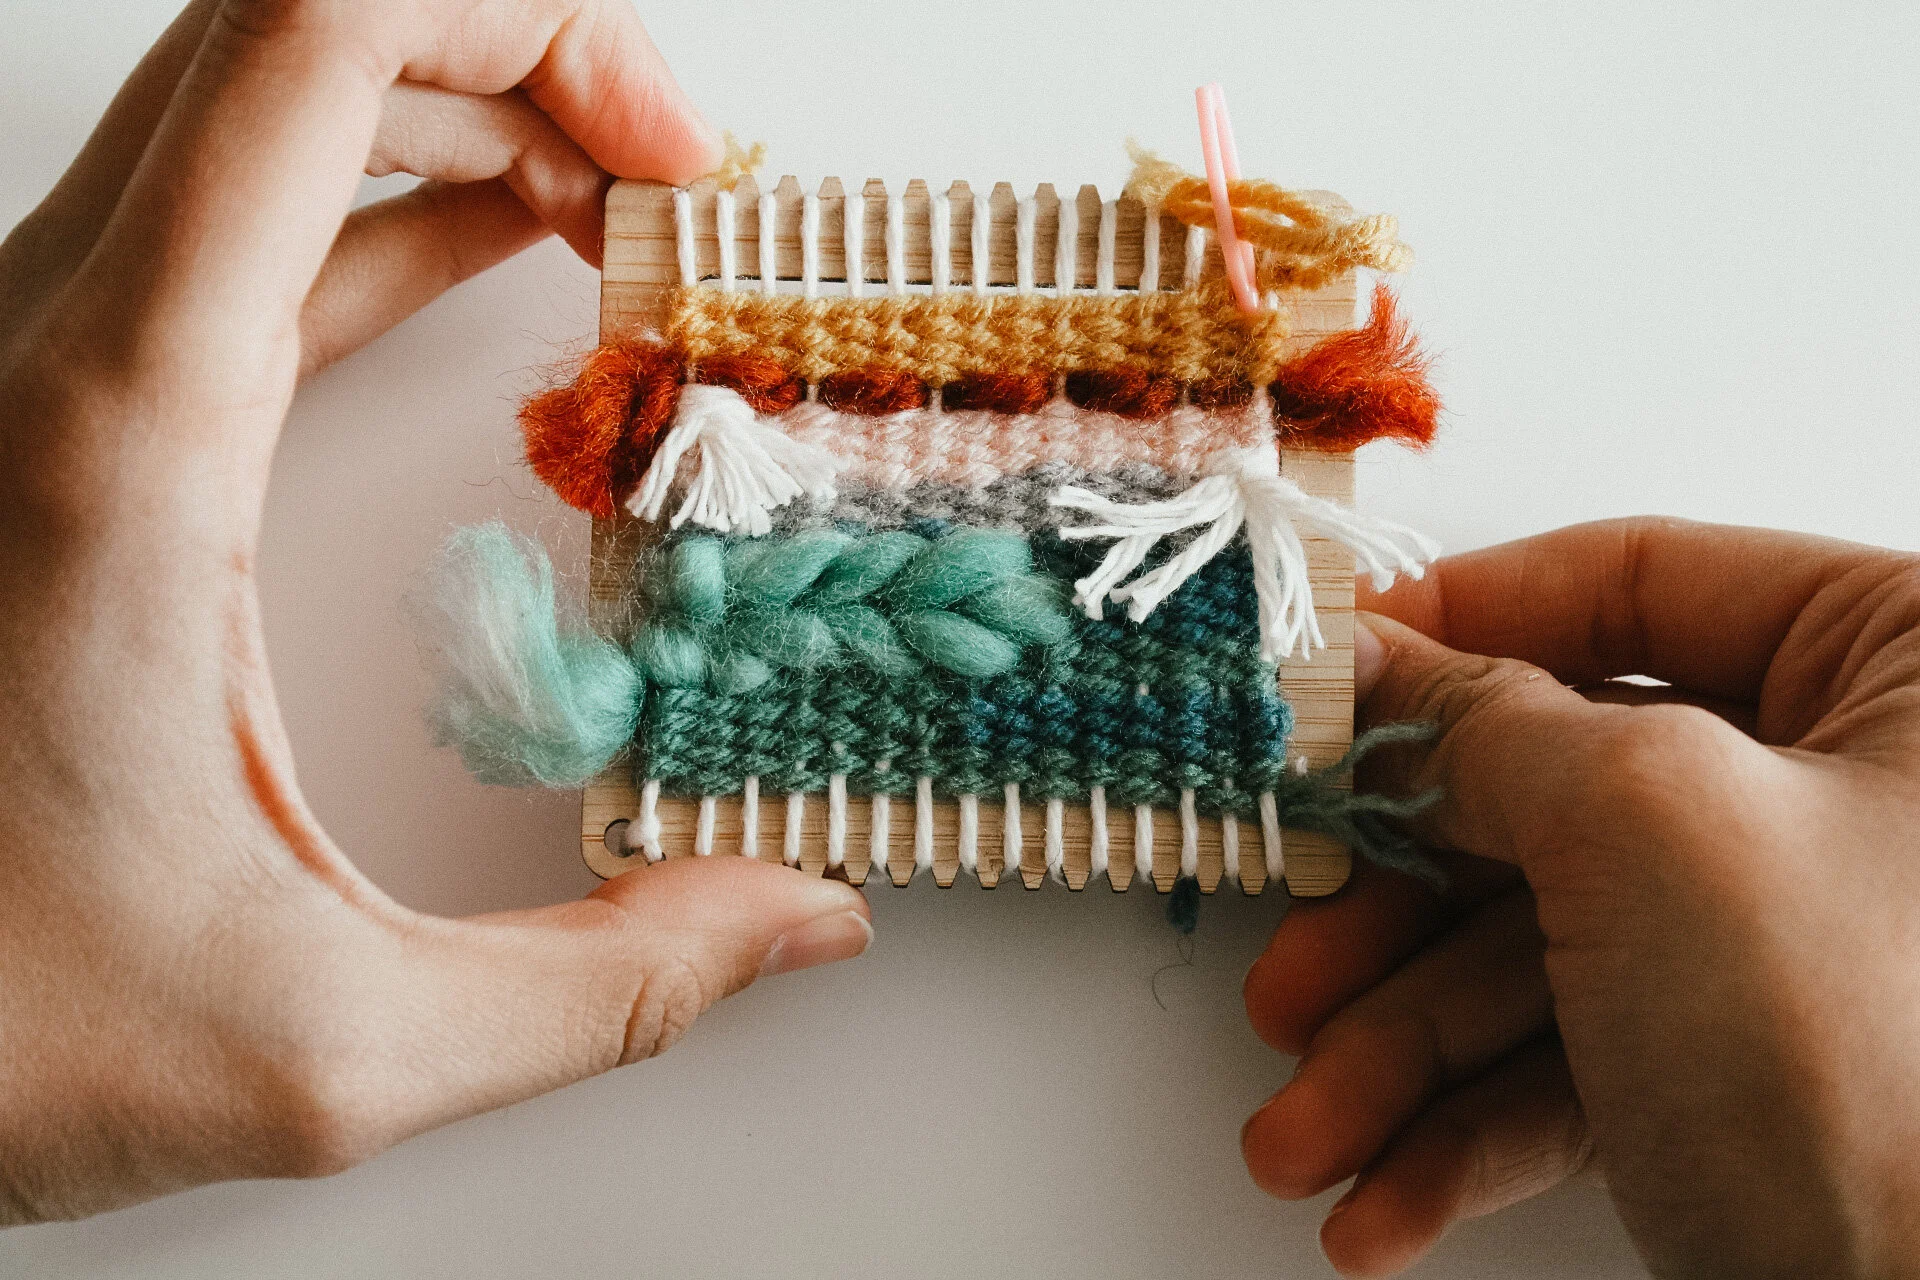
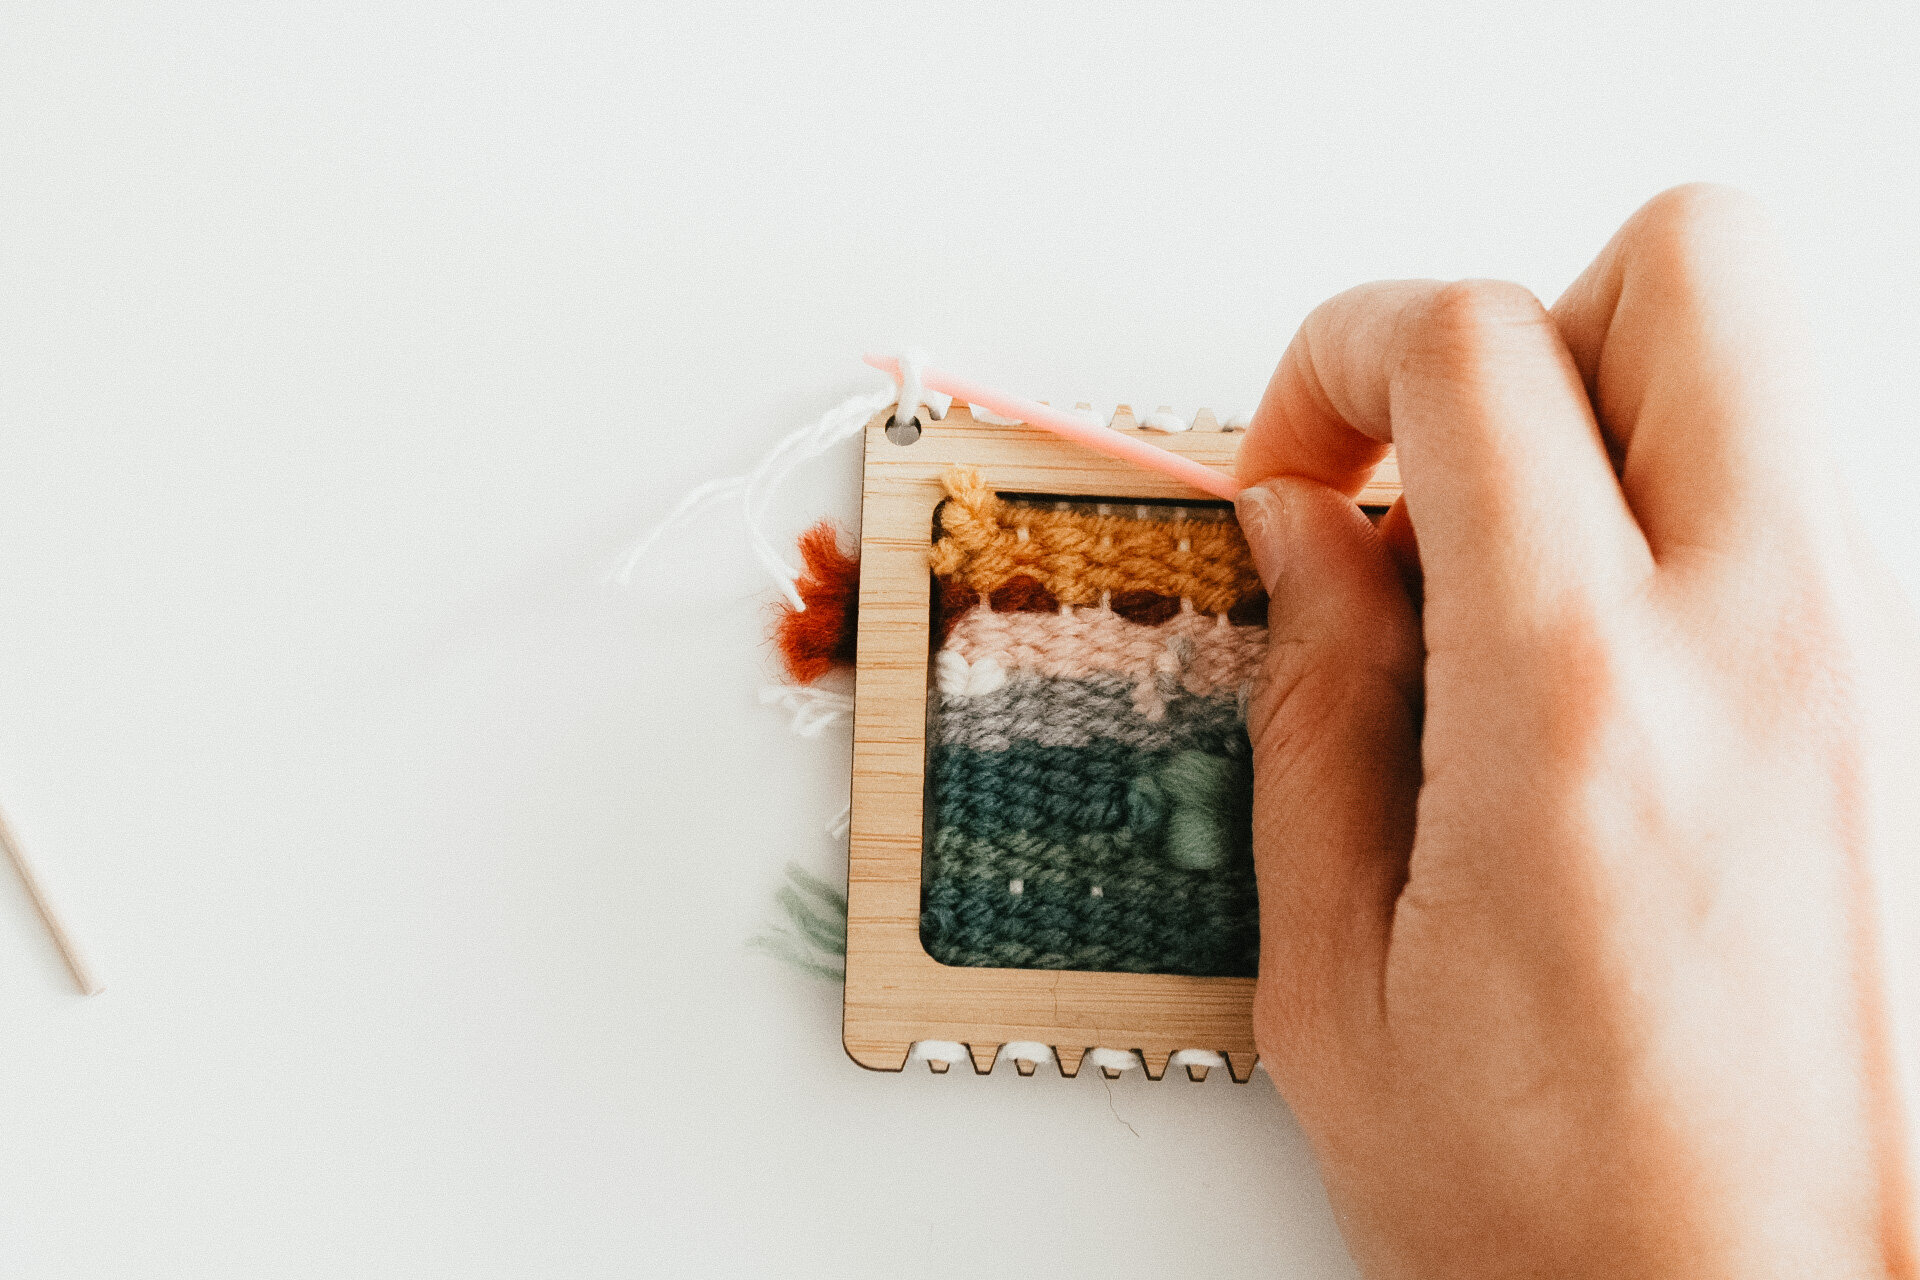
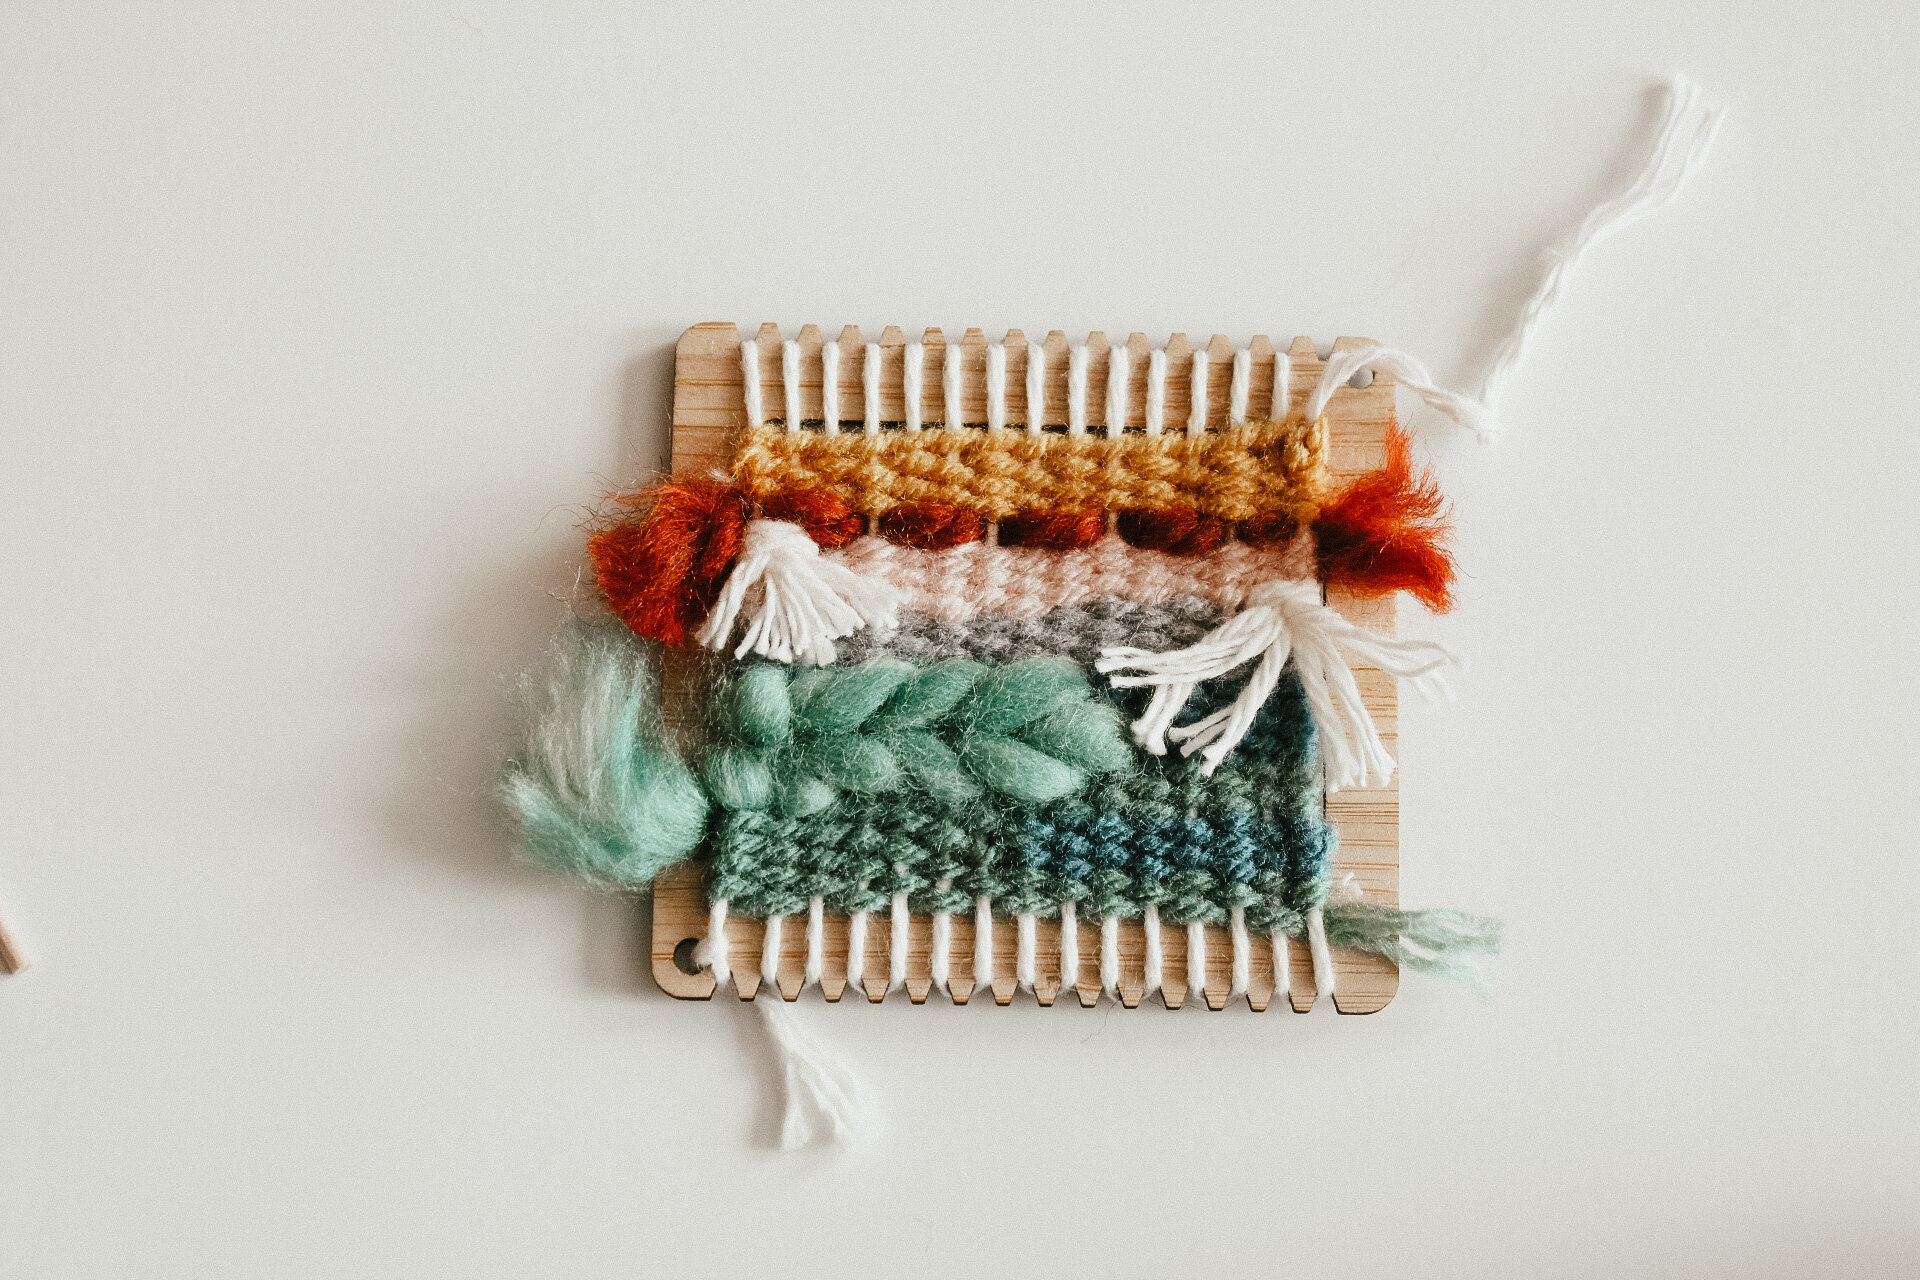
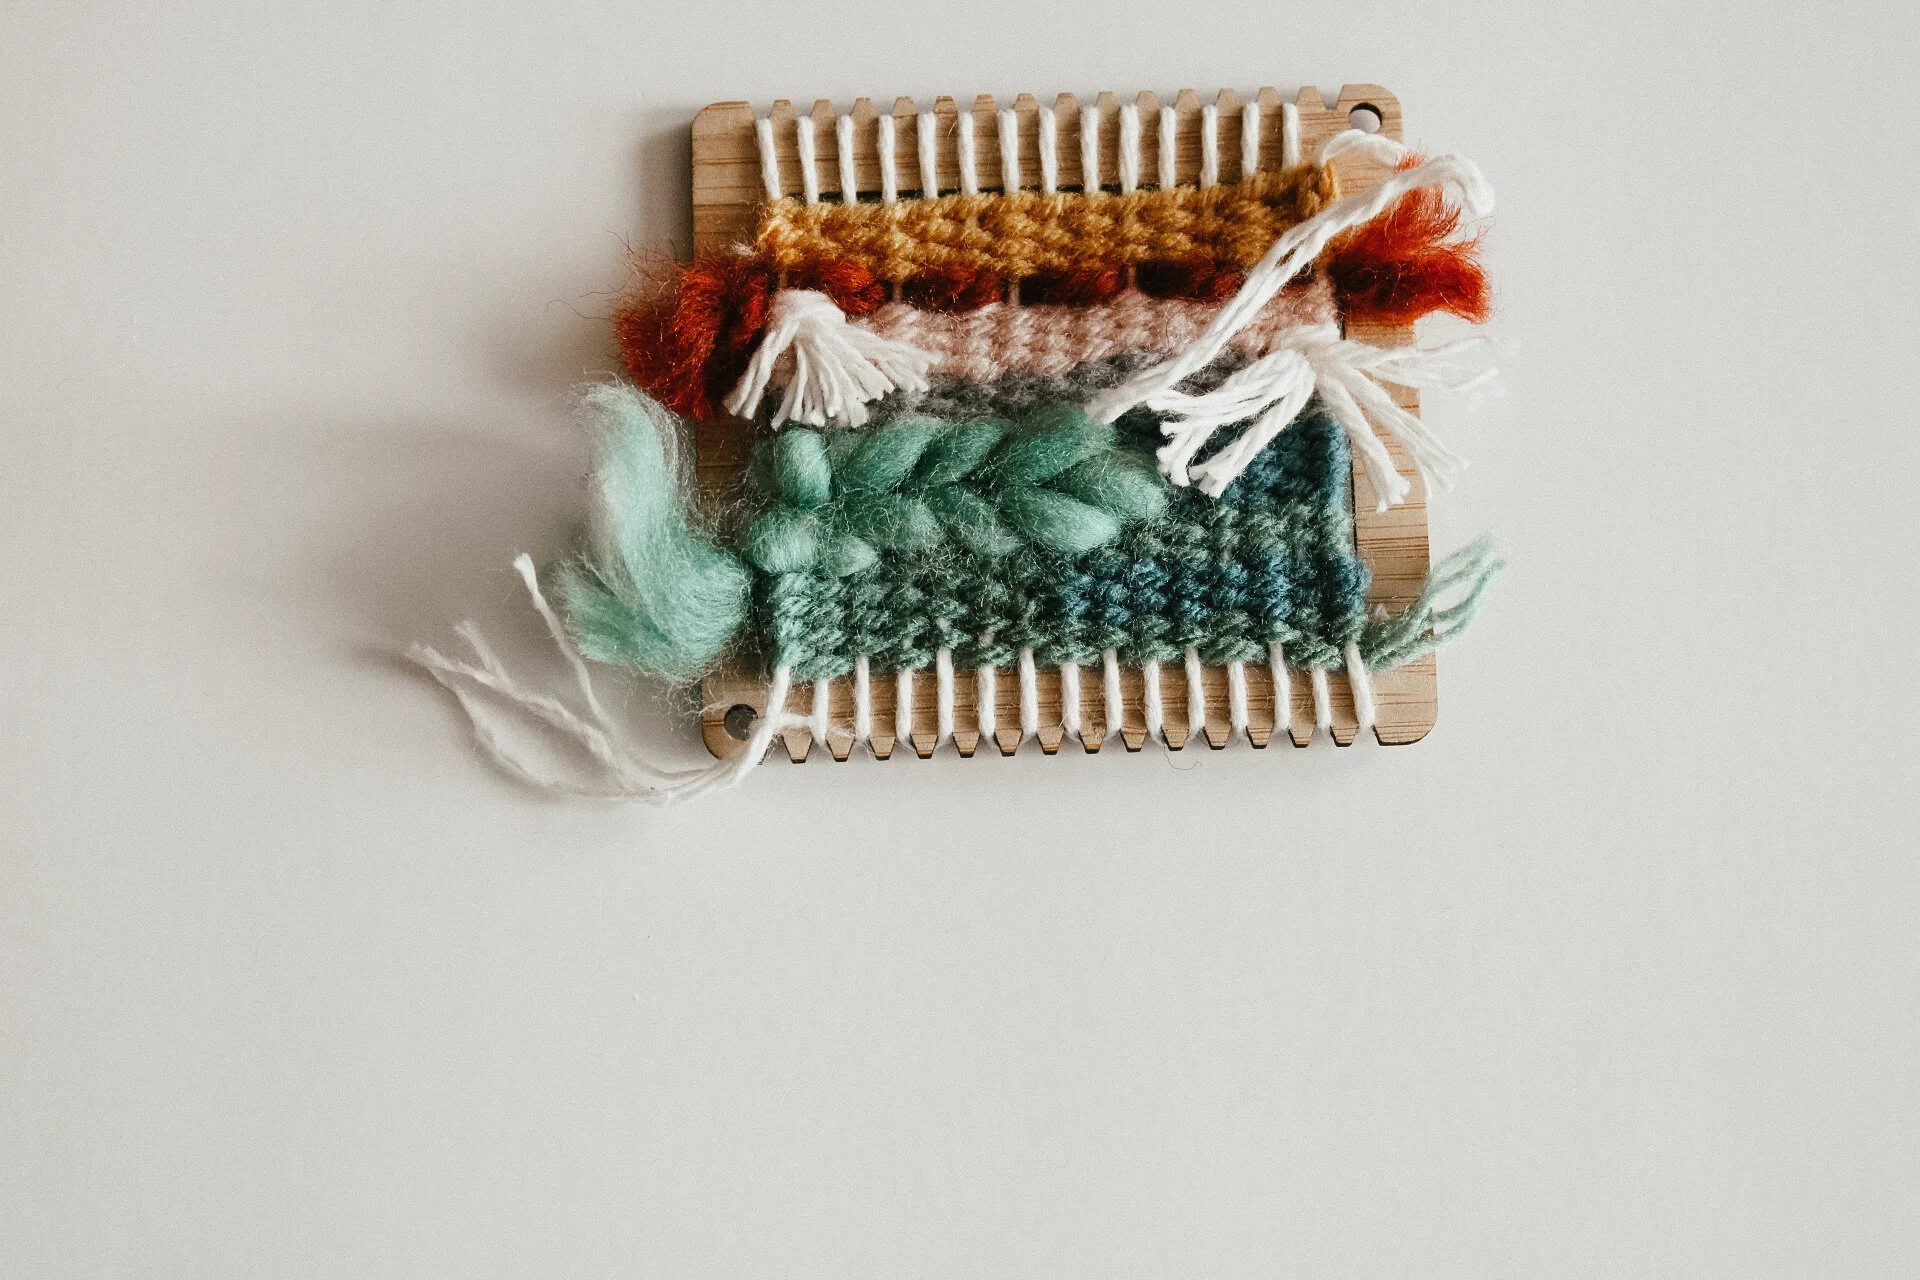
always begin each weaving with a tabby stitch. it is the primary stitch for all weavings. the best way to remember it is by thinking “over, under” because this stitch is made by pulling your yarn over and under each warp thread, alternating with each row. this will be the most commonly used stitch in your mini weaving.
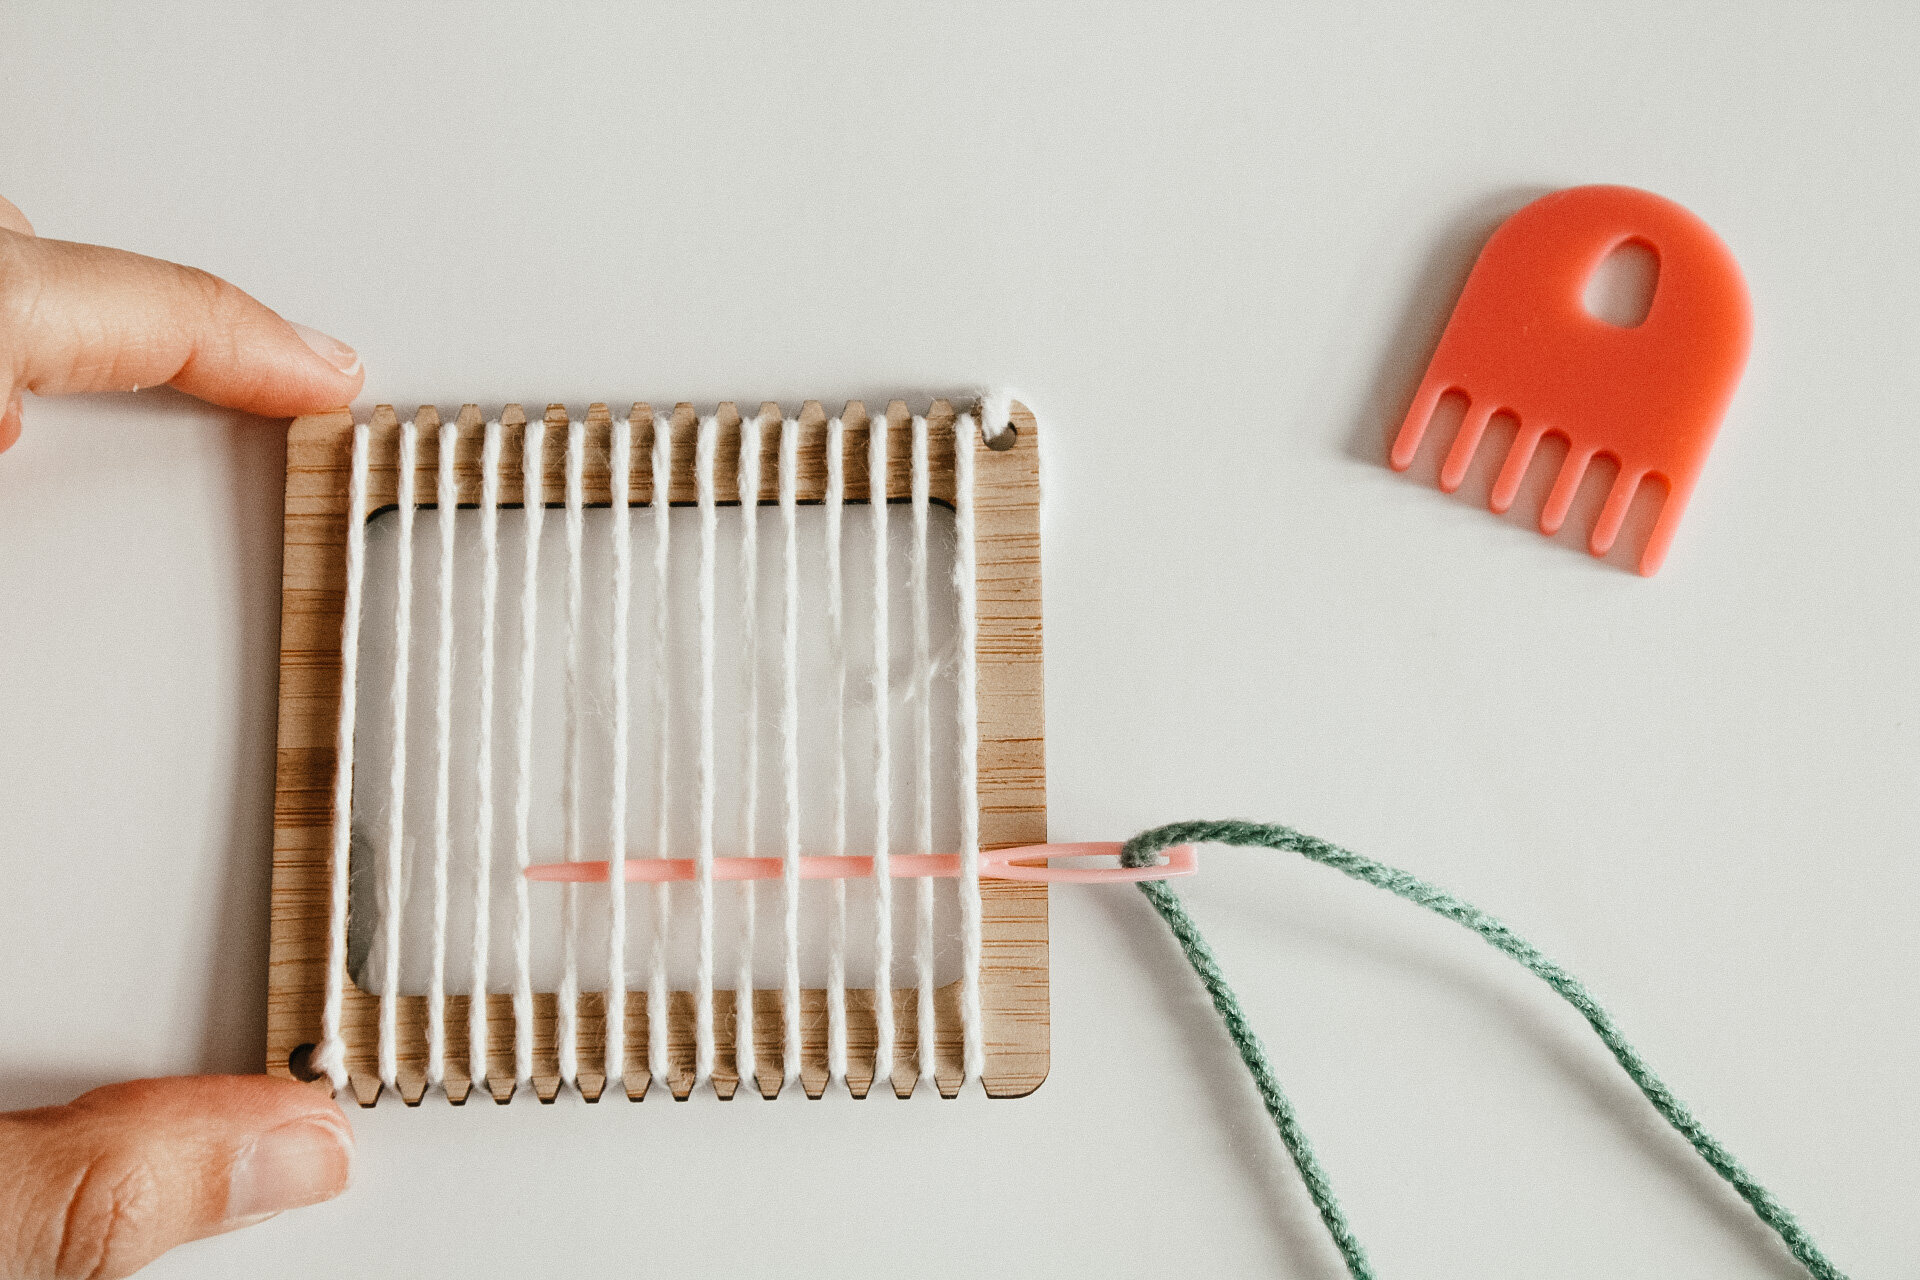
01. thread your tapestry needle with your first yarn color. leaving a 5” tail and working from right to left or left to right, bring the yarn under the outermost warp and over the next warp tread, repeating across the warp threads. pull through and comb down.
02. when you reach the outermost warp thread on the opposite side, begin weaving back towards the end you started from. bring the yarn around the last warp thread and start by going over the outermost warp thread and under the next warp tread. don’t pull too tight or the warp sides will pull in, creating a concave effect in your weaving.

03. as your finish each row of stitching, push the finished row down with your tiny comb so the row rests on top of the previous row neatly with no gaps. inspect your stitches after you finish each row. if your stitches look too loose or too tight, this is your opportunity to adjust them before proceeding to the next row.

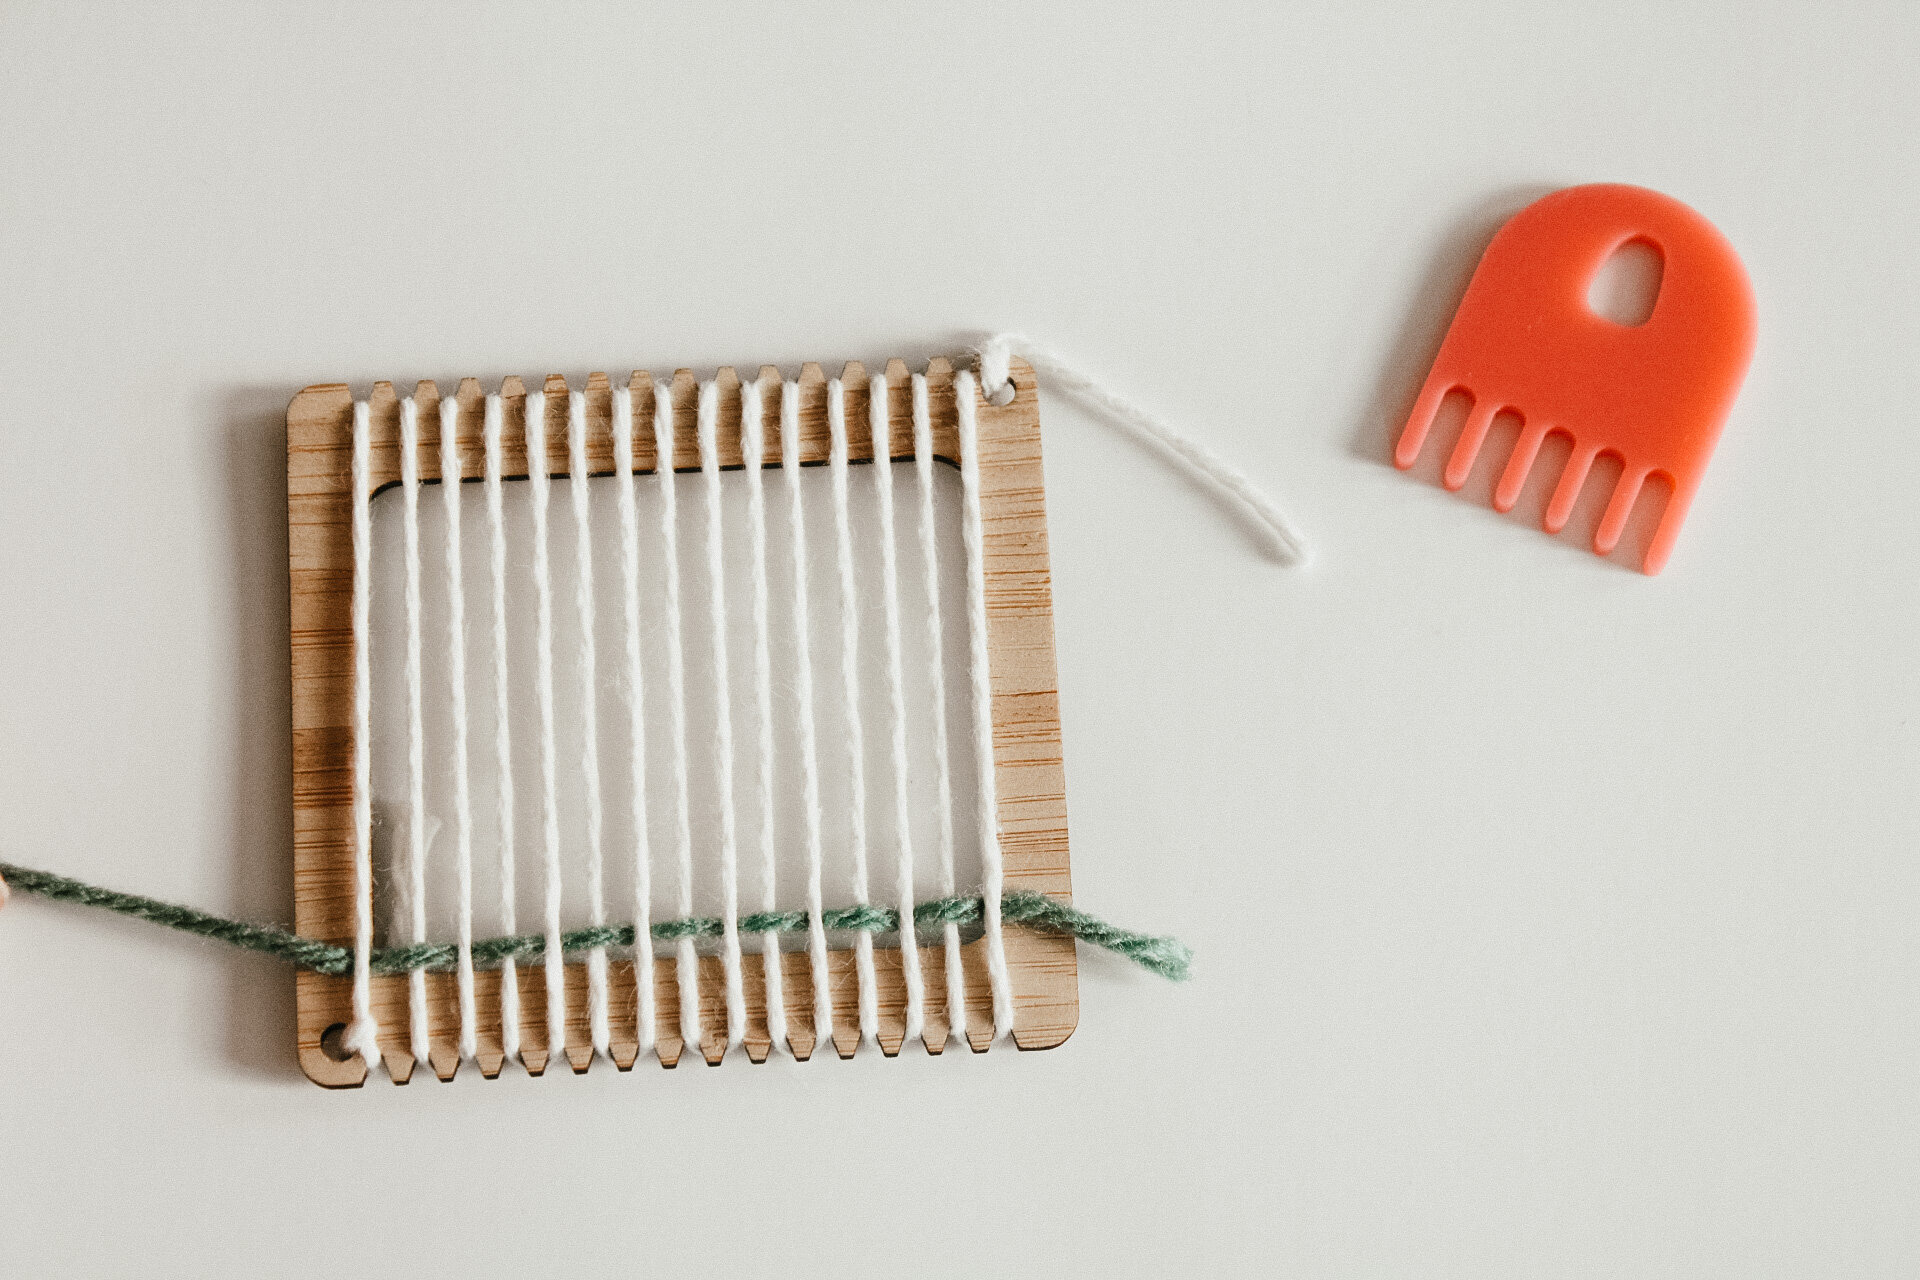
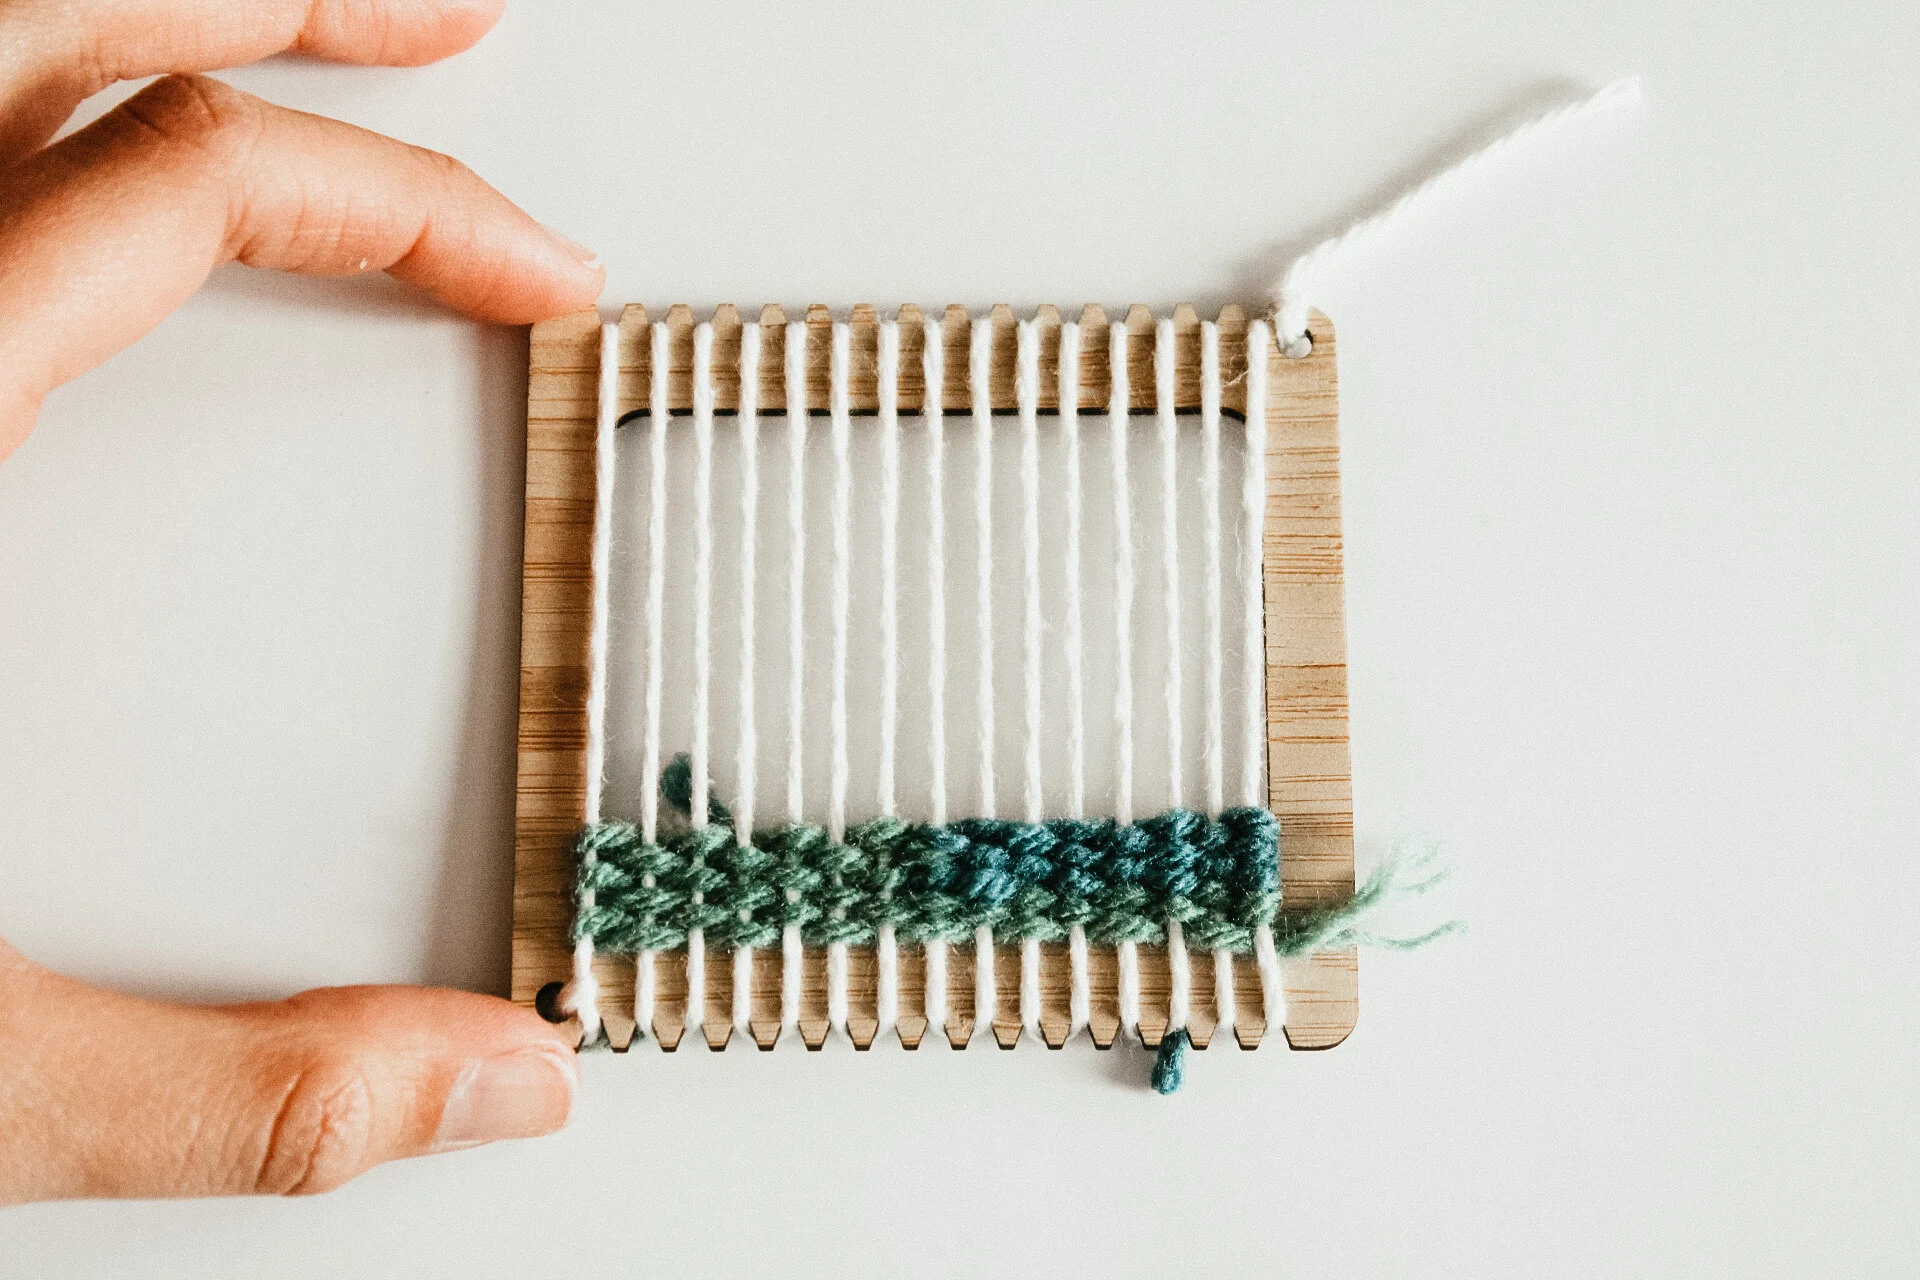
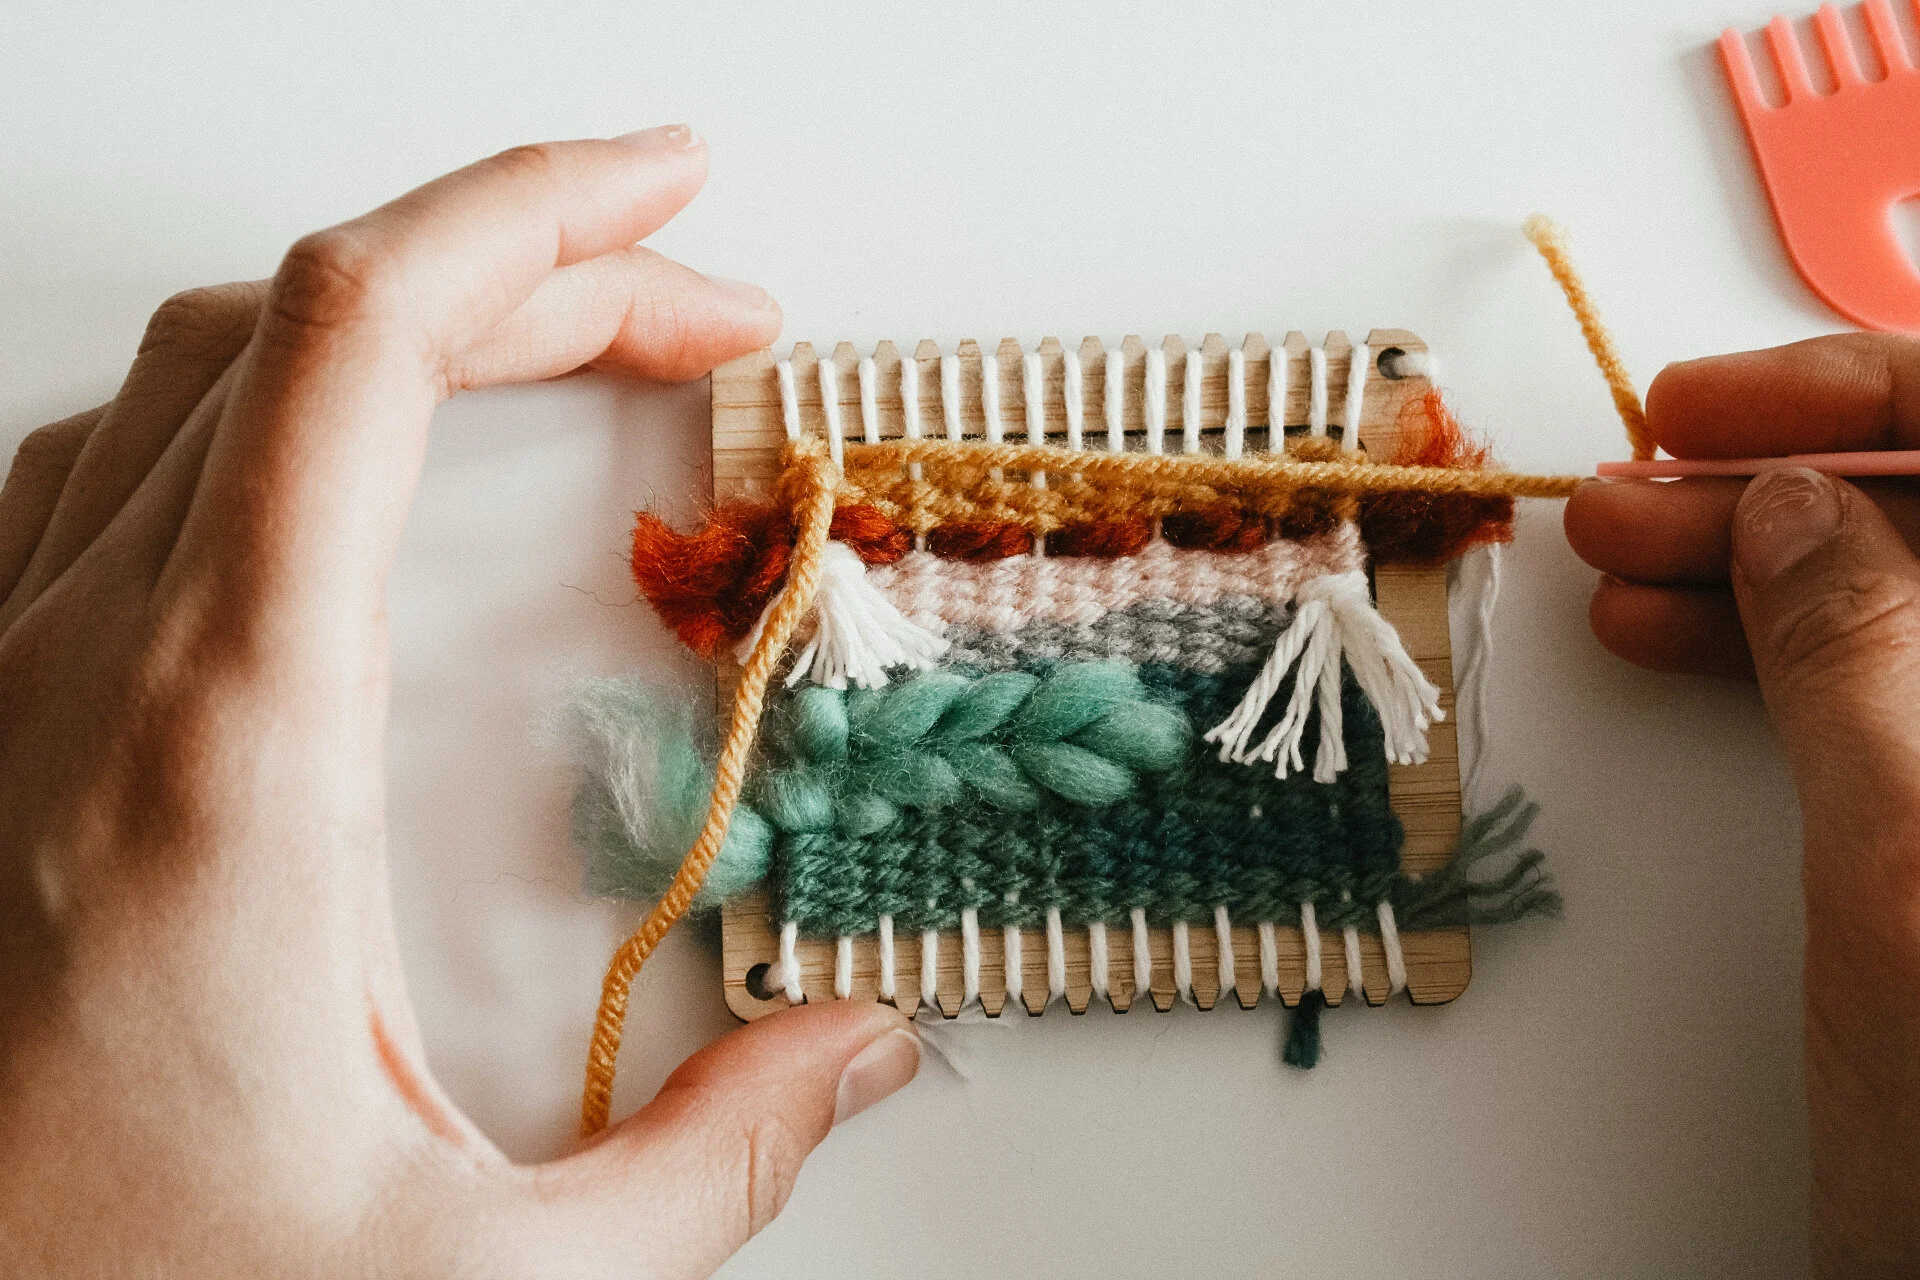
04. Continue to weave, until you want to change colors. I prefer to finish my the color i am using in the middle of a row and weave it behind, leaving the tail for later.
+interlocking stitch
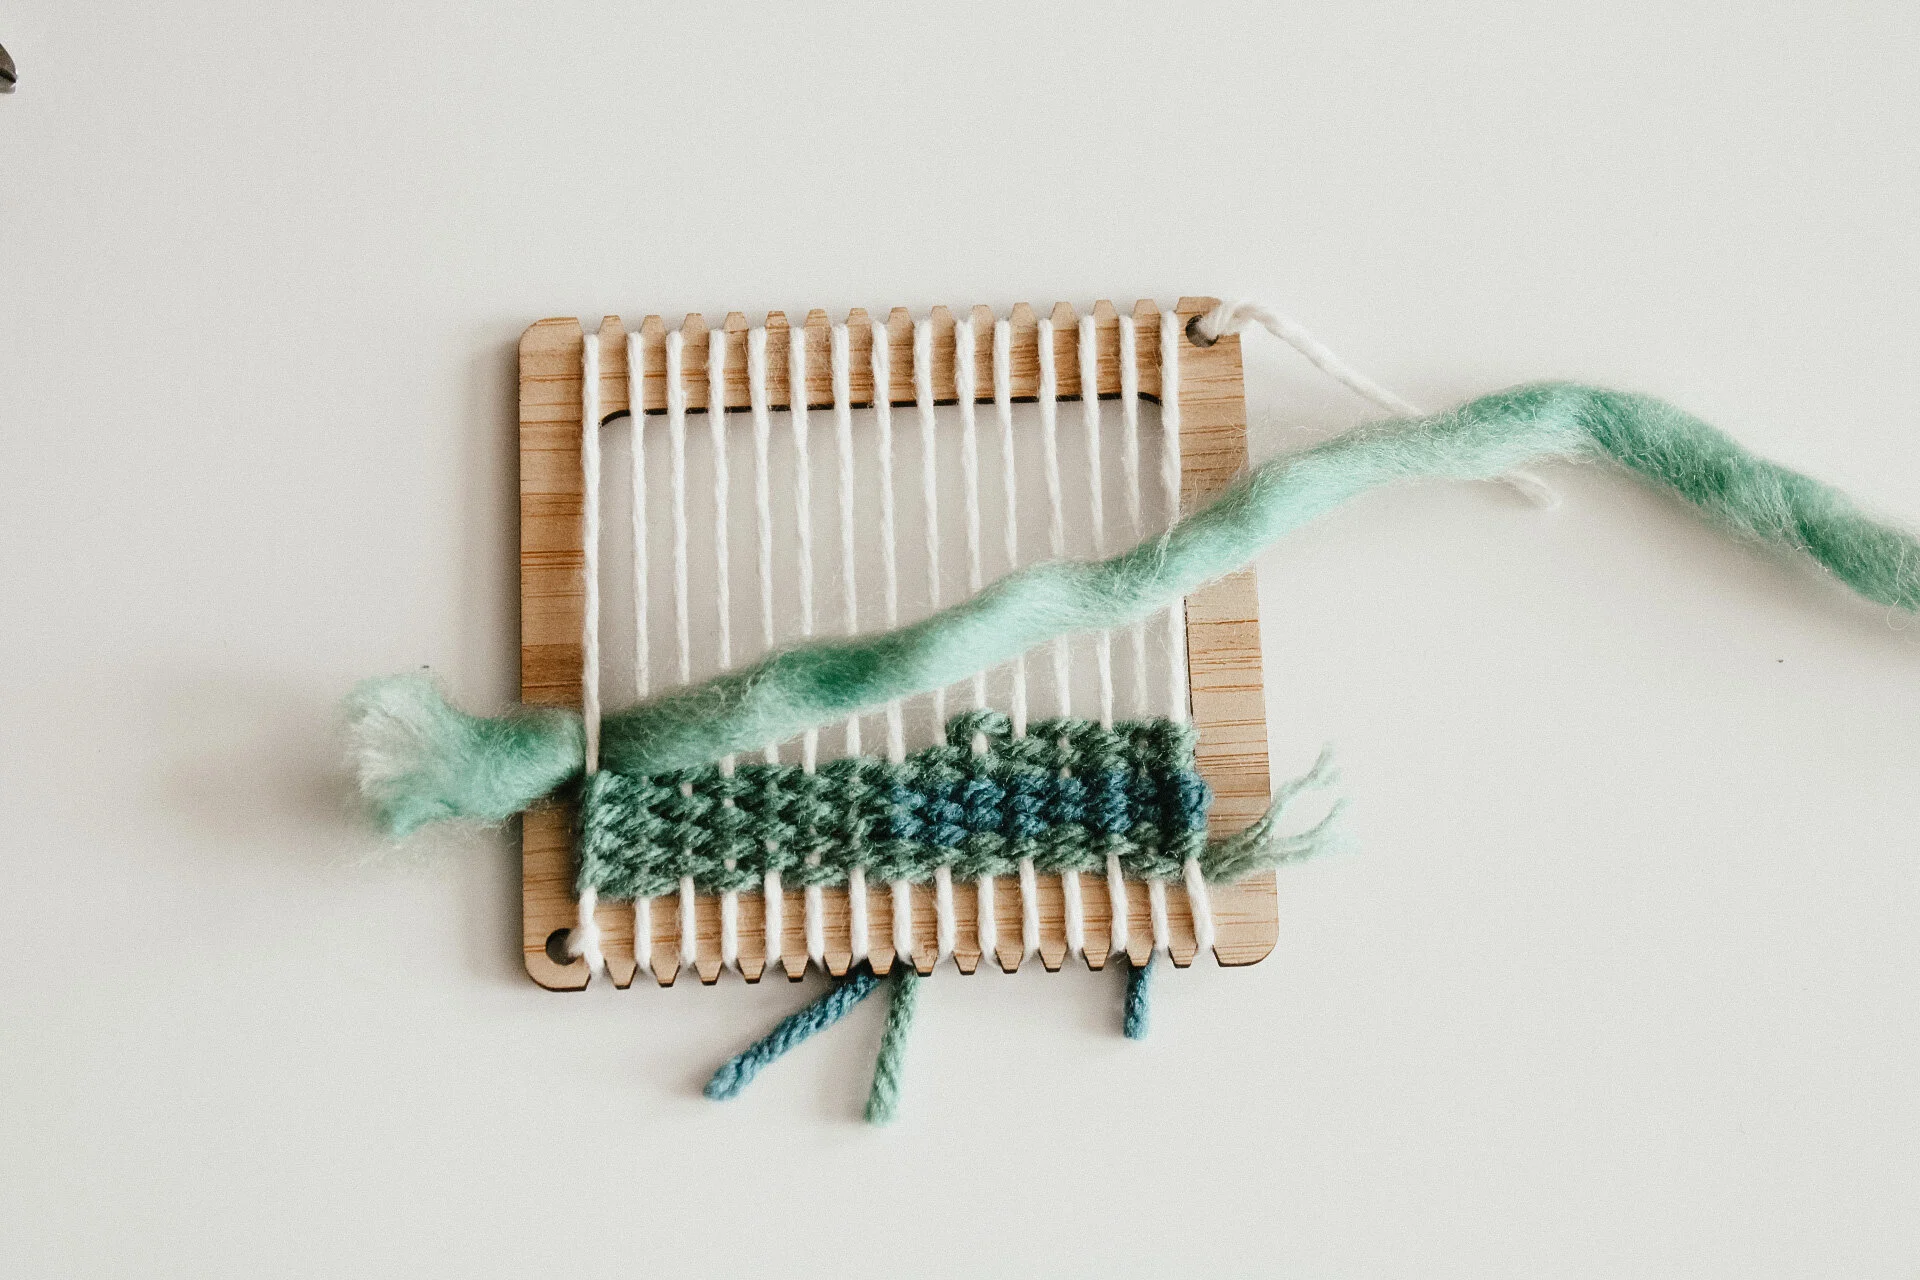
the interlocking weave allows you to weave patterns with different colors. shapes and colors bring a sense of complexity and sophistication to a small piece.

01. choose two colors that you would like to work with. with one color, working from right to left. begin a tabby tabby stitch. each row ends at one of the middle warp threads. you can do this for the whole weaving or just a part of the weaving. i left my stitches wider to make it easier to interlock.
02. with the second color, working from left to right begin a tabby stitch with your other color. to create interlocked colors, weave this second color onto the same warp thread as your first color ended on.
tip! if you are using yarns of the same weight, you can alternate row by row. if you are using fibers of a different weights you may have to interlock them with several rows of lighter weight yarn, but we will talk about that in the soumak.
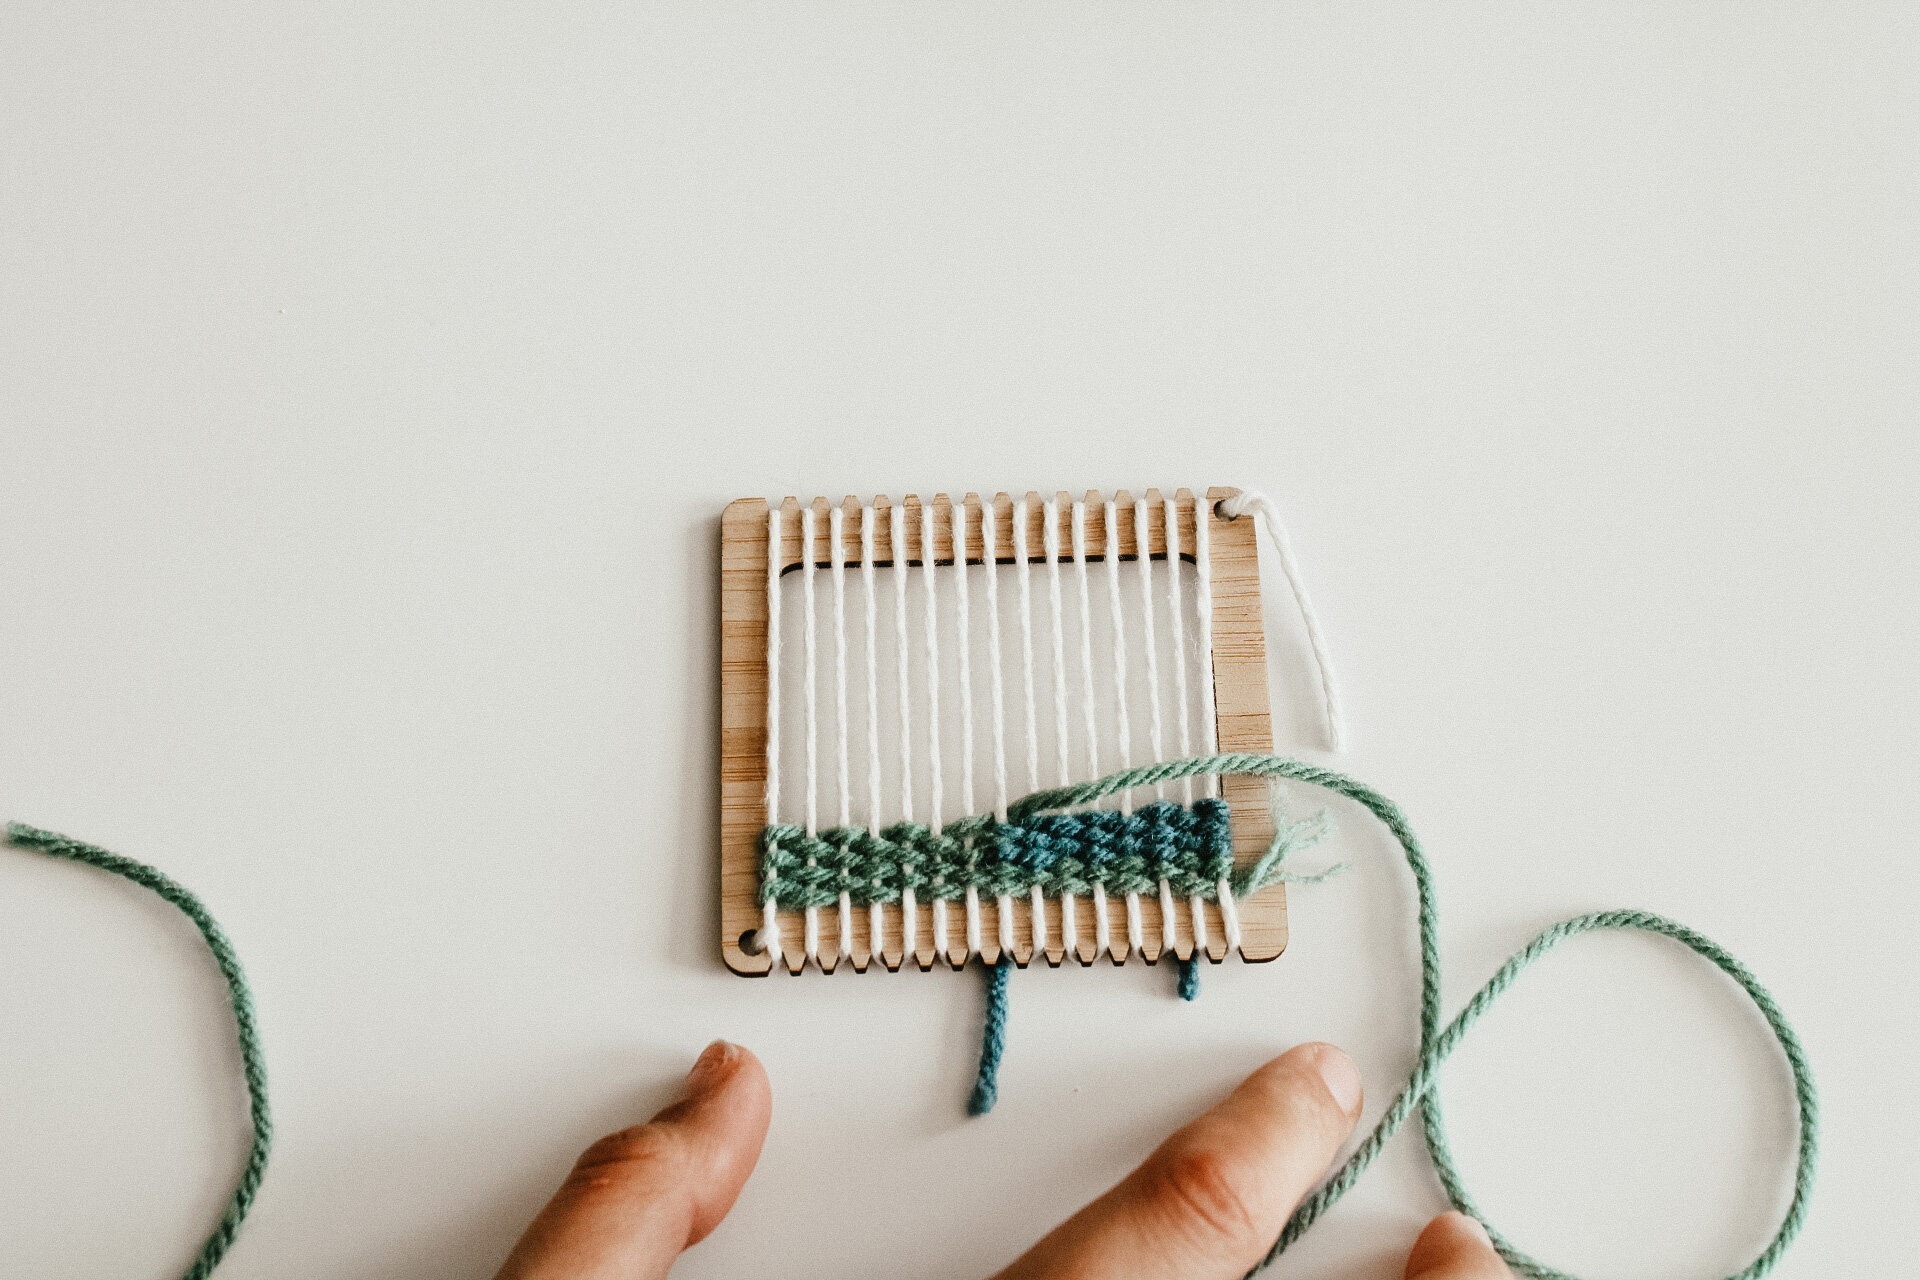

03. to continue the tabby weave, start off where you ended and continue weaving in the under over pattern for as long as you want.
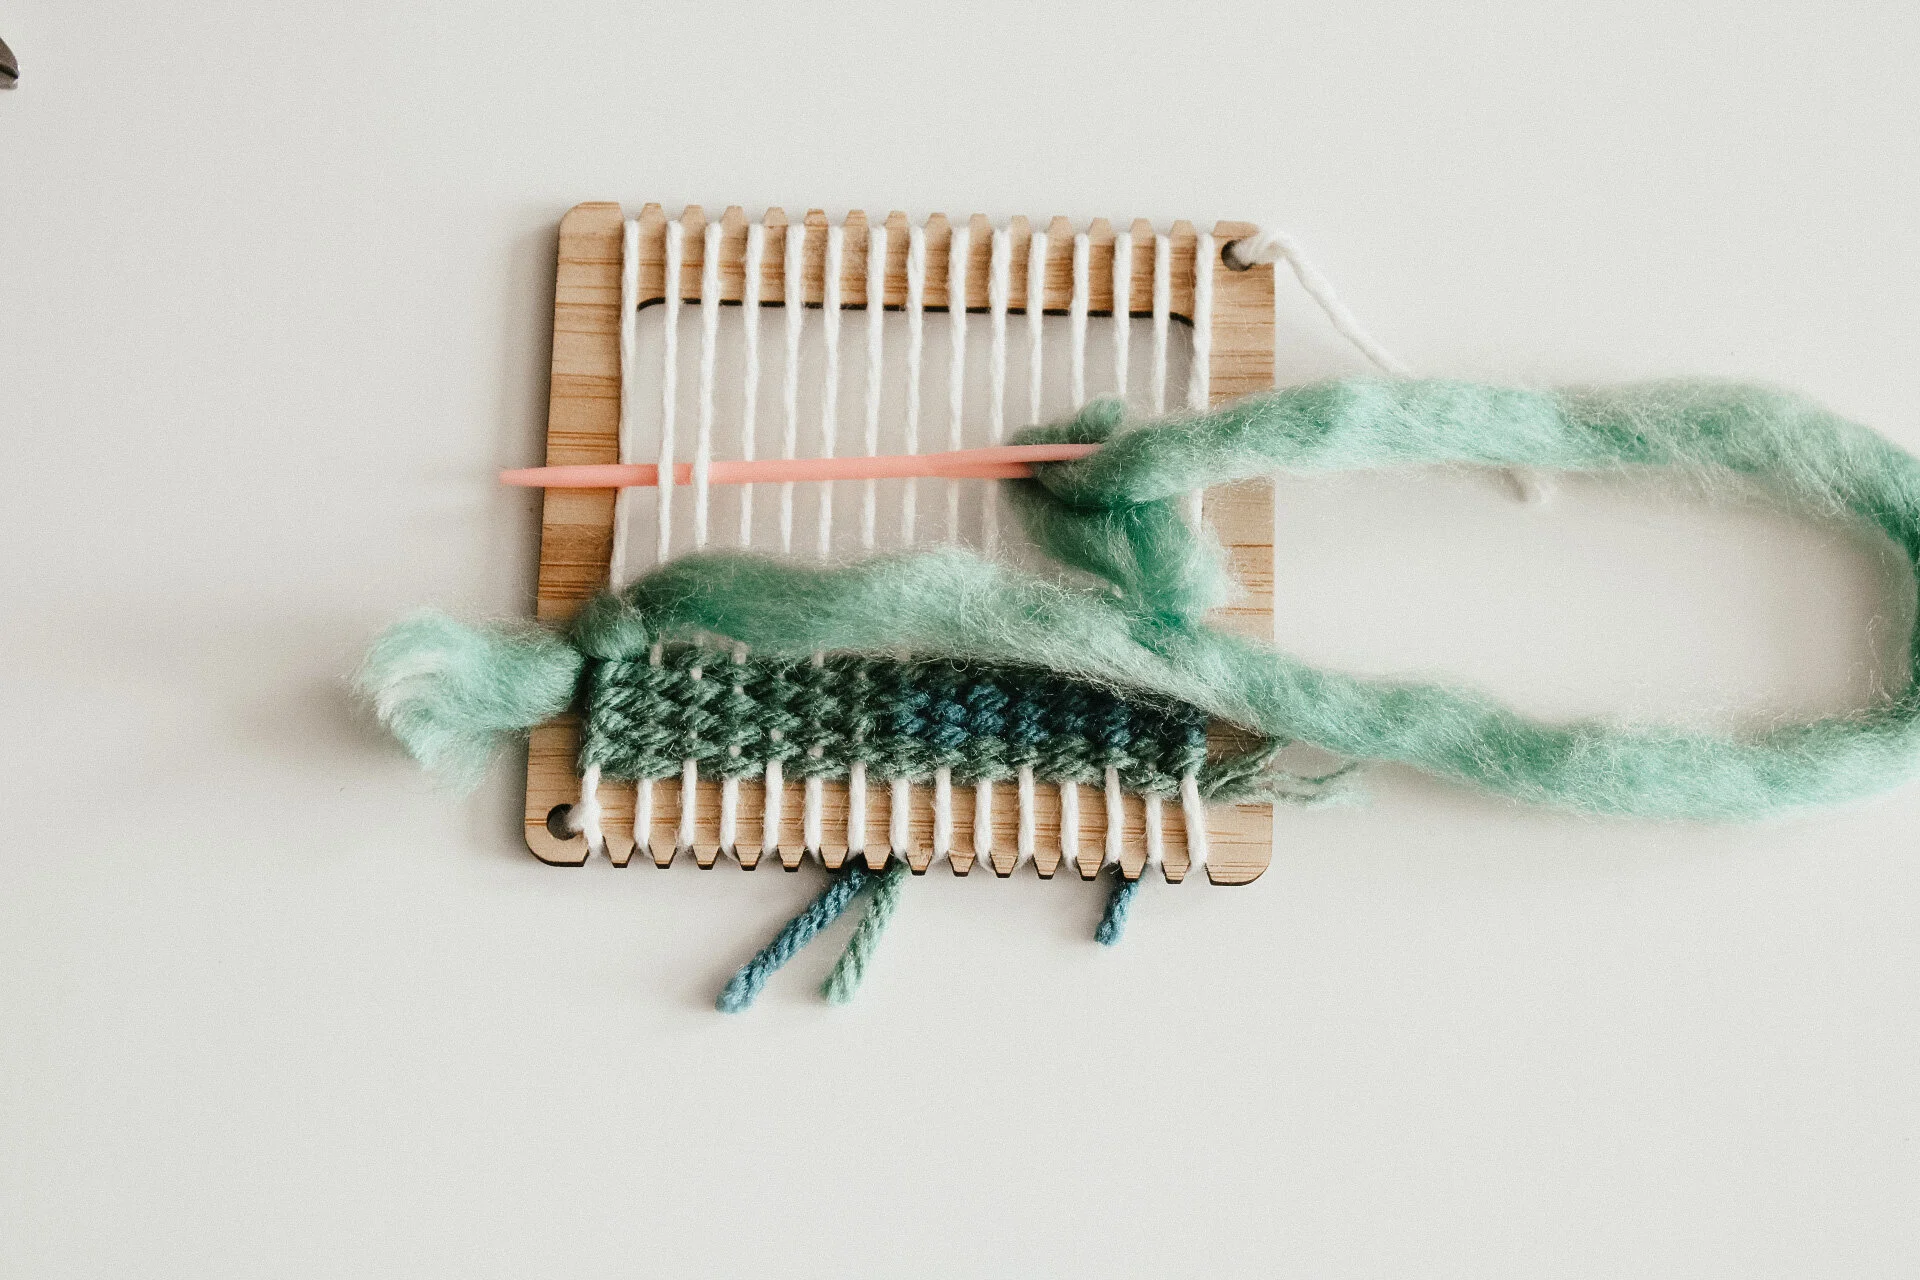
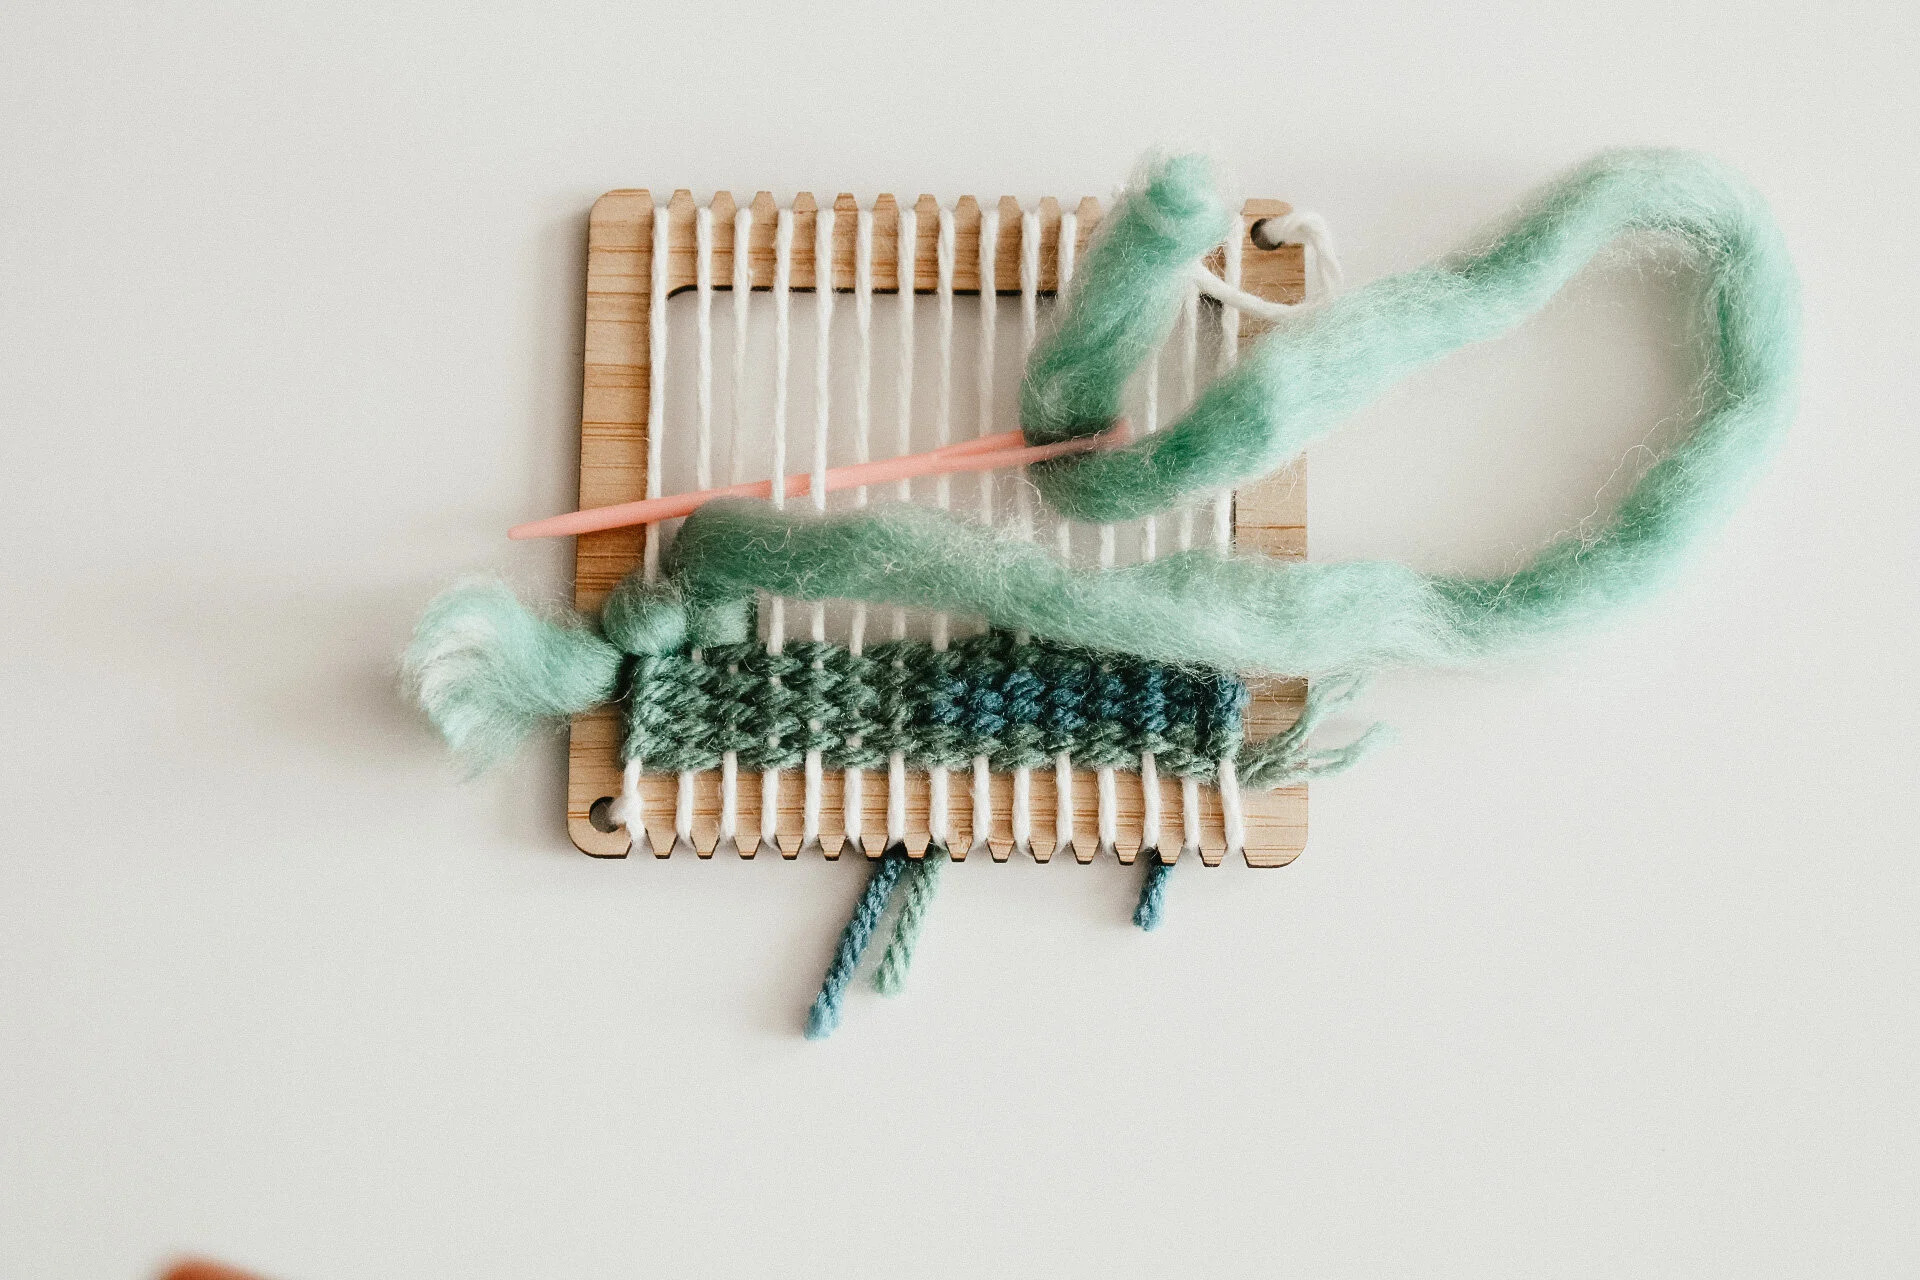
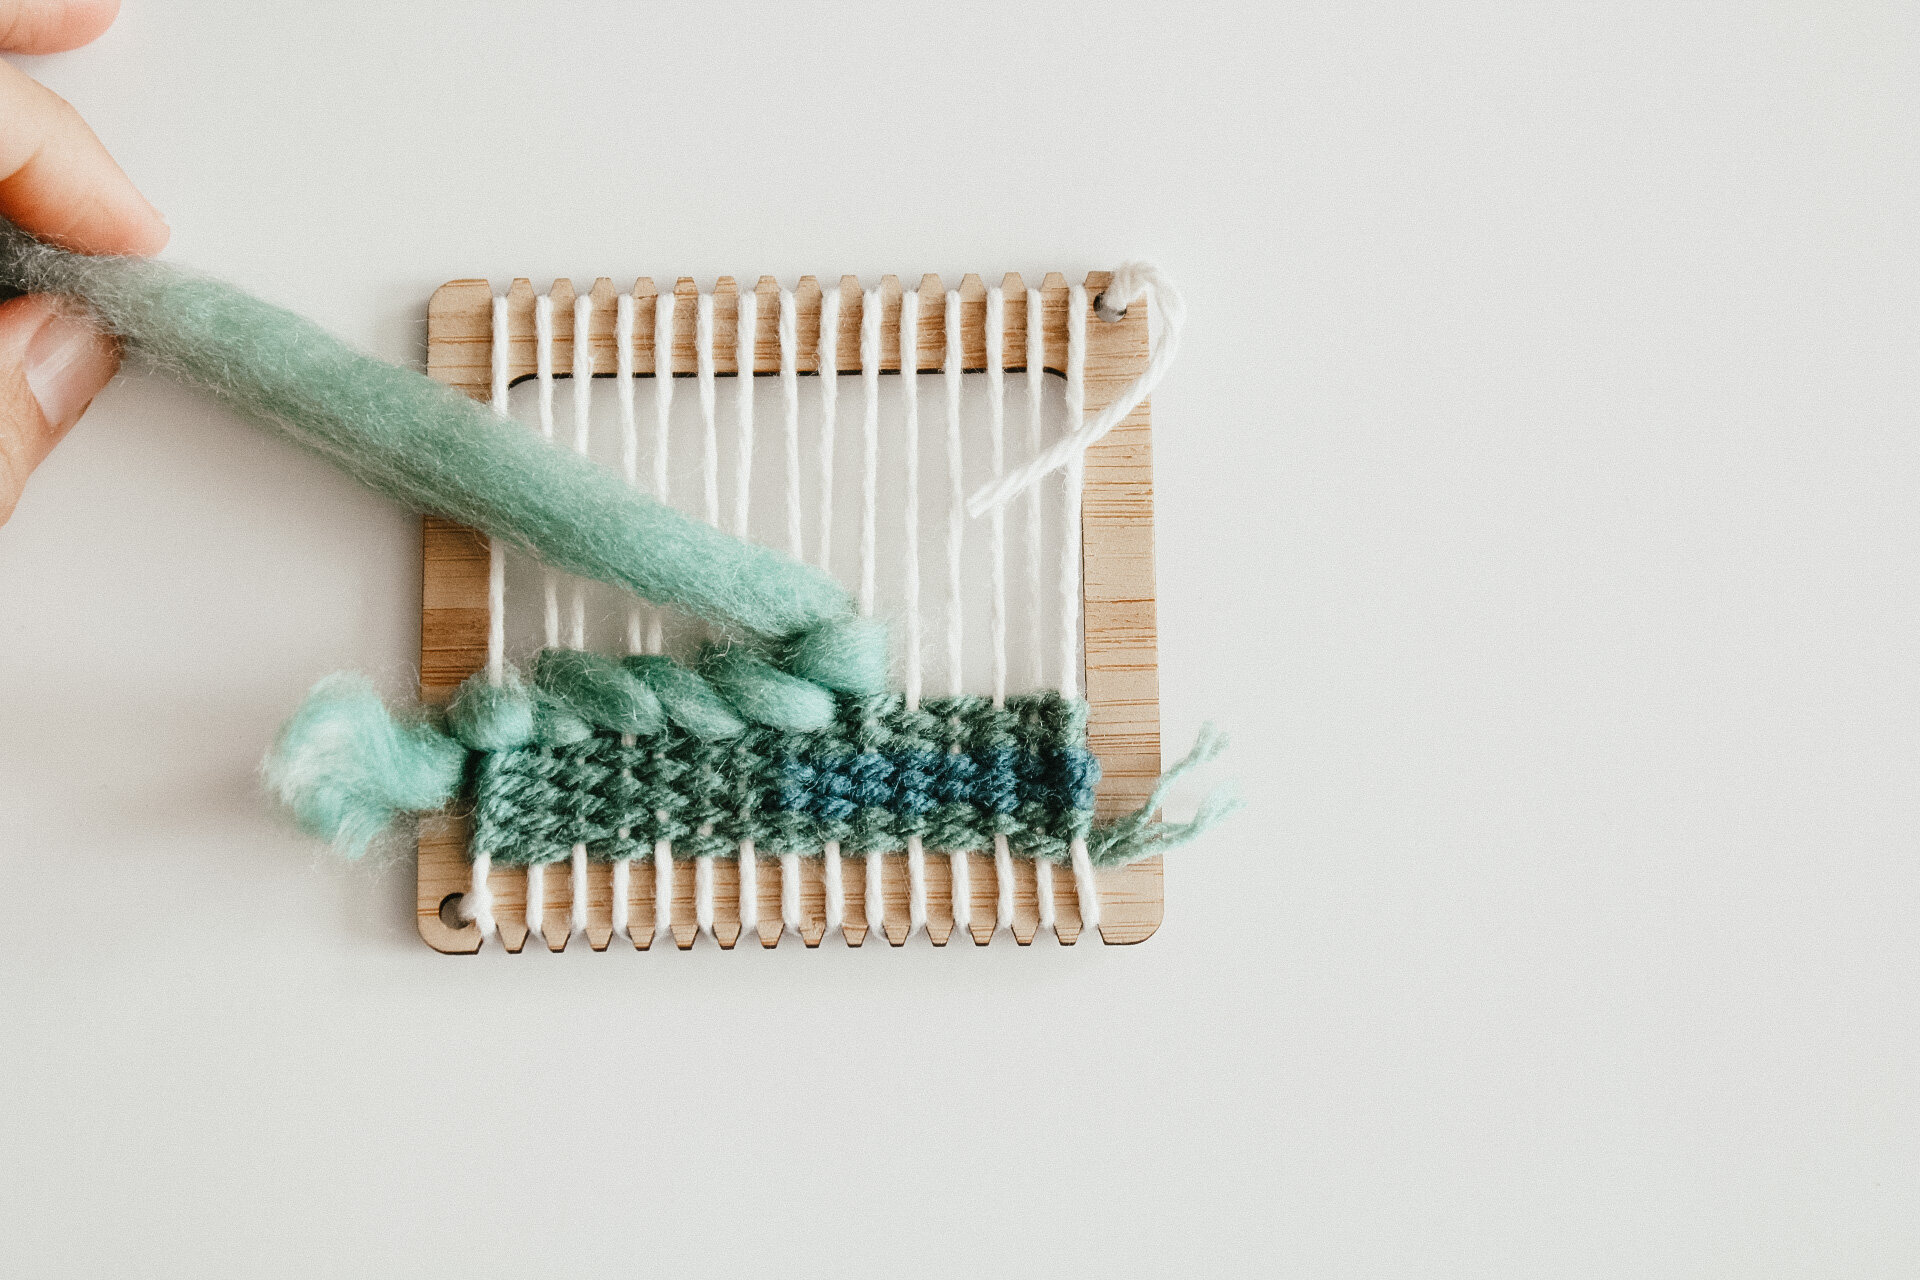
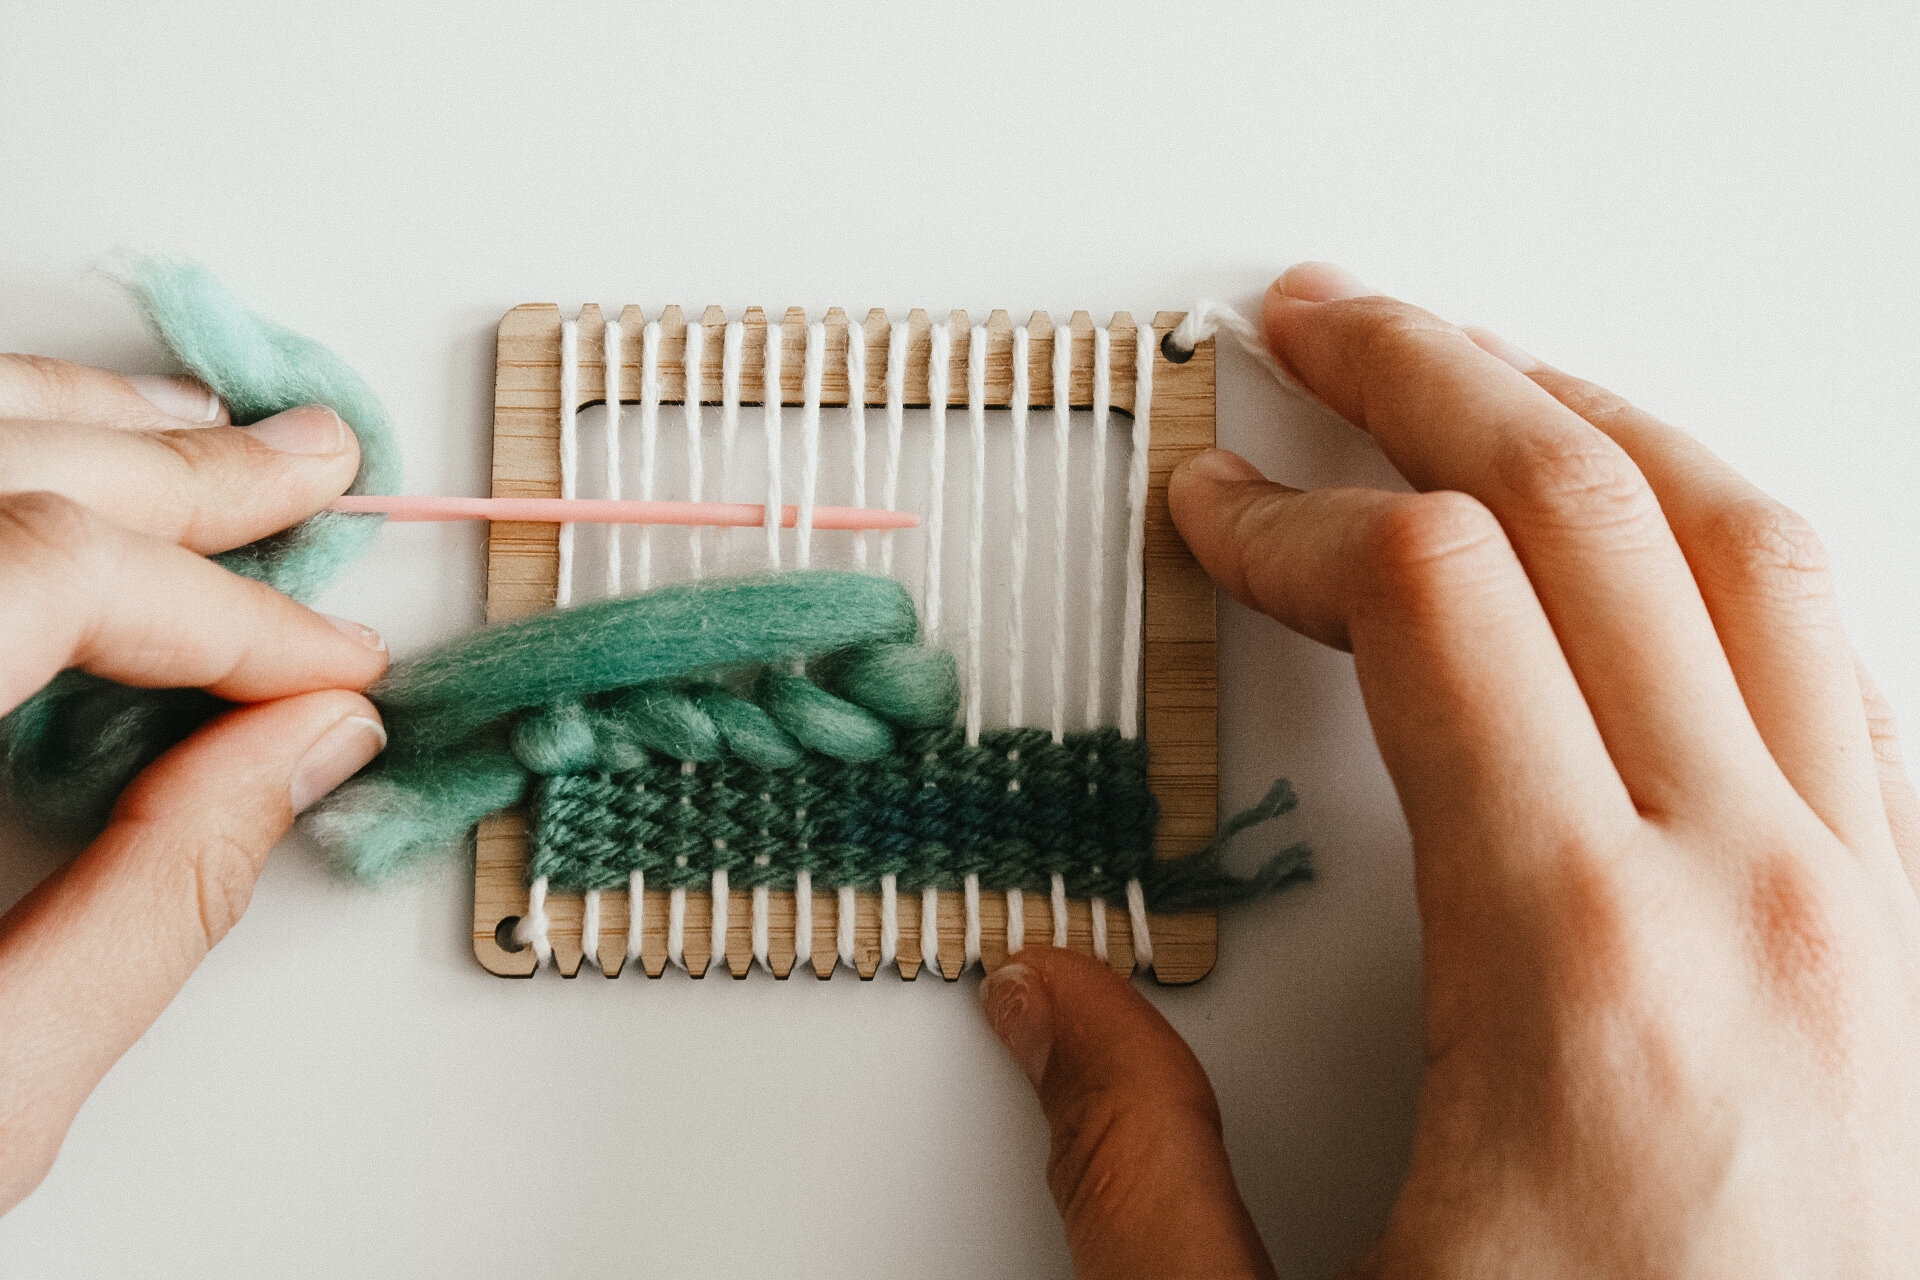
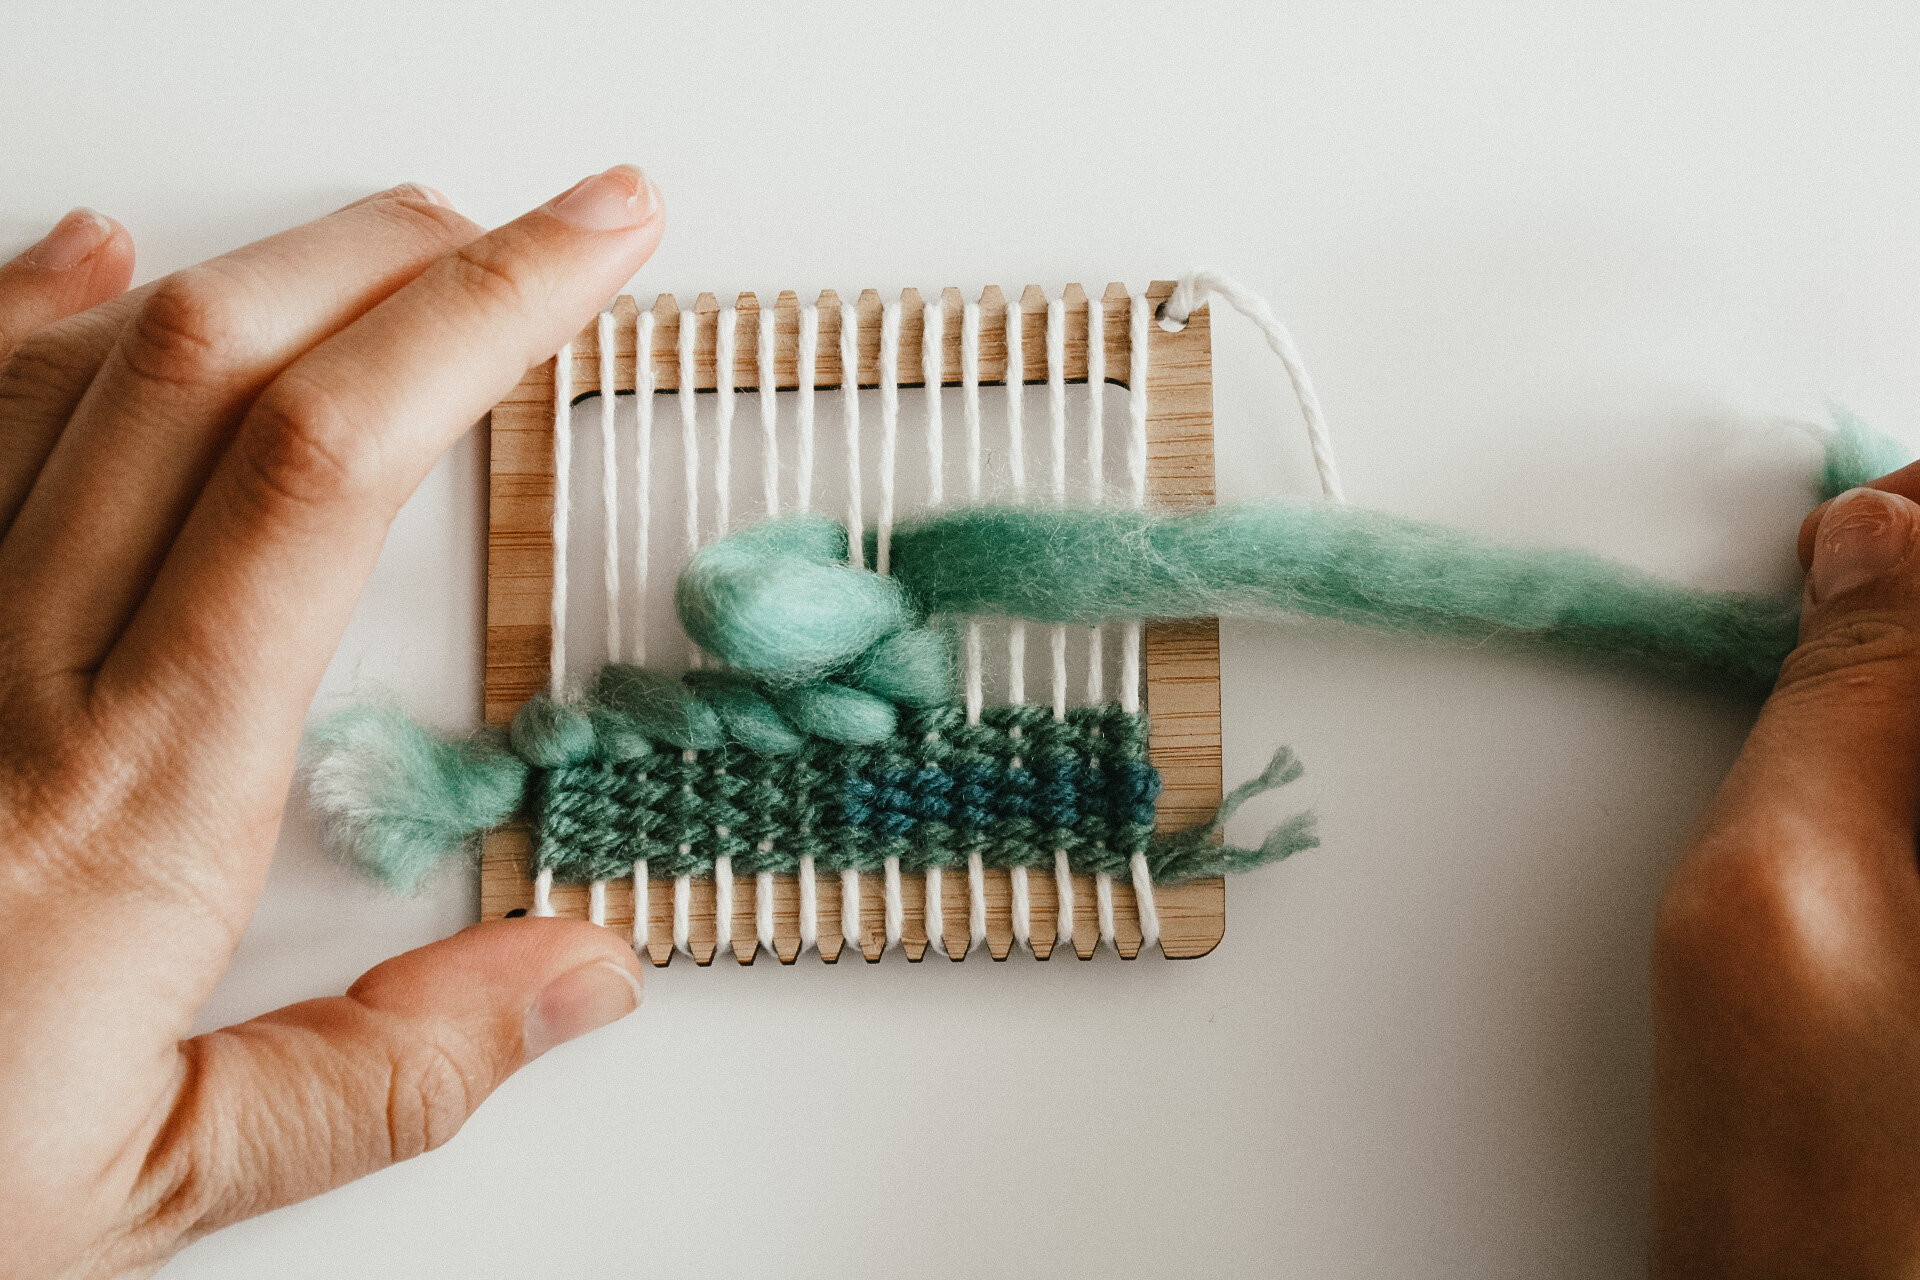
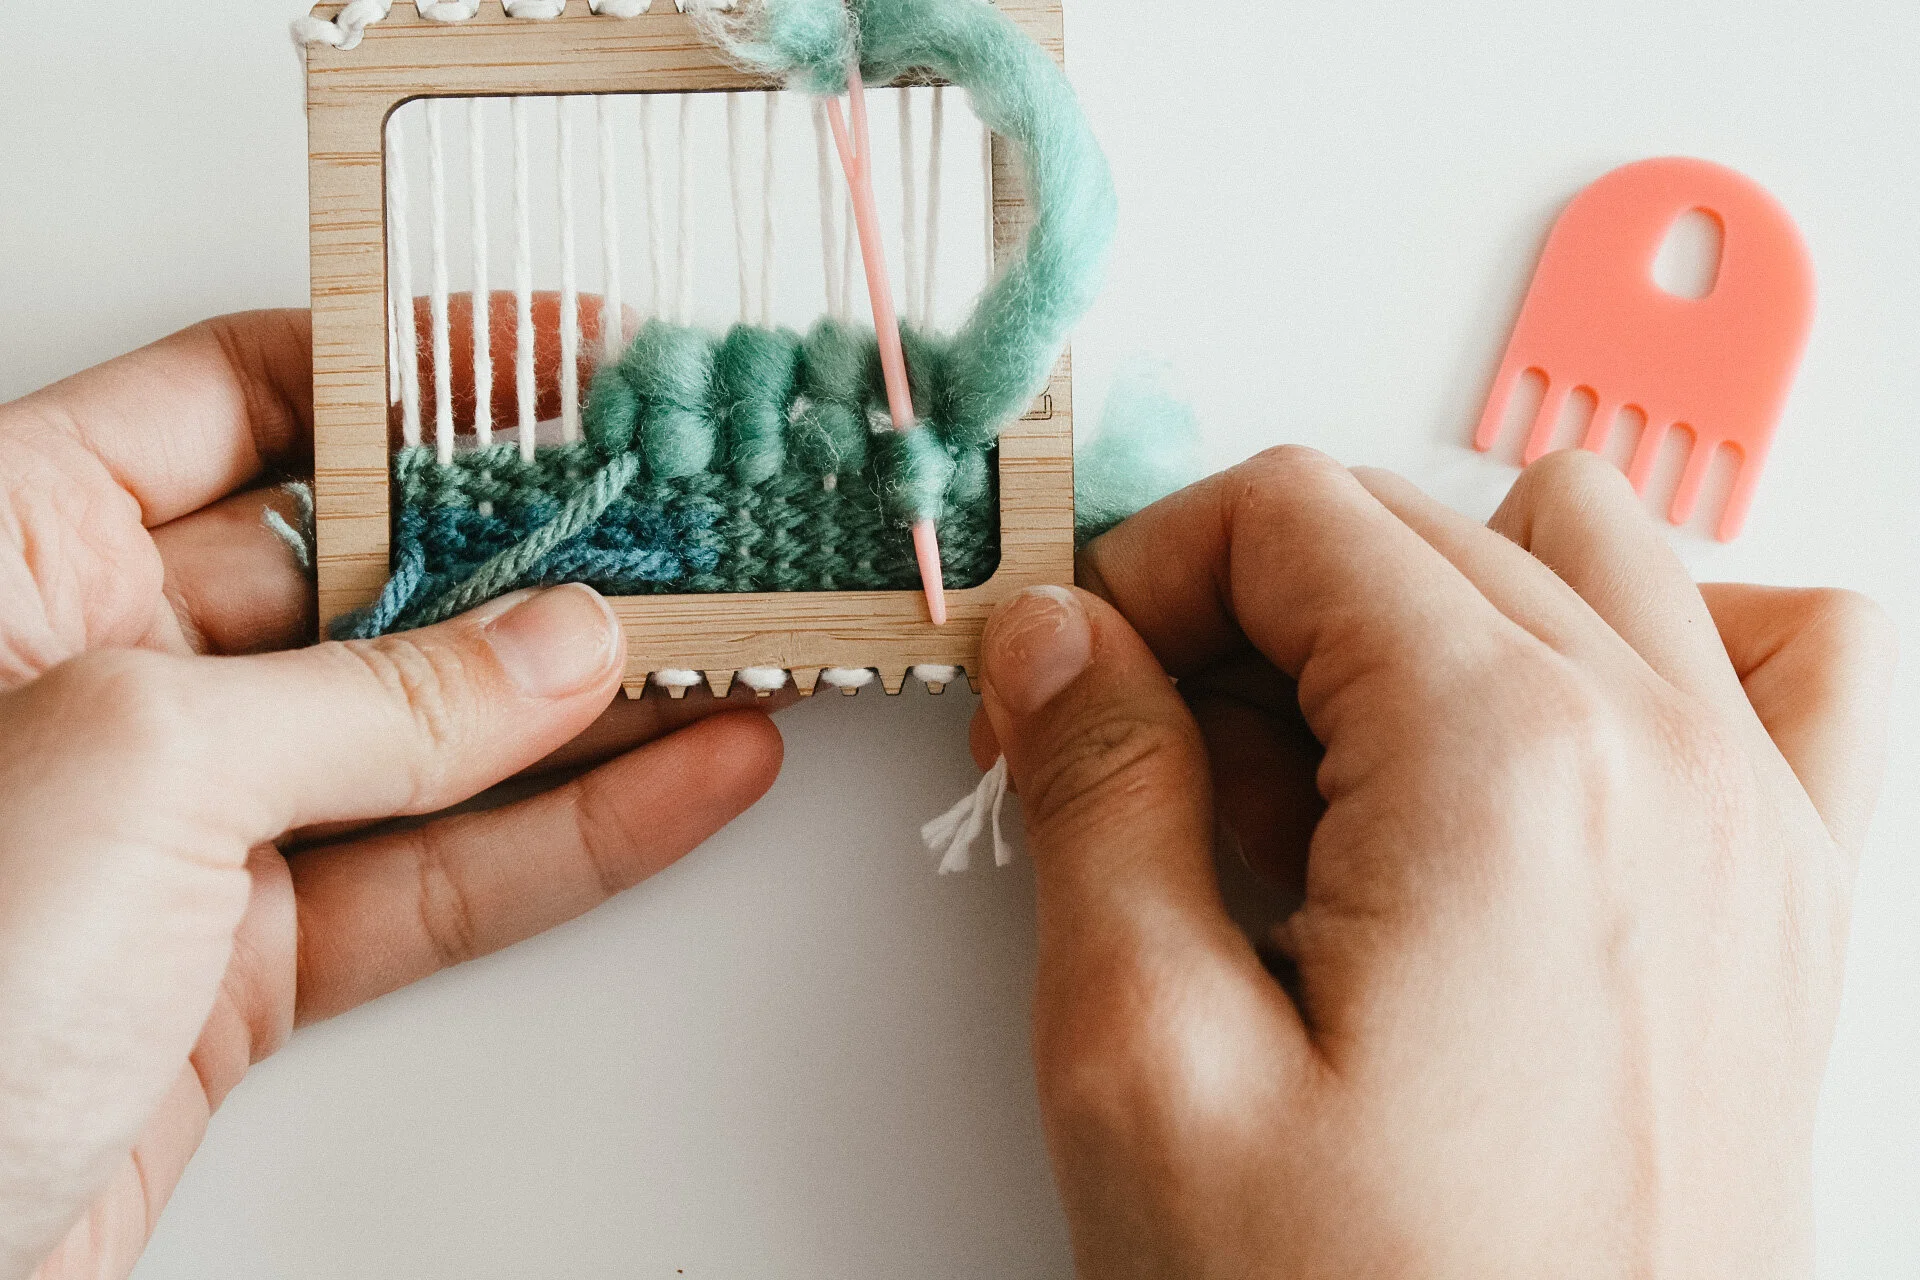
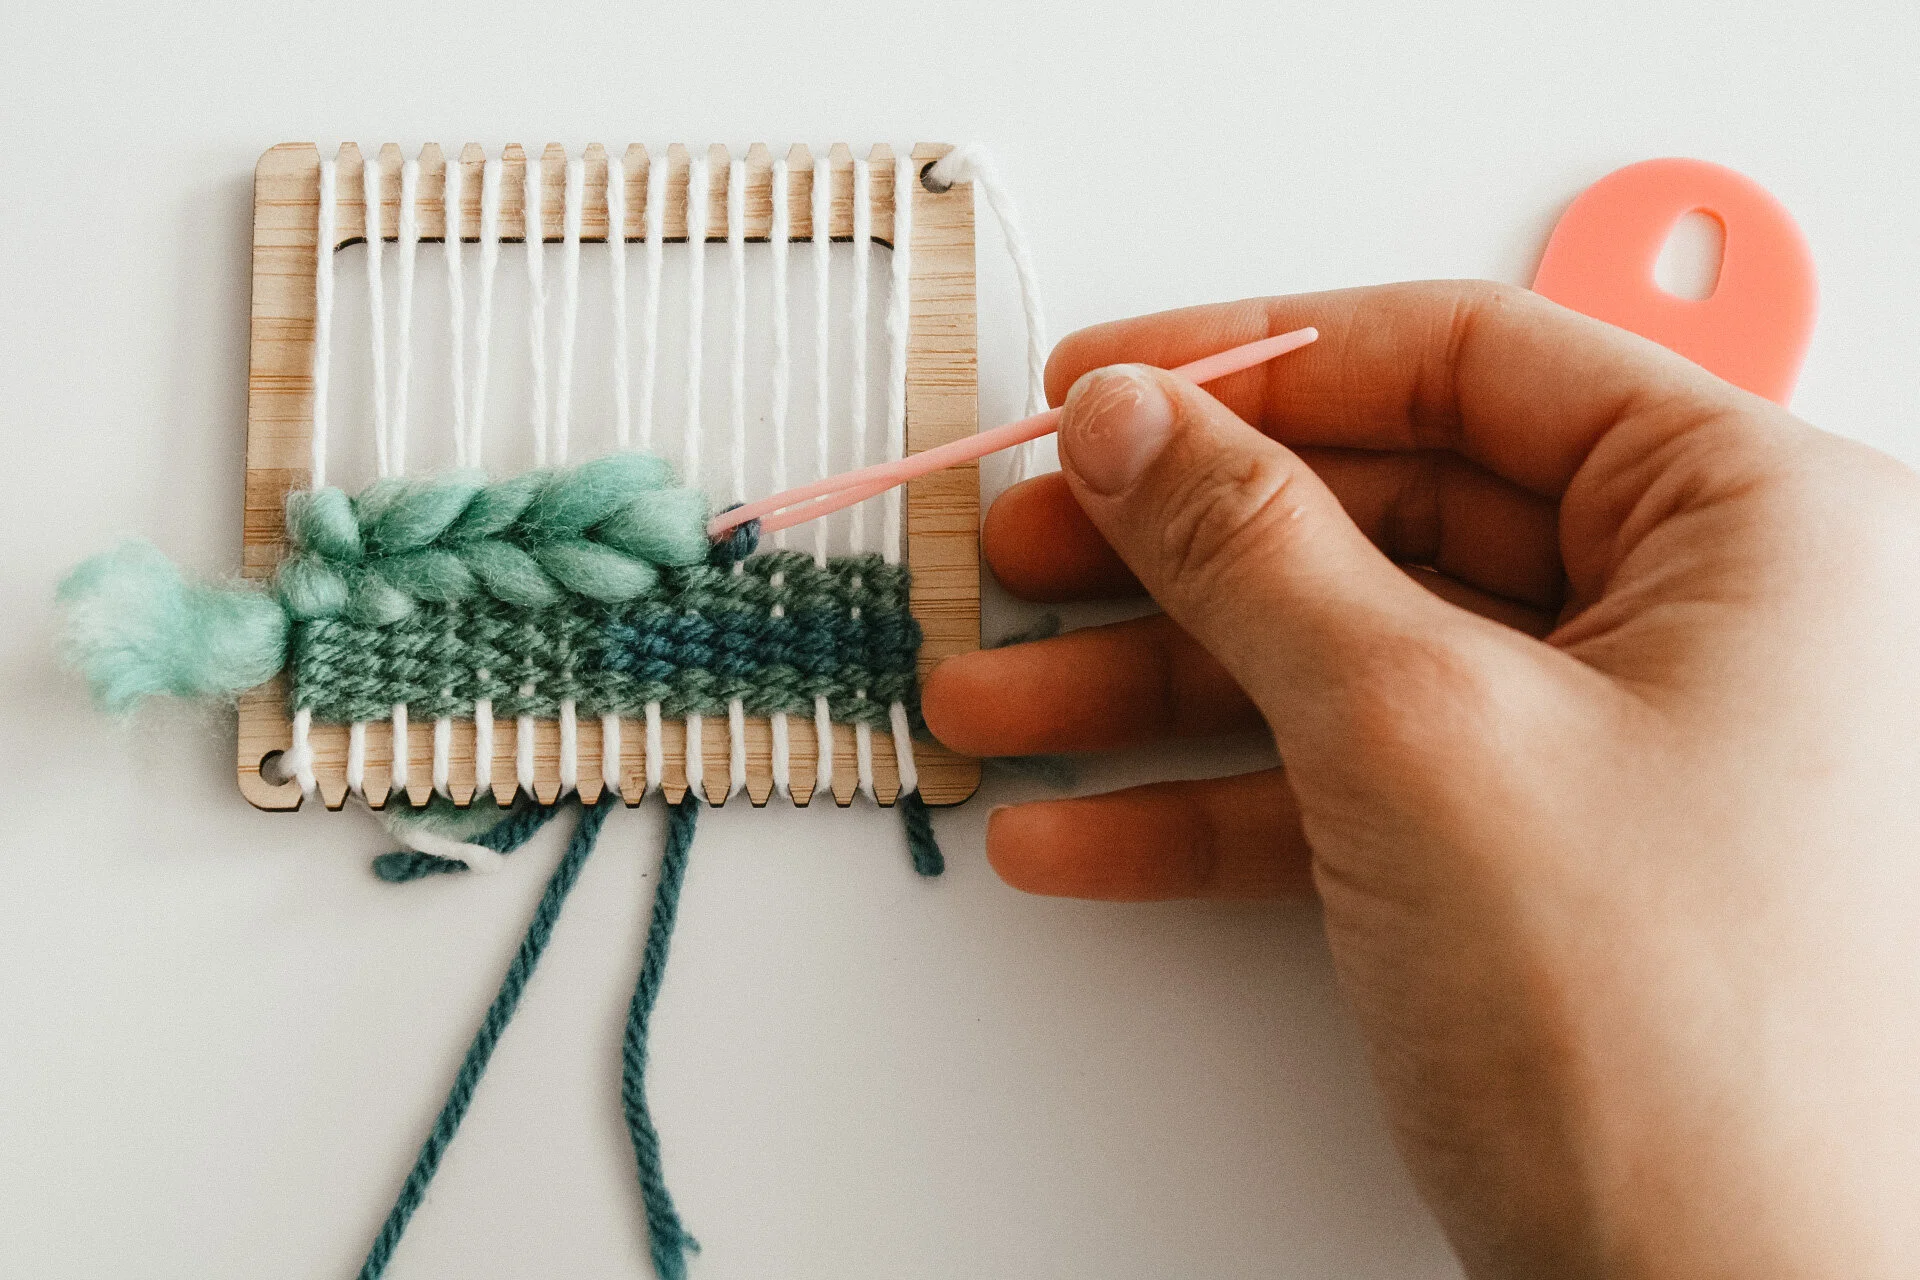
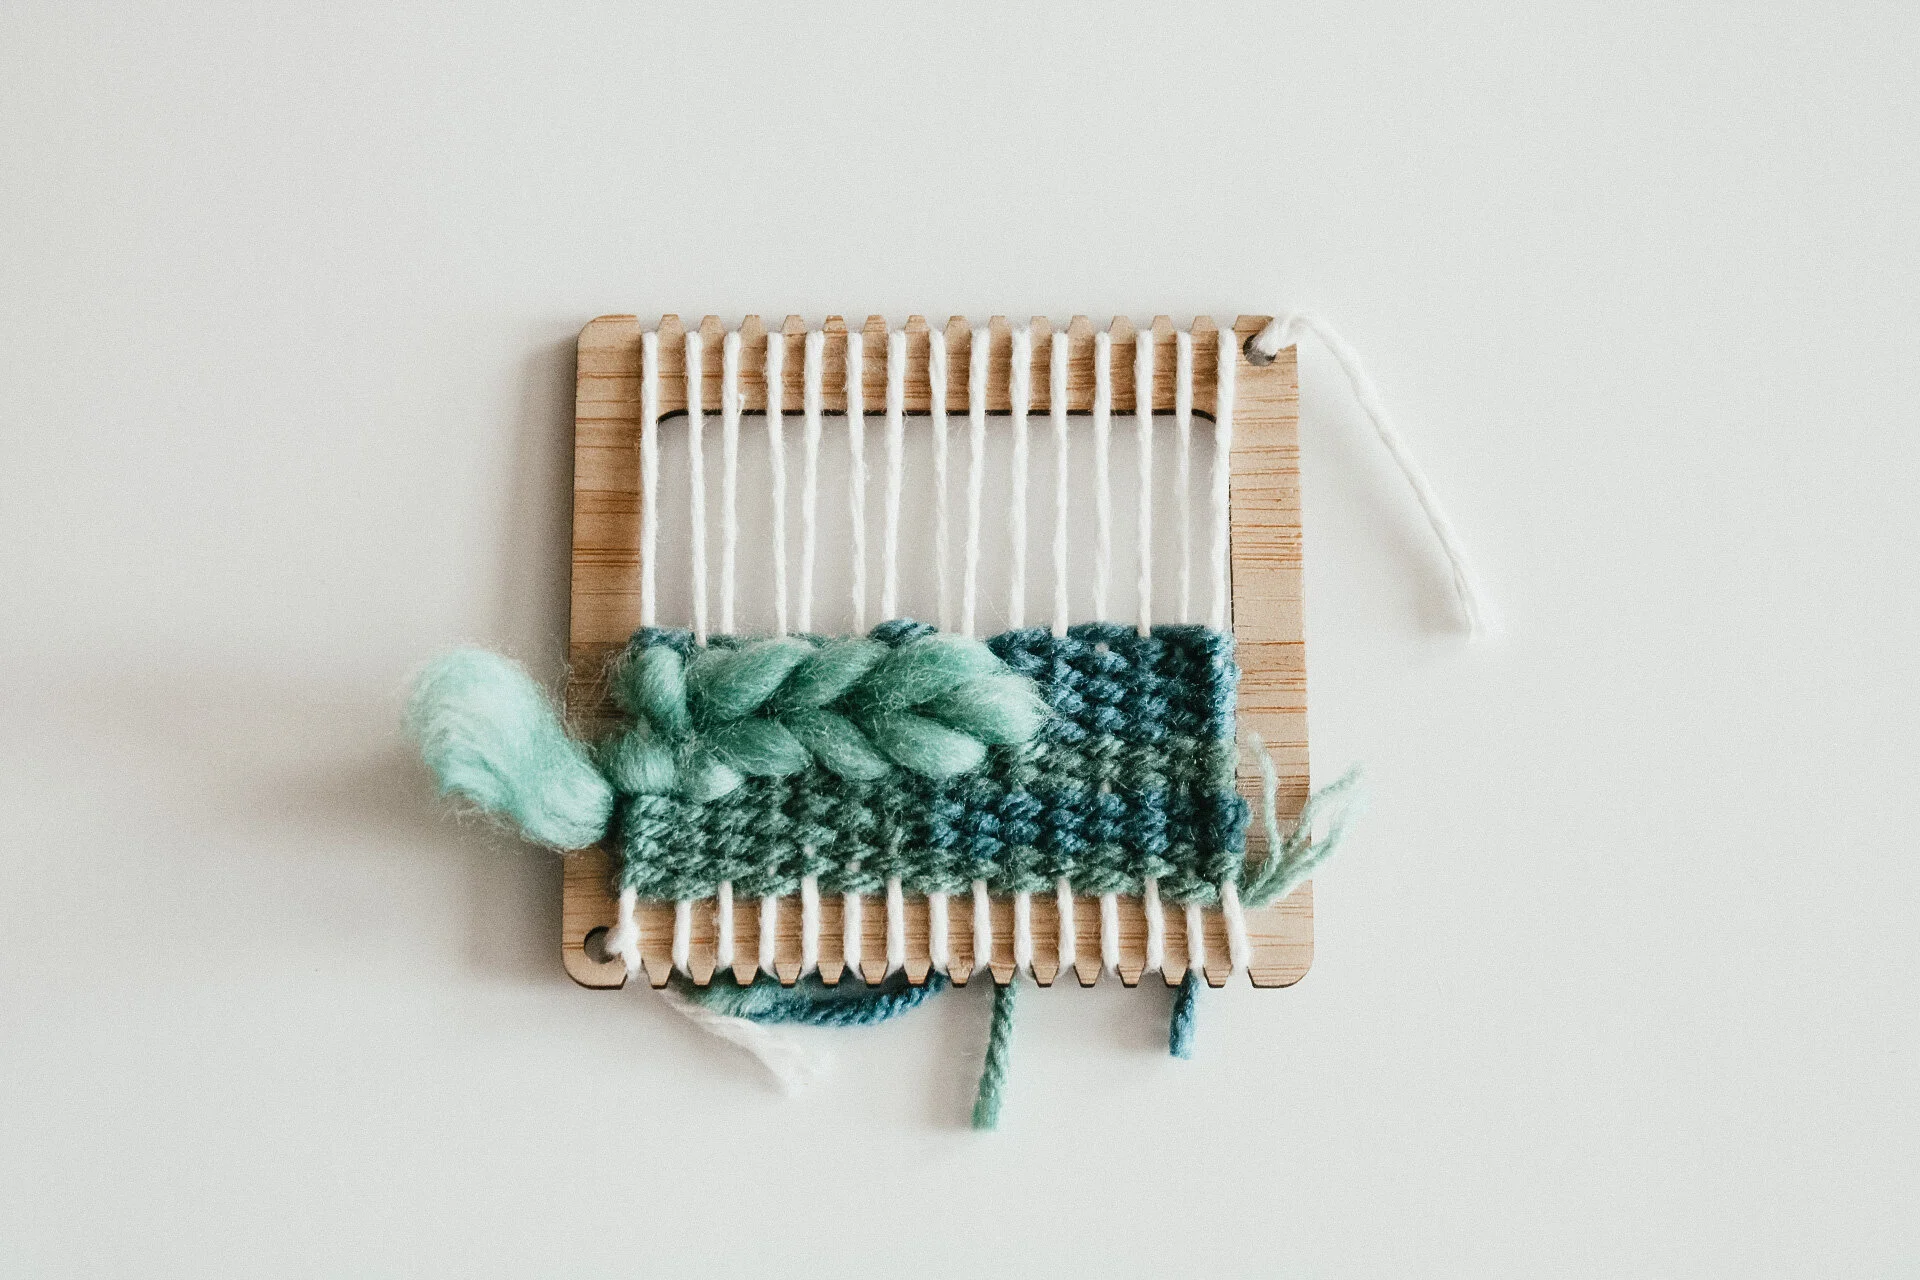
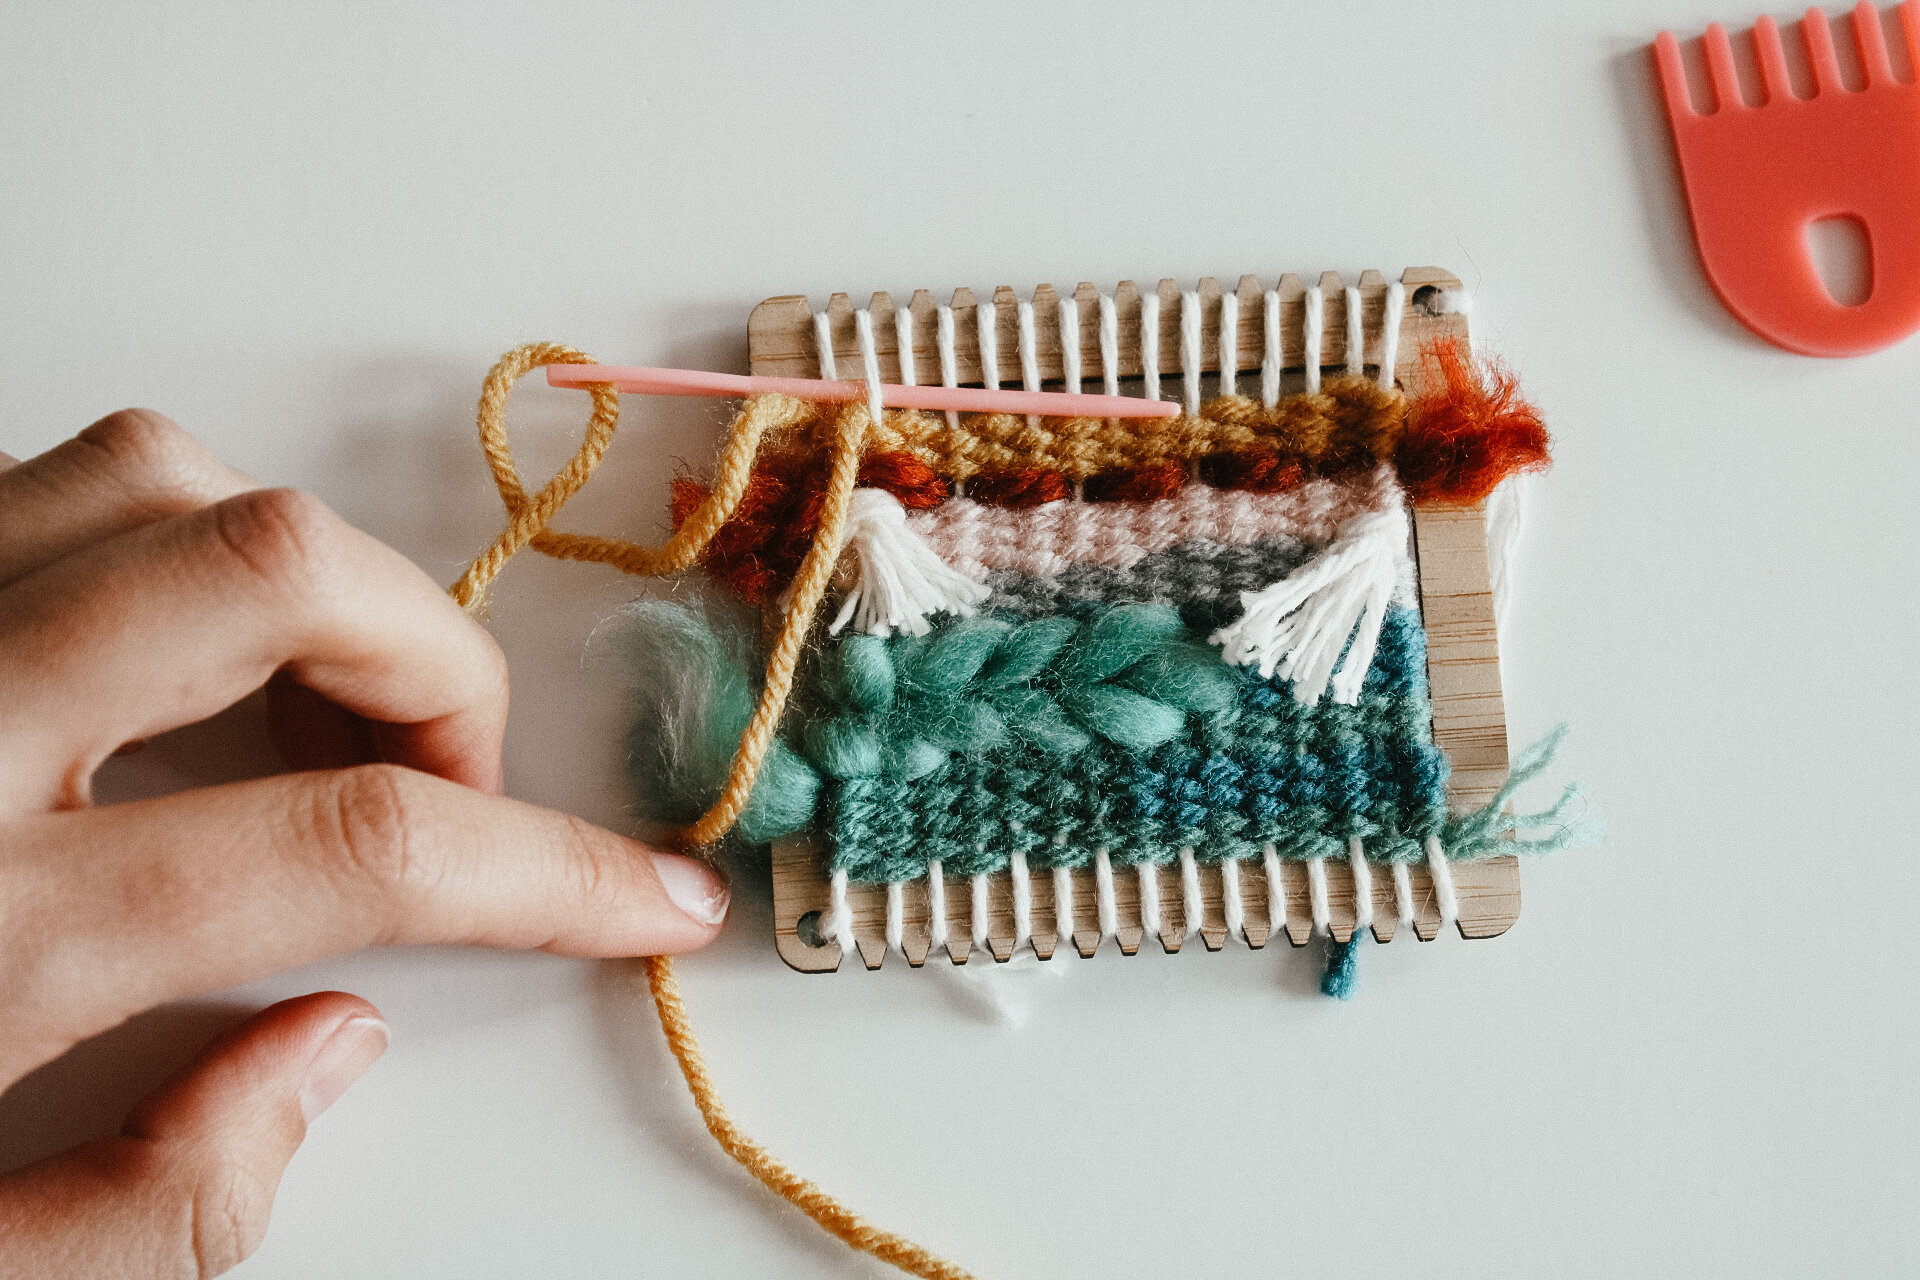
+soumak stitch
the soumak stitch is one of my favorite stitches. it looks like a braid and it is a really great way to bring texture to a small piece. plus it is a great way to use the roving that you get in your kit!
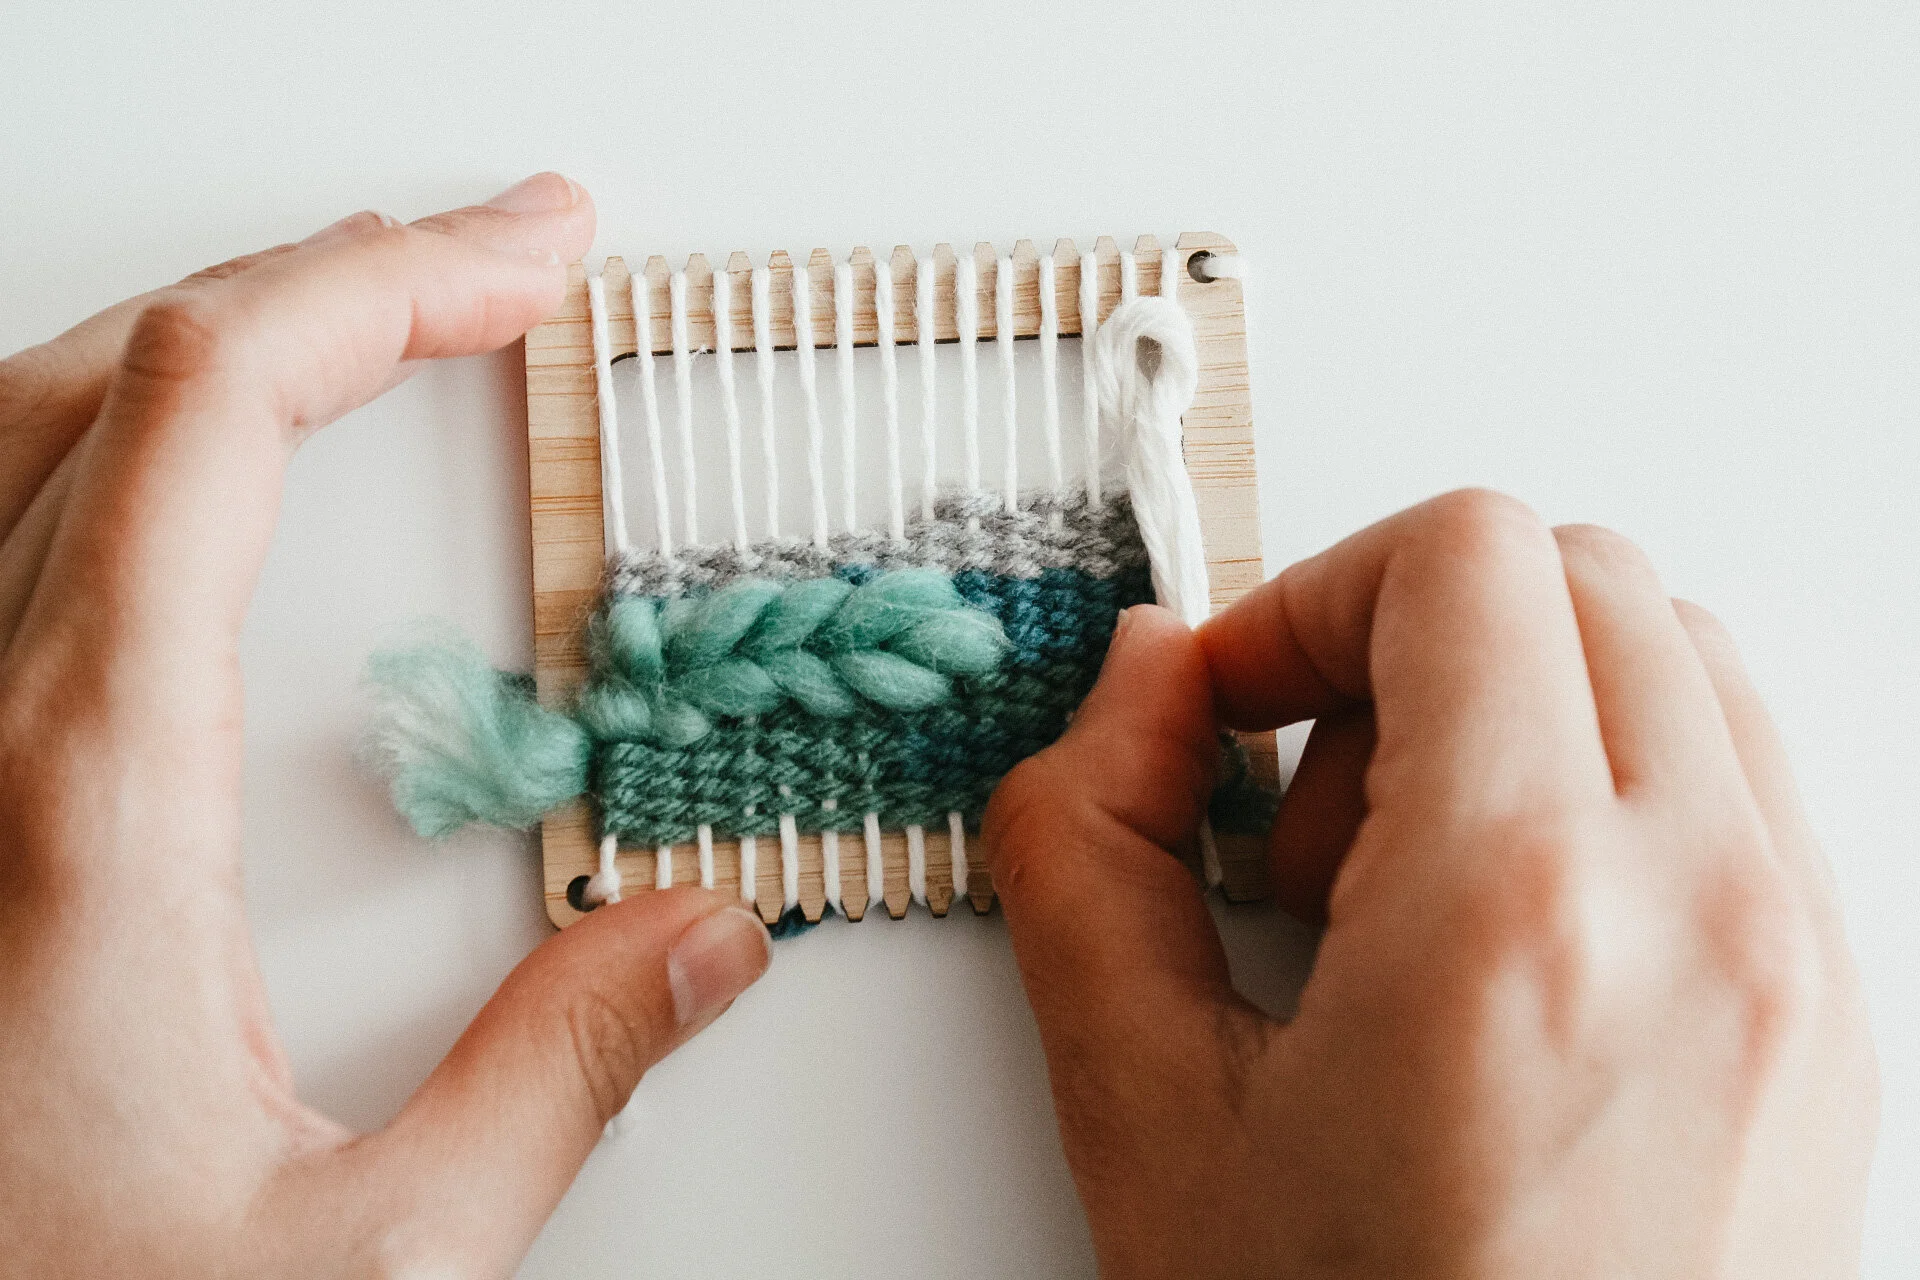
01. start by threading your needle with roving and going under the outermost warp thread. pull through, leaving a 2 in tail.

02. to secure in place, place your tapestry needle around and under the first warp string and pull through to tighten, creating a little knot.
03. lay your roving across the surface of your warp, in the direction you will be moving and count across two warp strings.
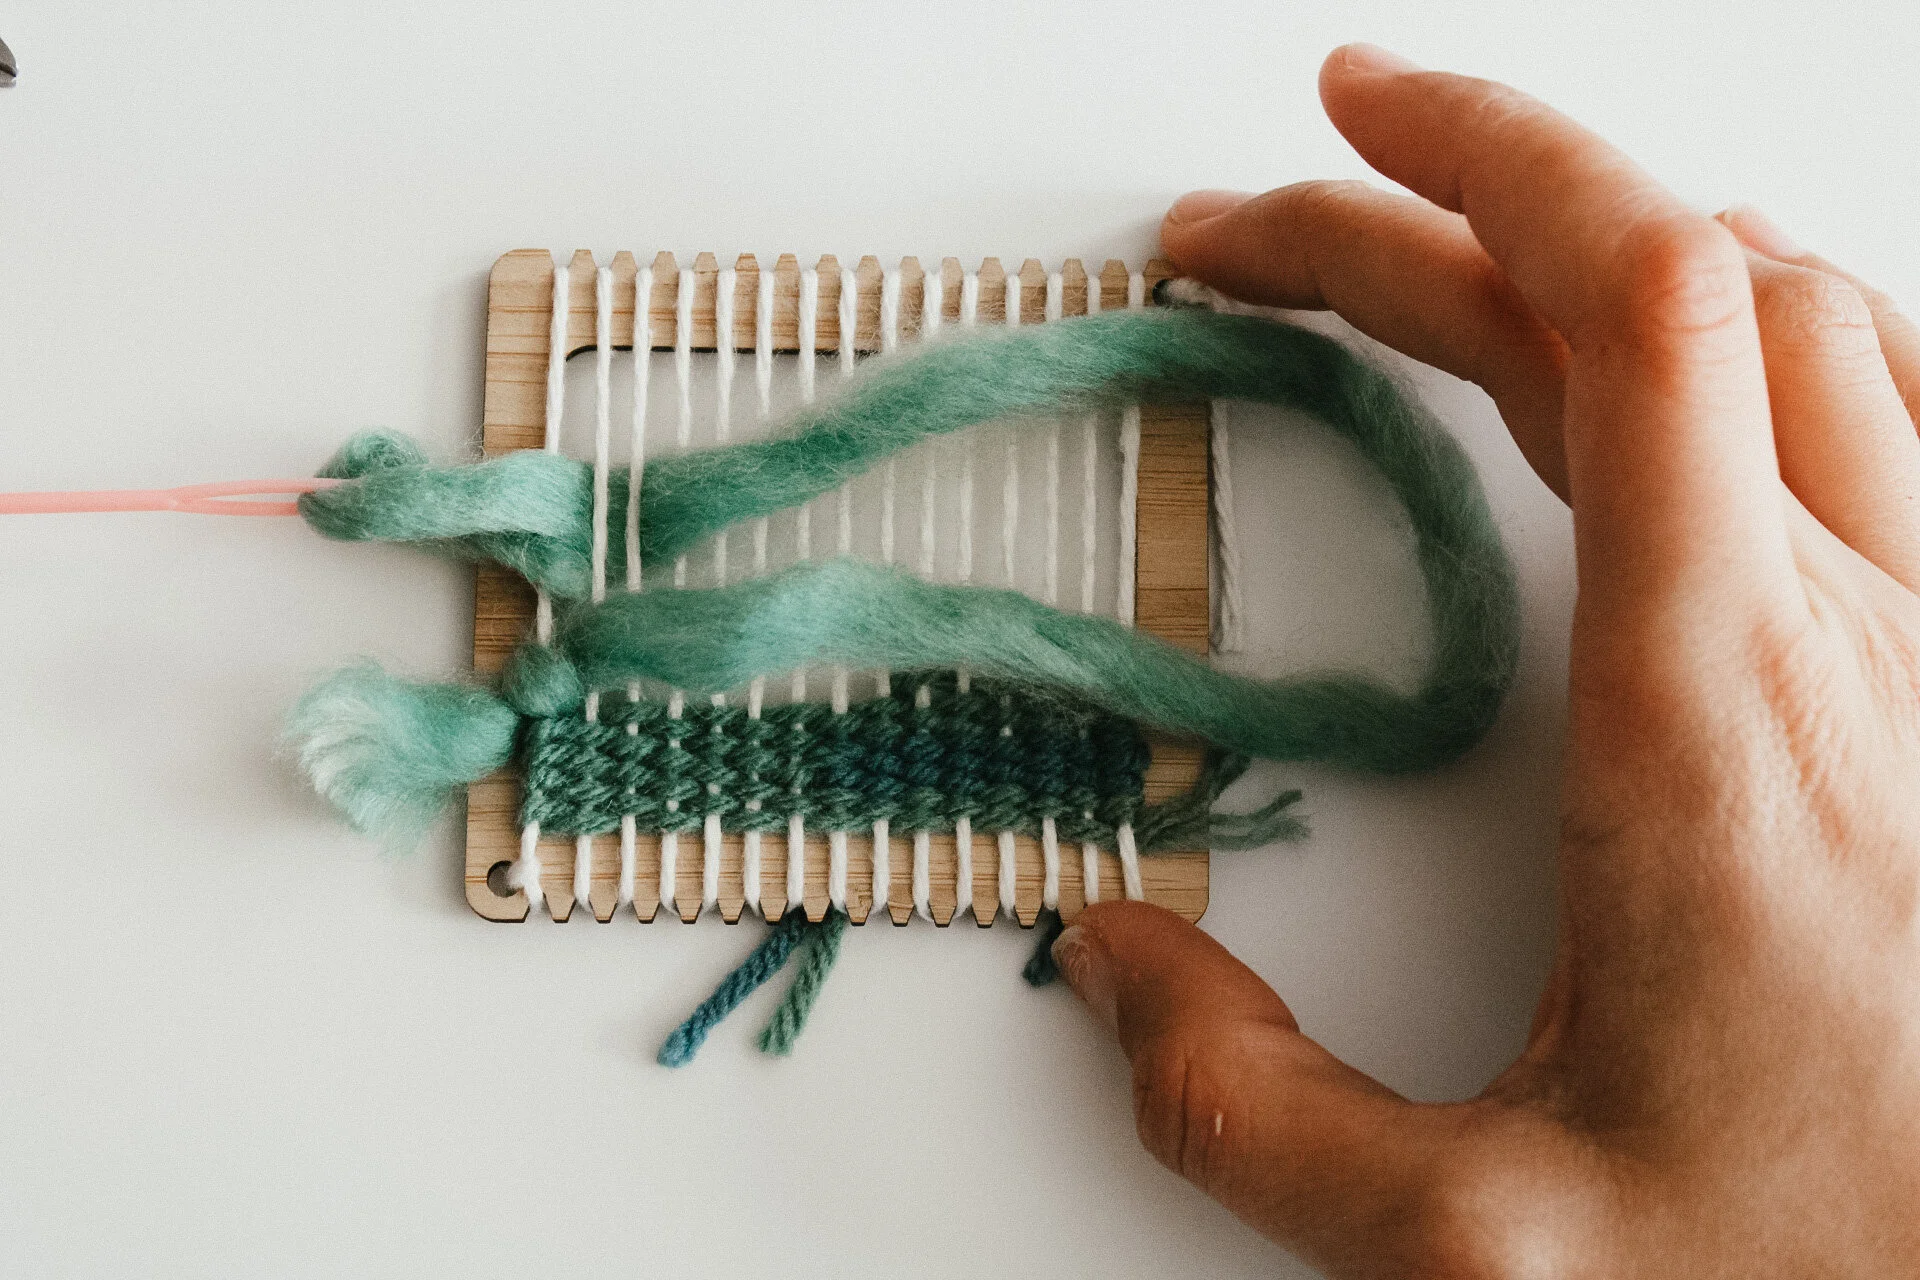
04. place your tapestry needle under the two warp threads and pull your roving back the way is came, underneath the warp.
05. lay your roving across the surface again.

06. count two more warp strings,place your tapestry needle under the two warp threads and pull your roving back the way is came, underneath the warp.
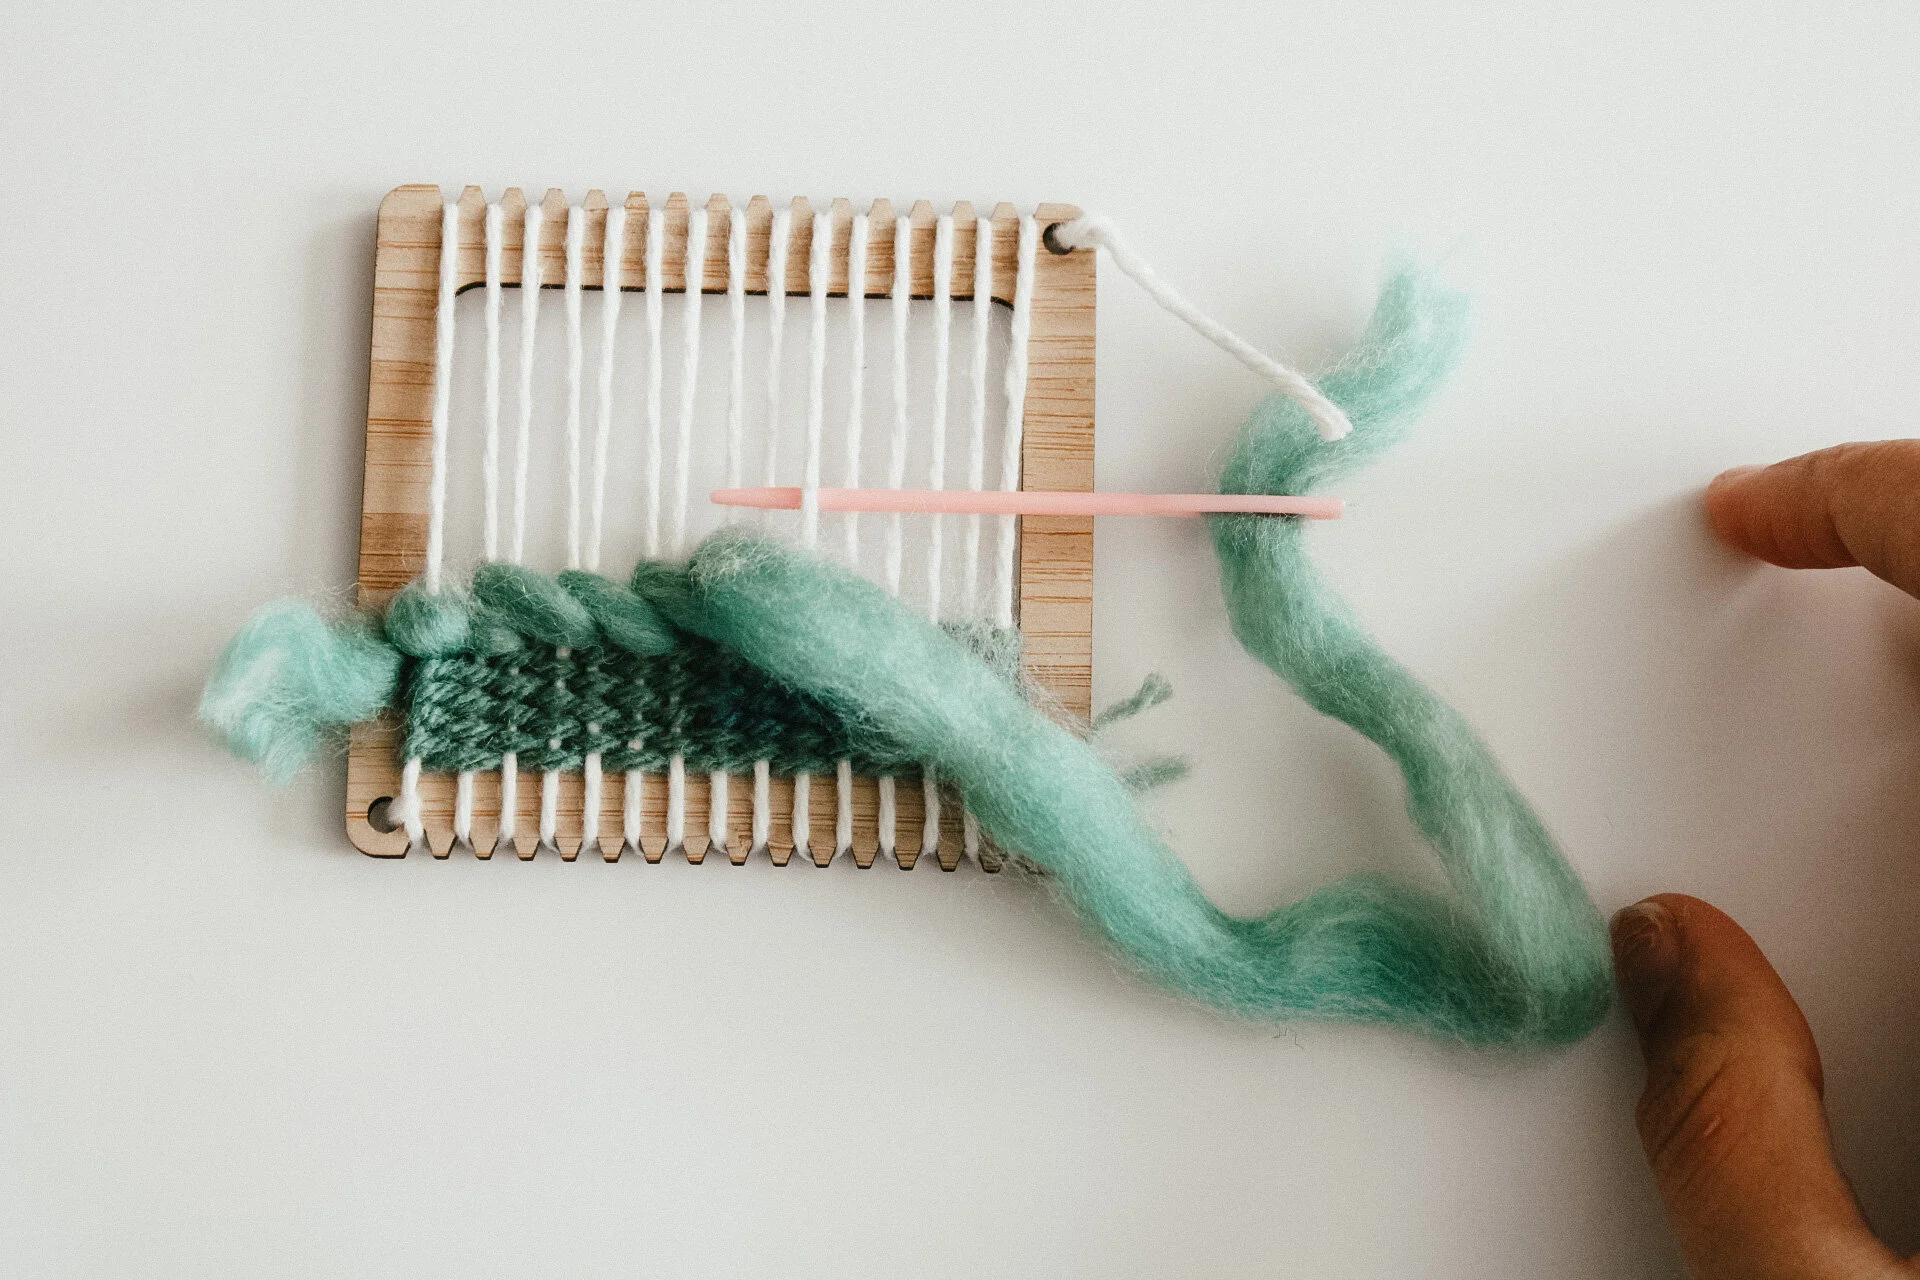
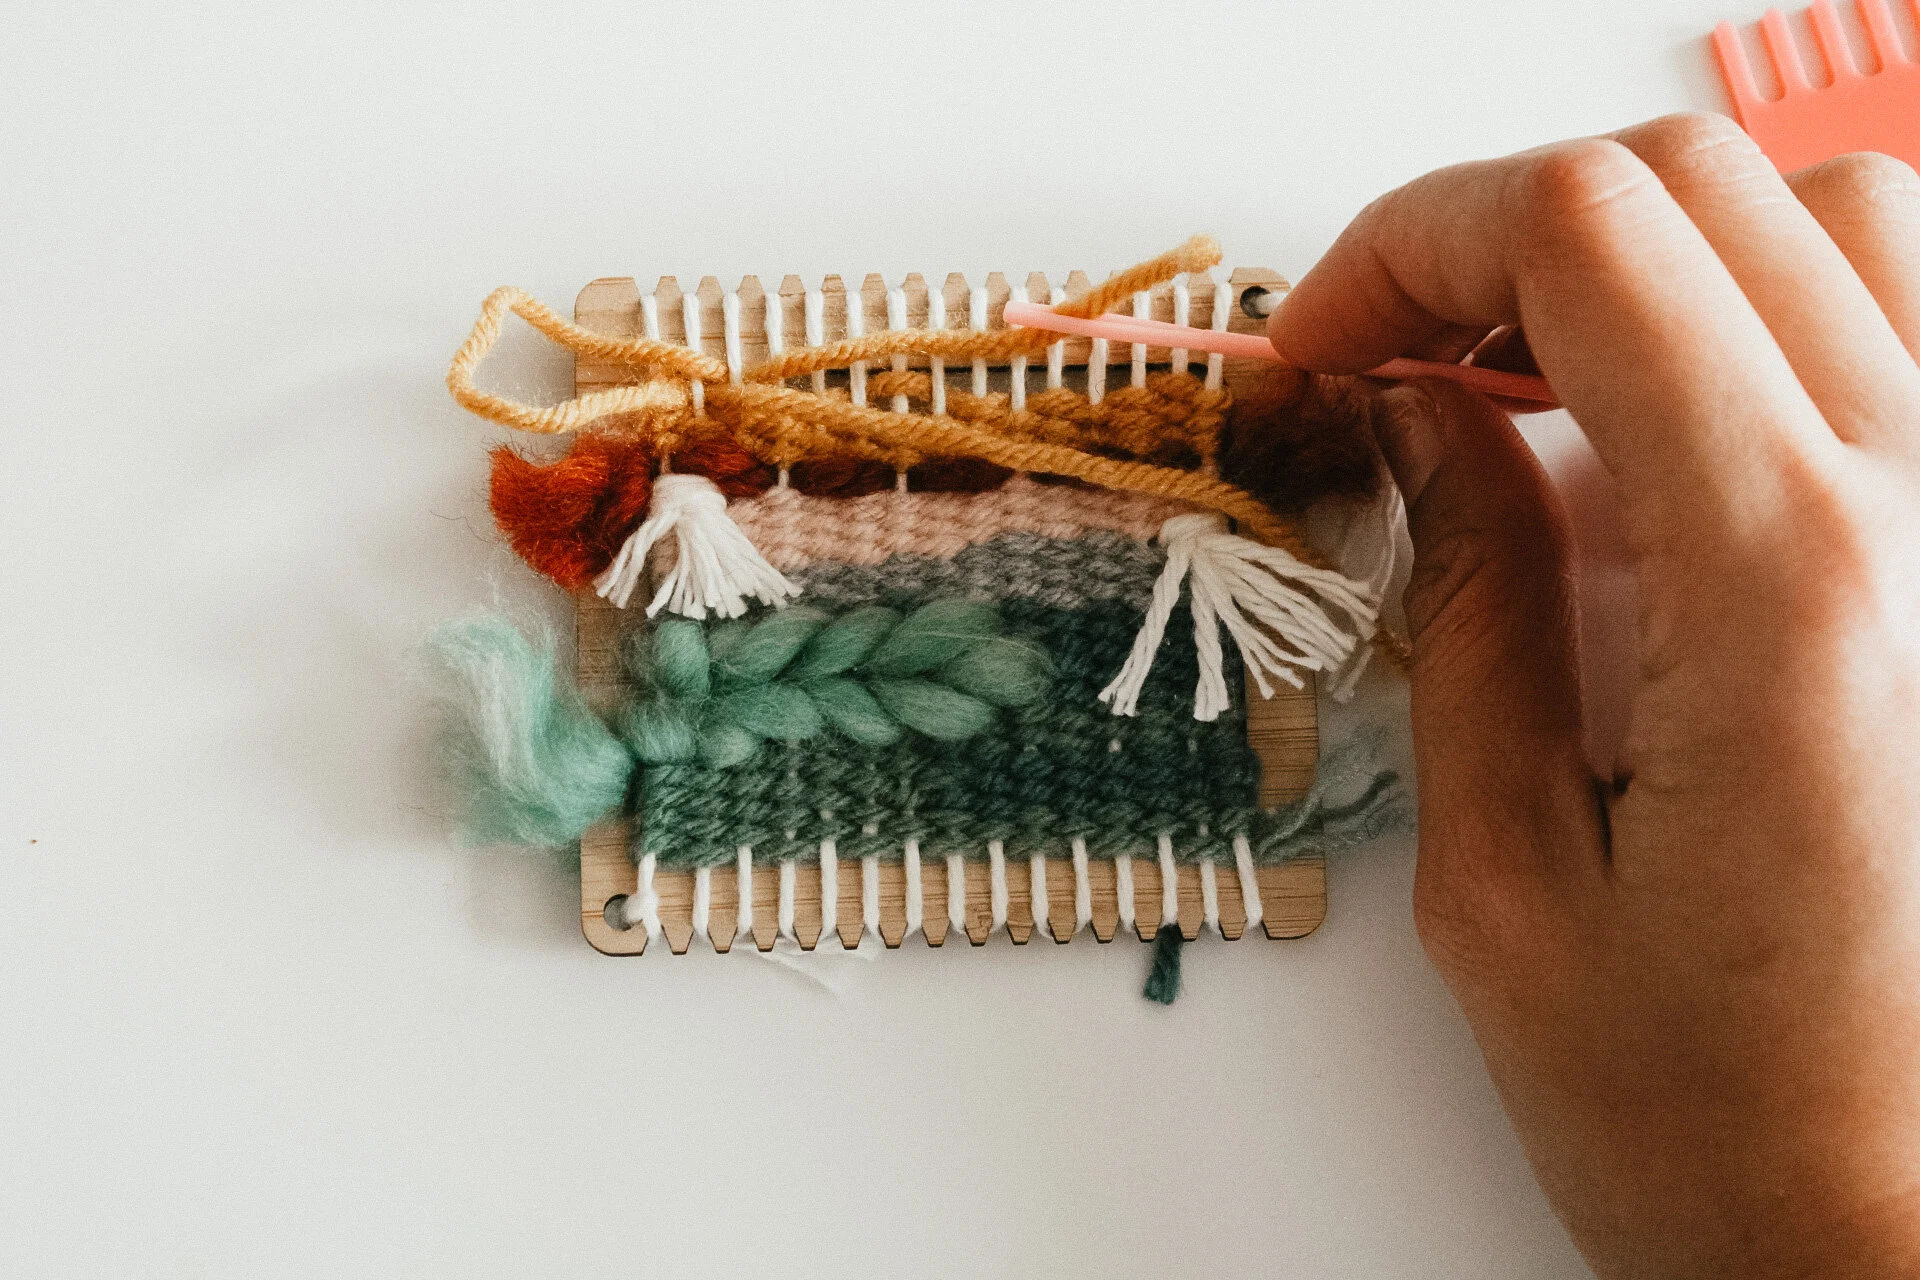
07. to turn around, wrap the roving around the last warp thread that you would want to use. this can be in the middle or at the end.

08. begin weaving the other way by following steps 02-05. comb down at the end.
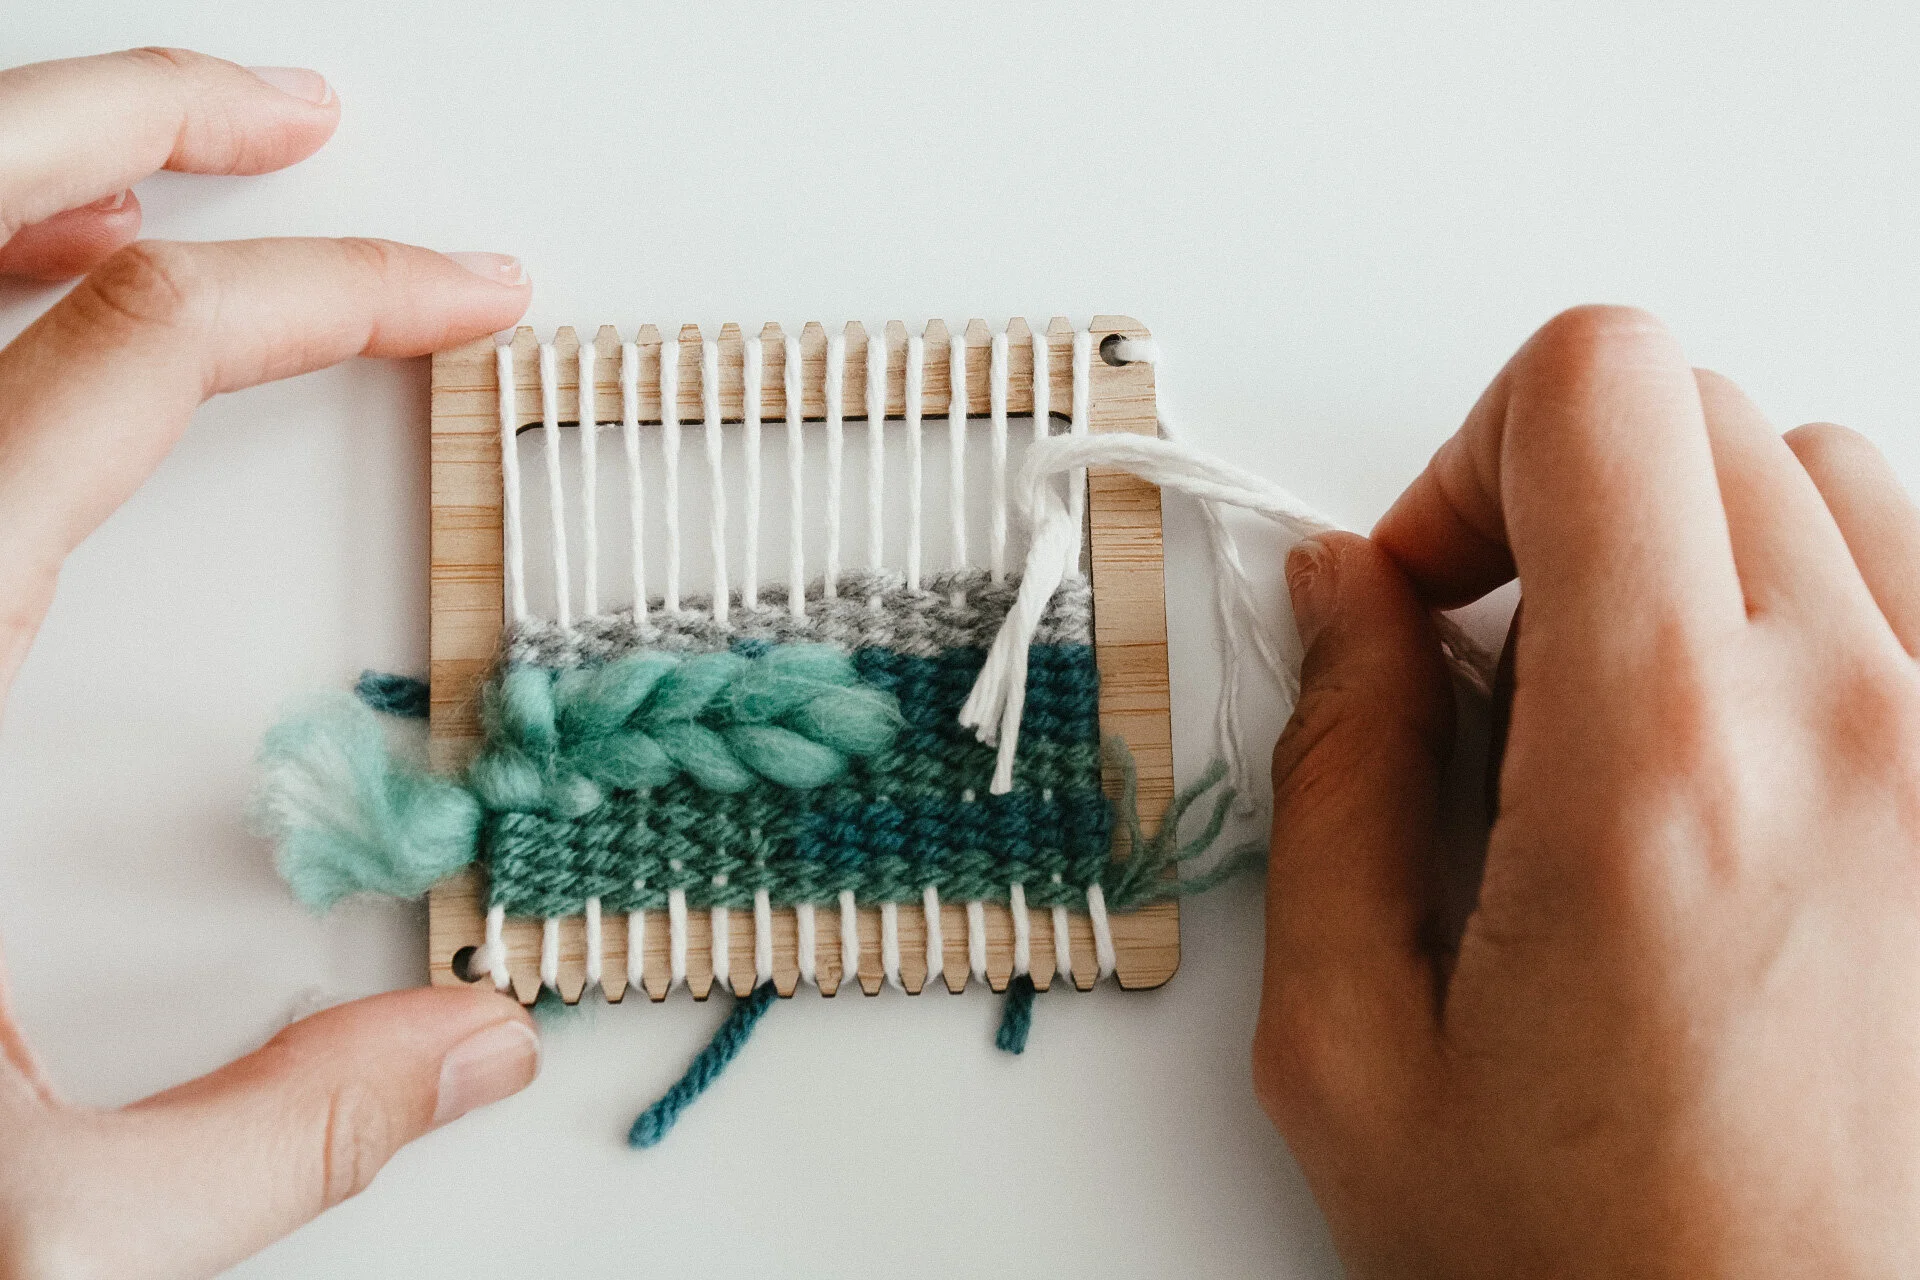
09. when you are done with the soumak stitch, sew the end into the back of your weaving by placing your tapestry needle in one of the loops on the back.
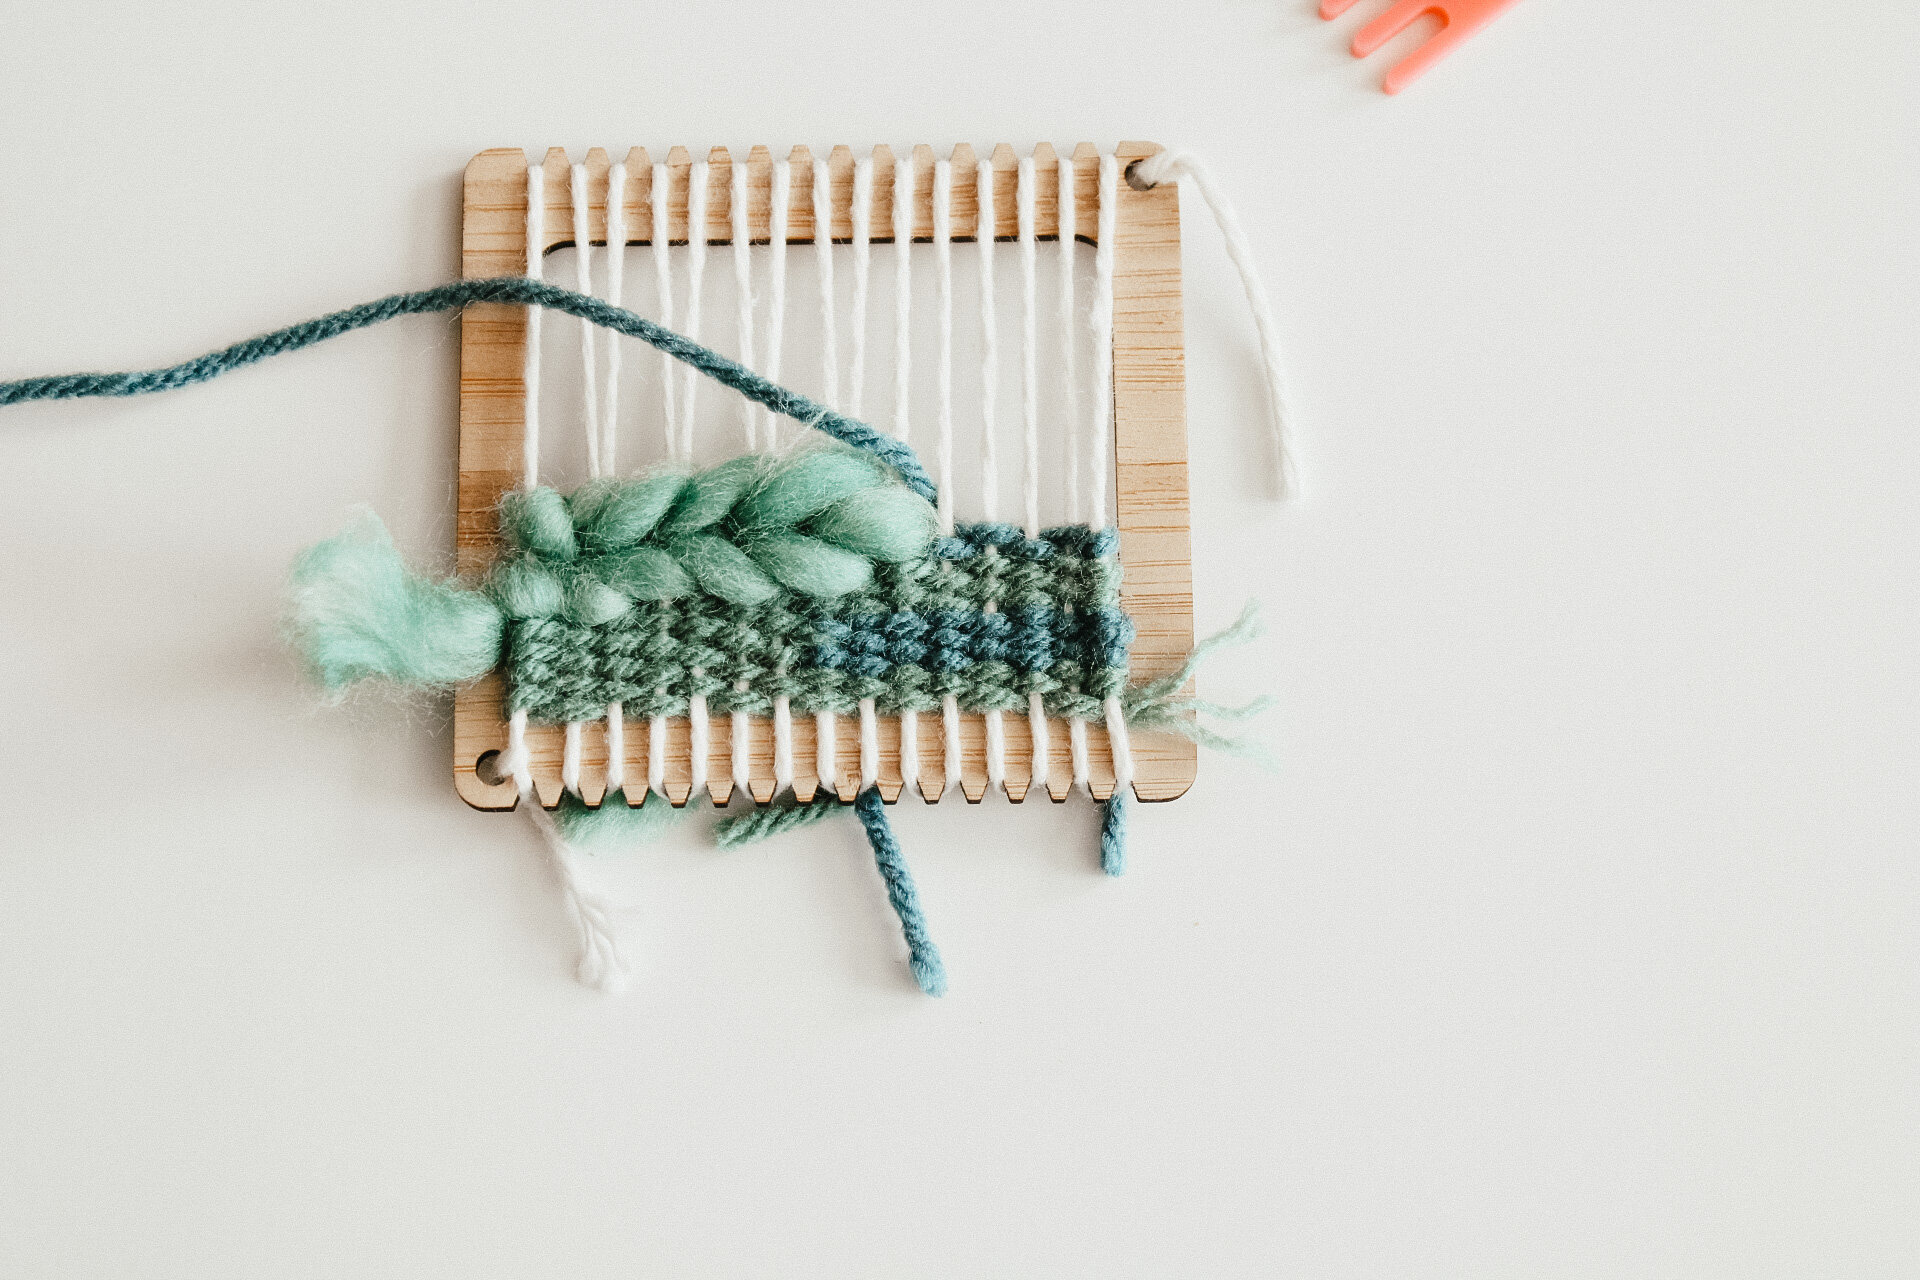
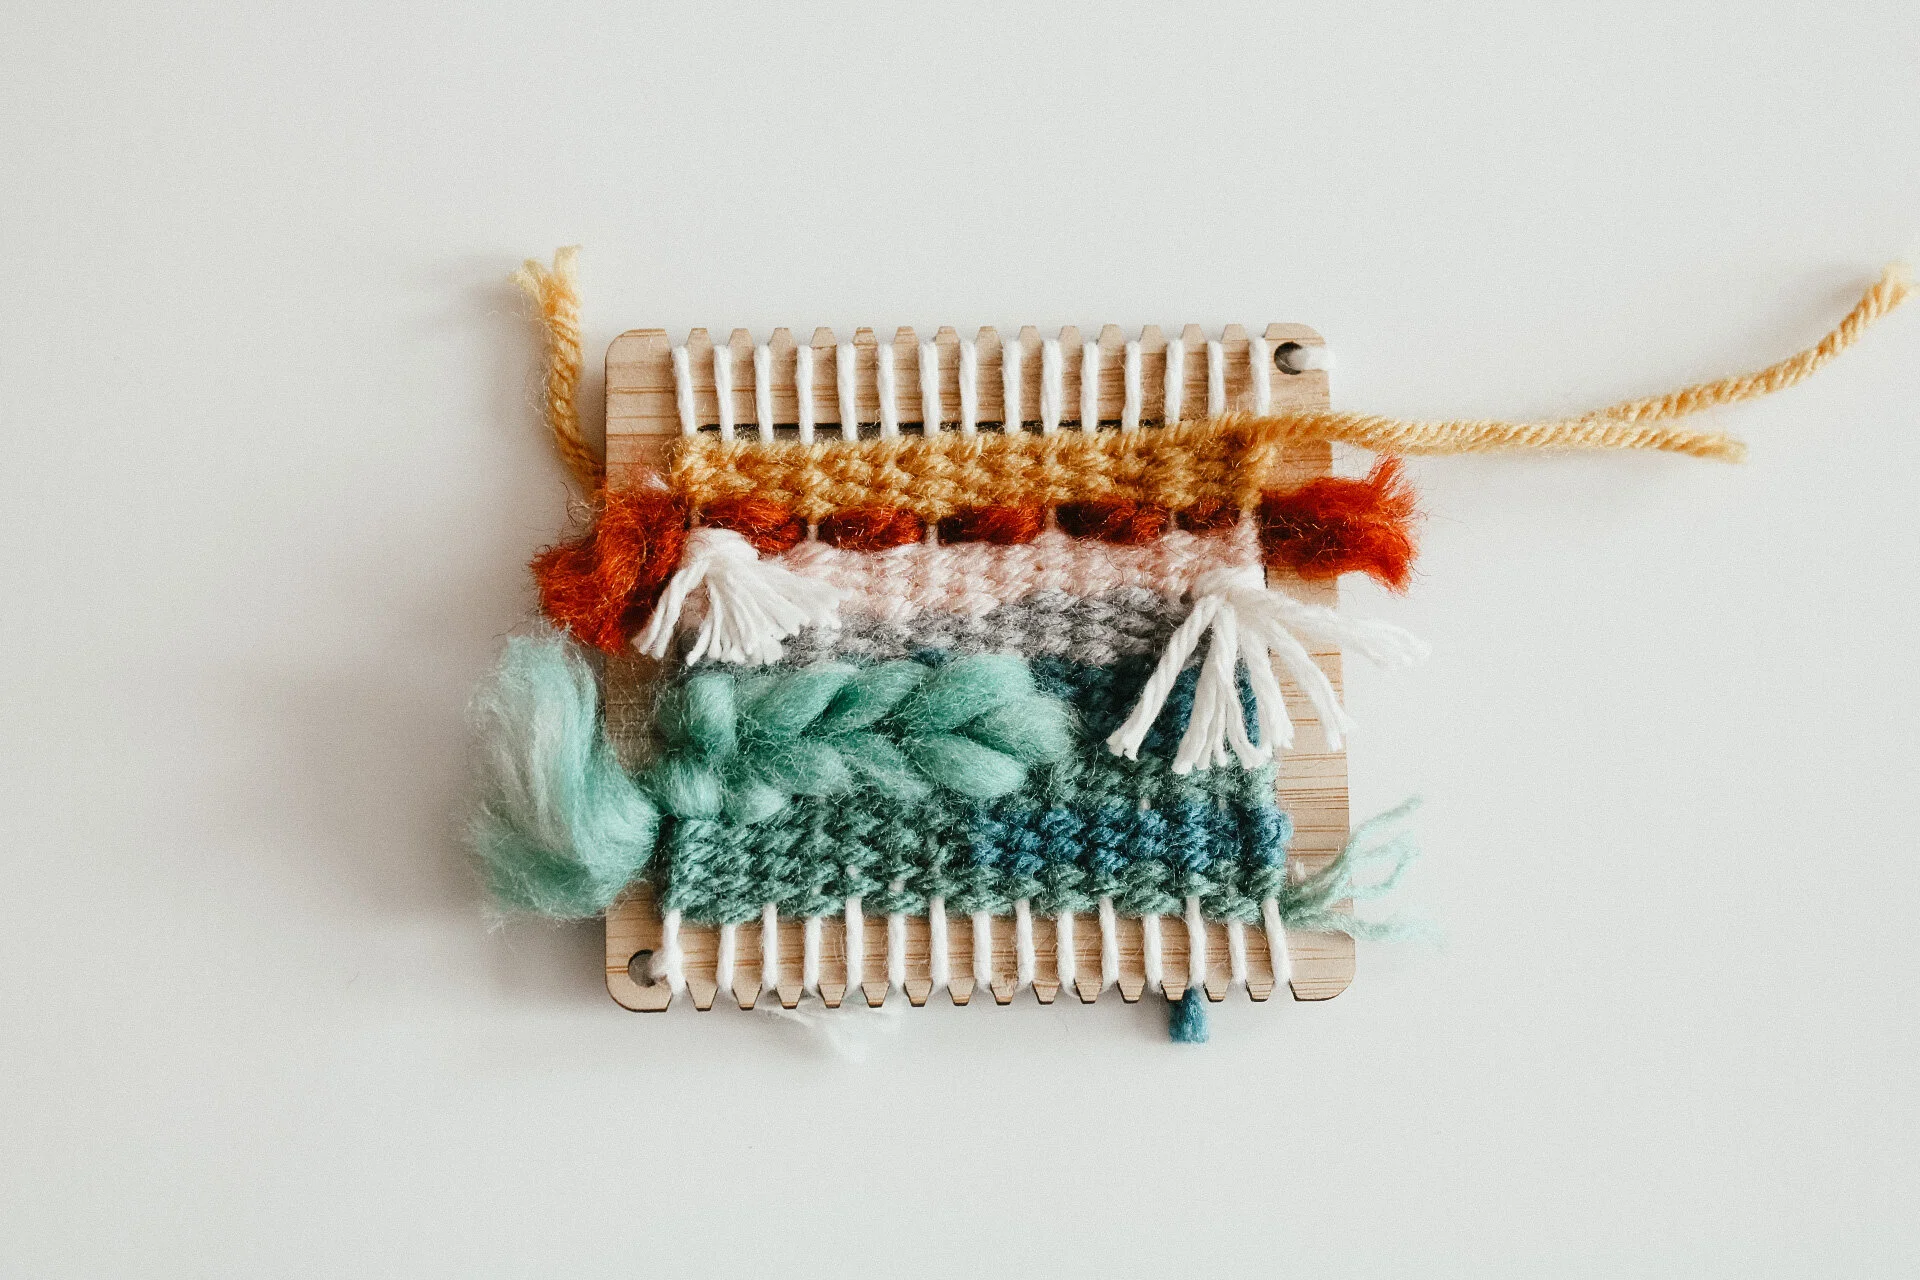
if you decide to do soumak to the center, you will have to use the interlocking stitch to fill in the other side of the weaving. you will be using roving to create the soumak and you will need to weave a few rows of tabby interlocking into the same warp thread that the soumak ends on for 3-4 rows. then you can add rows of tabby above the soumak stitch.
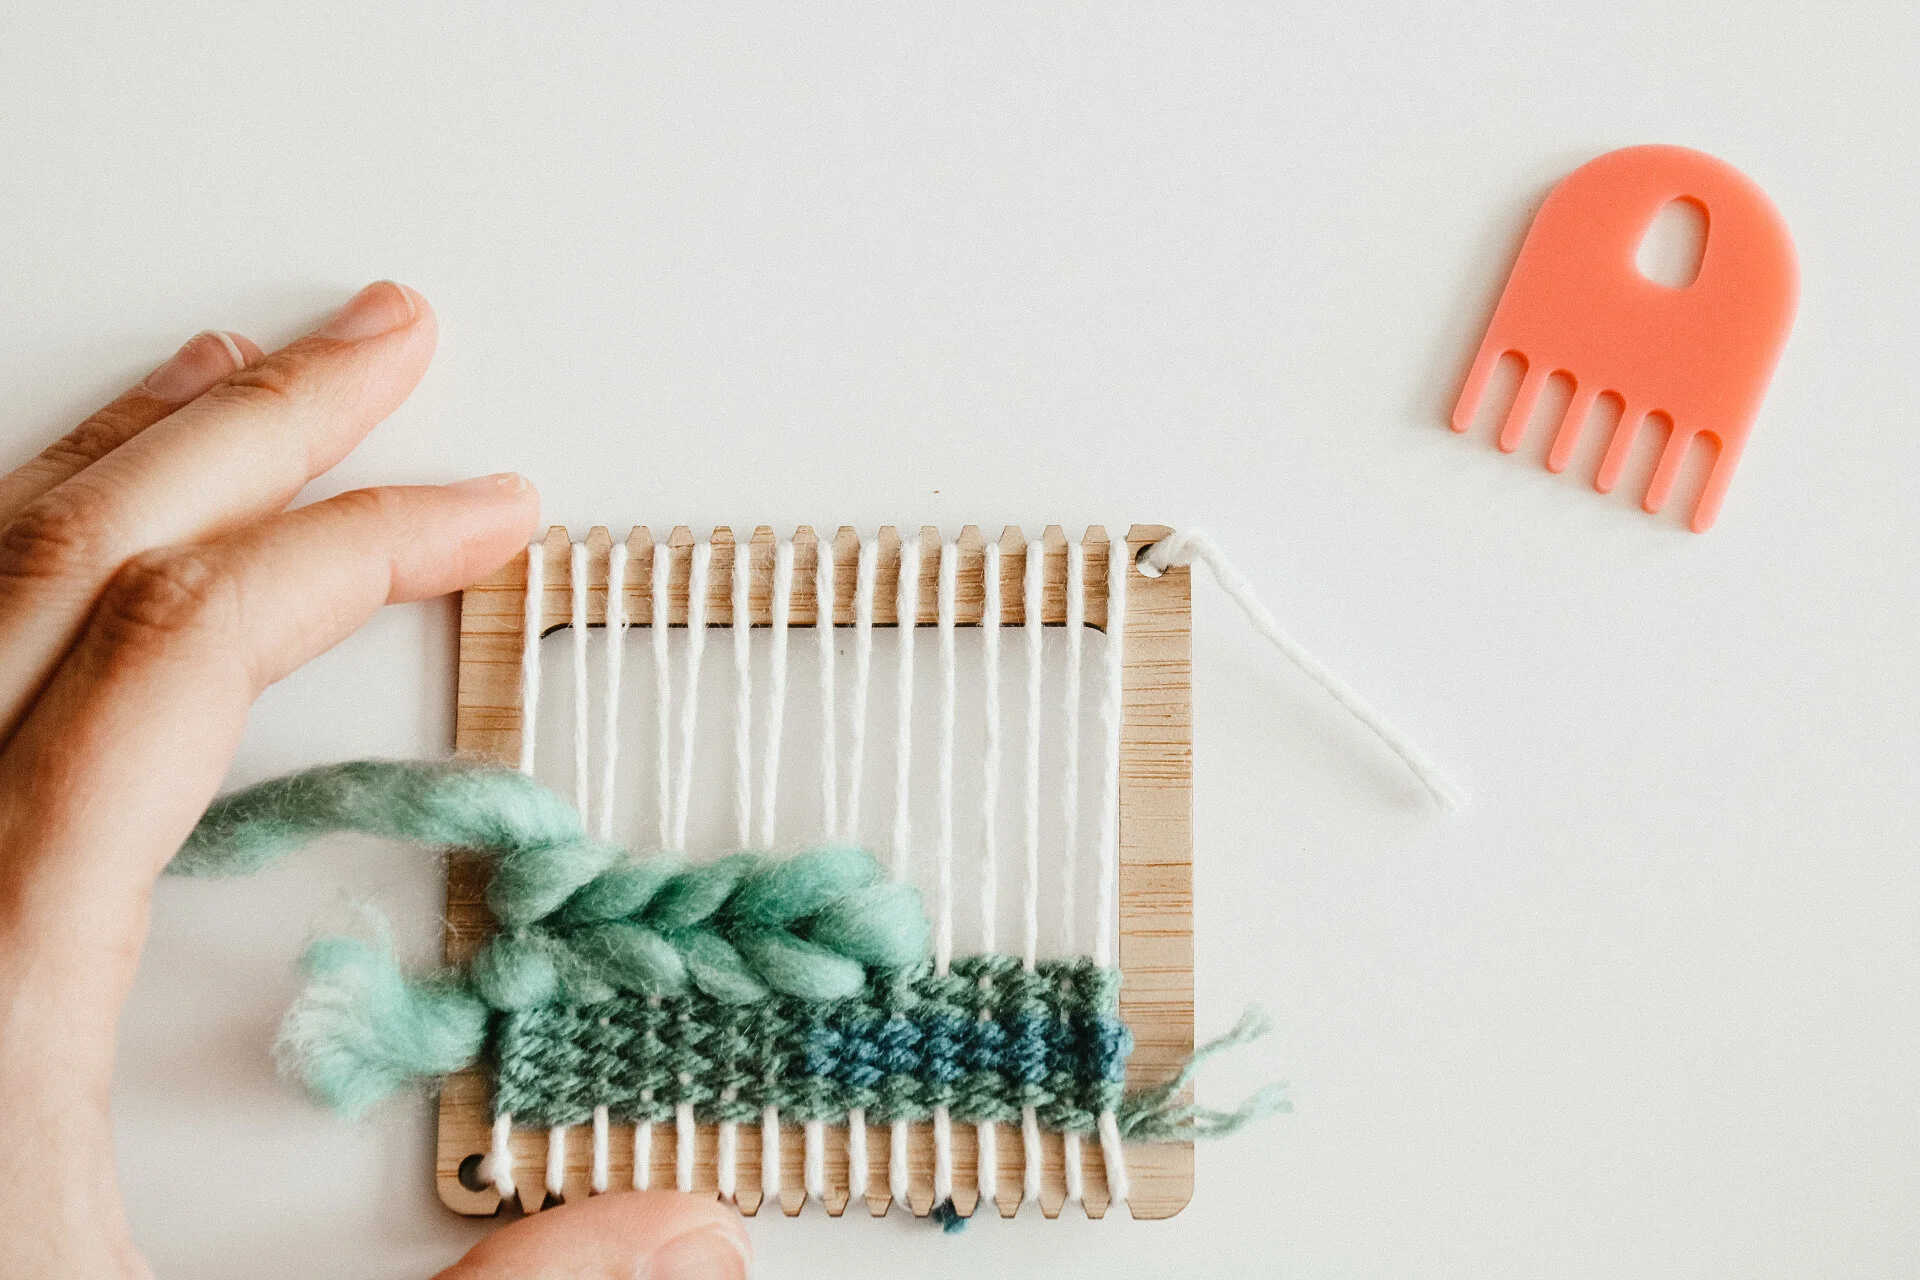
+rya knot
i love a good fringe moment and you can use these knots to create fringe at the bottom of the weaving or throughout the weaving for extra added texture. tabby is needed as a base for your rya knots. you will need to create many similar size strands of yarn. you can use a book or piece of cardboard to wrap the yarn around. you can also cut the yarn strand by strand if you only need a few pieces.
01. you will need three strands of yarn per rya knot. depending on the thickness of your yarn and and the look you want, you can adjust the number of strands up and down as needed.

02. fold one of the bunches in half and lay the top of the loop over two warp strings.
03. pull the ends of the right- most strands of yarn around and behind the right warp and to the front between the two warp strands. repeat for the left side.
04. tug the ends gently to tighten the knot and ease it down to butt against your previous row of weaving.
05. trim your rya knot to your desired length.
06. “lock in” the knots by making more rows of tabby stitch above.
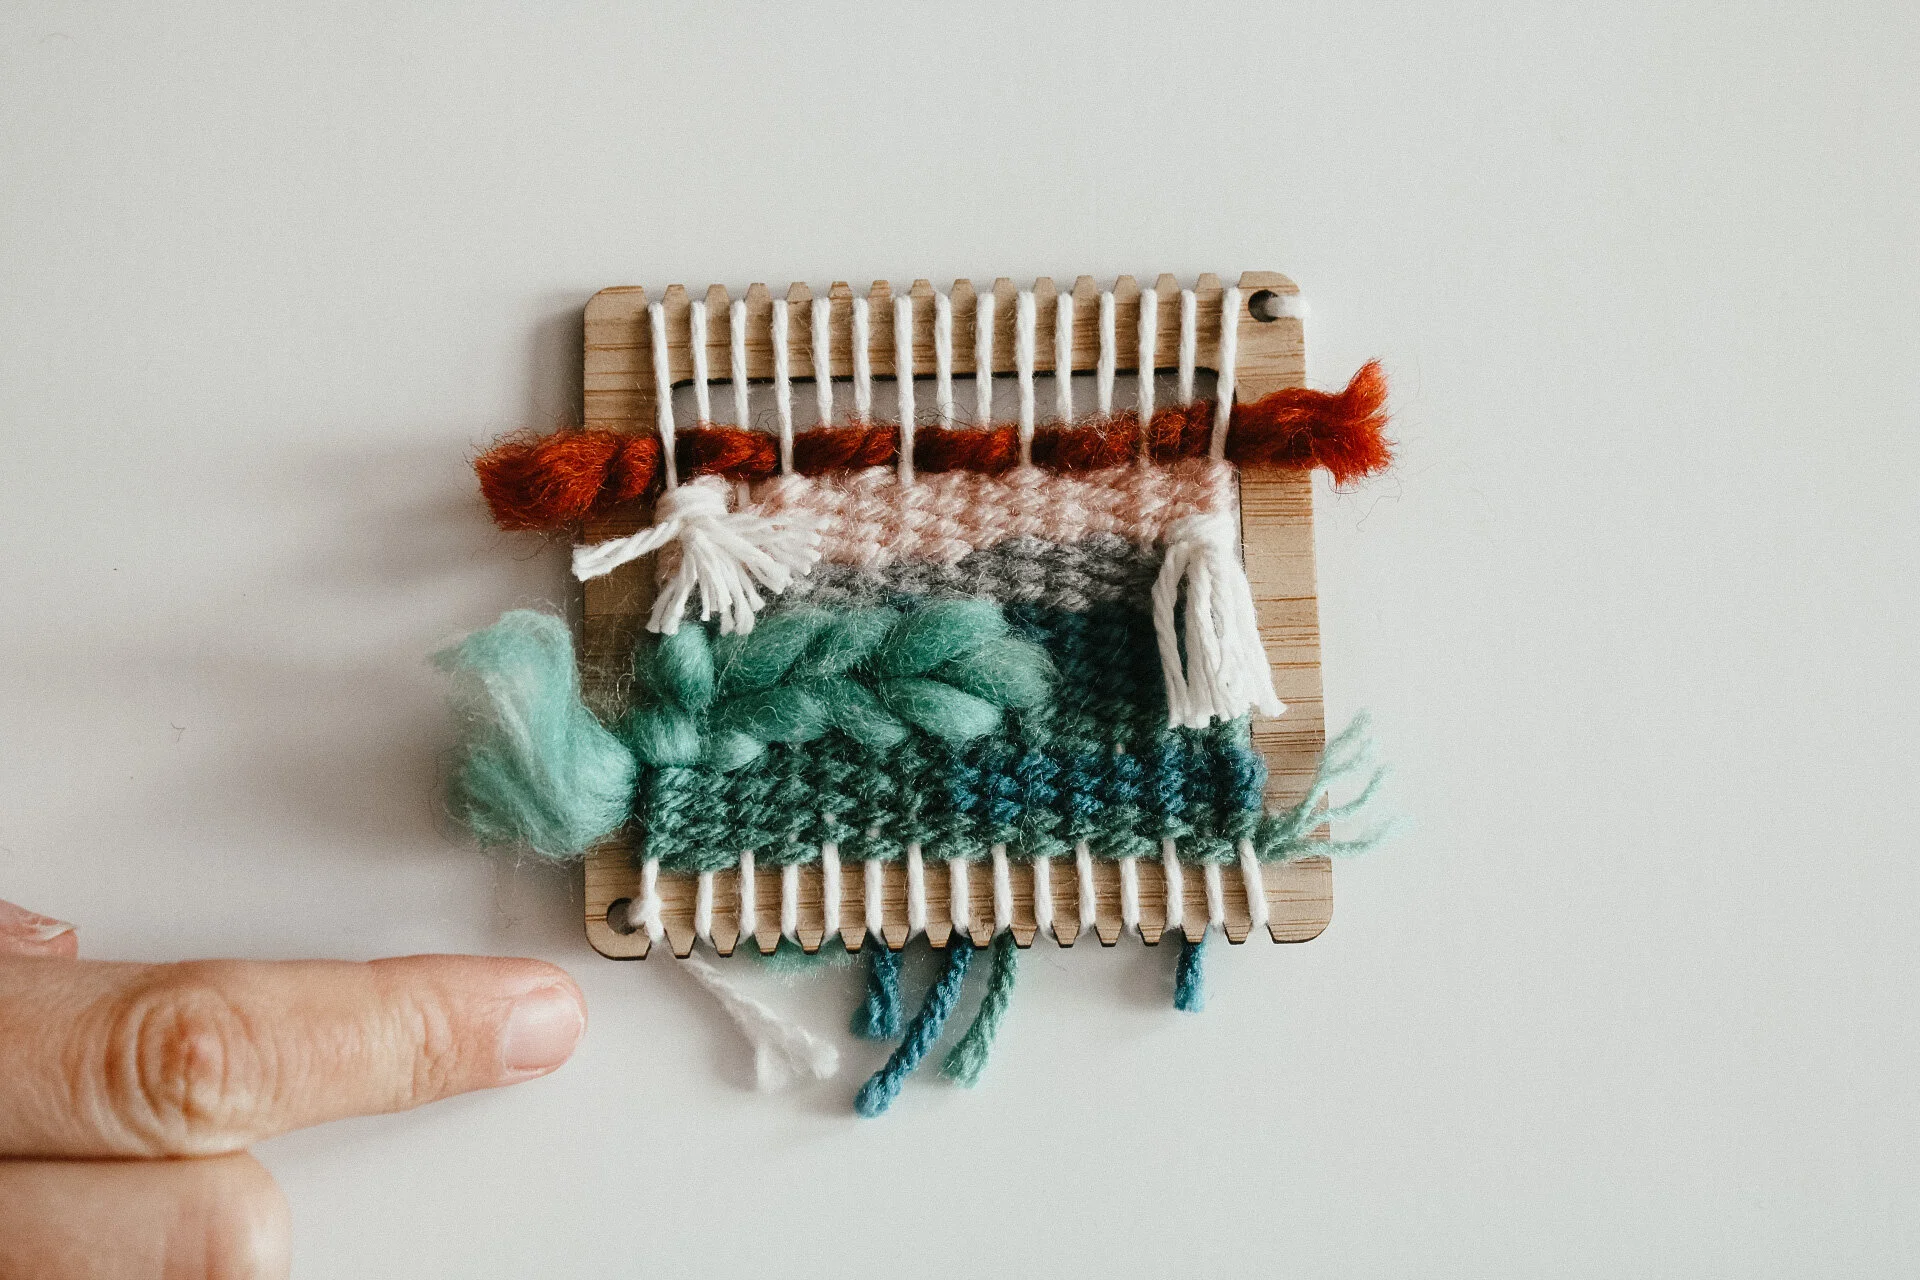
+twining
i like to use twining as a way to secure the top of the weaving that way when you take your weave off the loom the weave is super stable.
01. for a single row of twining, cut a length that is the width of your warping area 3x plus a bit extra.
02. place the tails together to find the center and wrap it around the first warp string. lay them flat, across your warp.
03. to twine, grab the bottom twining tail and lift it over the top.
04. using you tapestry needle, pull the bottom twining tail behind the next warp string.
05. lay them down across your warps again. now your bottom and top twining tails have switched places.
06. using your tapestry needle, grab the new bottom tail, lift if over the top and behind the next warp string.
07. continue repeating this motion to twine across the entire width of your tapestry.
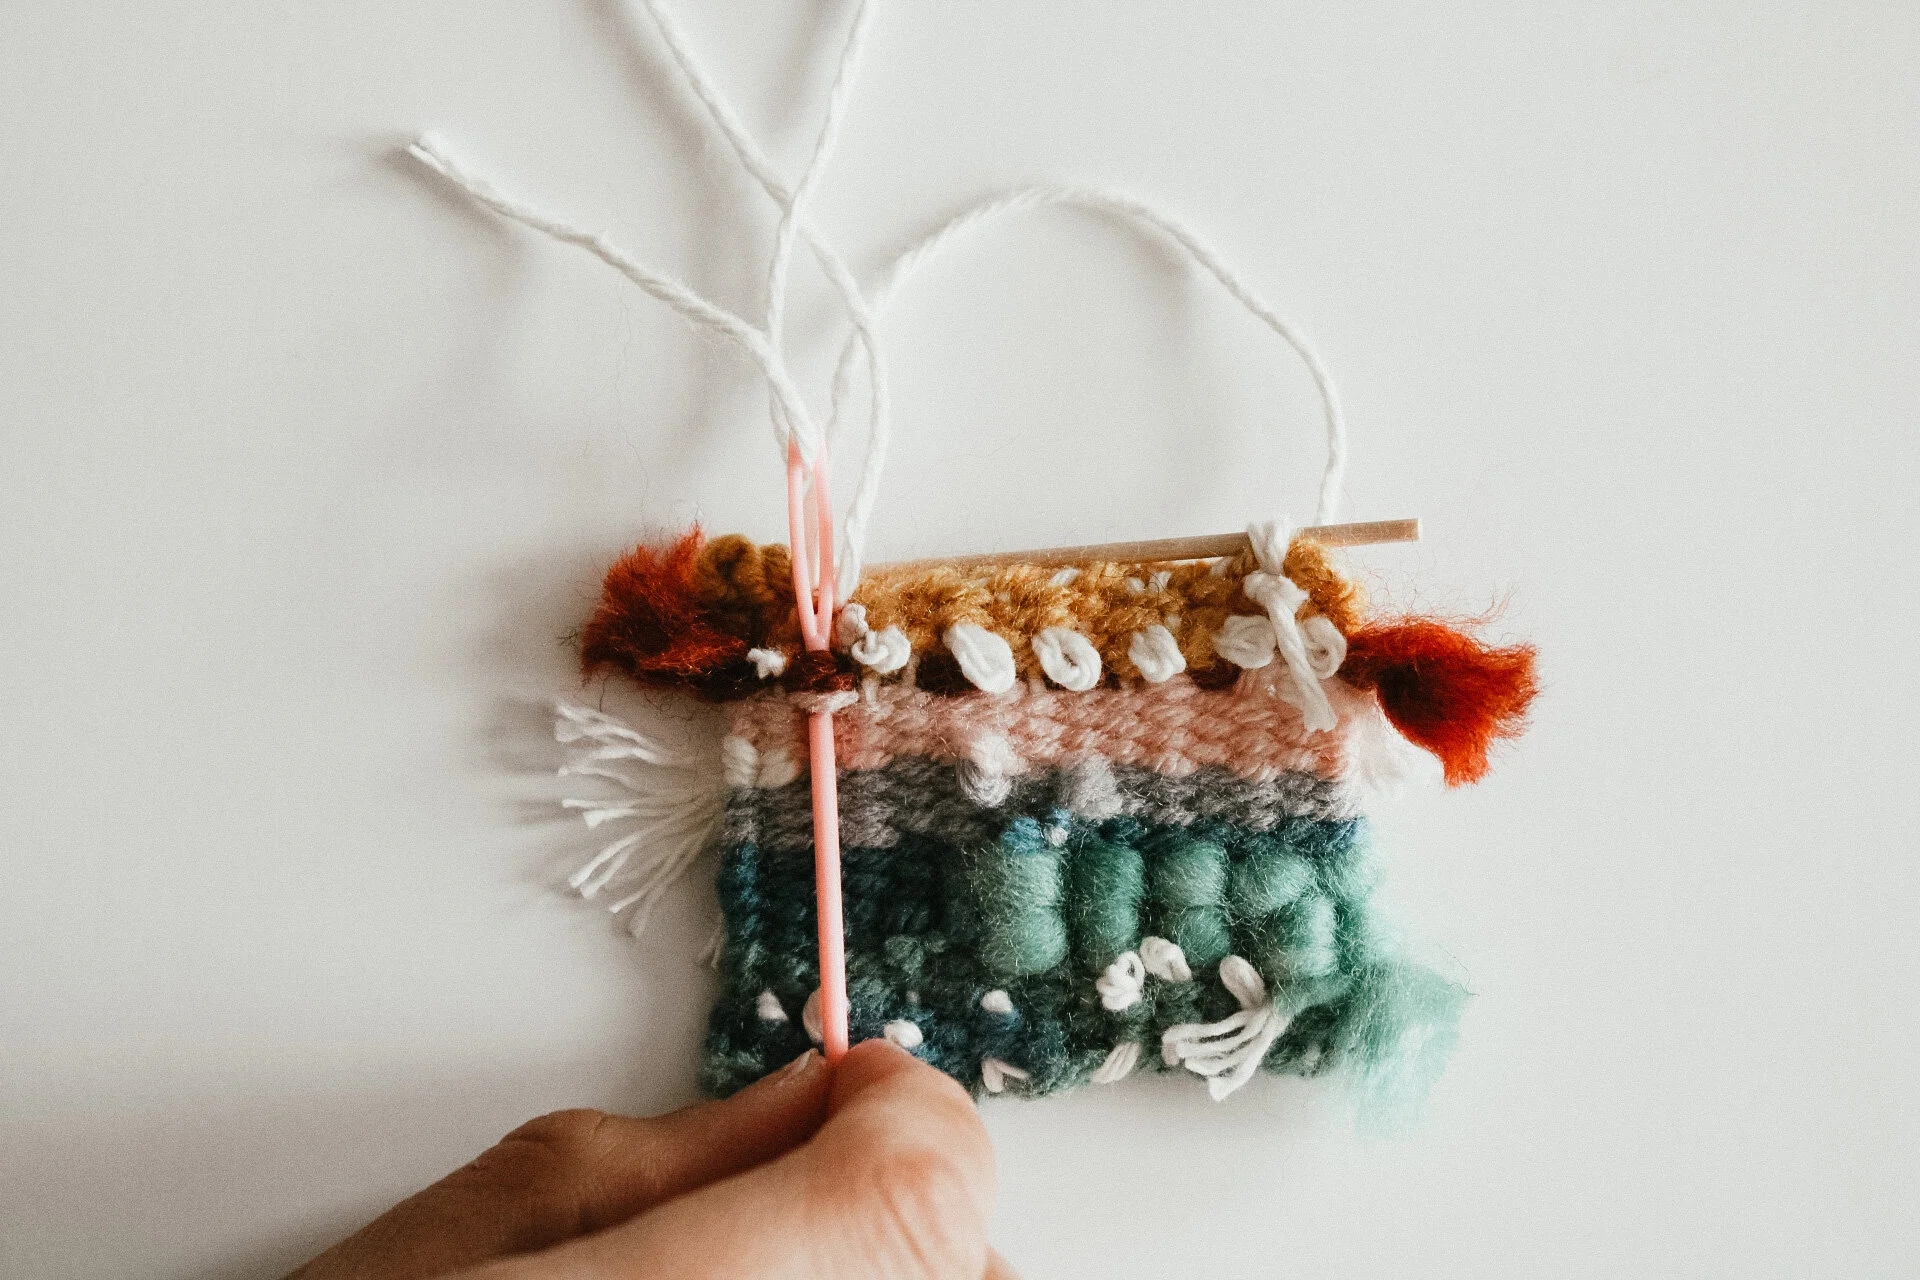
08. when you reach the end, using your tapestry needle sew your twinning to the back and secure.
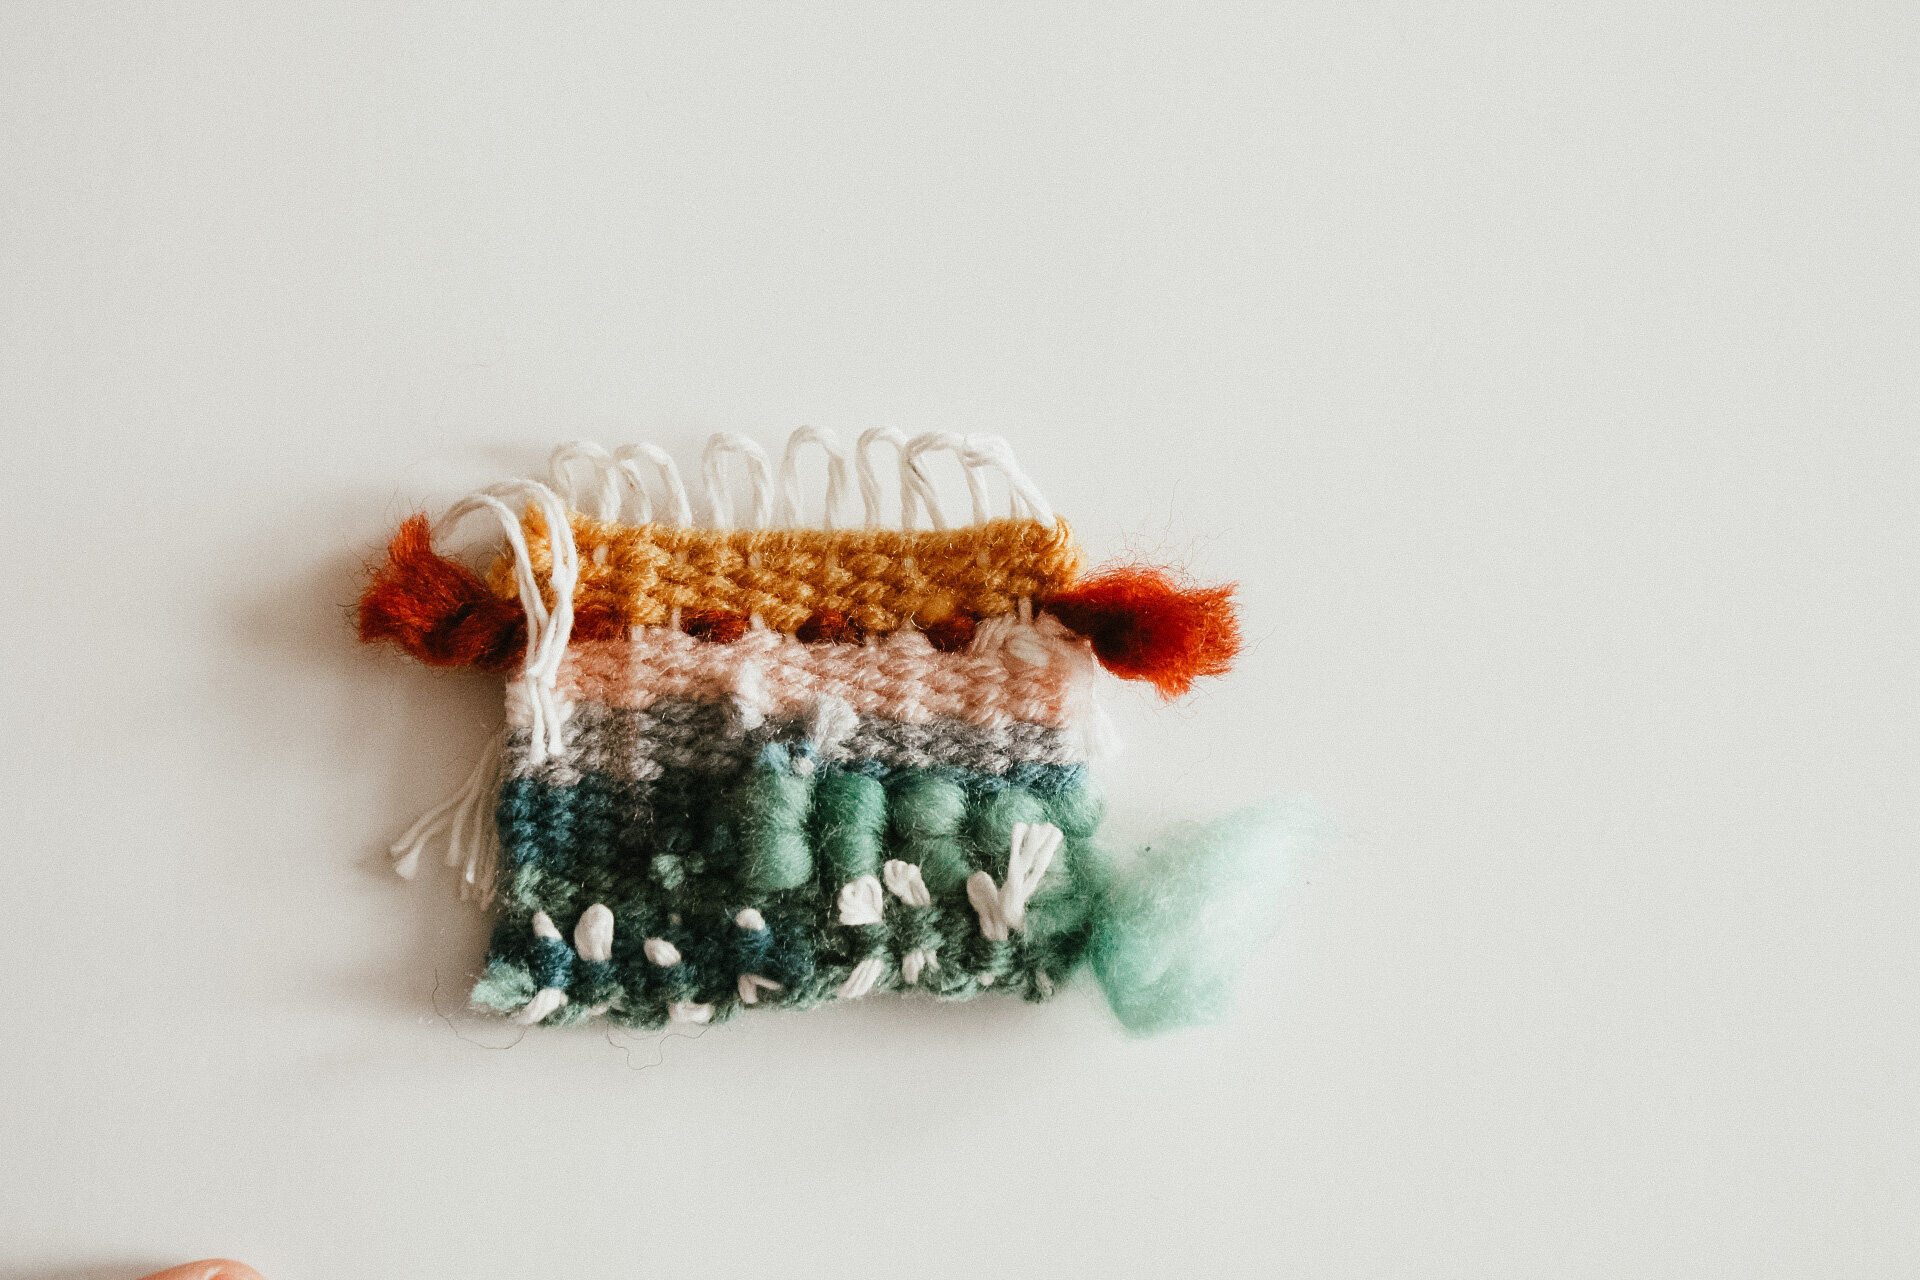
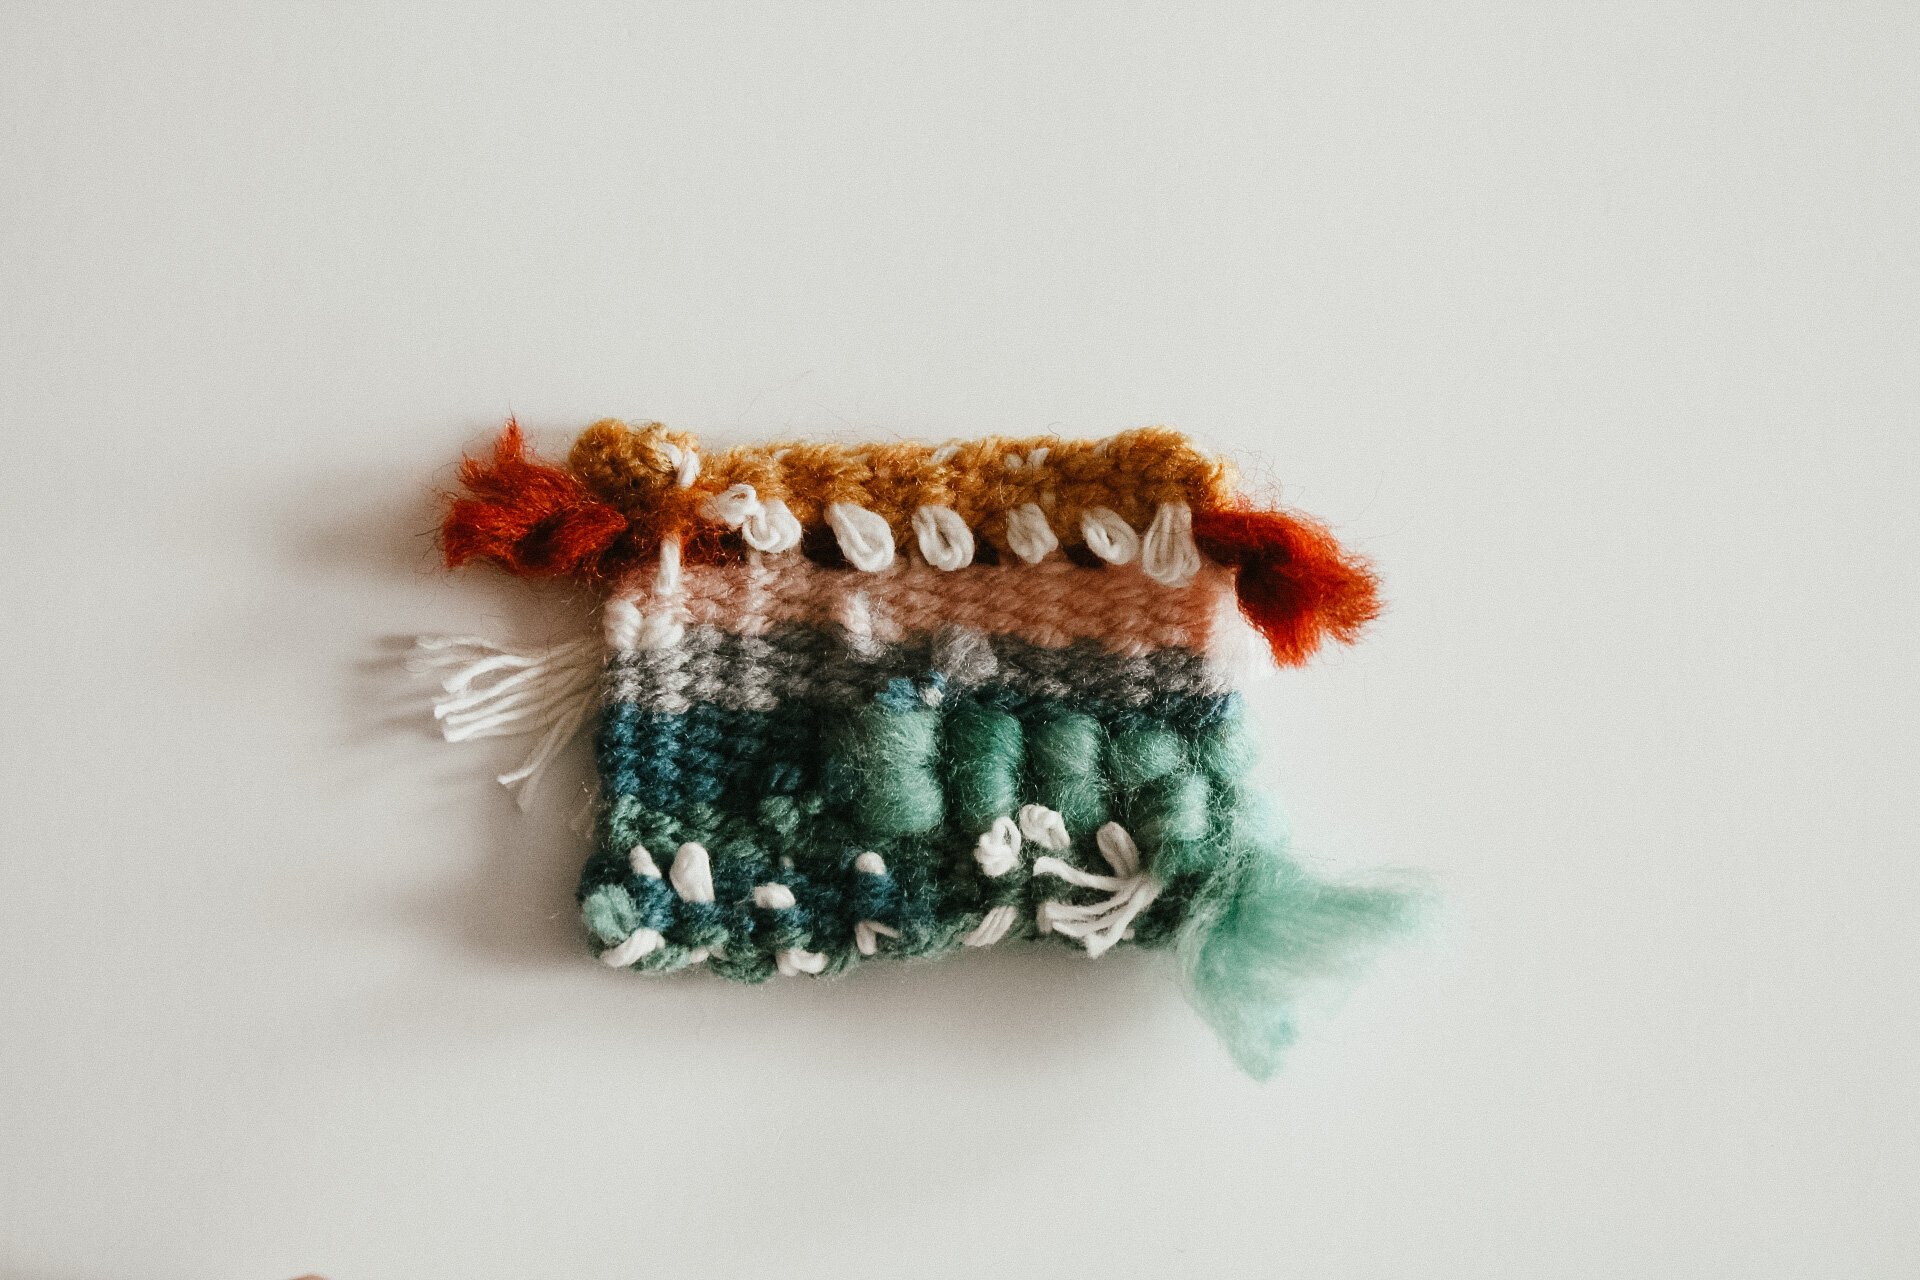
+cleaning

make the back of your weaving look at great as the front! tuck your tails as you are weaving so you aren’t left with the task of weaving in the ends, just tying the strings together.

01. flip you weaving around and tie your weaving ends together using a basic square knot.
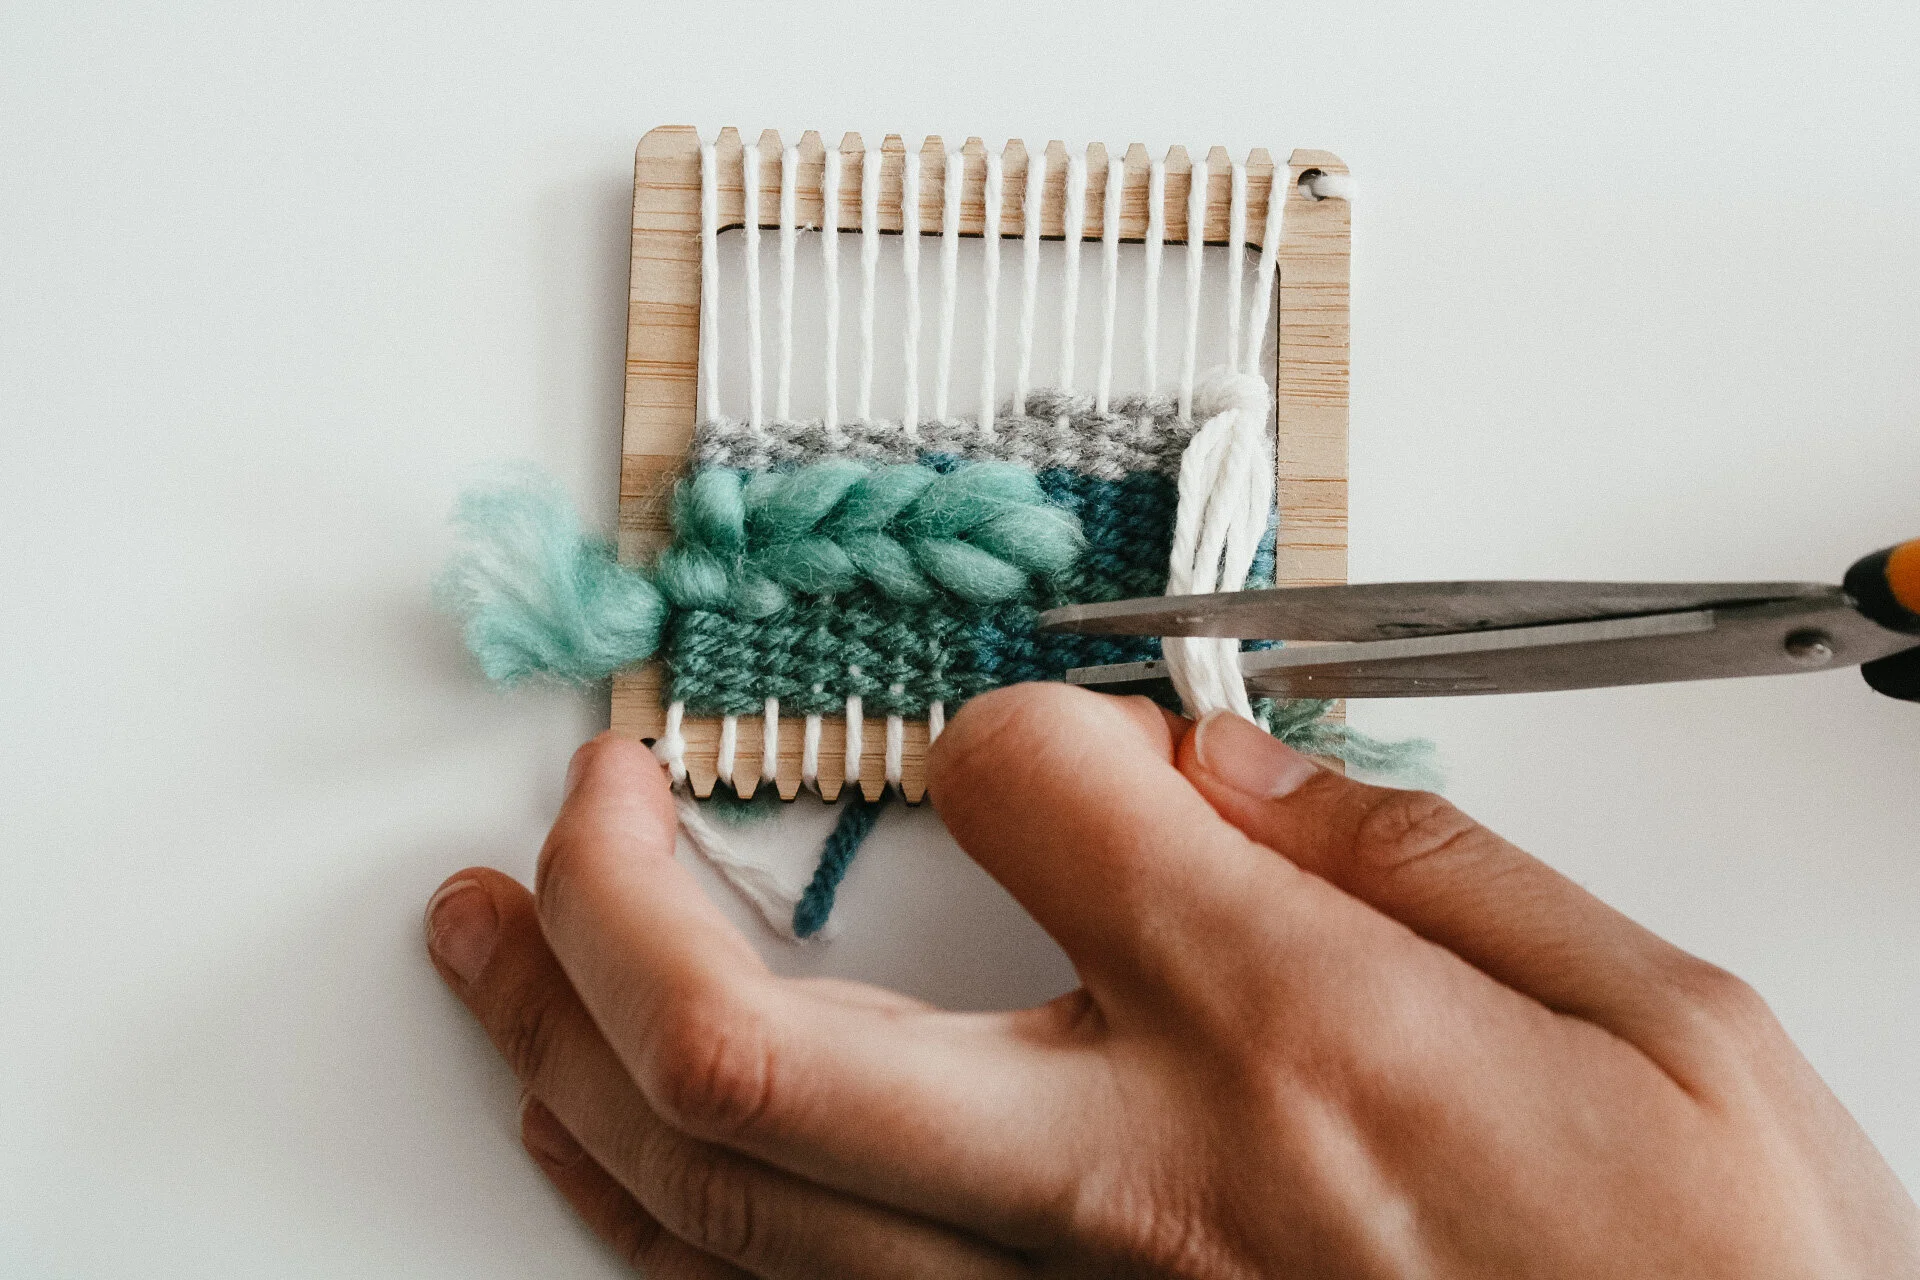
02. cut all the tails from the knots, leaving a clean back.
03. now you are ready to remove your weaving from the loom.
+remove weaving/ attach a stick.
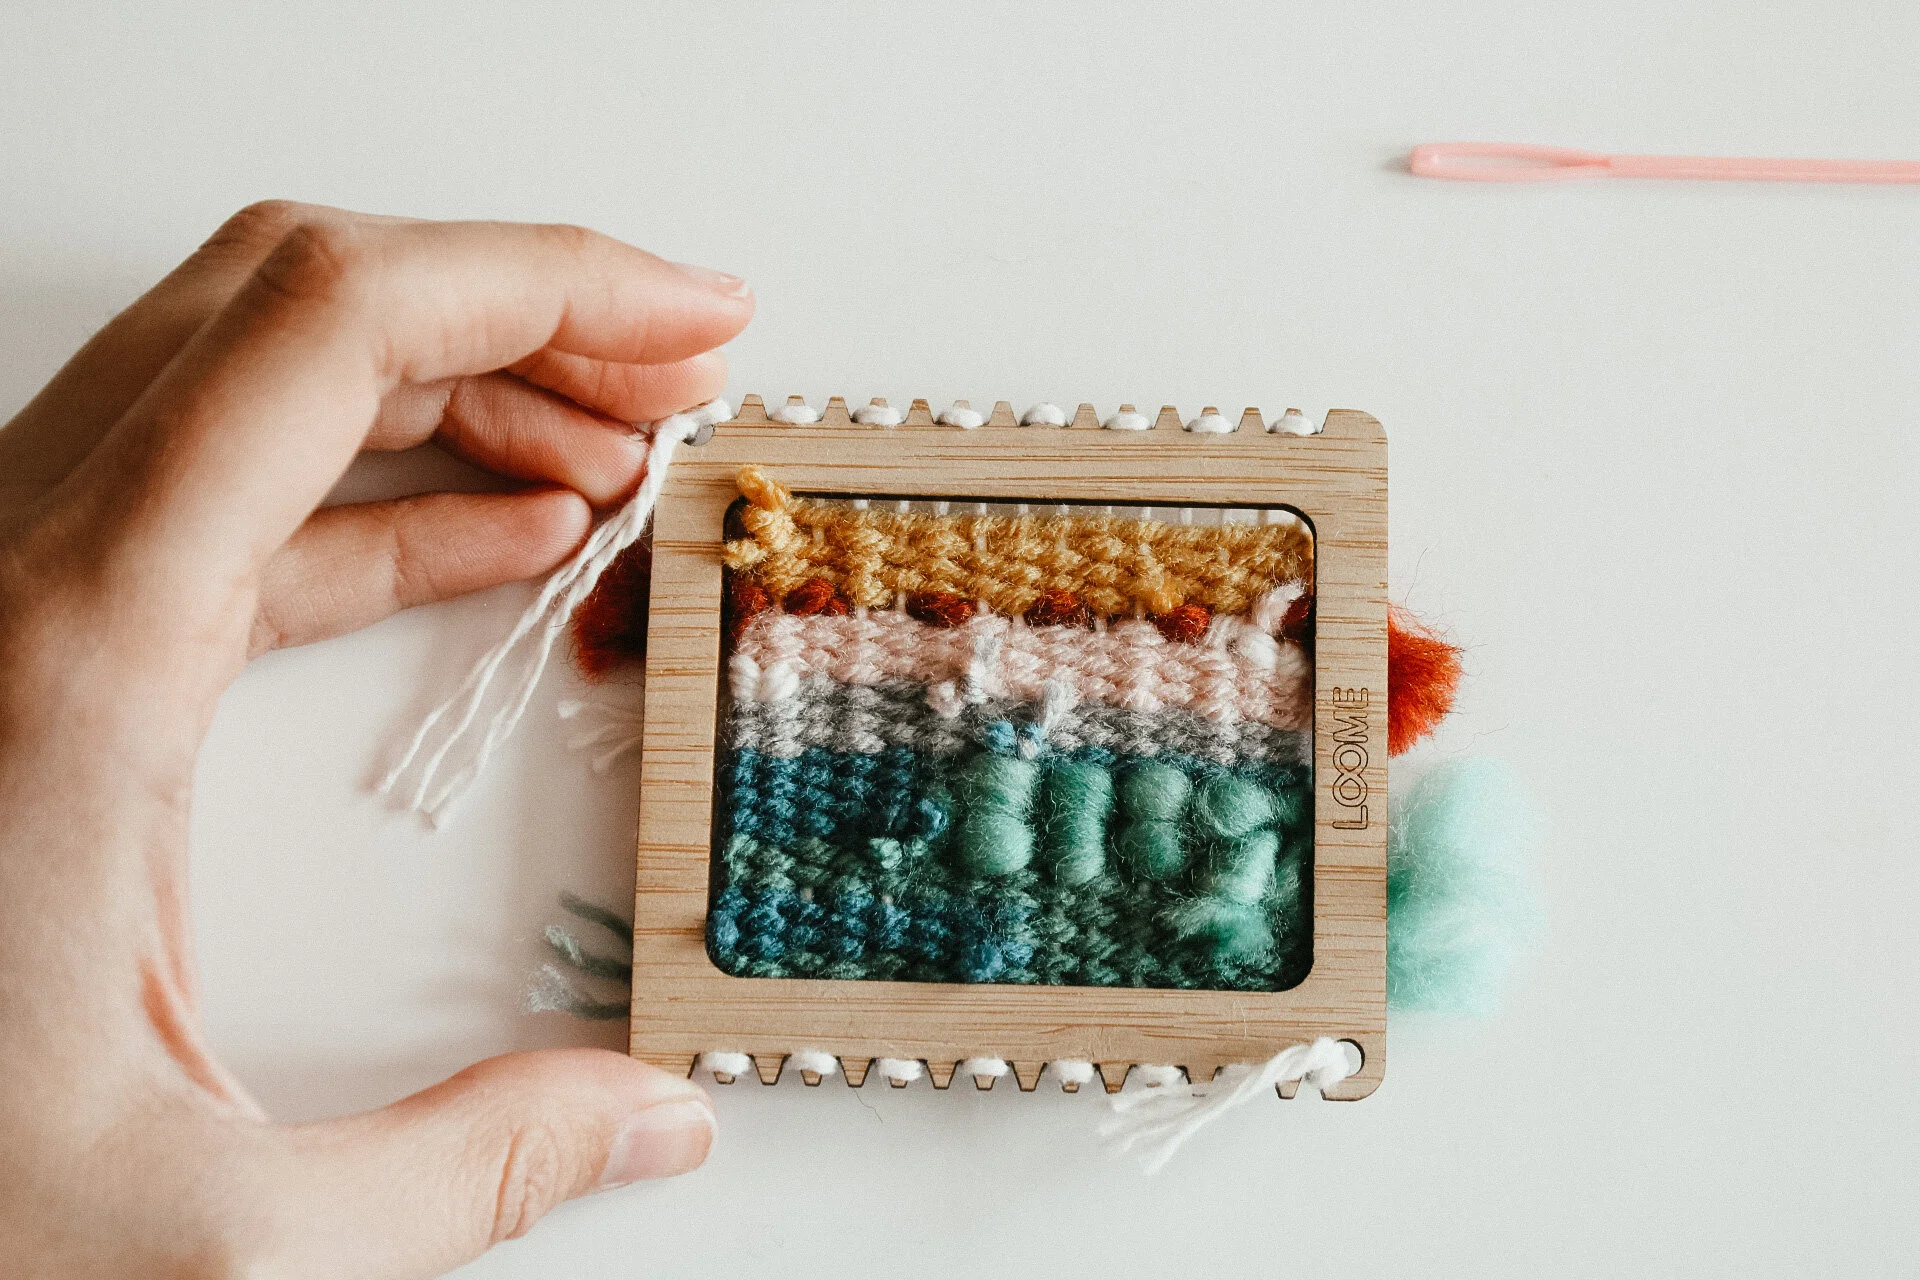
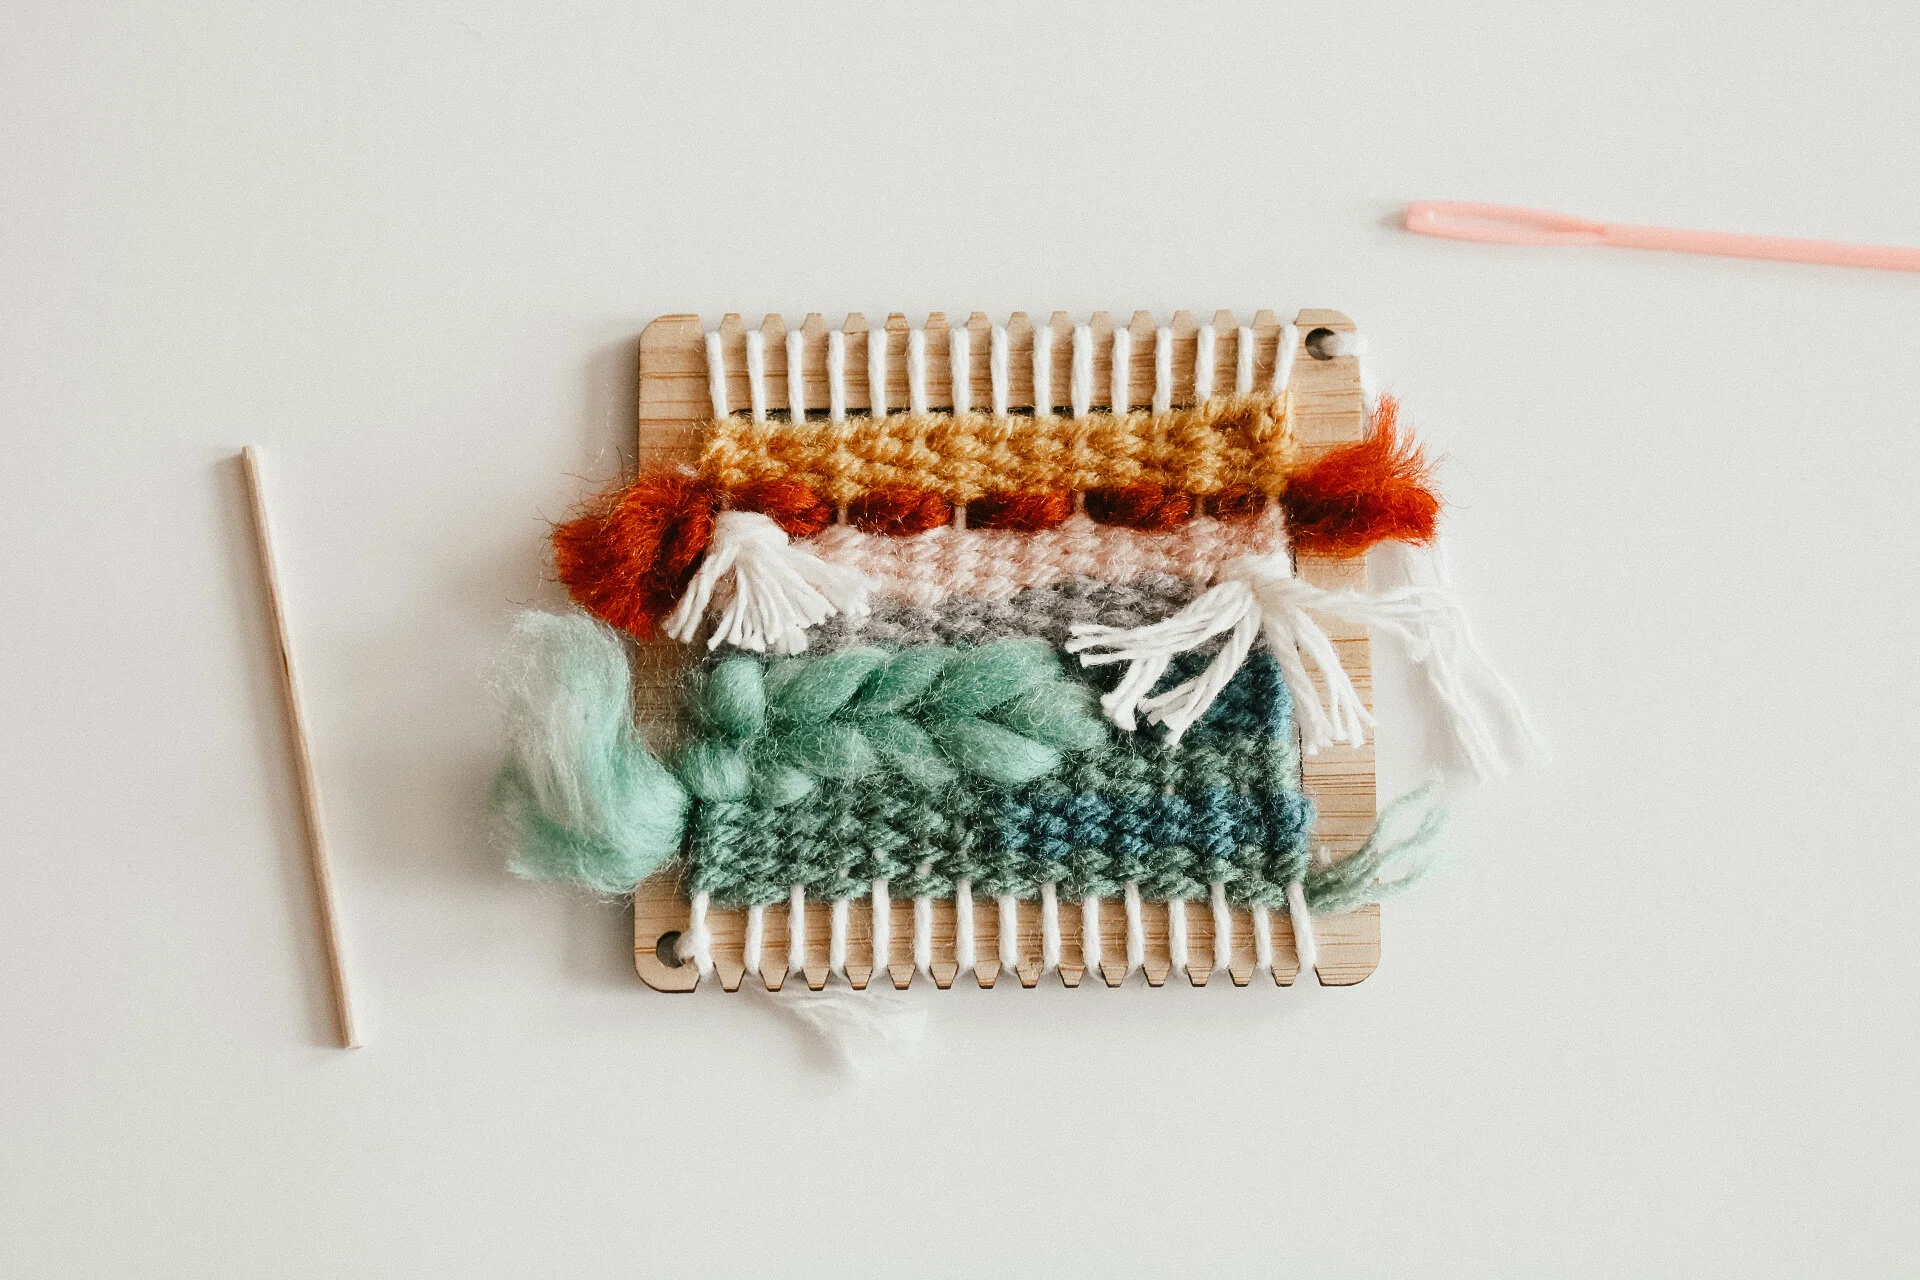
the fun part of this mini weaving is that you can leave it on the loom if you want, creating a little frame. or you can take it off easily and add a stick for hanging.
01. with the tip of your tapestry needle, loosen and undo the ties in the hole on both sides.

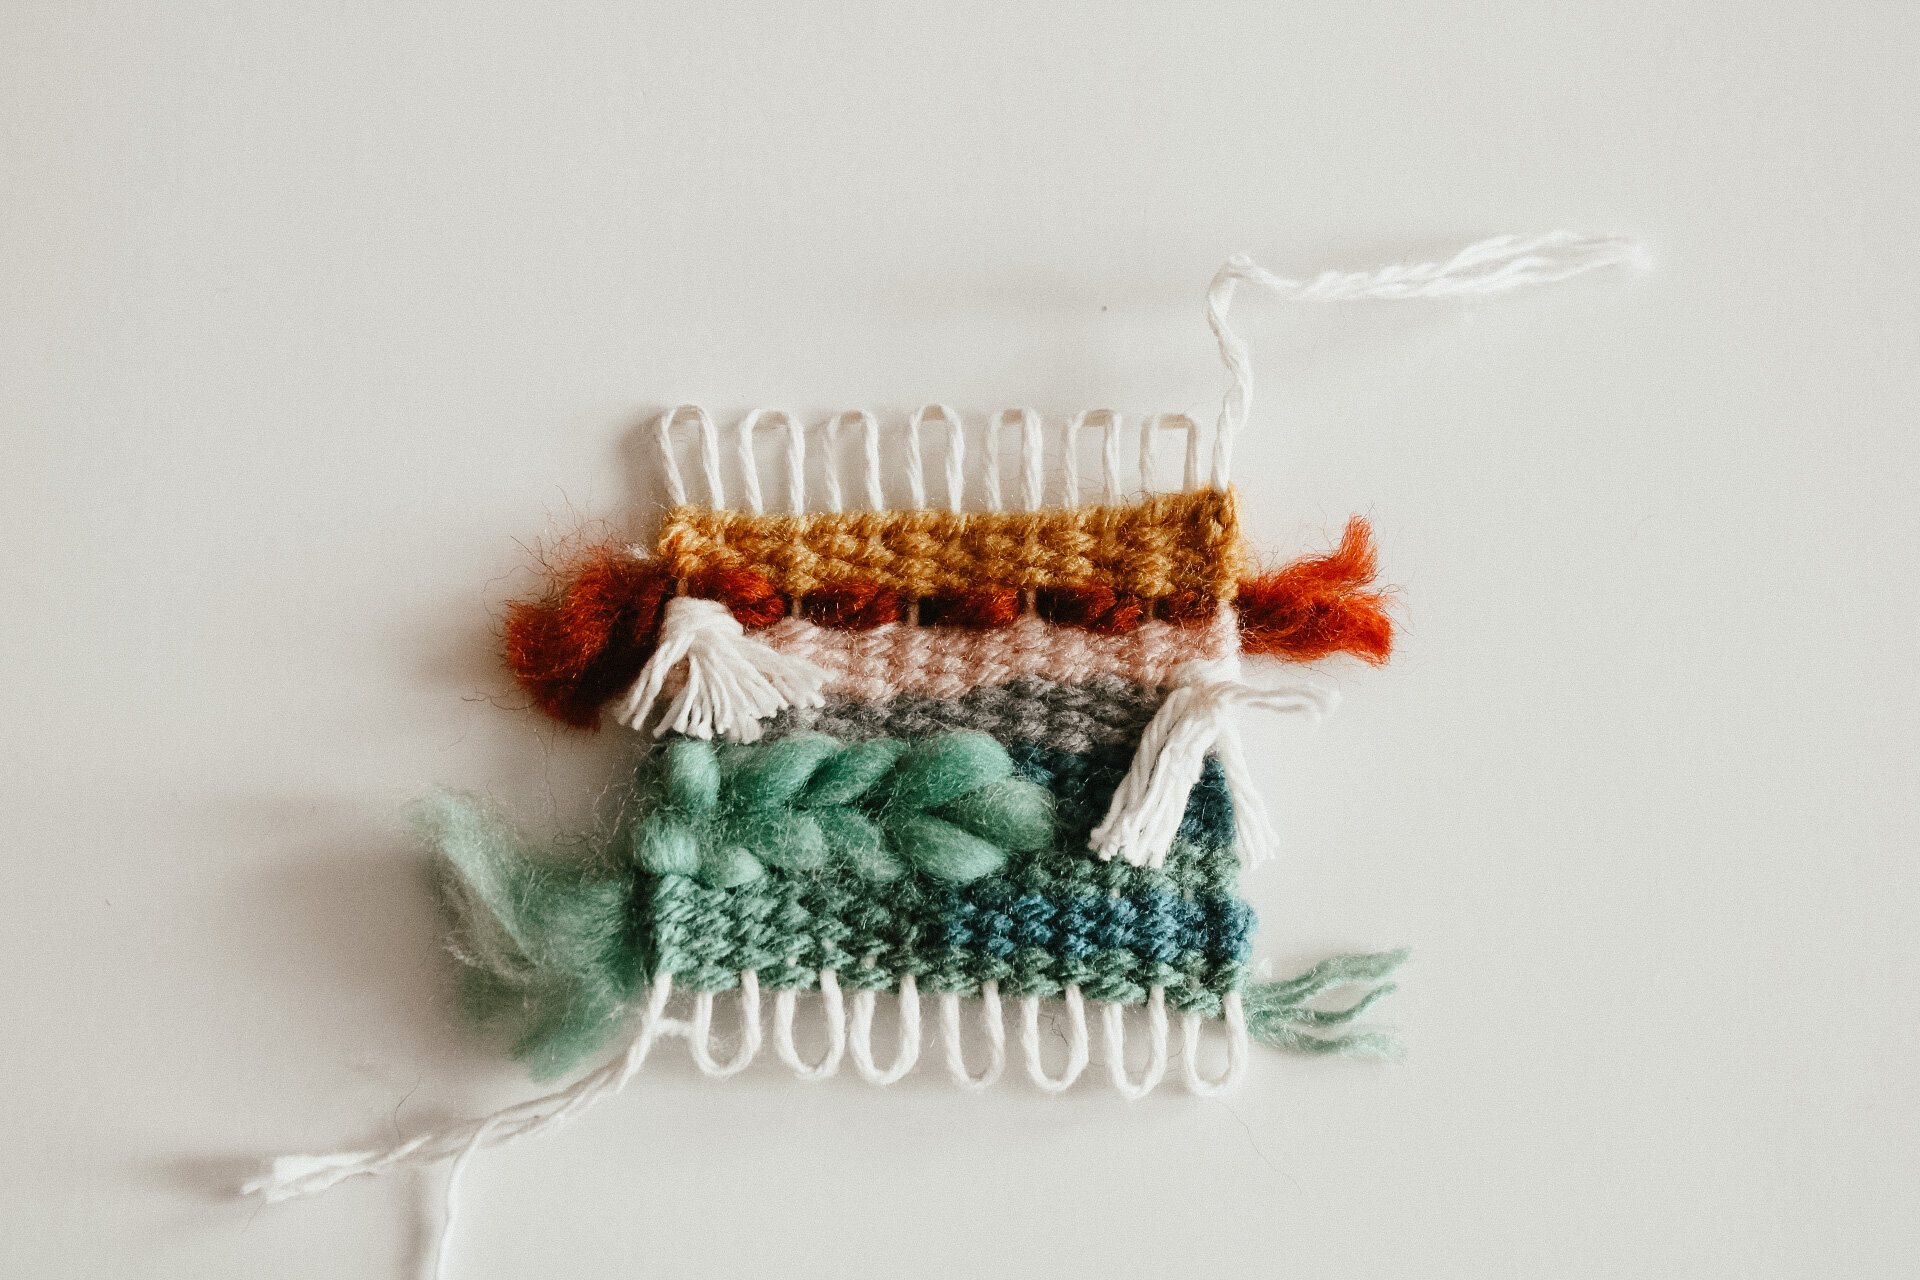
02. use your tapestry needle to wedge under the warp loop and pop it off the frame. do this for all warps on both sides.
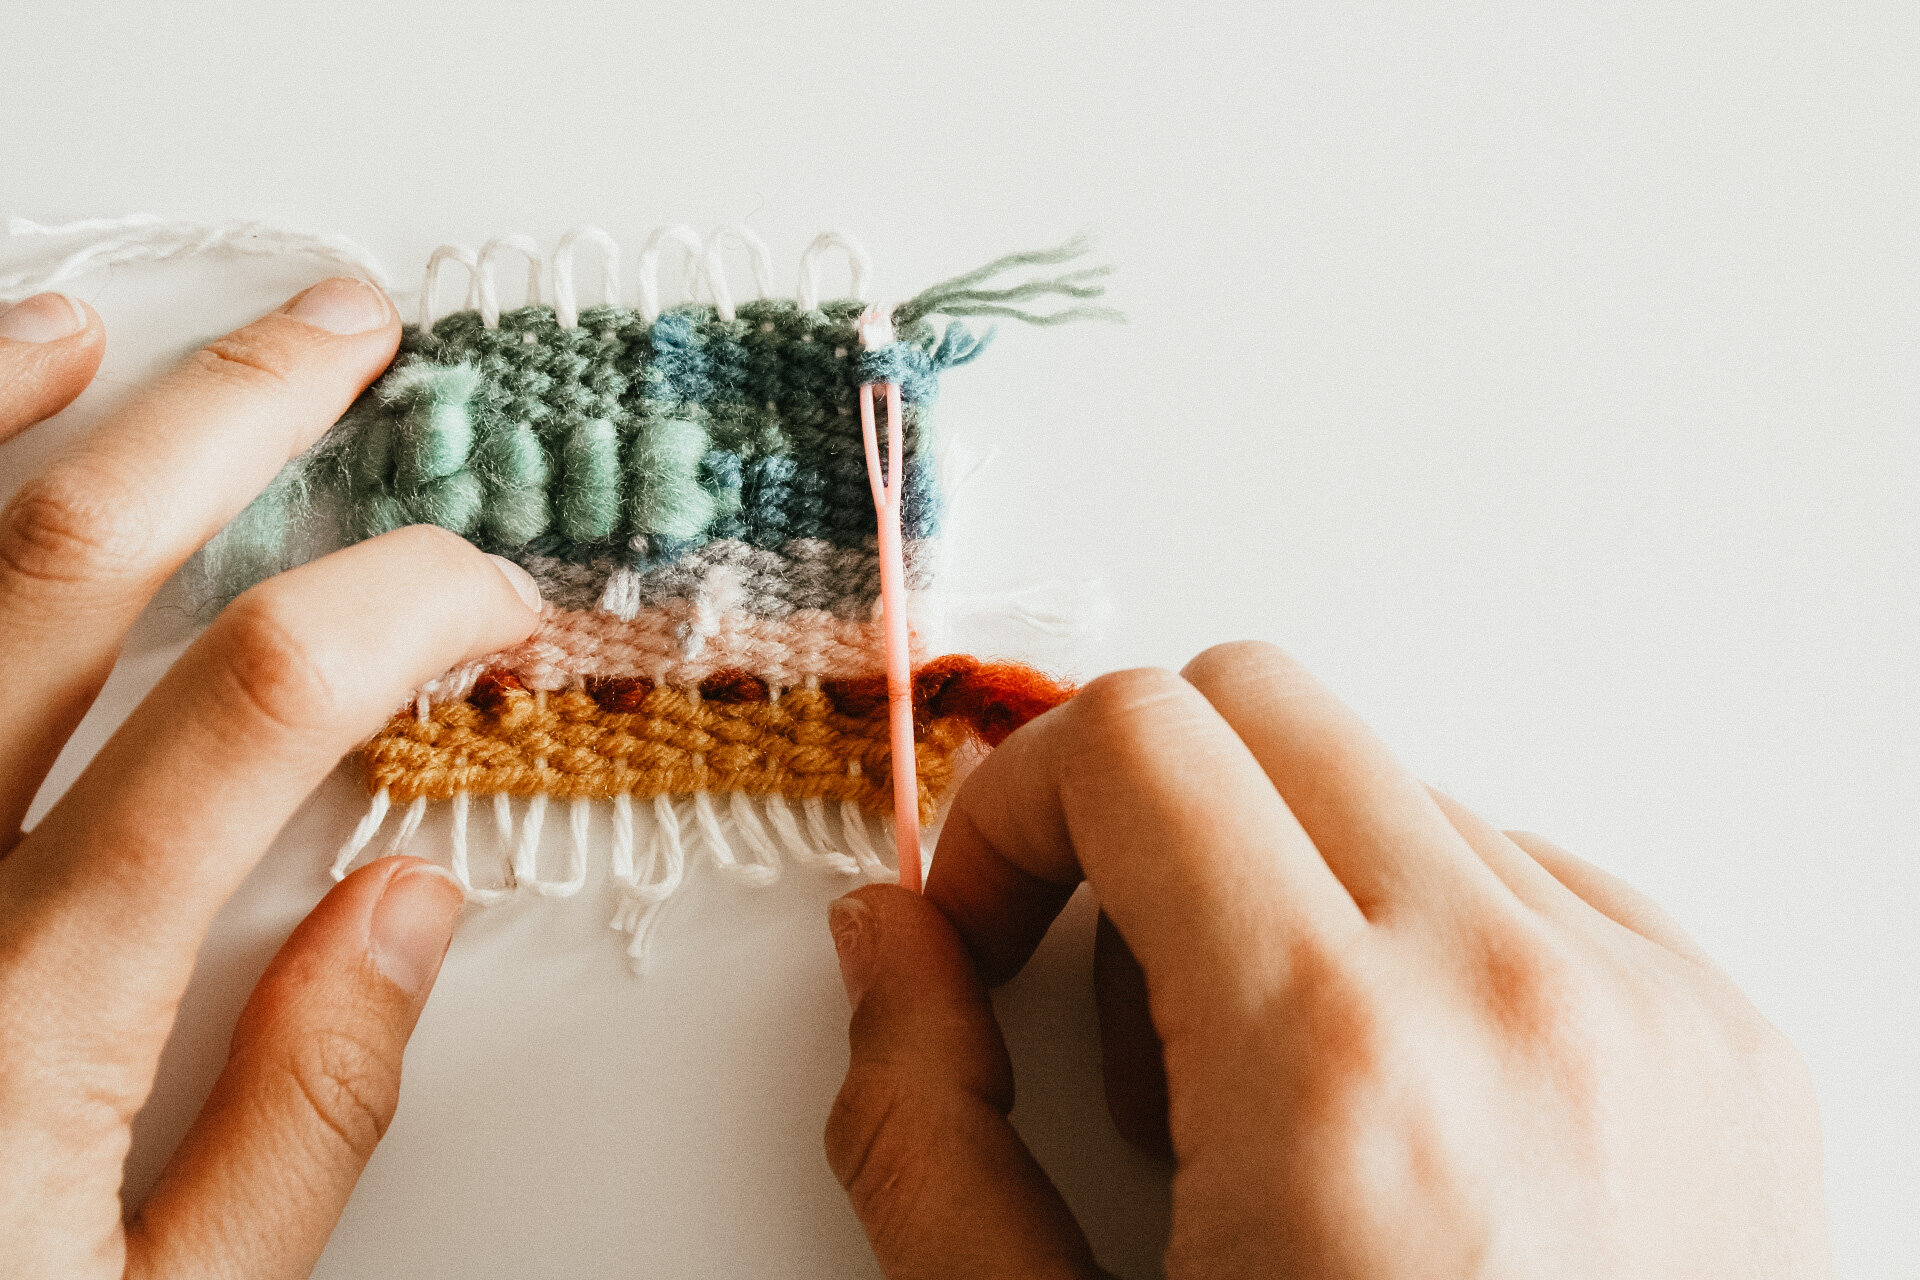
03. you can choose to cut the loops in half, but i prefer to weave in each loop tail into the back of the weaving. do this for the top and the bottom loops.
+ attach a stick by using the technique “tuck and sew bundles.”

01. take a piece of left over warp string and attach to your tapestry needle. sew the string through the back of your weaving to the front, leaving a 5 in tail.

02. loop over to the back and sew the string into the same spot. creating a loop that tightens around the stick.
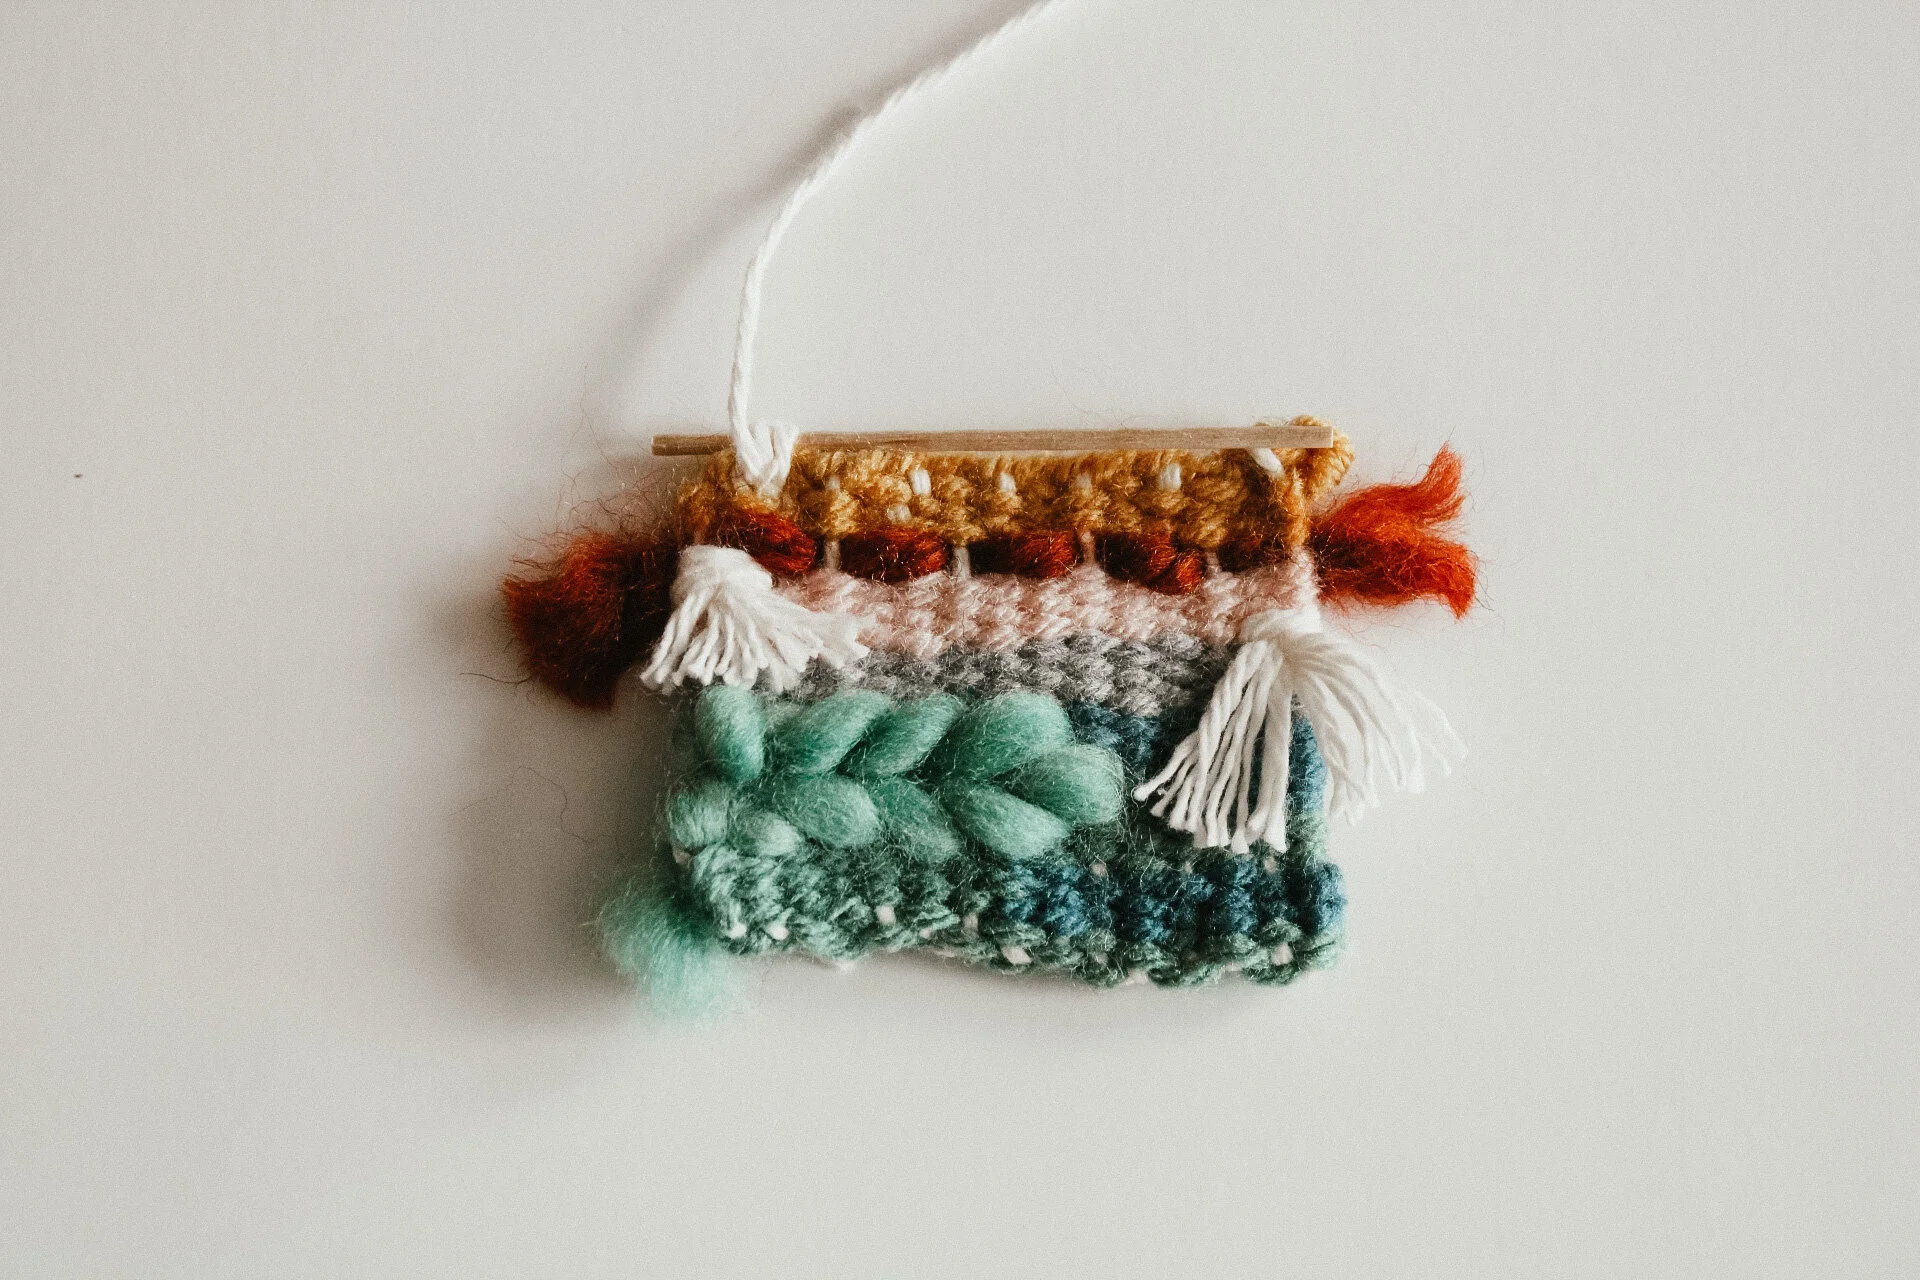
03. repeat that one more time.
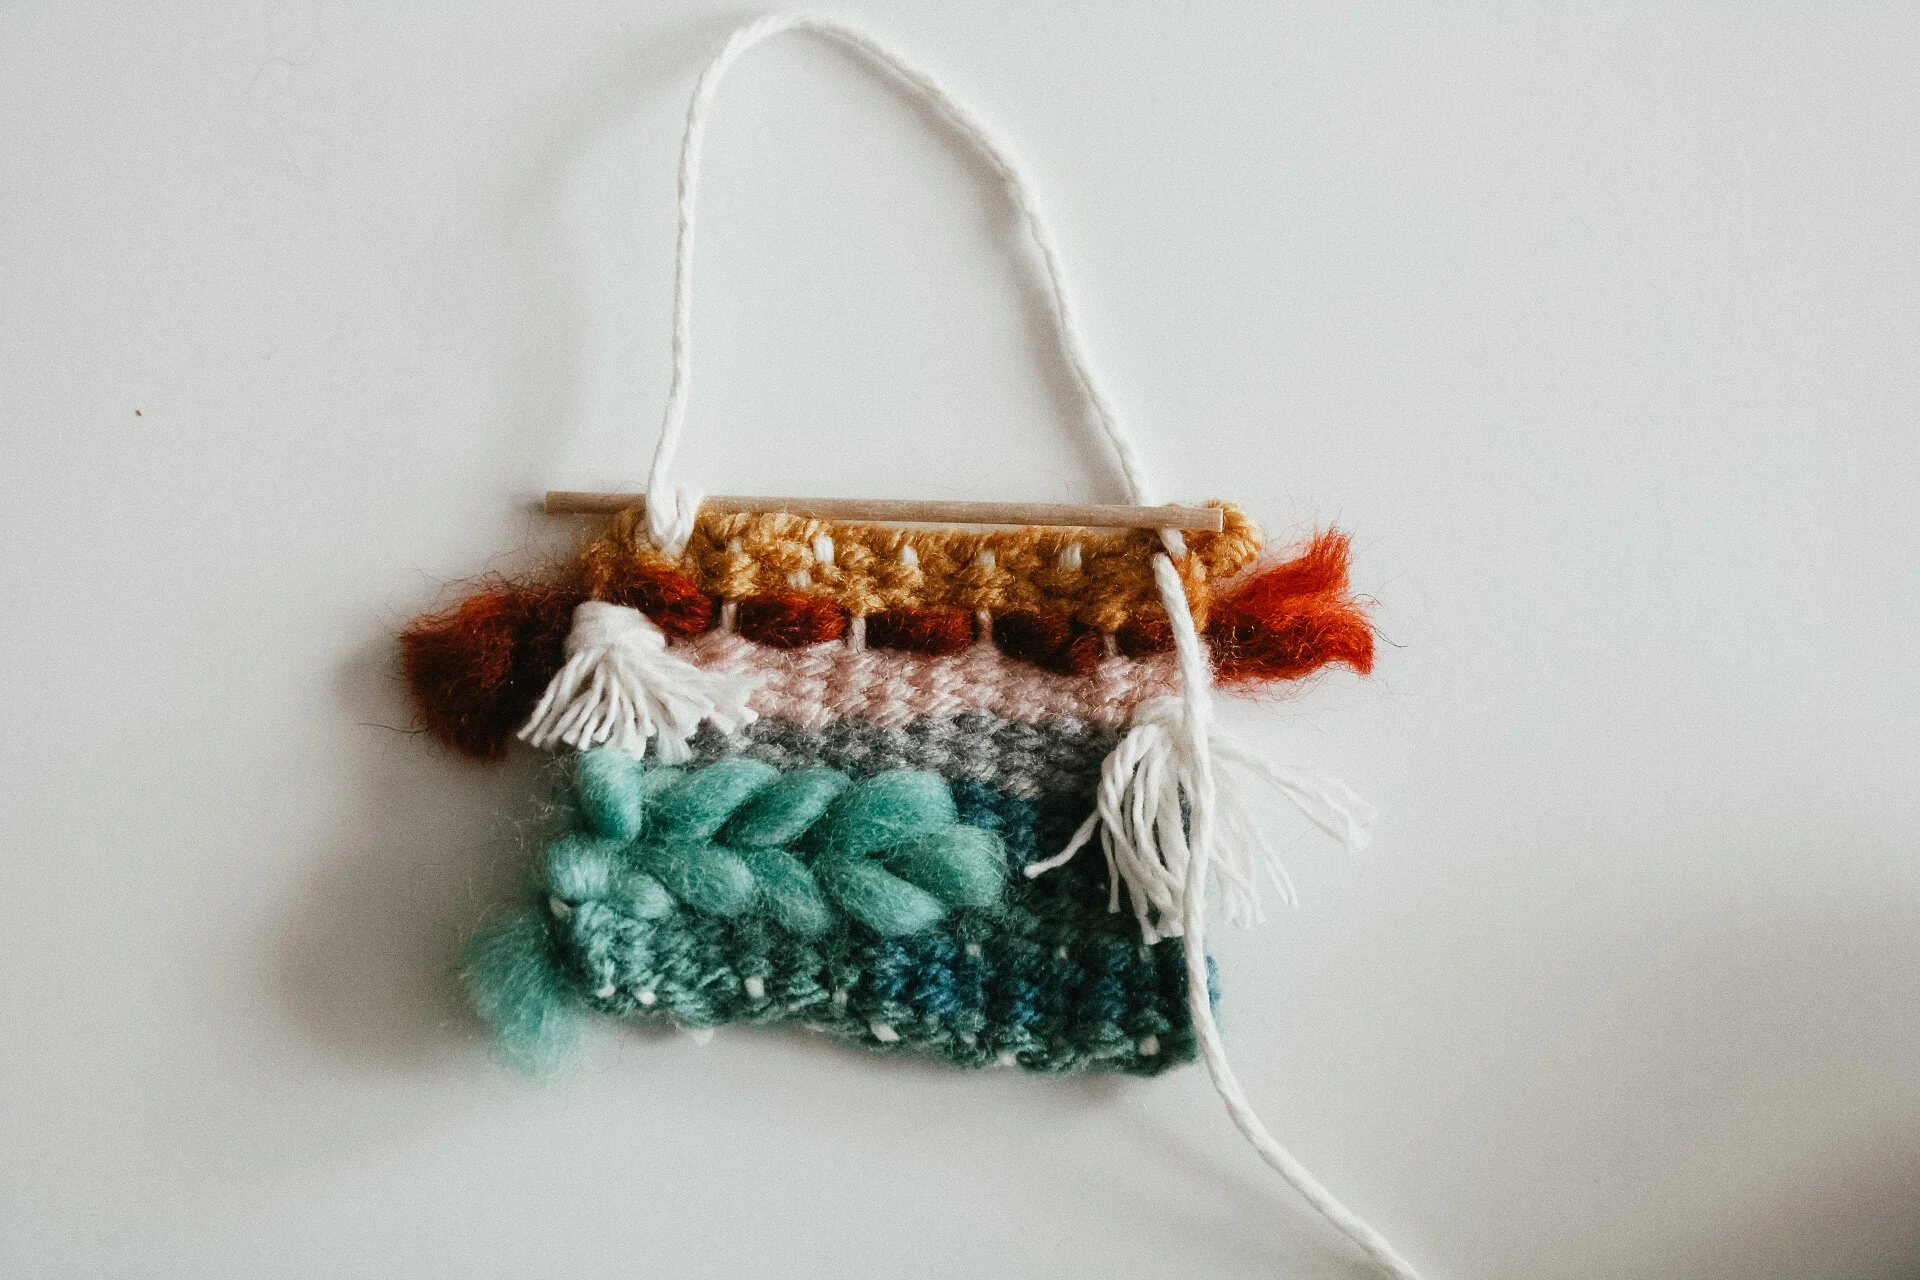
04. sew your sting to the back of the weaving and move to the other side, creating a hanger for your weaving in the process.

05. create another bundle on the opposite side.
06. sew your left over string into the back of the weaving
07. hang your mini weaving up where you will see it each day and it will bring you so much joy.


making weaving is so much fun! you have enough materials to make many a weaving’s so get excited, because you are on your way to becoming a weaving queen like me!