
DIY Zip Pouch
Sew a Zip Pouch

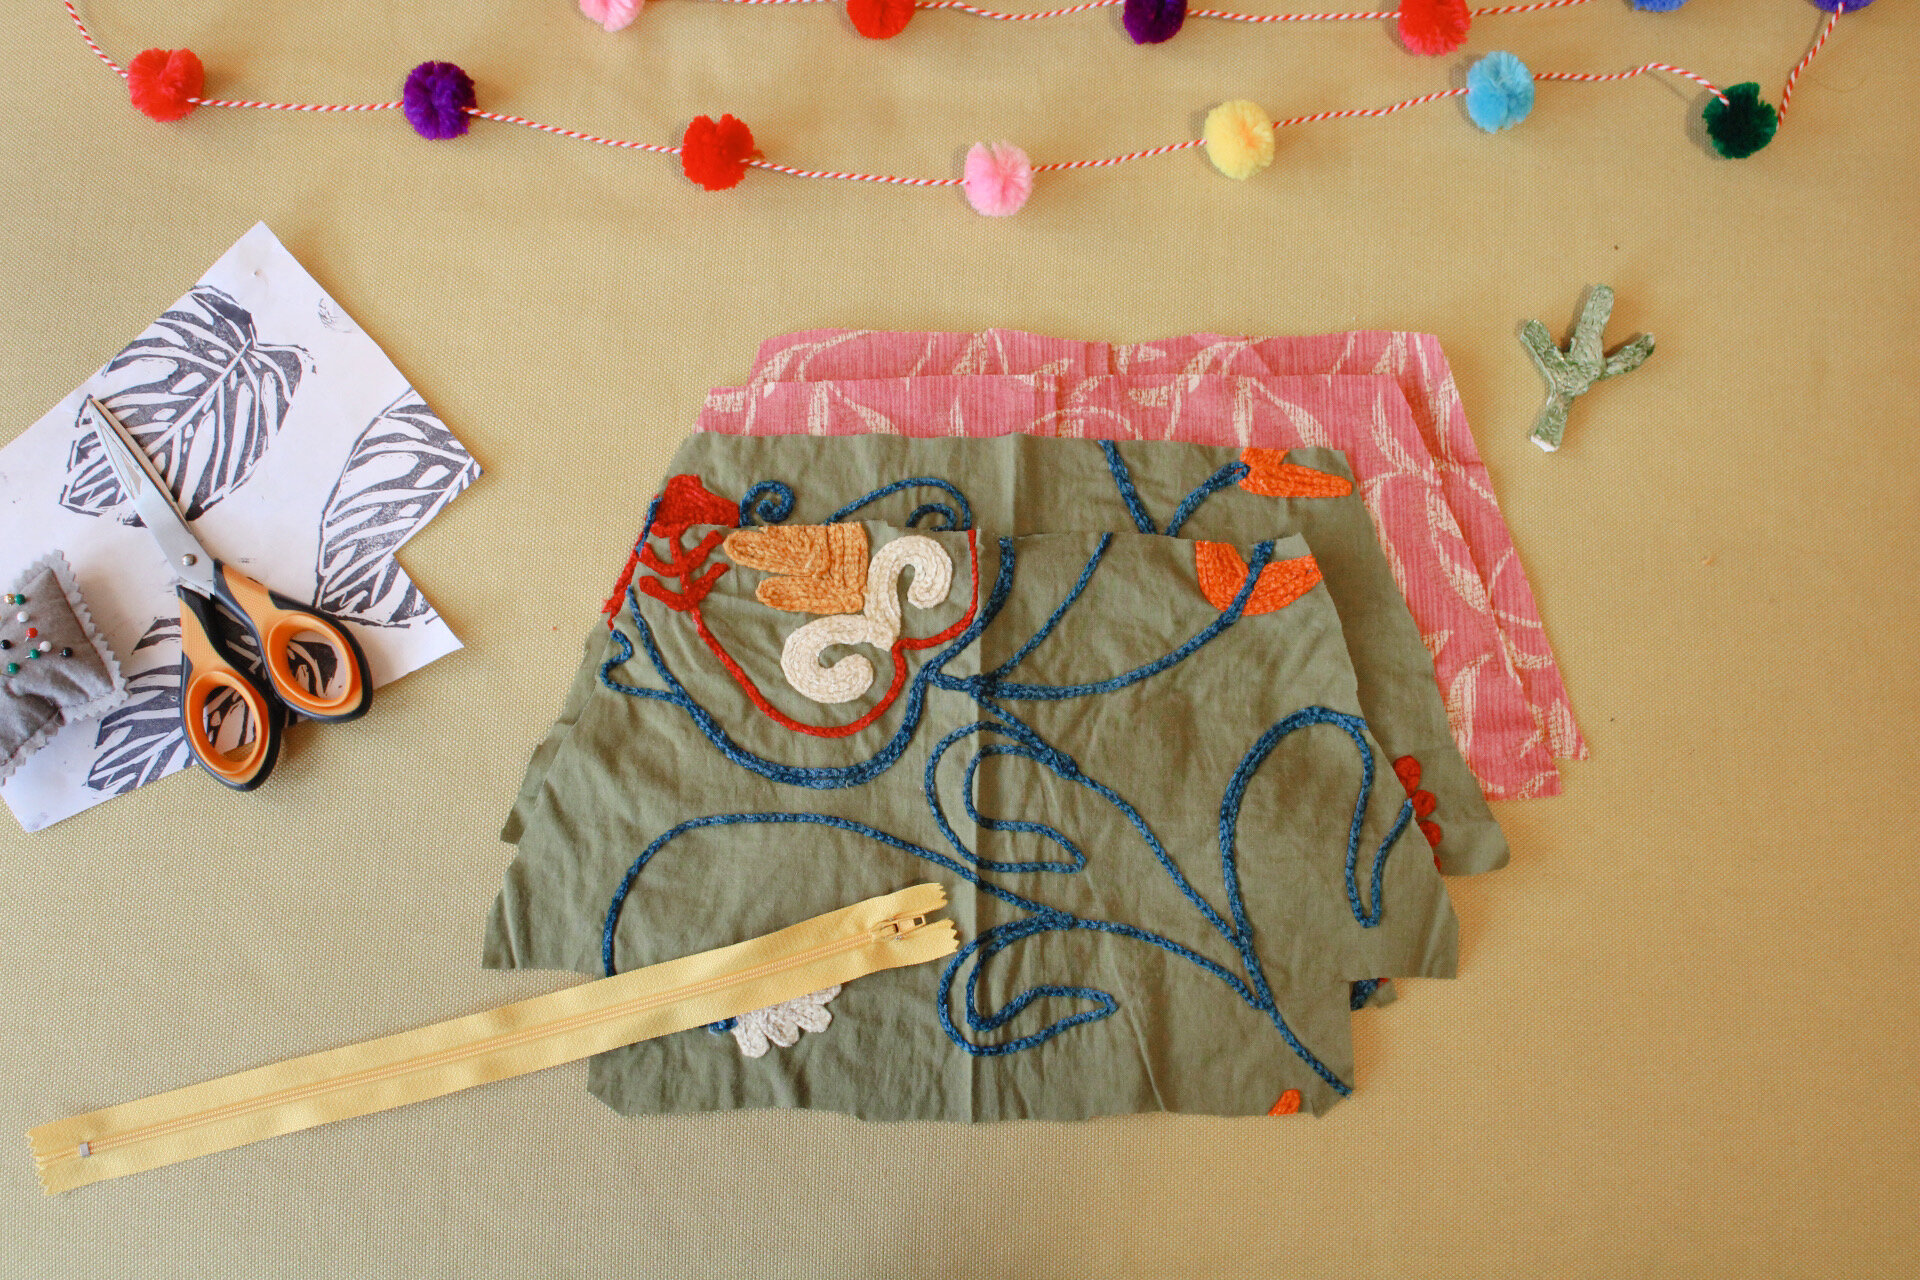
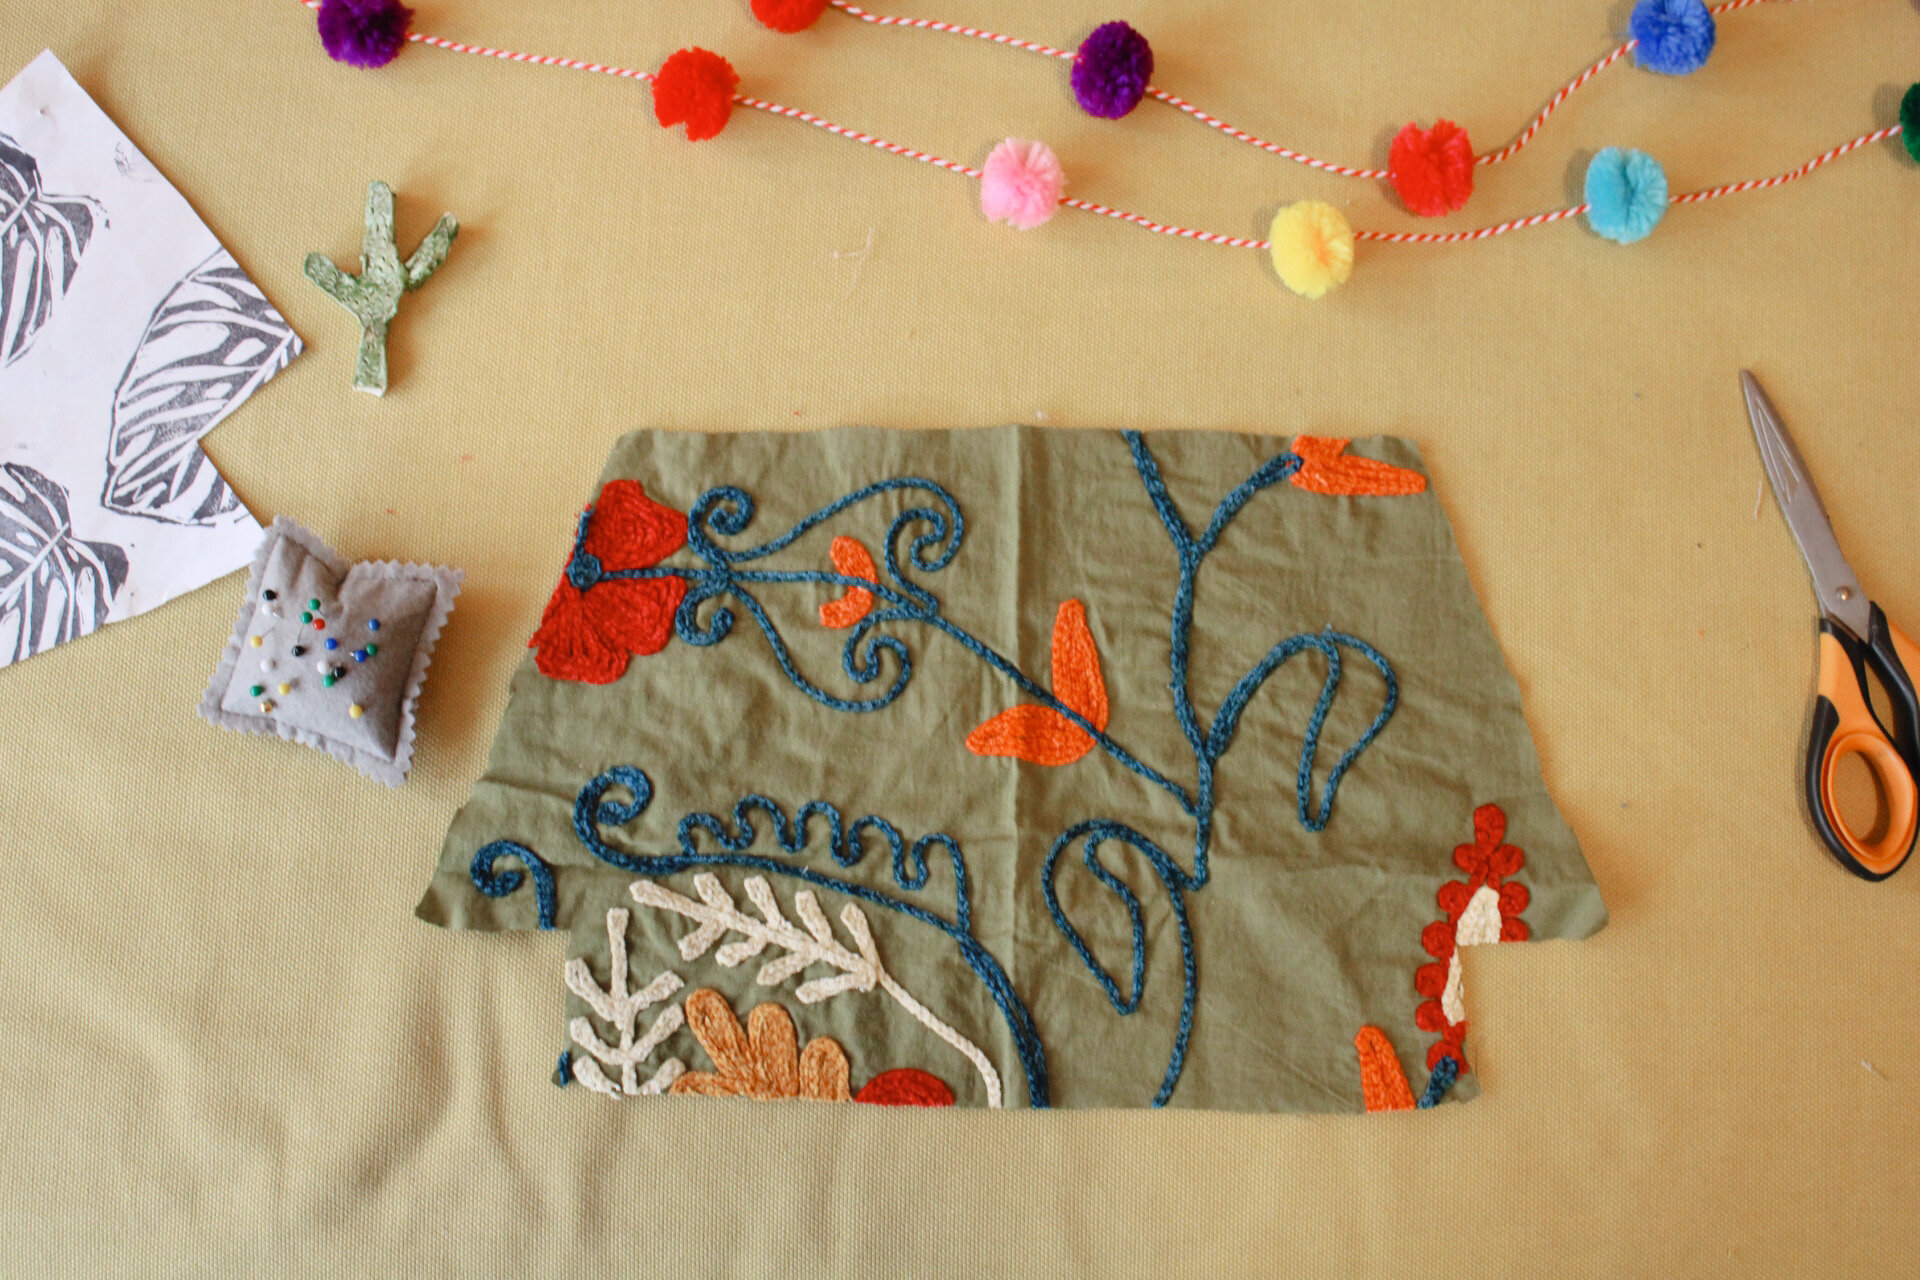
Pouches are honestly the greatest gift to this creation. You can use them for everything and anything and they keep all of you belongings in 1 simple place. I recently just started carrying a large tote bag instead of my backpack and I knew I needed a pouch to keep all my things together so I would not lose everything and look cute at the same time. Enter this DIY Zip Pouch! I purchased this fabric from a local store here in Somerville called Make and Mend. I fell in love with the chenille embroidered flowers throughout. The greatest part about this pouch is that you can use any fabric that you love! Follow along below as I share my tips on how to make your own zip pouch for all your necessary needs.
Supplies:
¼ yard Exterior Fabric
¼ yard Interior Fabric
6”- 10” Colored Zipper
Sewing Machine and Thread
Scissors
Step One: Start by cutting the size of the pattern that you want out from the template. I used the 10” template for this pouch because I wanted a larger pouch for my bag.
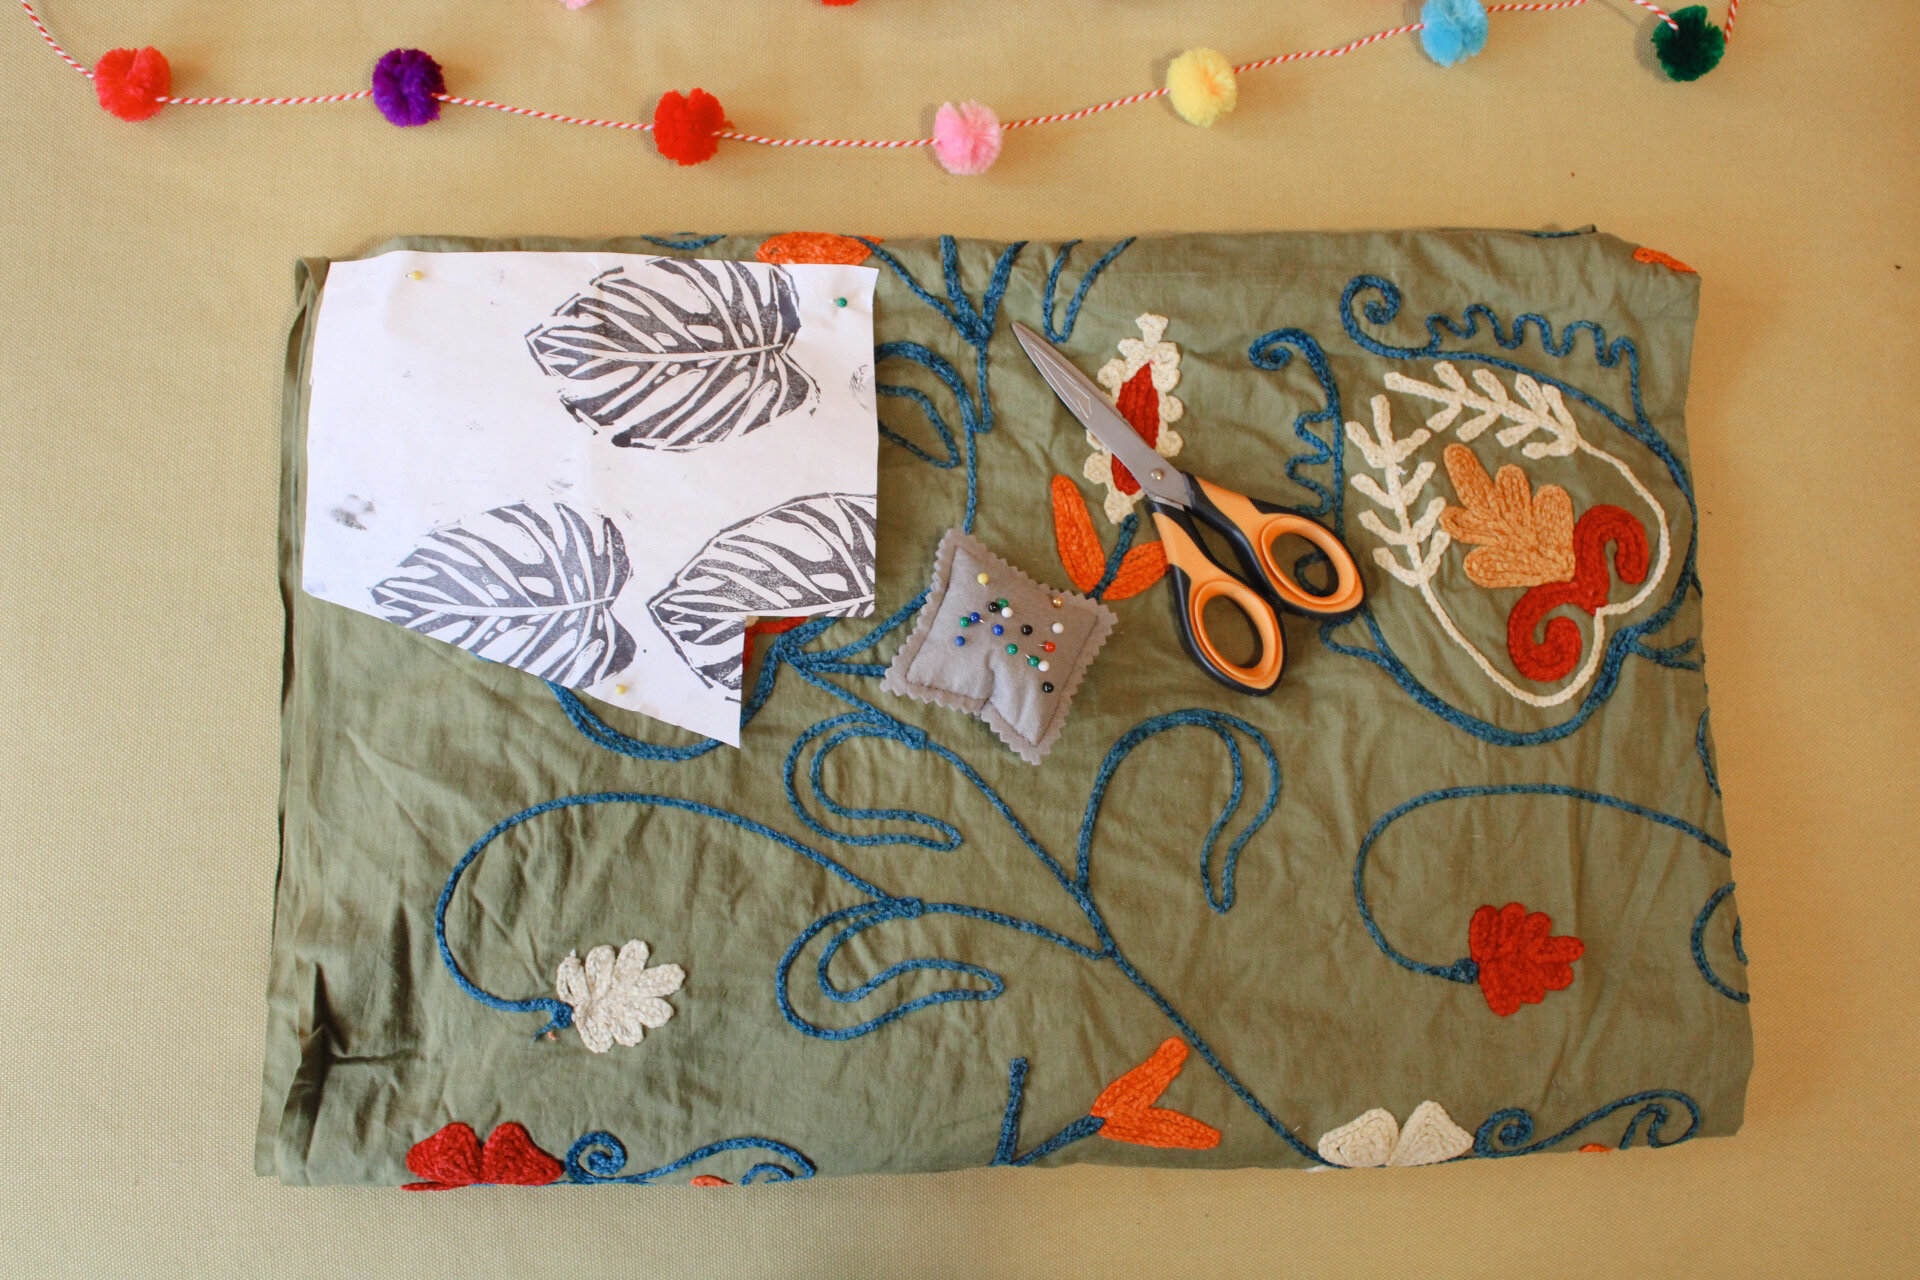
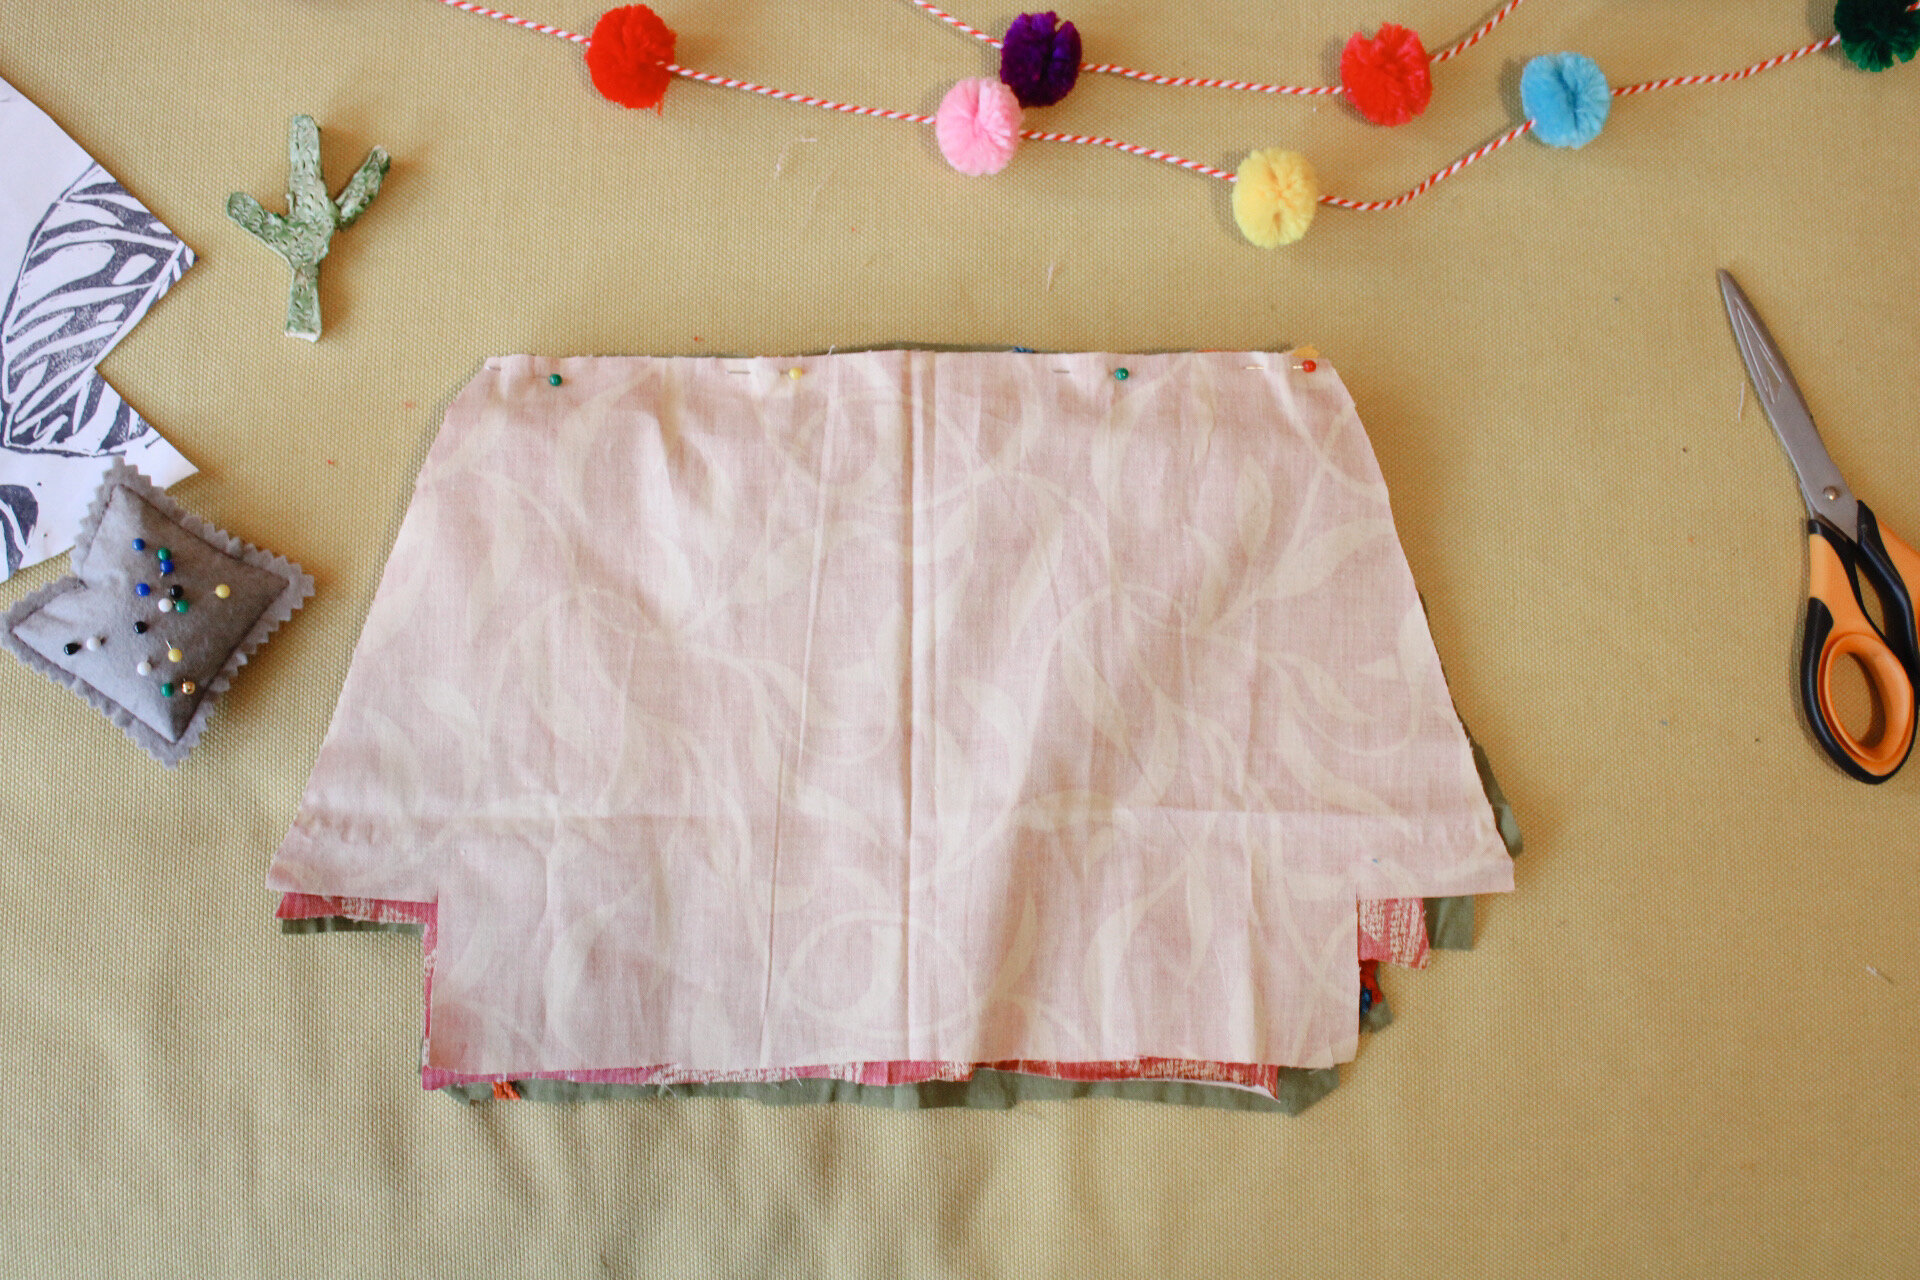
Step Two: Next fold the exterior fabric in half. Lay the template on top of the fabric lining it up with the fold. Pin the template to the fabric and cut the fabric out. Do not cut the top where you lined up the template. That will cut your pouch in half. You will have to complete this step twice for each fabric.

Step Three: Next you will repeat step two but with the interior fabric. At the end of this step you should have 4 pieces of cut fabric.
Step 4: (Optional Step) Now you add a tab to the edge of the zipper. Take a small scrap of fabric, just as long as its width is the same as the zipper. Cut about a 2in piece. Fold the edges of the fabric to meet in the middle and slide it onto the zipper at the stopper edge. Using a clip (binder clips work here) clip the fabric into place and sew. If you have a machine that can go forward and backwards, do that 2 times. If not just sew through one time, cut off and sew through again.

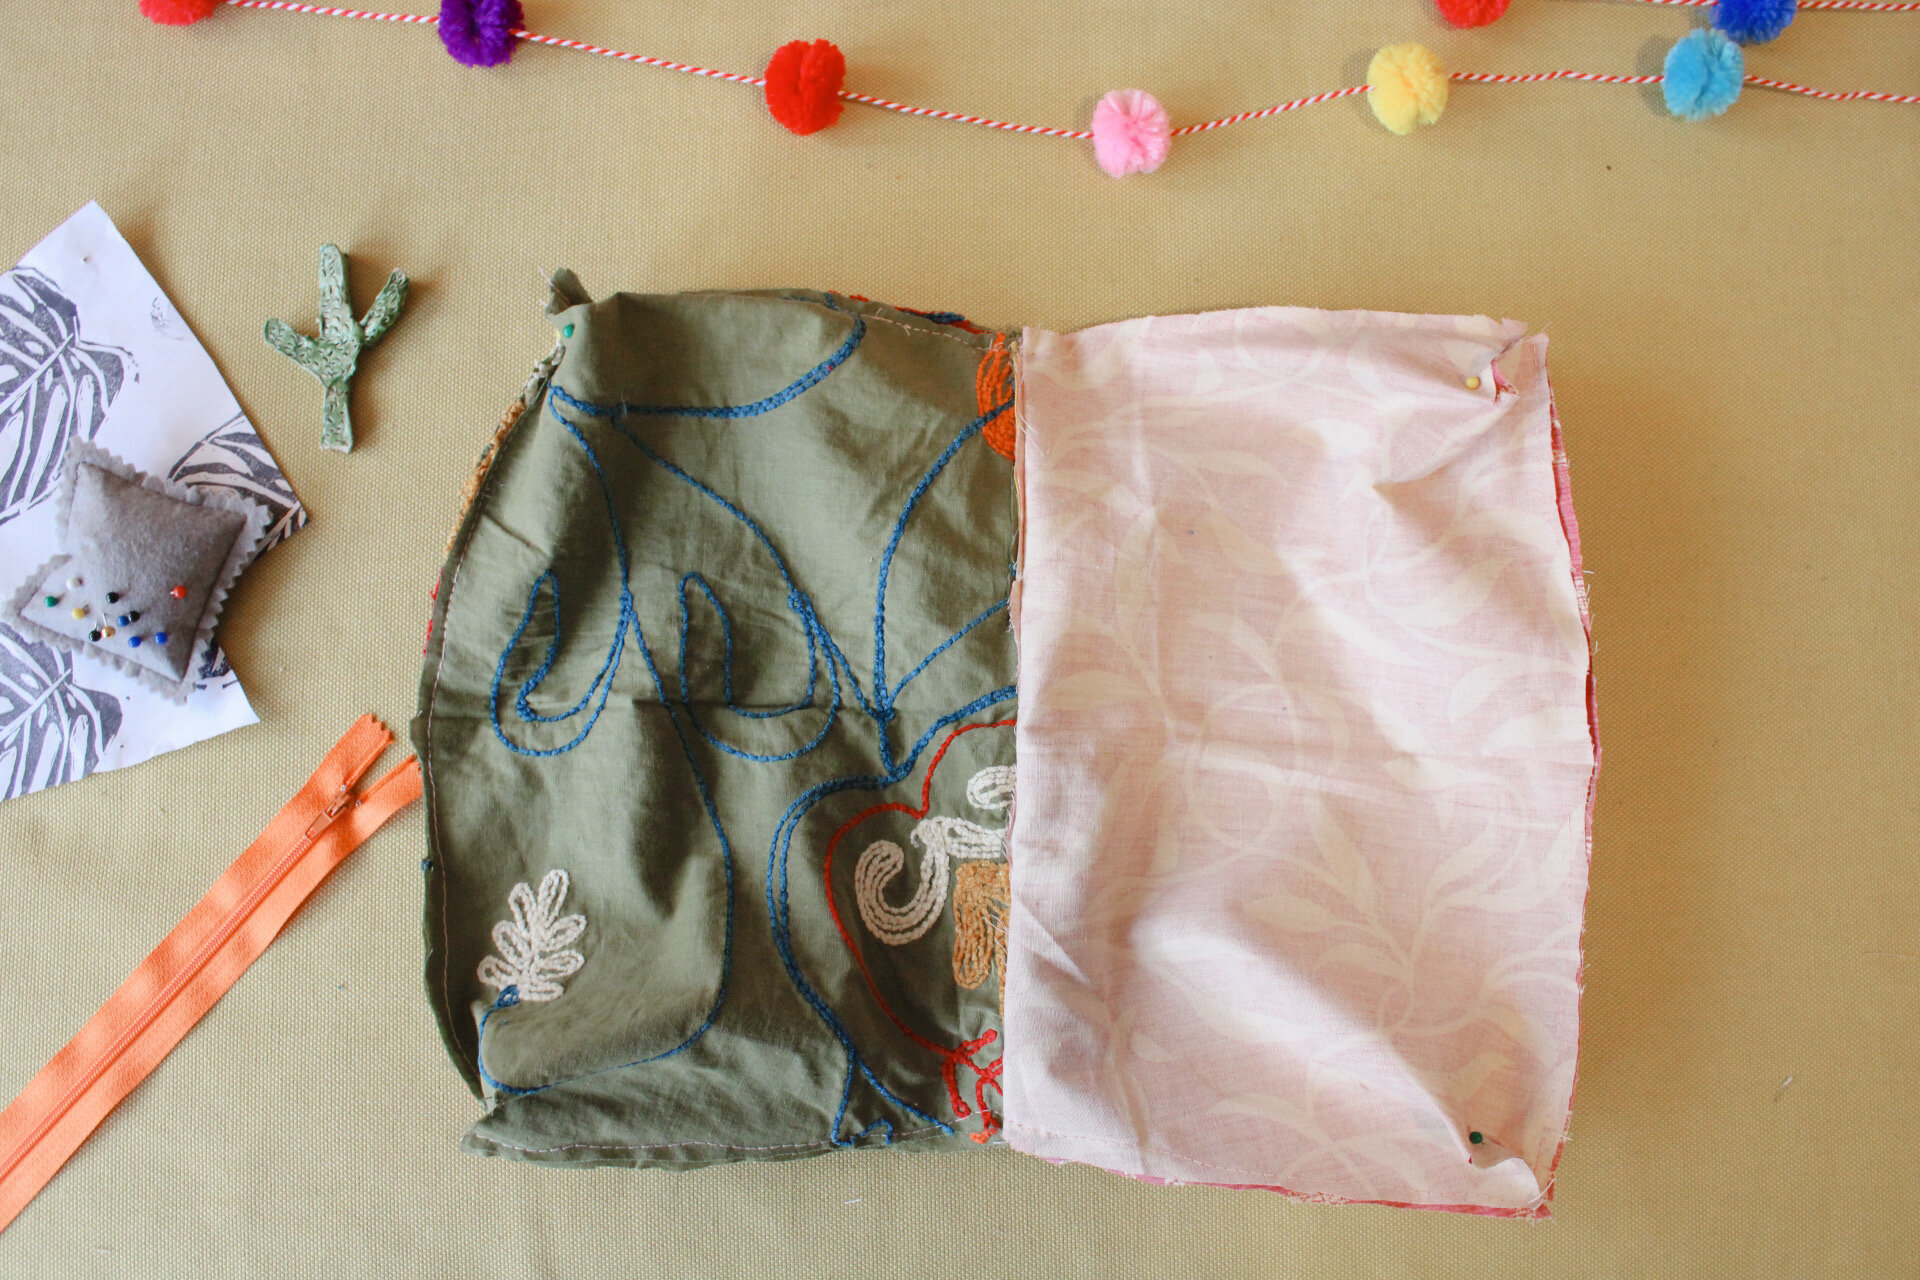
Step Five: Next you will attach the zipper. Starting with the exterior fabric face up, lay the zipper TEETH SIDE DOWN at the top of the fabric. Following that you will lay the interior fabric on top face down. Pin in place. Once it is pinned, open the zipper to the middle of the pouch, Using a zipper foot on your sewing machine, sew in place. When you are sewing you will sew to the center of the pouch where the zipper will be open. Keeping the needle down in the fabric, close the zipper and finish sewing. Once you are finished, fold over the fabric so the zipper is showing and both patterns are face out.
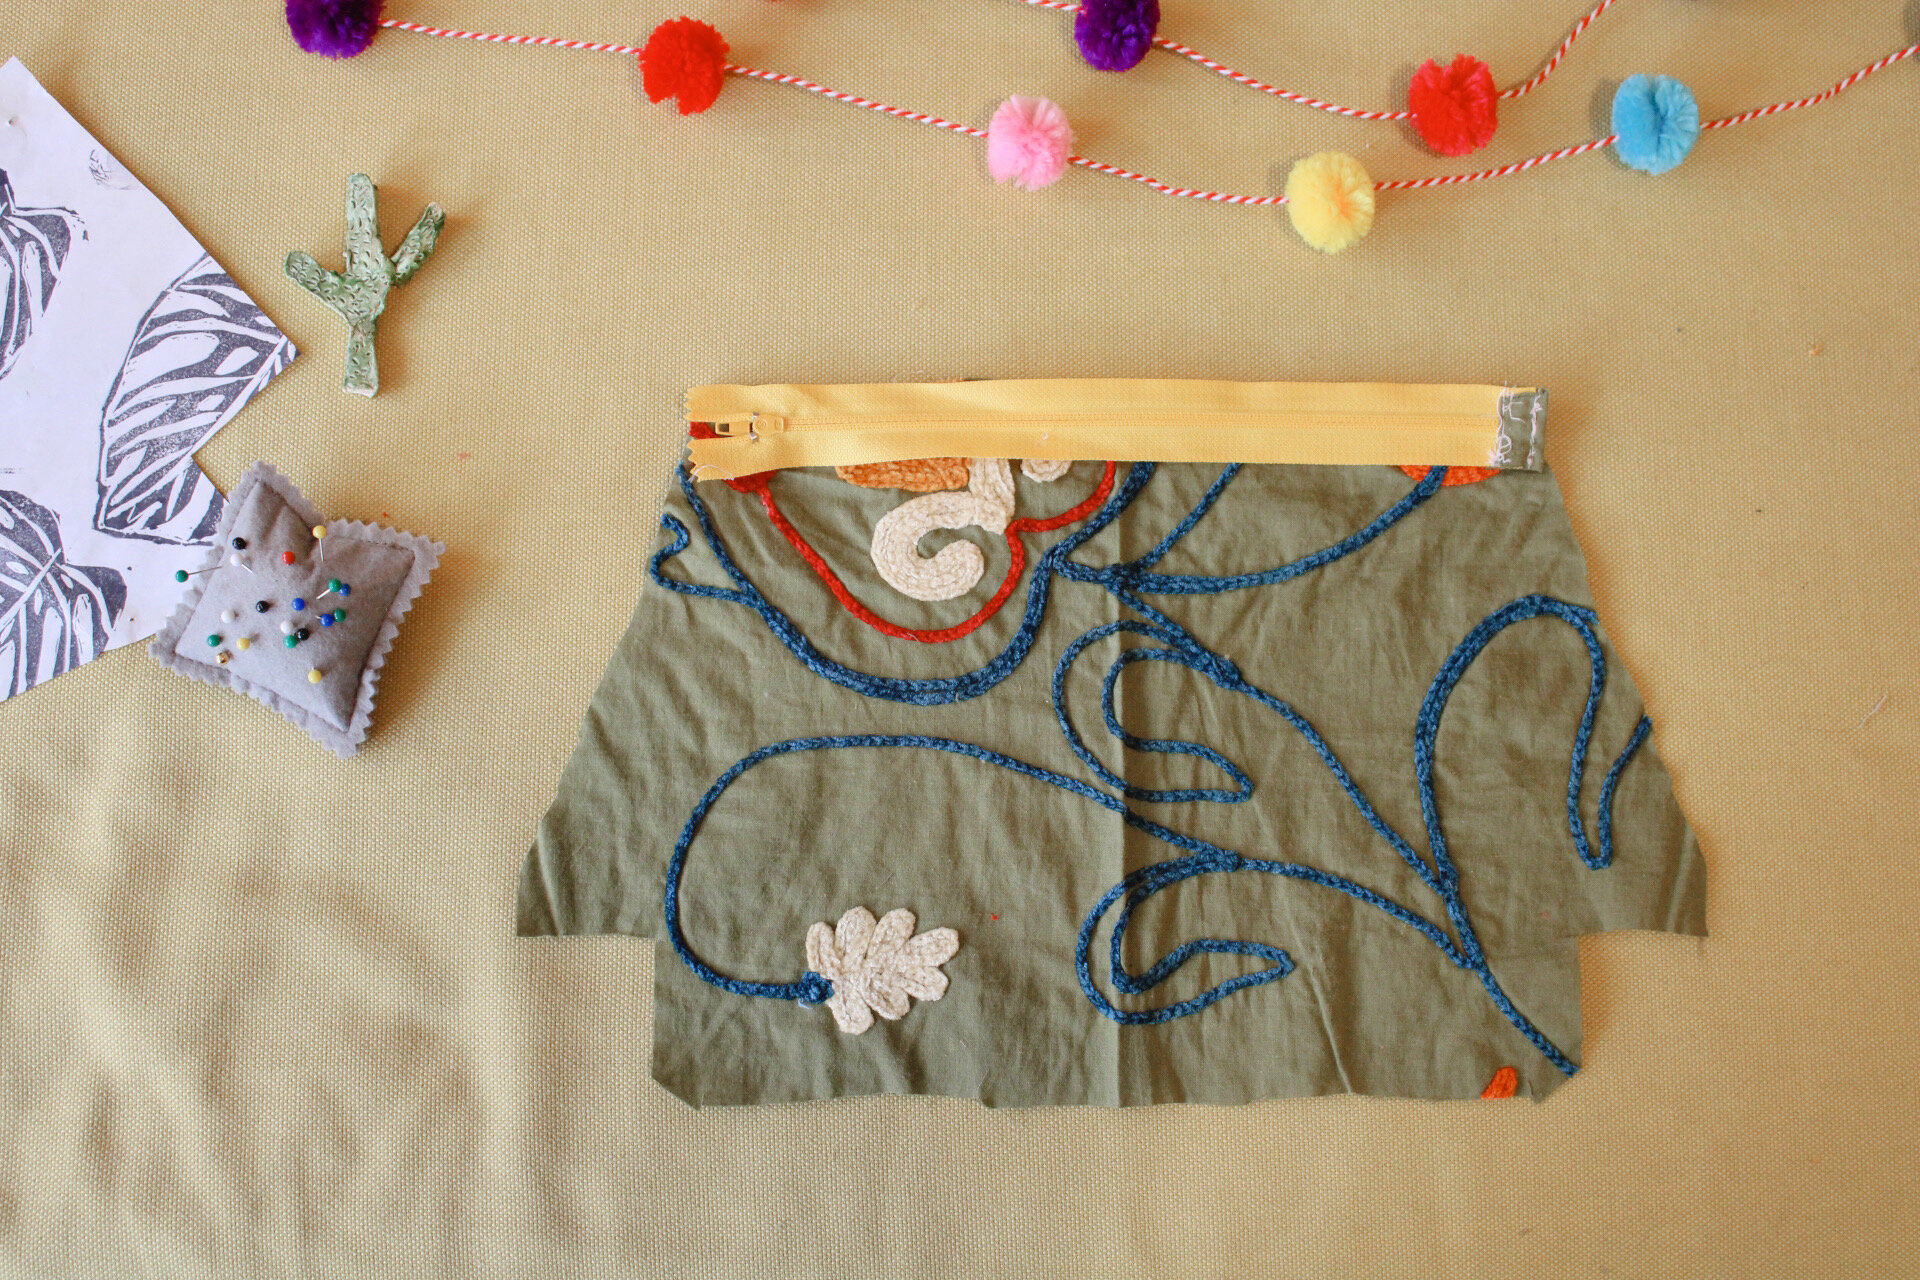
Step Six: Now you will sew the other side. This step is basically the same as above but the placement of the fabric is important. Starting with the exterior fabric face up, line the zipper TEETH SIZE DOWN, other half of pouch connected with the top of the fabric. Lay the interior fabric face down on top and pin into place. Follow step 5 for sewing.

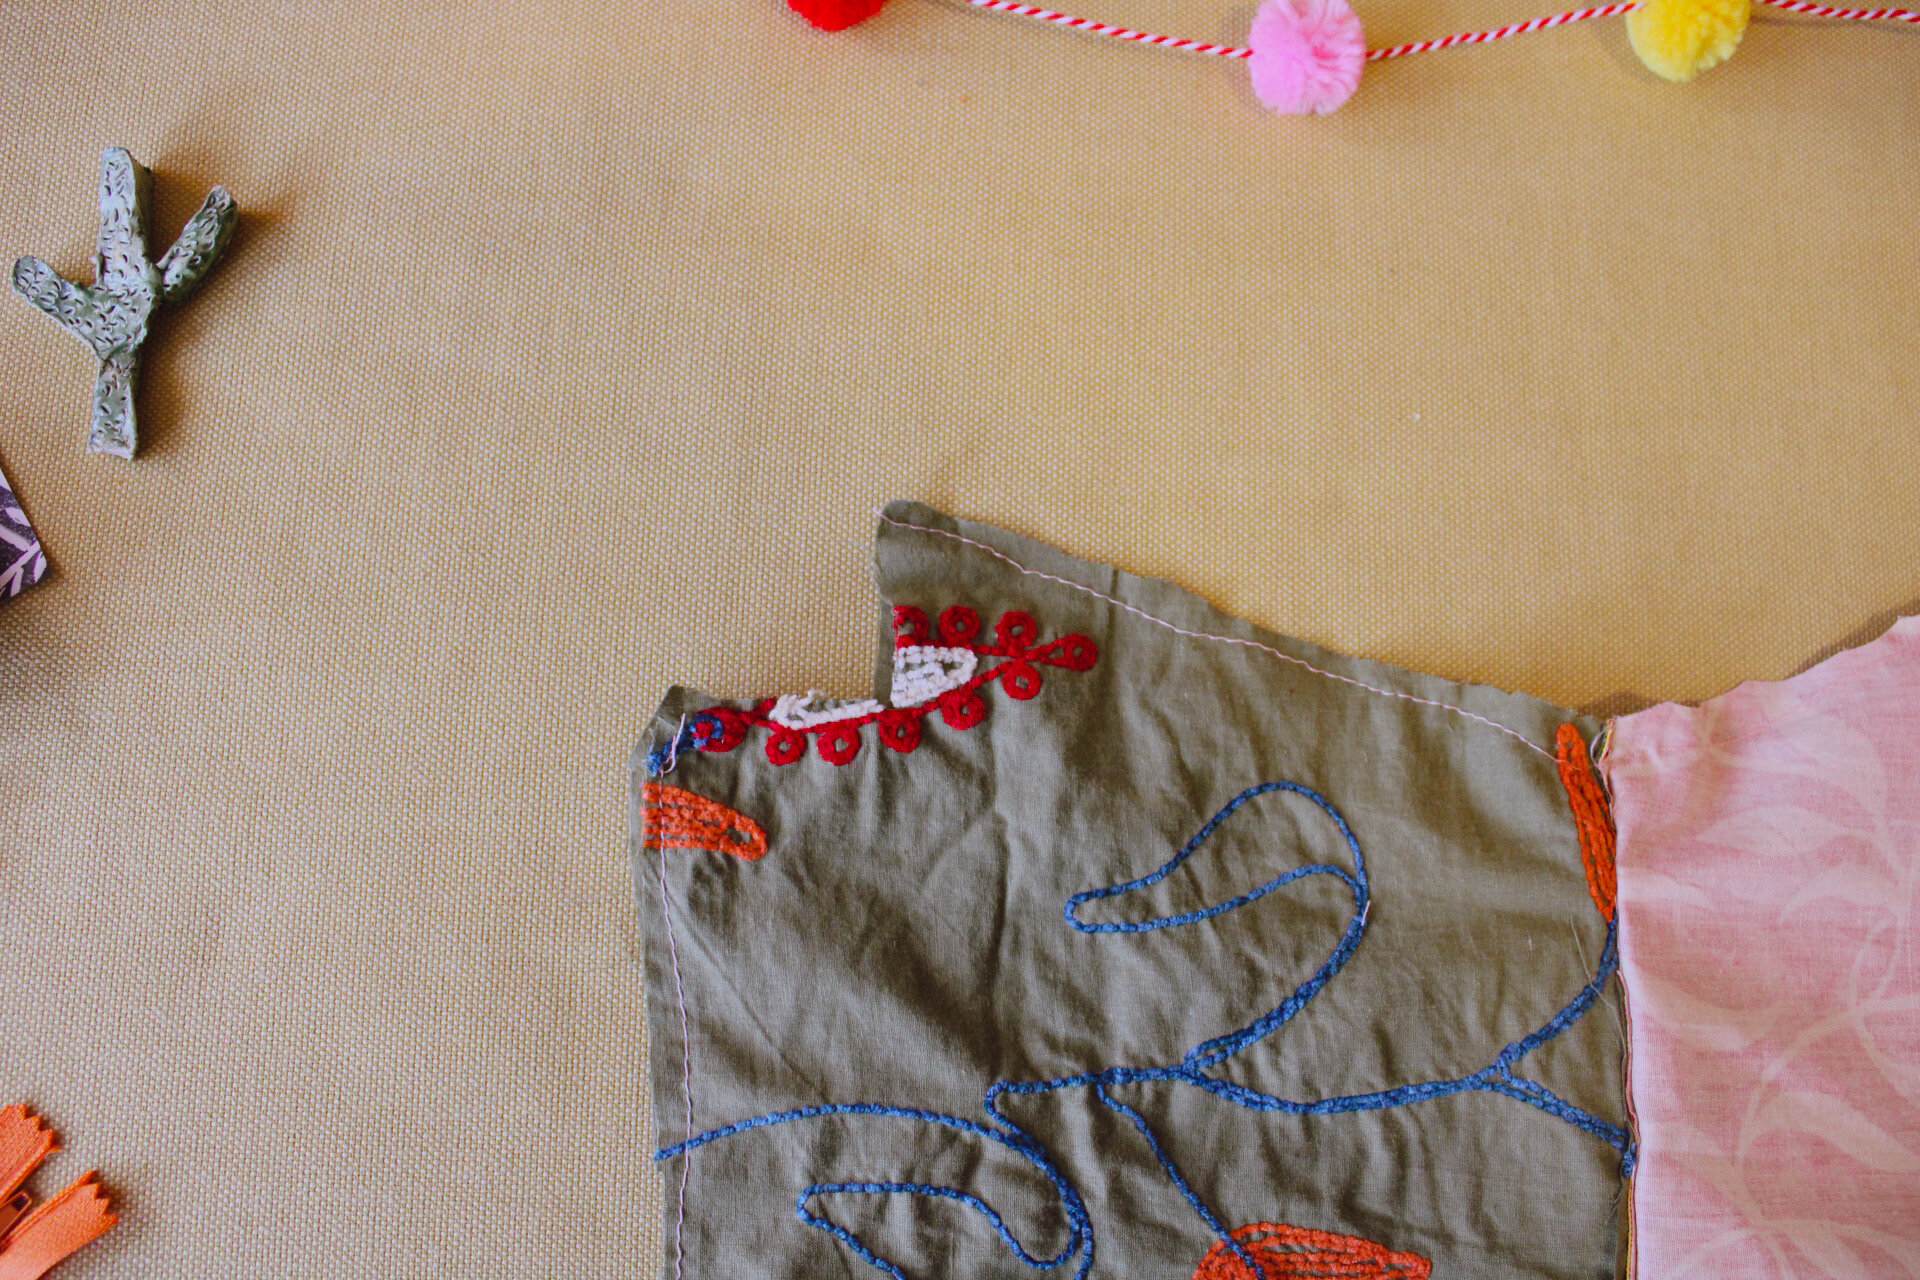
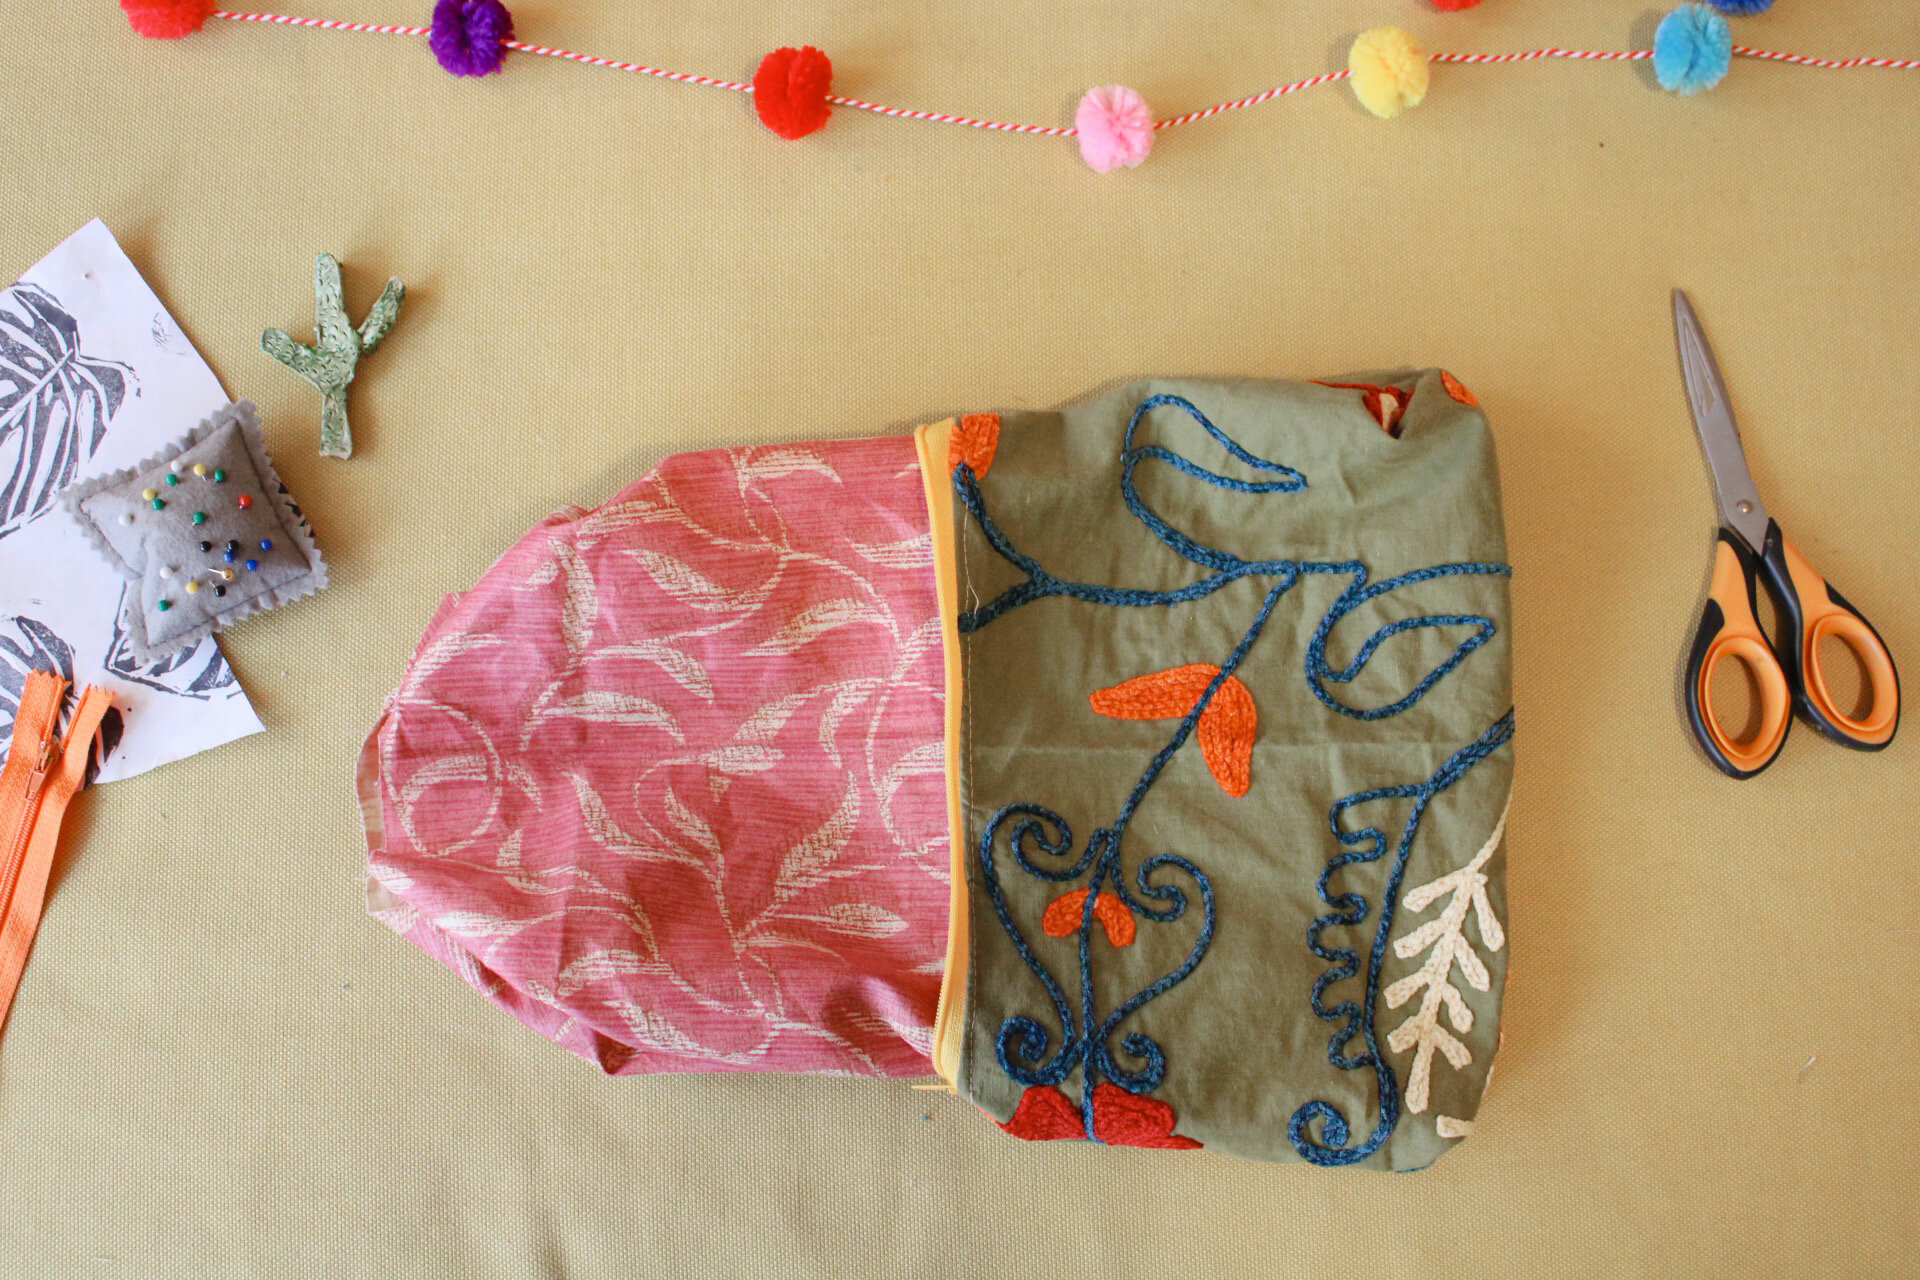
Step Seven: Now it is time to seam the zipper. Still using the zipper foot, sew across the top of the exterior fabric fusing it to the zipper and allowing the fabric to lay flat. Make sure the zipper is open half way.

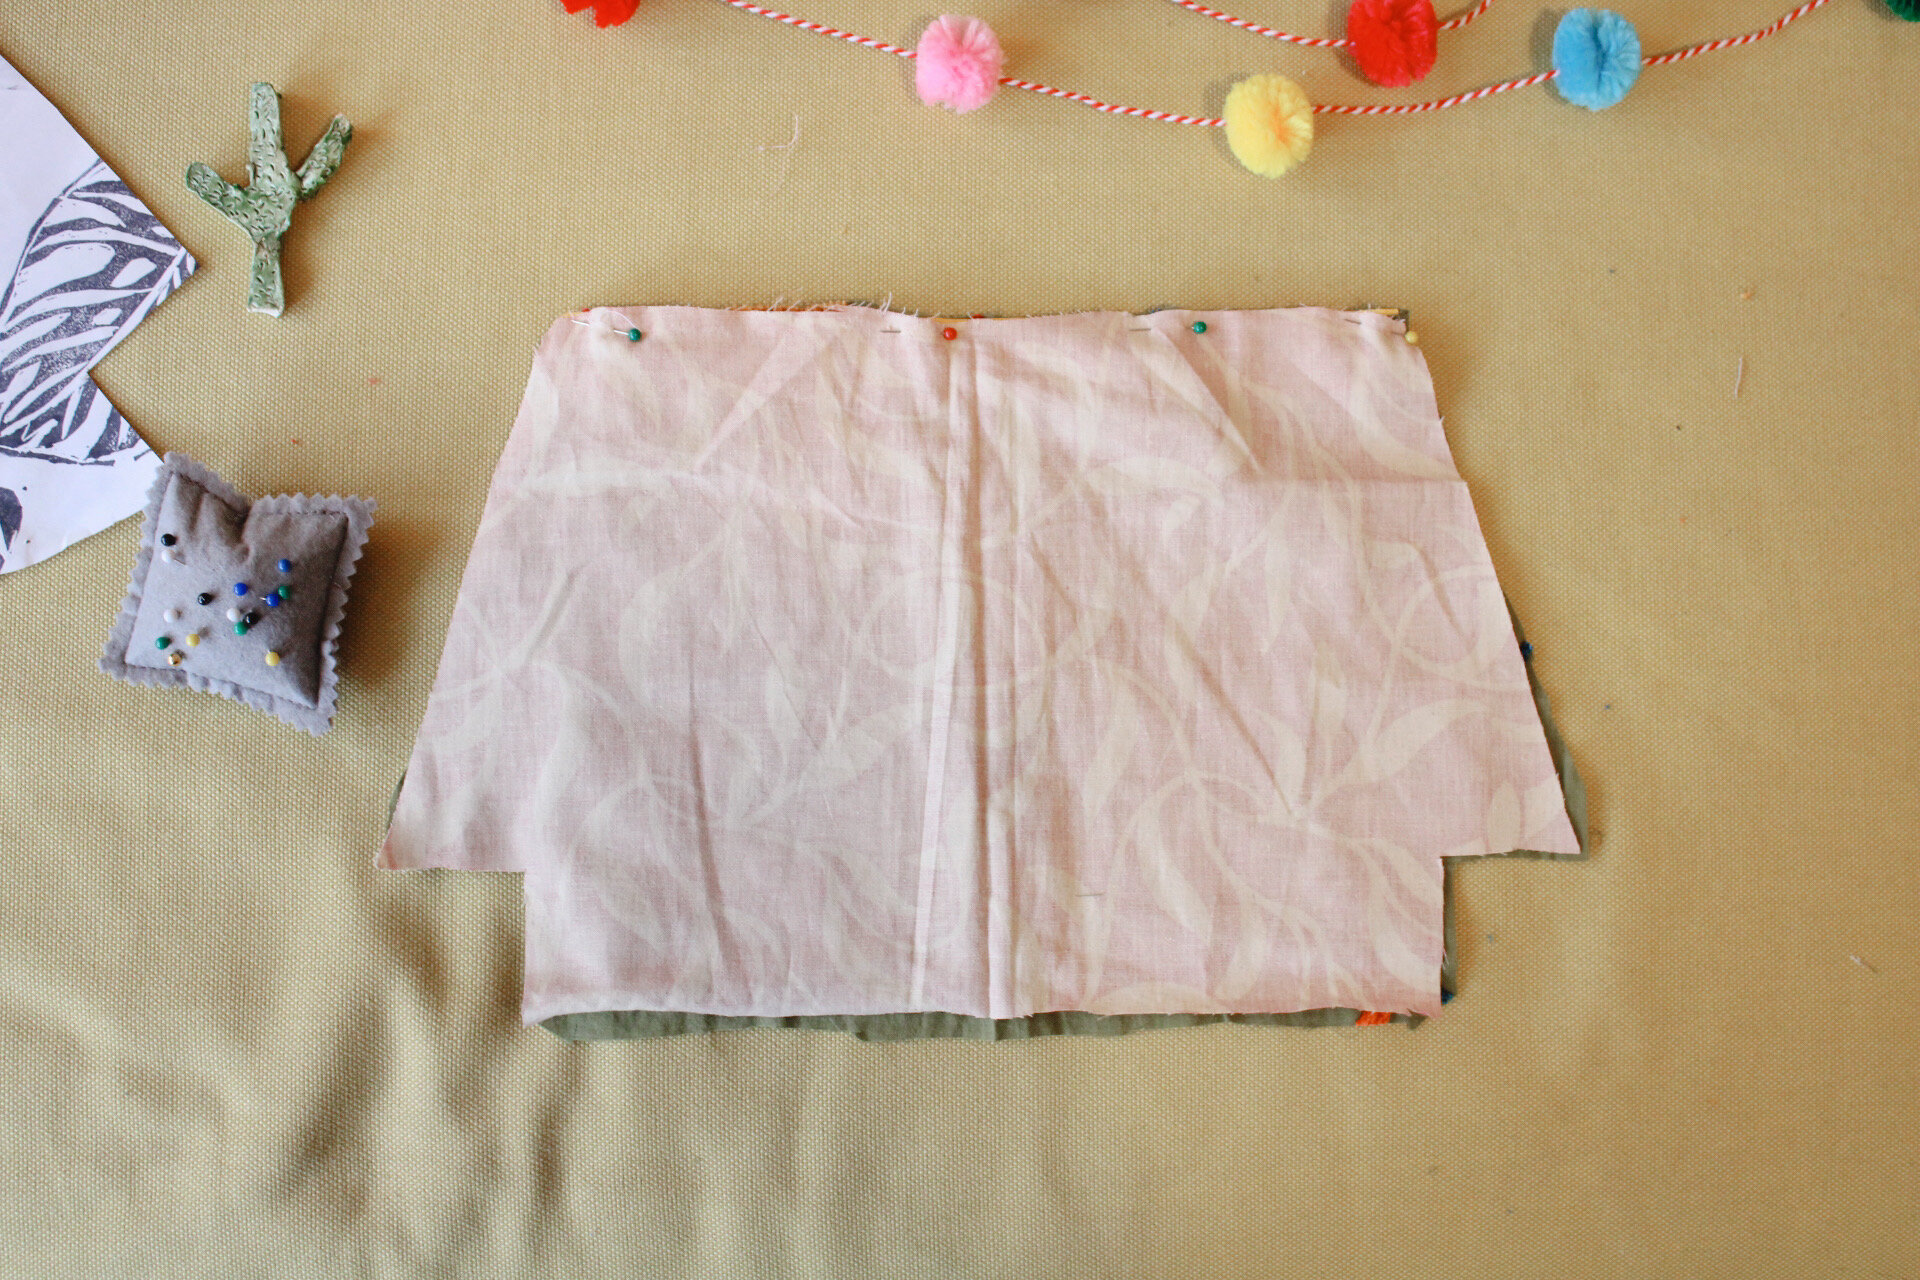
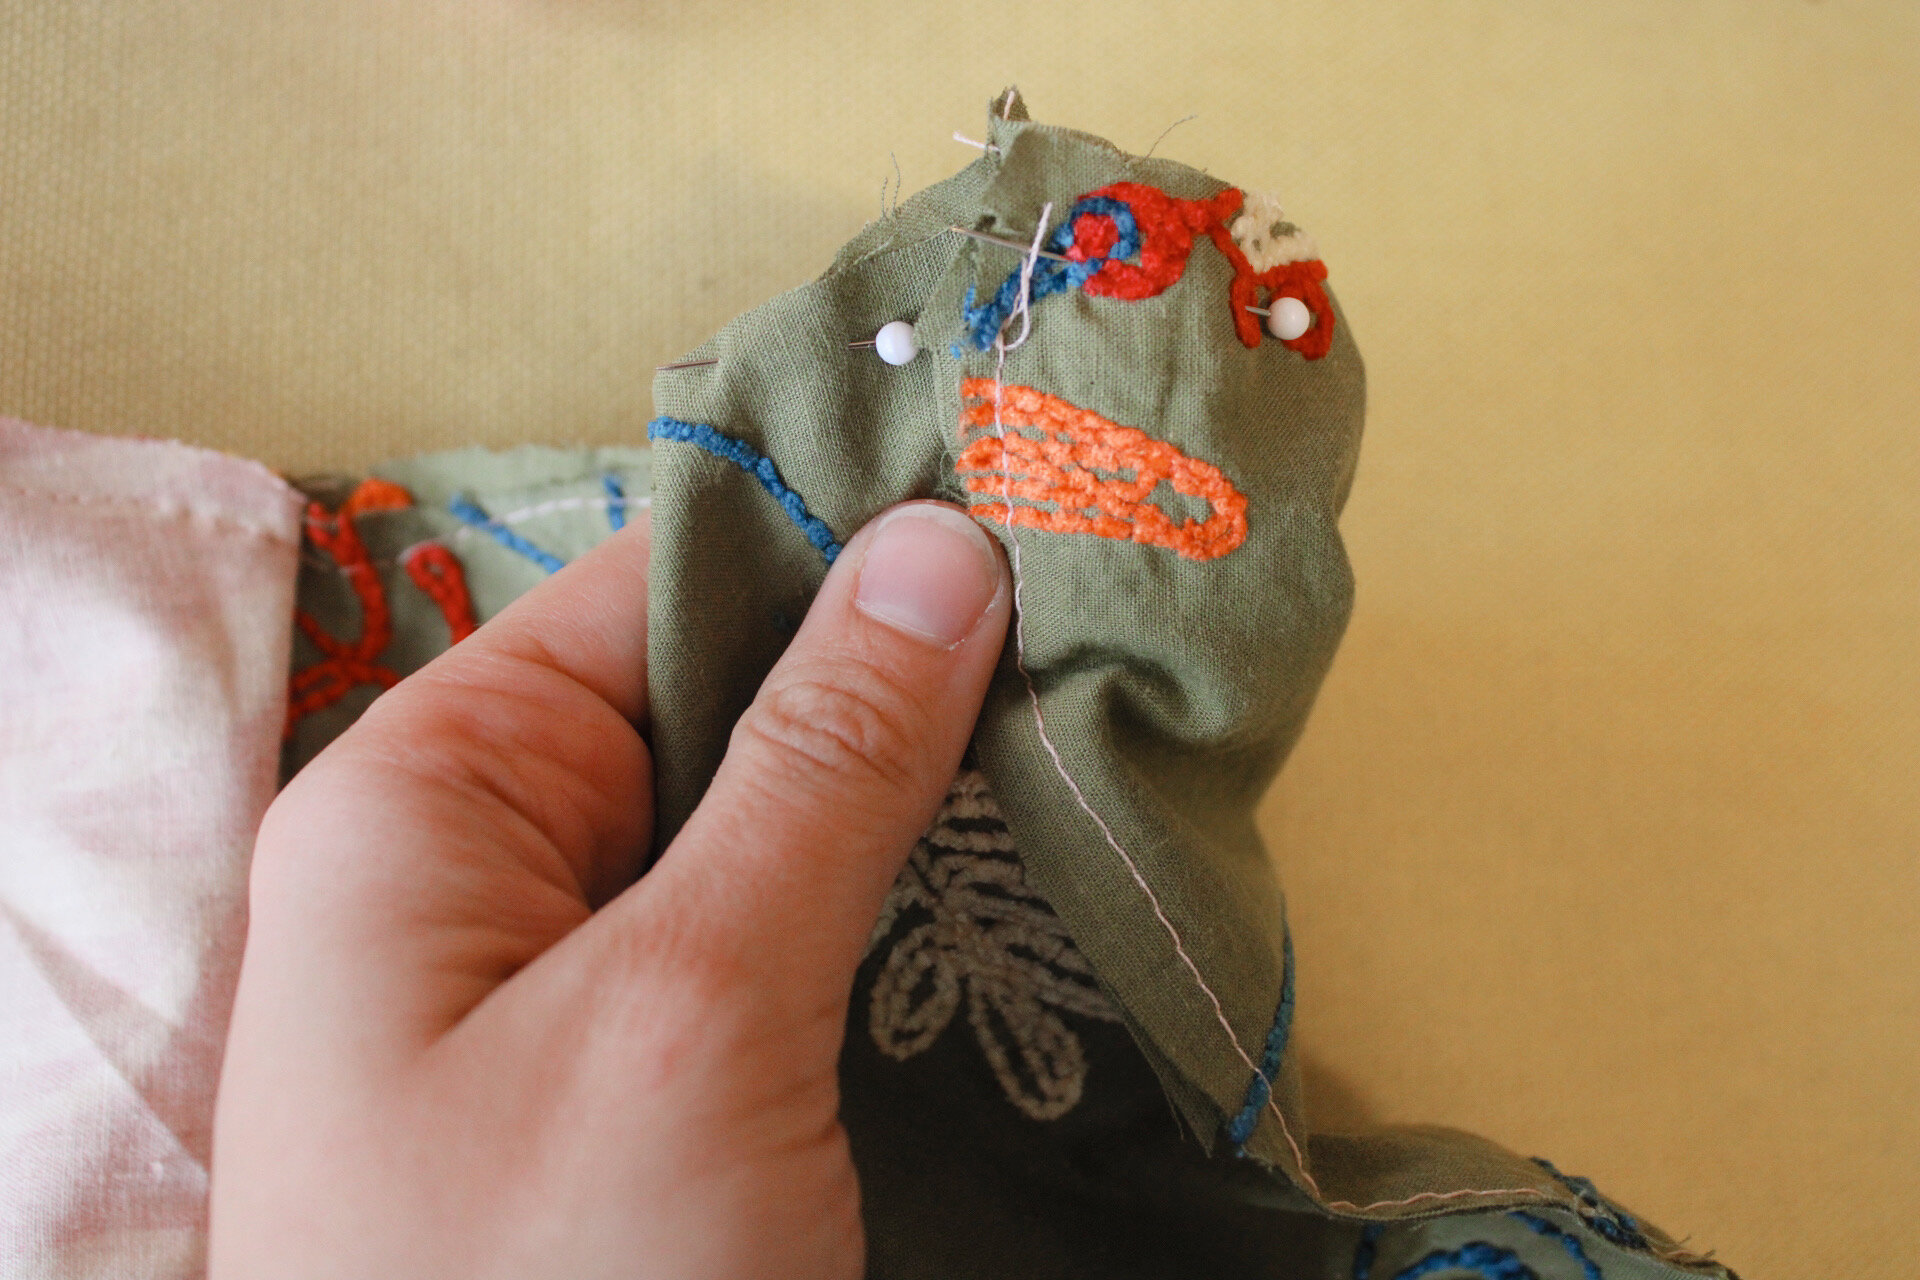
Step Eight: Next you will sew the sides of the pouch. With the zipper STILL OPEN HALF WAY. Pin to secure the exterior to exterior and interior to the interior. The patterns will be facing each other. If the fabrics to not perfectly match up, trim the excess fabric. Then sew around the outer edge seam, skipping the 90 degree angles in the corners (we will box those later) and leaving a 5-6” gap at the bottom of the interior fabrics. Double back over the seams where the zipper edges are. This gives the pouch more security.

Step Nine: Now you will box the corners of the pouch. Align the bottom and side seams of one of the corners. Basically just pulling apart at the sides and creating a straight line. Pin into place and stitch along the horizontal edge. Trim the excess fabric and repeat for the next 3 sides.
Step Ten: Next turn the bag right side out through the opening in the interior fabric. Check to make sure all the seams are together and there are no holes. Now seam the hole in the interior fabric folding the edges internally and pinning together. Sew horizontally across. Push the interior fabric into the pouch, straighten everything out and close the zipper.

You have now created a zipper pouch! You can use this for anything you want; makeup, craft supplies, on the go coping skills kits, a place to keep your workout clothes. You can even increase the measurements to make a larger version to hold even more things!
