
Warping An Embroidery Hoop Circle Loom
I recently posted about how weaving on a circle loom has been all the rage for me lately. I have really enjoined the ability to weave in a circle as well as experiment with weaving across the circle. It has really opened my eyes to the improvisational way of weaving because when I am weaving in a circle I often go in without a plan and let the colors guide me through the experience.
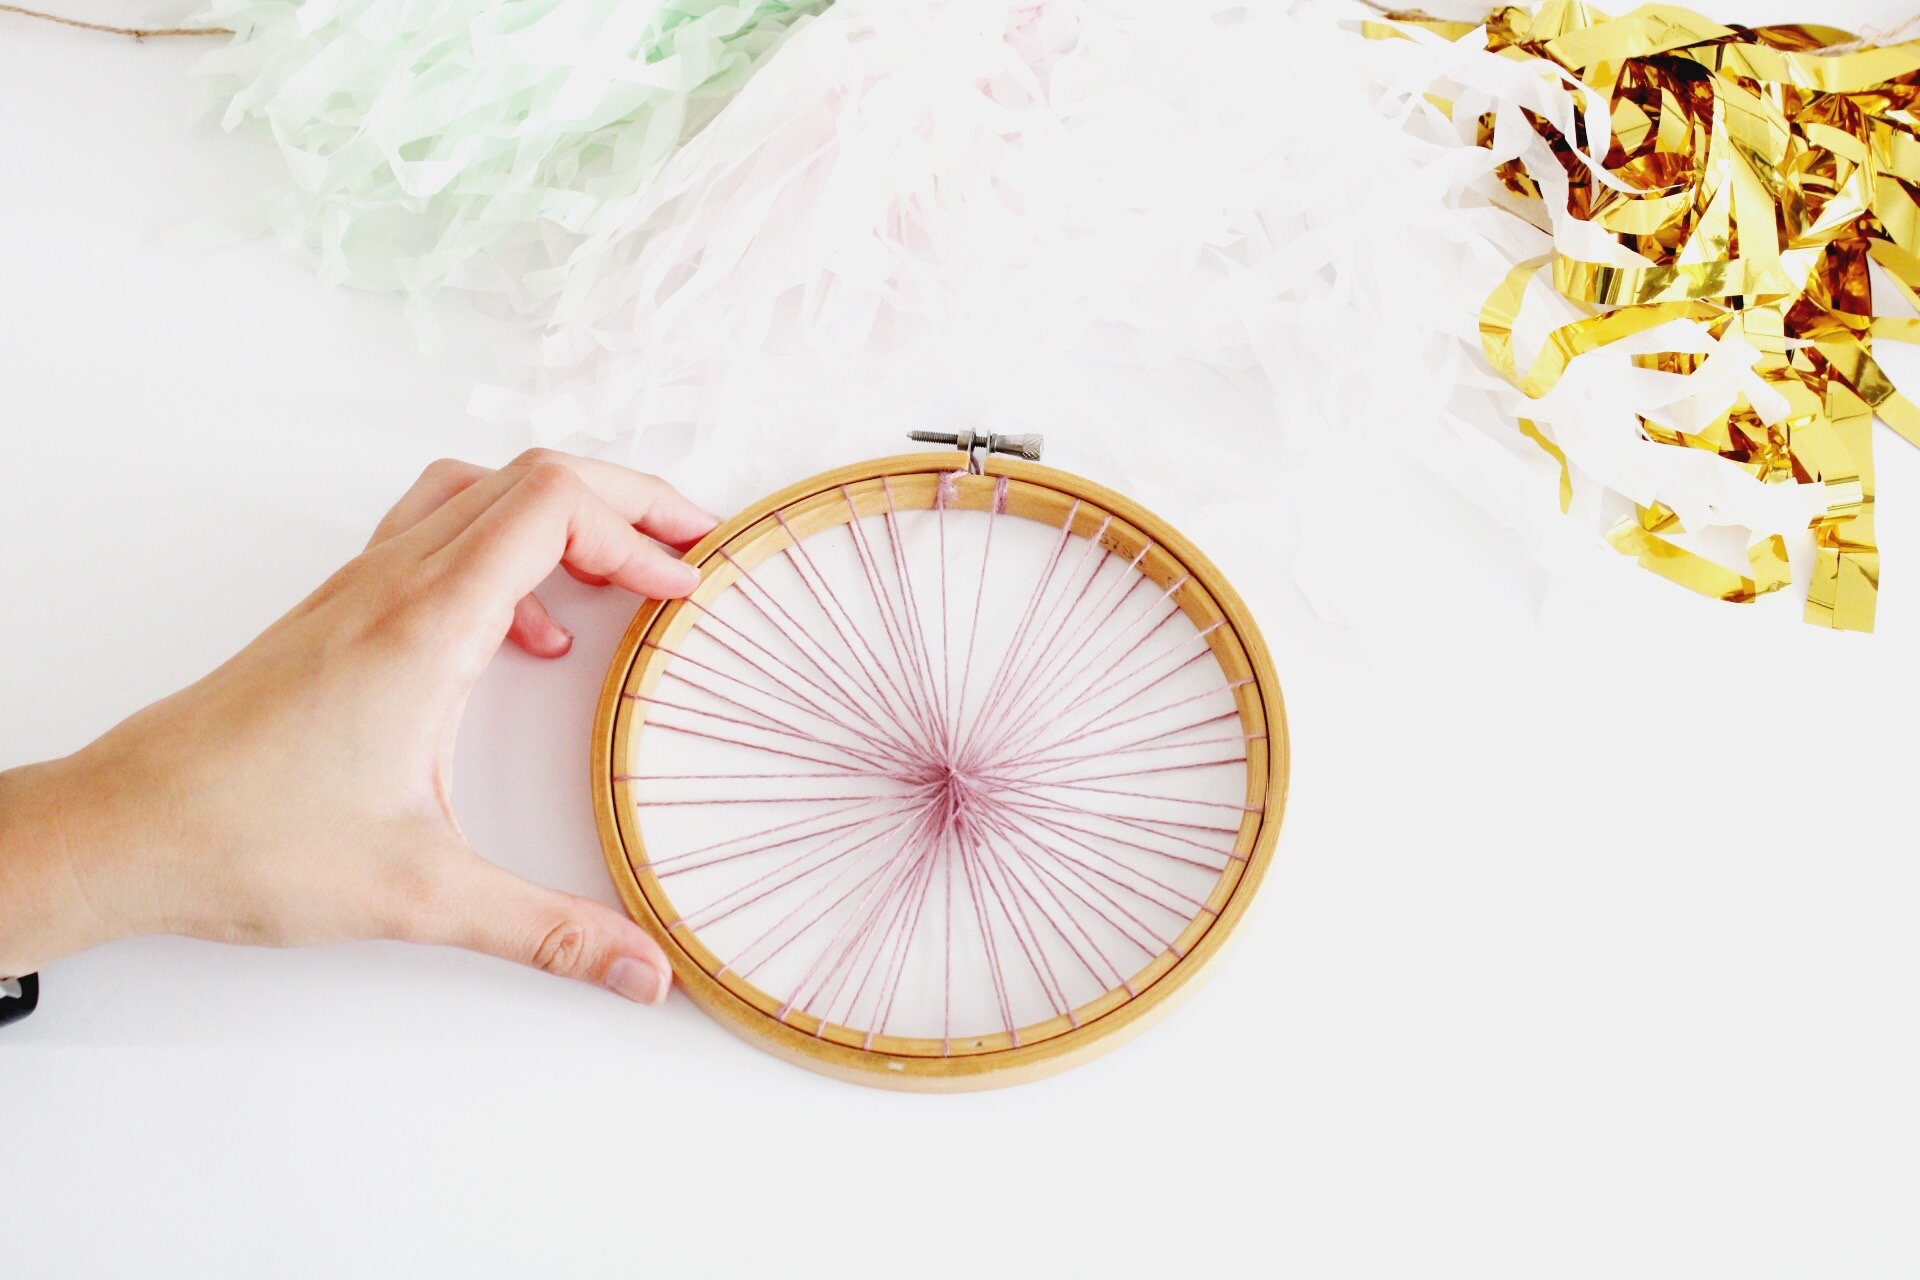
There are plenty of ways to go about circle weaving, but my favorite way to go about it is to use an embroidery hoop! They are pretty cheap and when you put the outer hoop over the weaving it creates this nice wooden border that is super nice looking. You also could wrap the inner hoop, that you warp with yarn and add some fun texture that way.
SUPPLIES:

-Embroidery hoop
-Yarn
-Scissors
THE STEPS:
01. Remove the outer ring and set it aside.

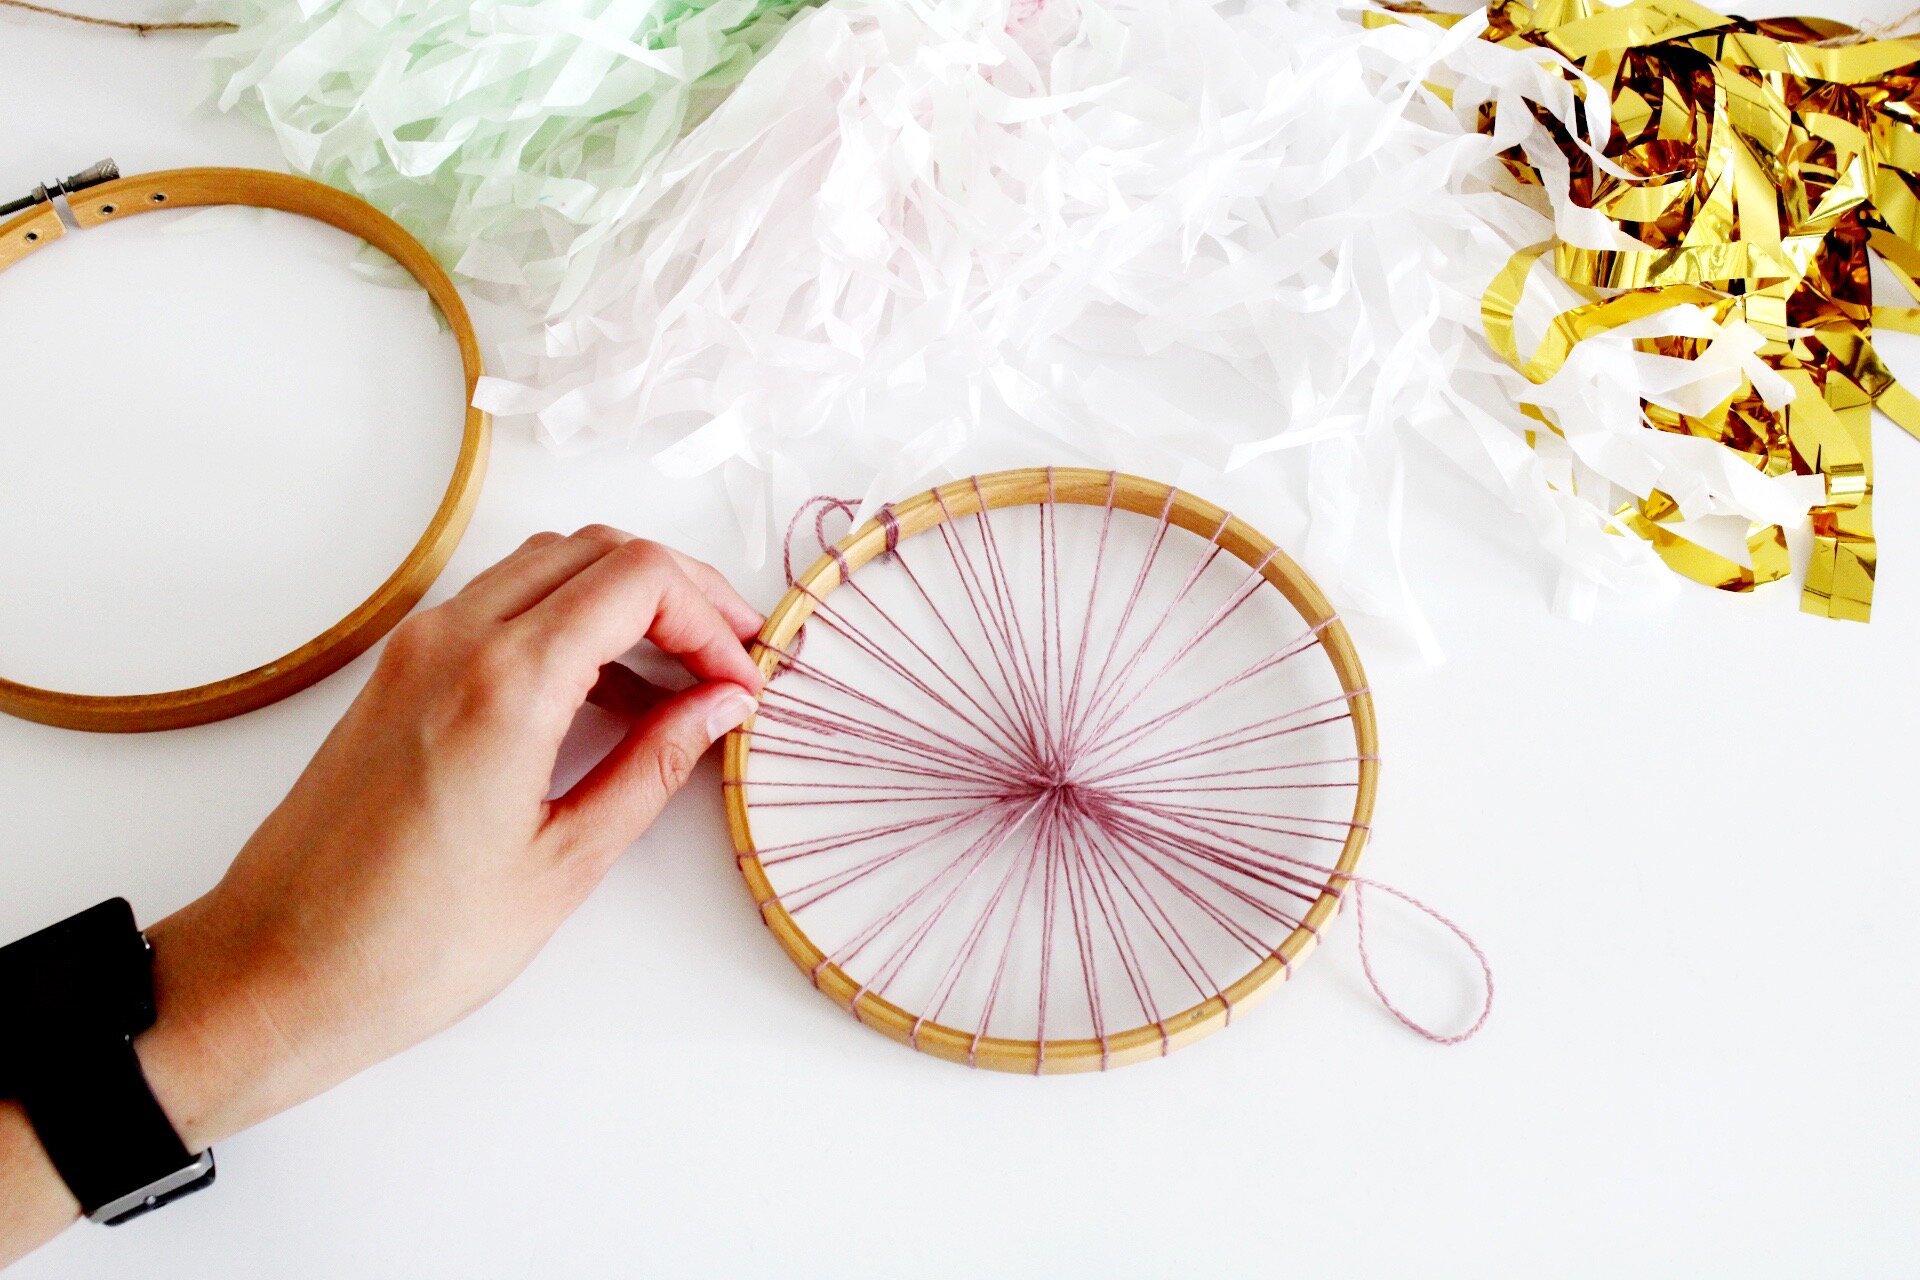
02. Gather a large amount of thin string to use as the warp. The more the better! Tie your warp thread to the embroidery hoop by wrapping the string around the hoop two times and tying a knot.

03. Pull the warp thread straight across the hoop to the bottom.

04. Bring the warp thread over the hoop and then down and around the hoop. The sting should be behind the hoop now.
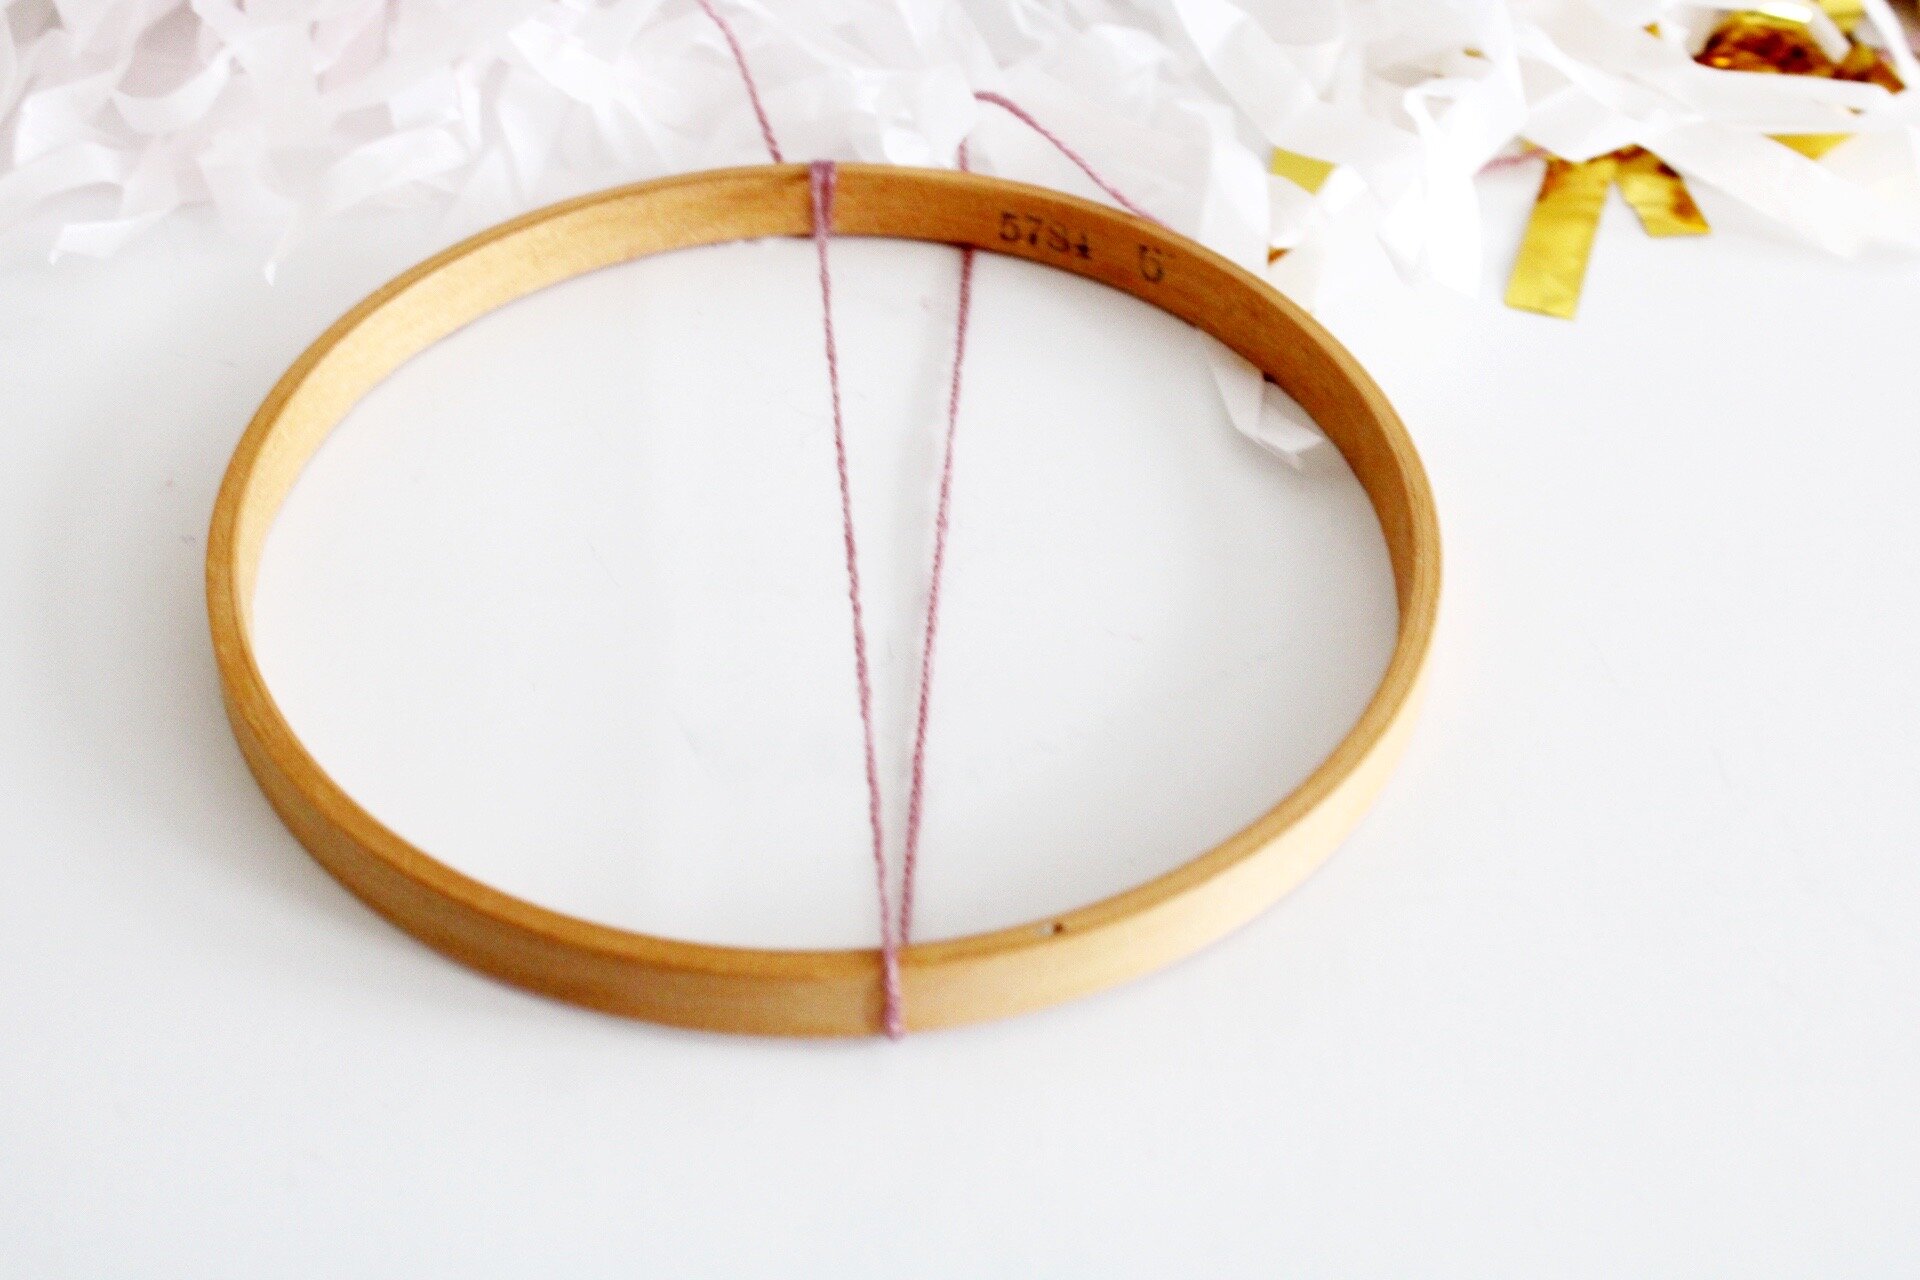
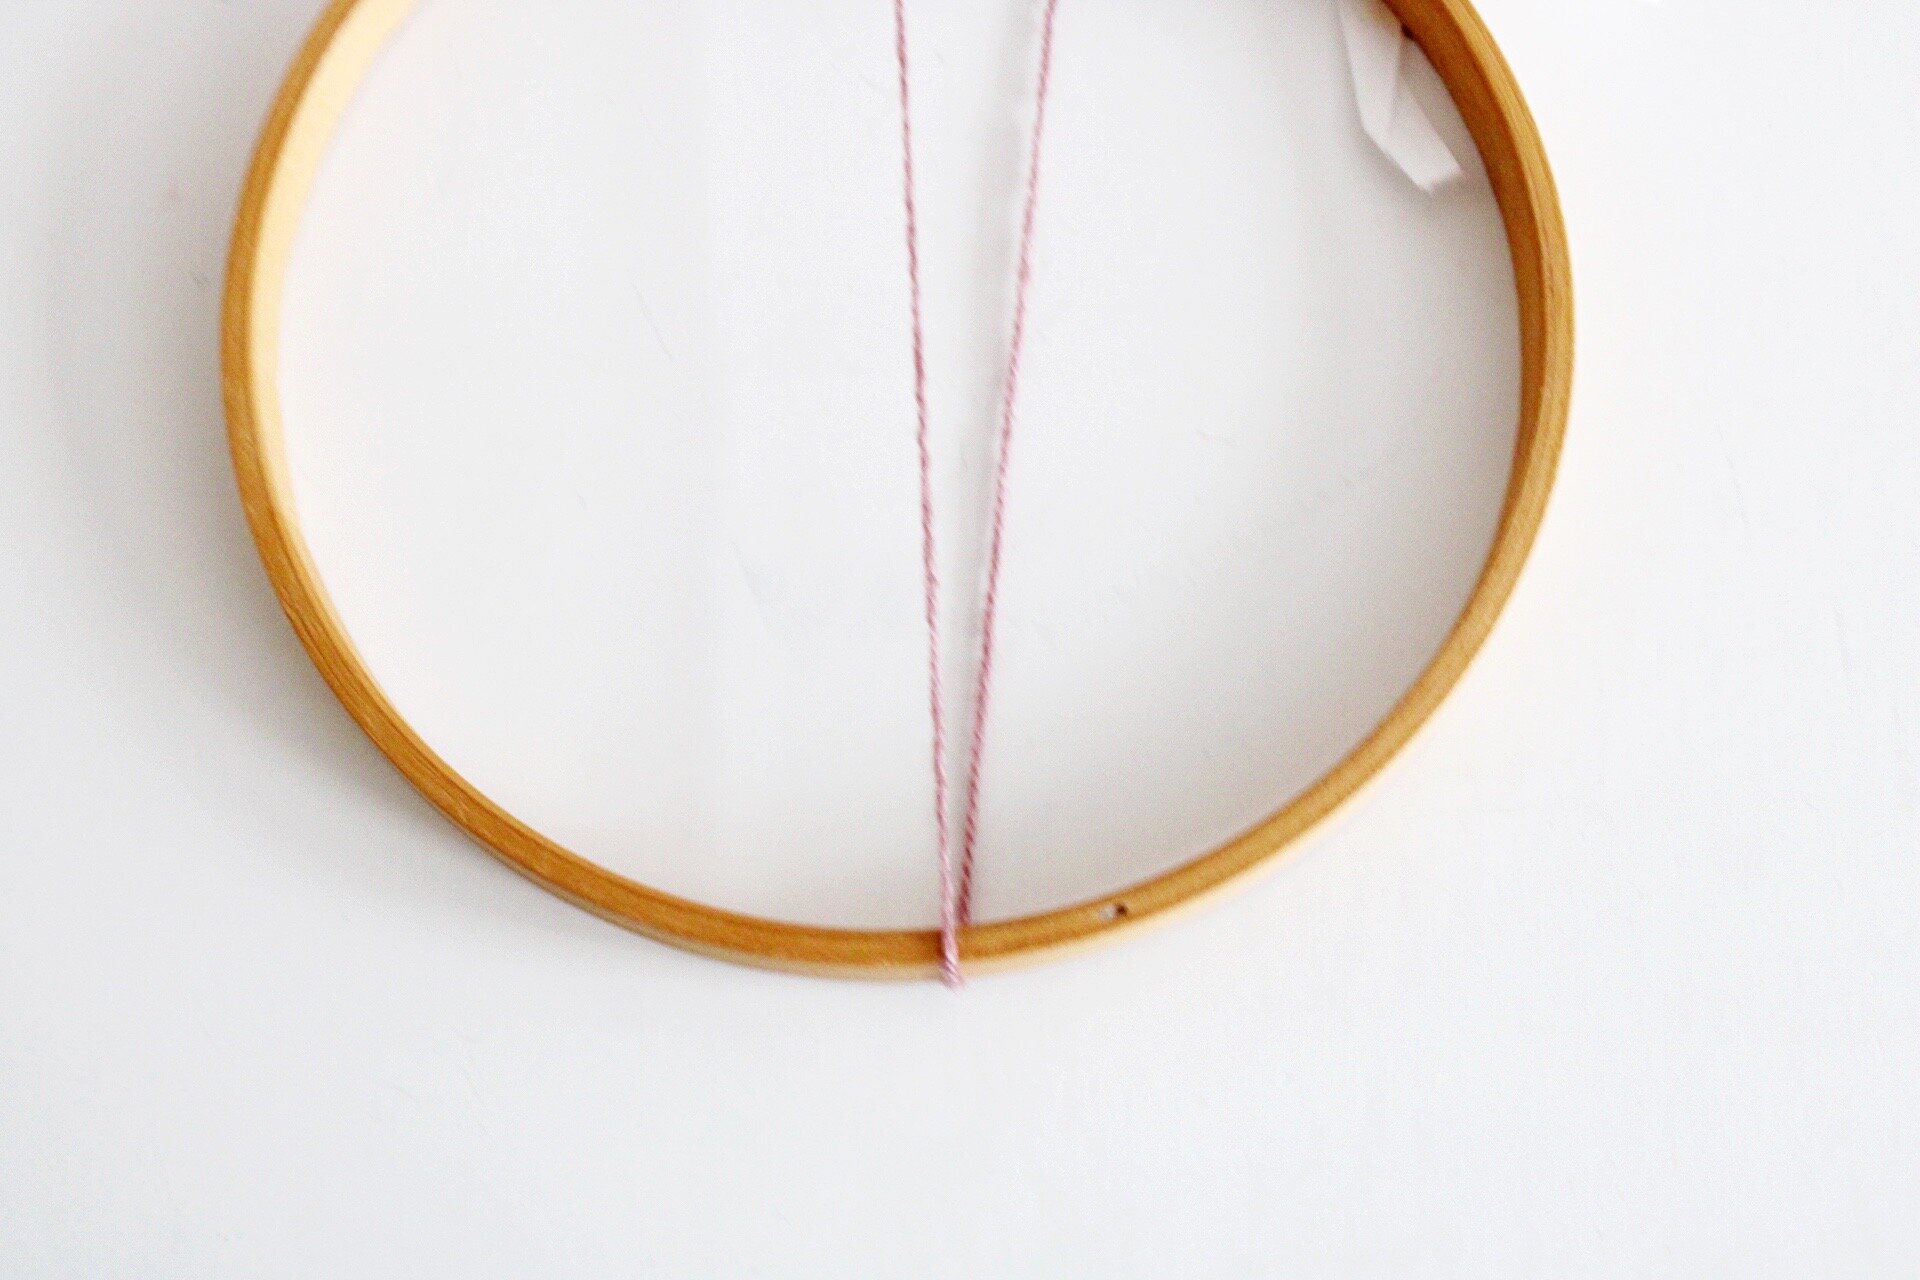
05. Now pull the warp thread back towards the center, but an inch or so to the right side of where you tied your warp thread.

Basically what is going to happen here, is you are making some figure eights that all meet in the middle as like an X. The way I like to think about it is that as you wrap around the top, there should be a corresponding wrap at the bottom on the diagonal, this will continue around the circle. I hope that makes sense as we continue!
06. Your thread that is an inch from the tie, pass the warp over and around the hoop so it comes out the bottom.
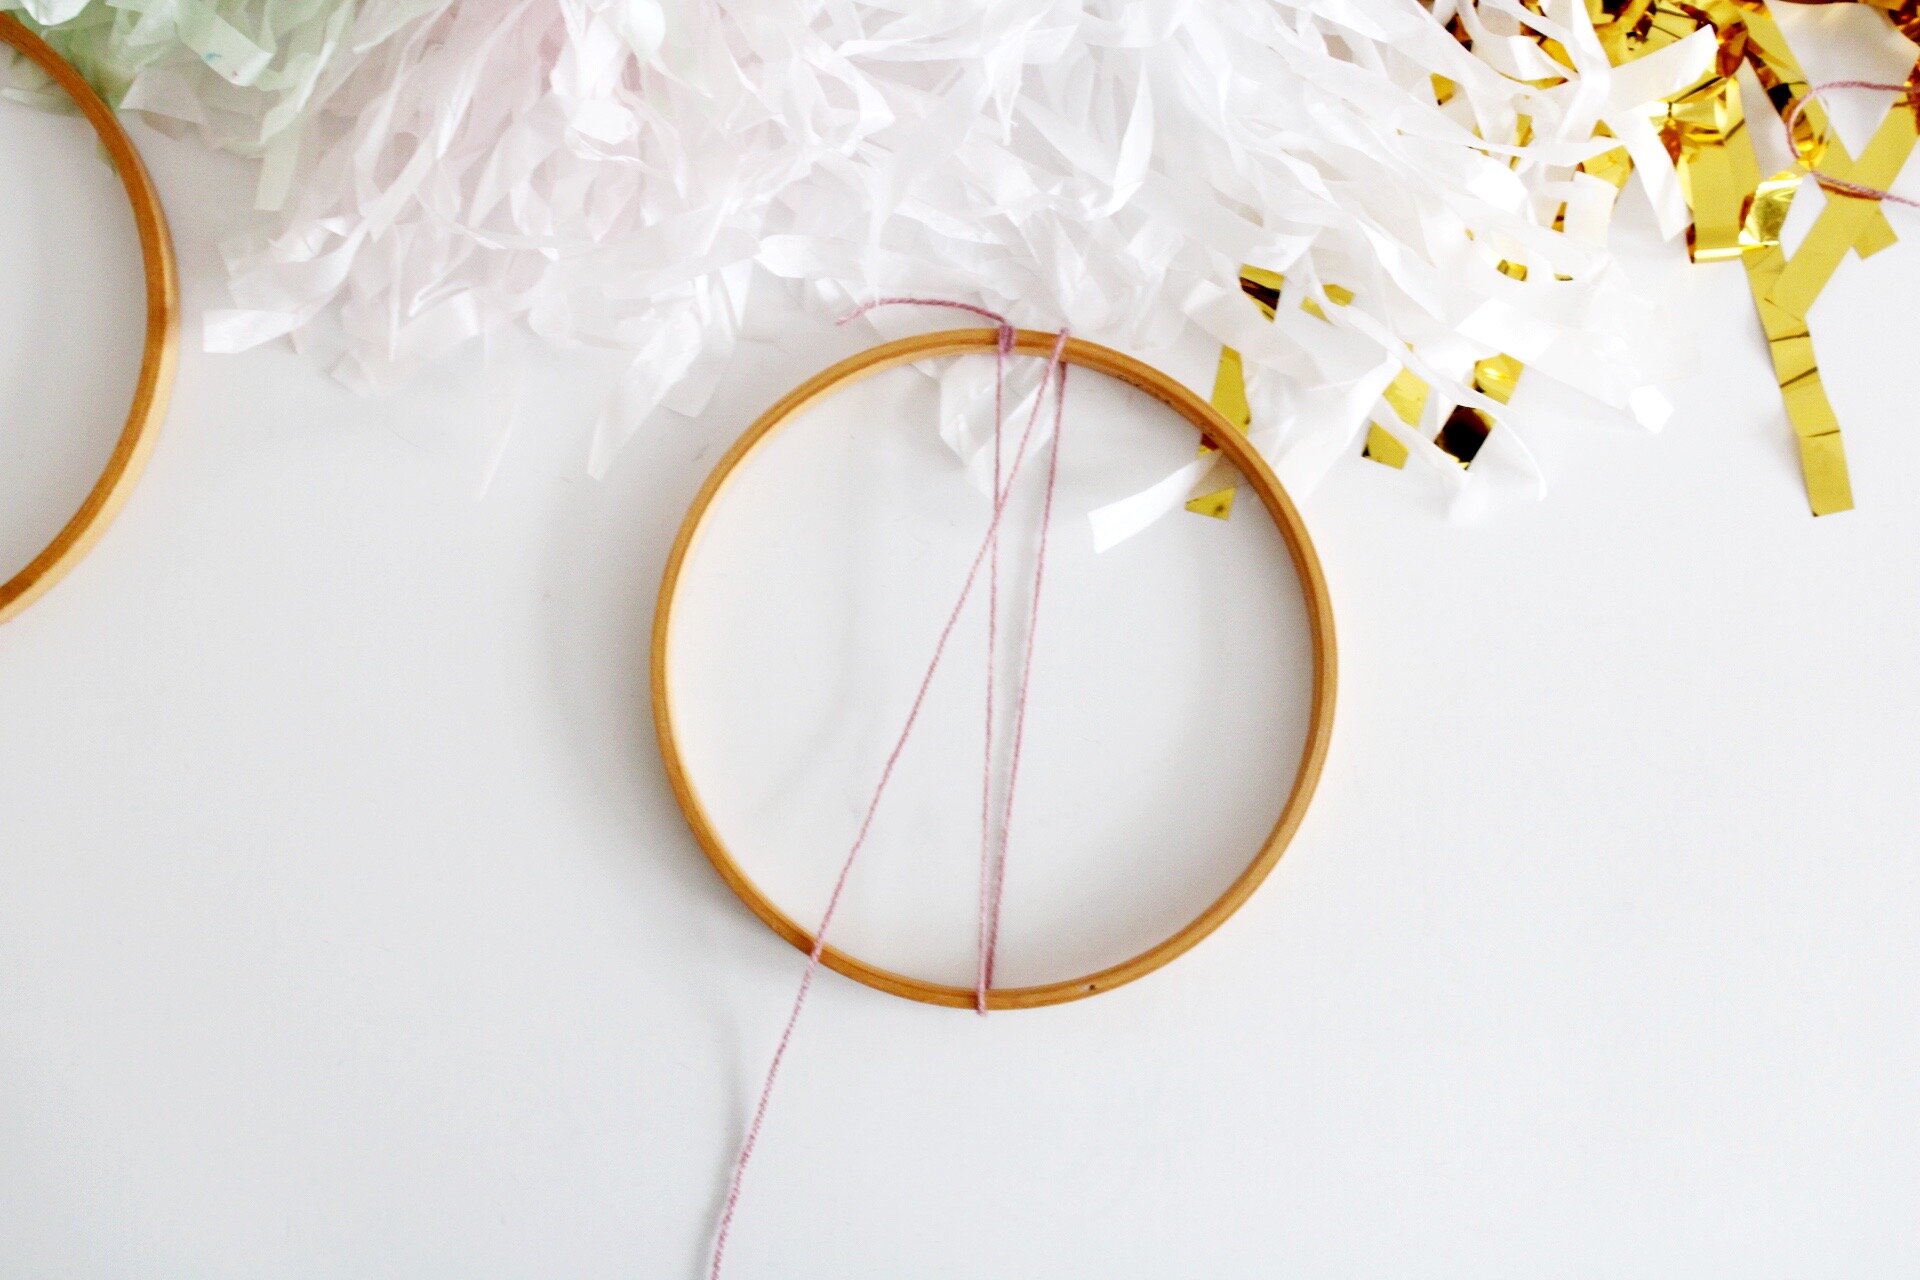
07. Continue to bring the warp thread across the loom to the corresponding diagonal space an inch to the right of the previous thread. You will always be passing the thread over an edge and then around to the bottom and over to the next spot.

08. Continue with your figure eight shapes until you are an inch away from the last open spot on the loom. Loop the warp thread over and around the last stop. You will then wrap the thread two times around the hoop, tying two knots to secure. You can push them to be close together to create one section.
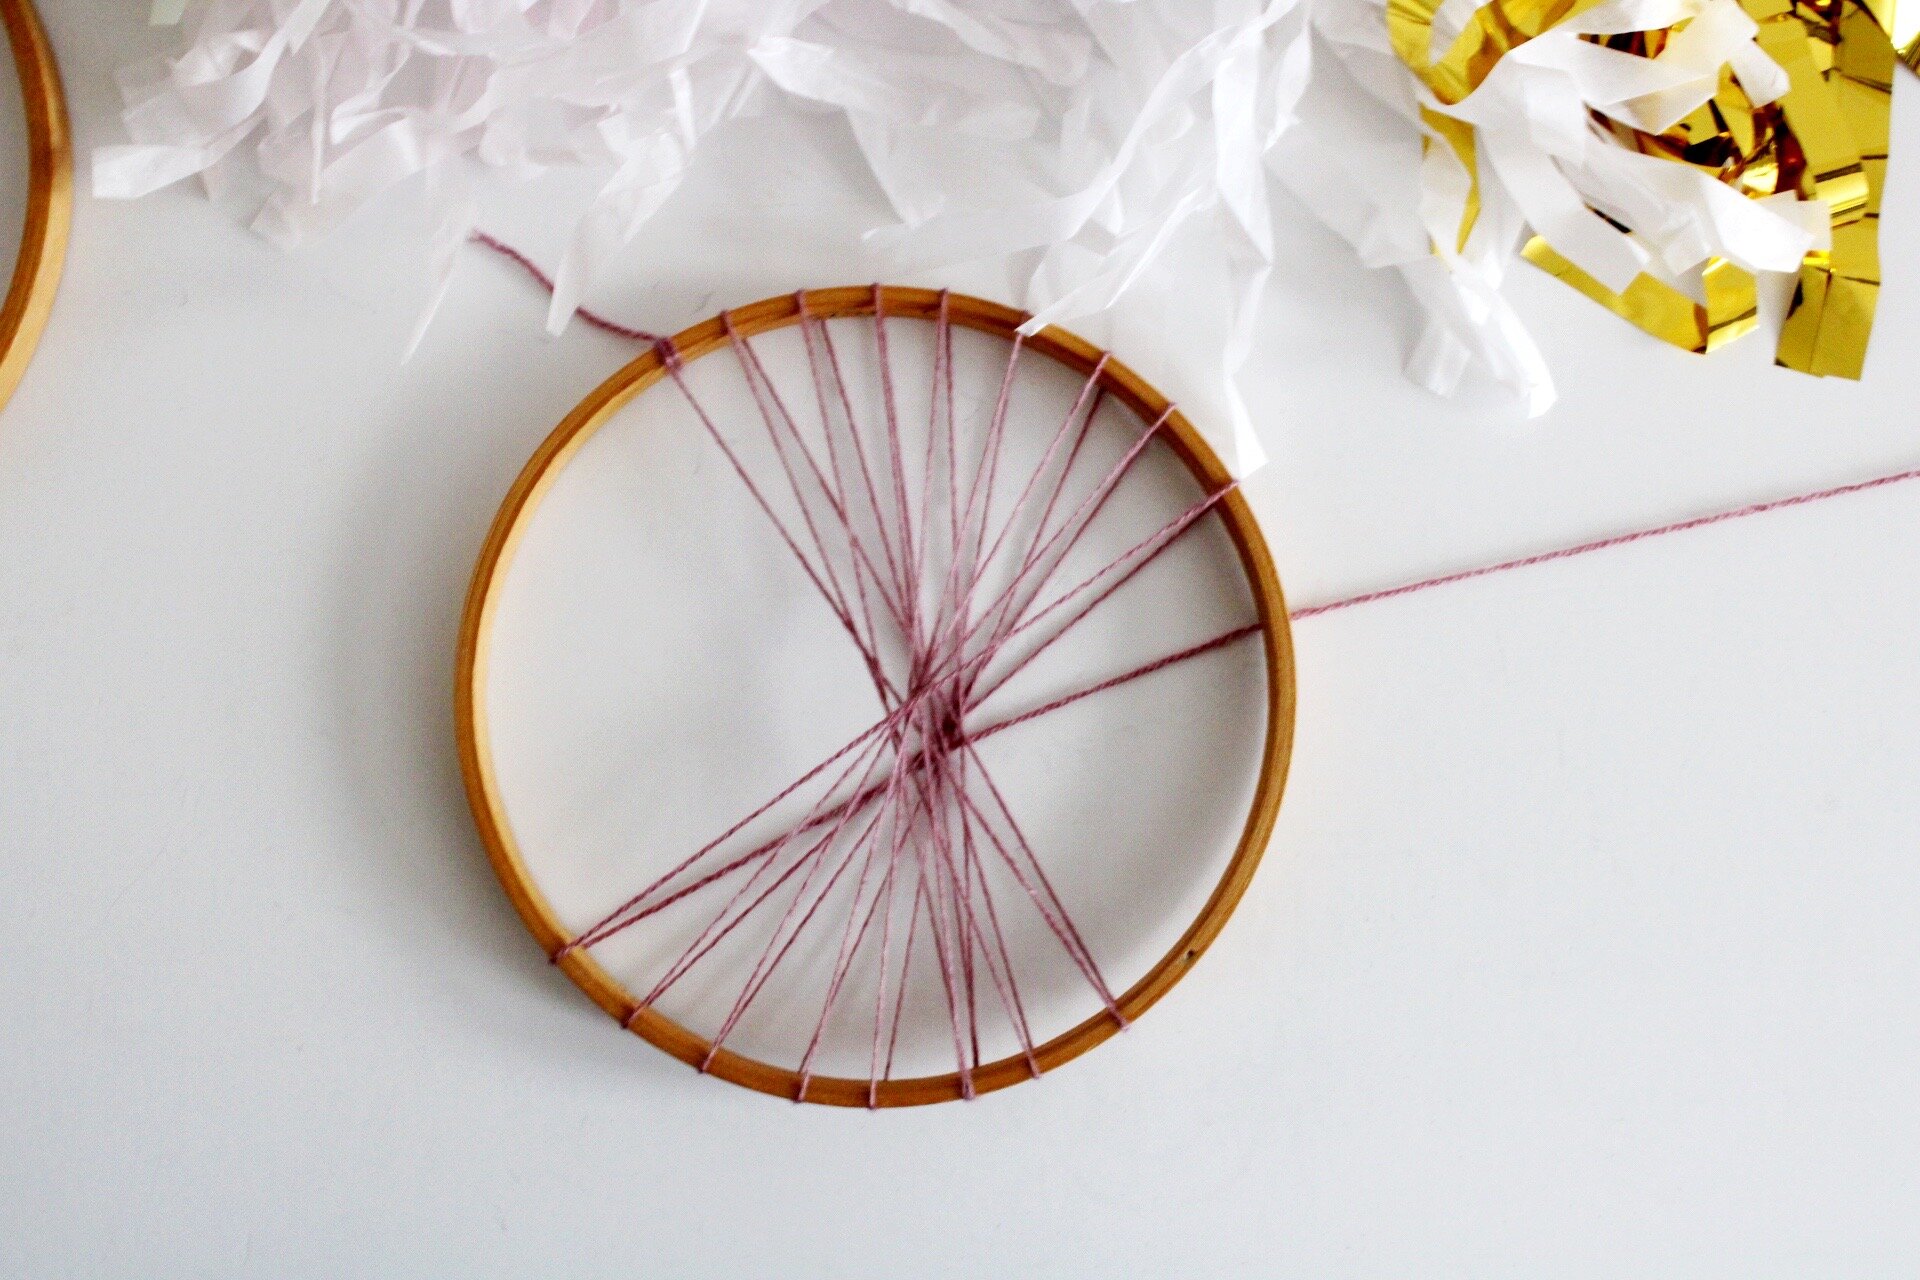
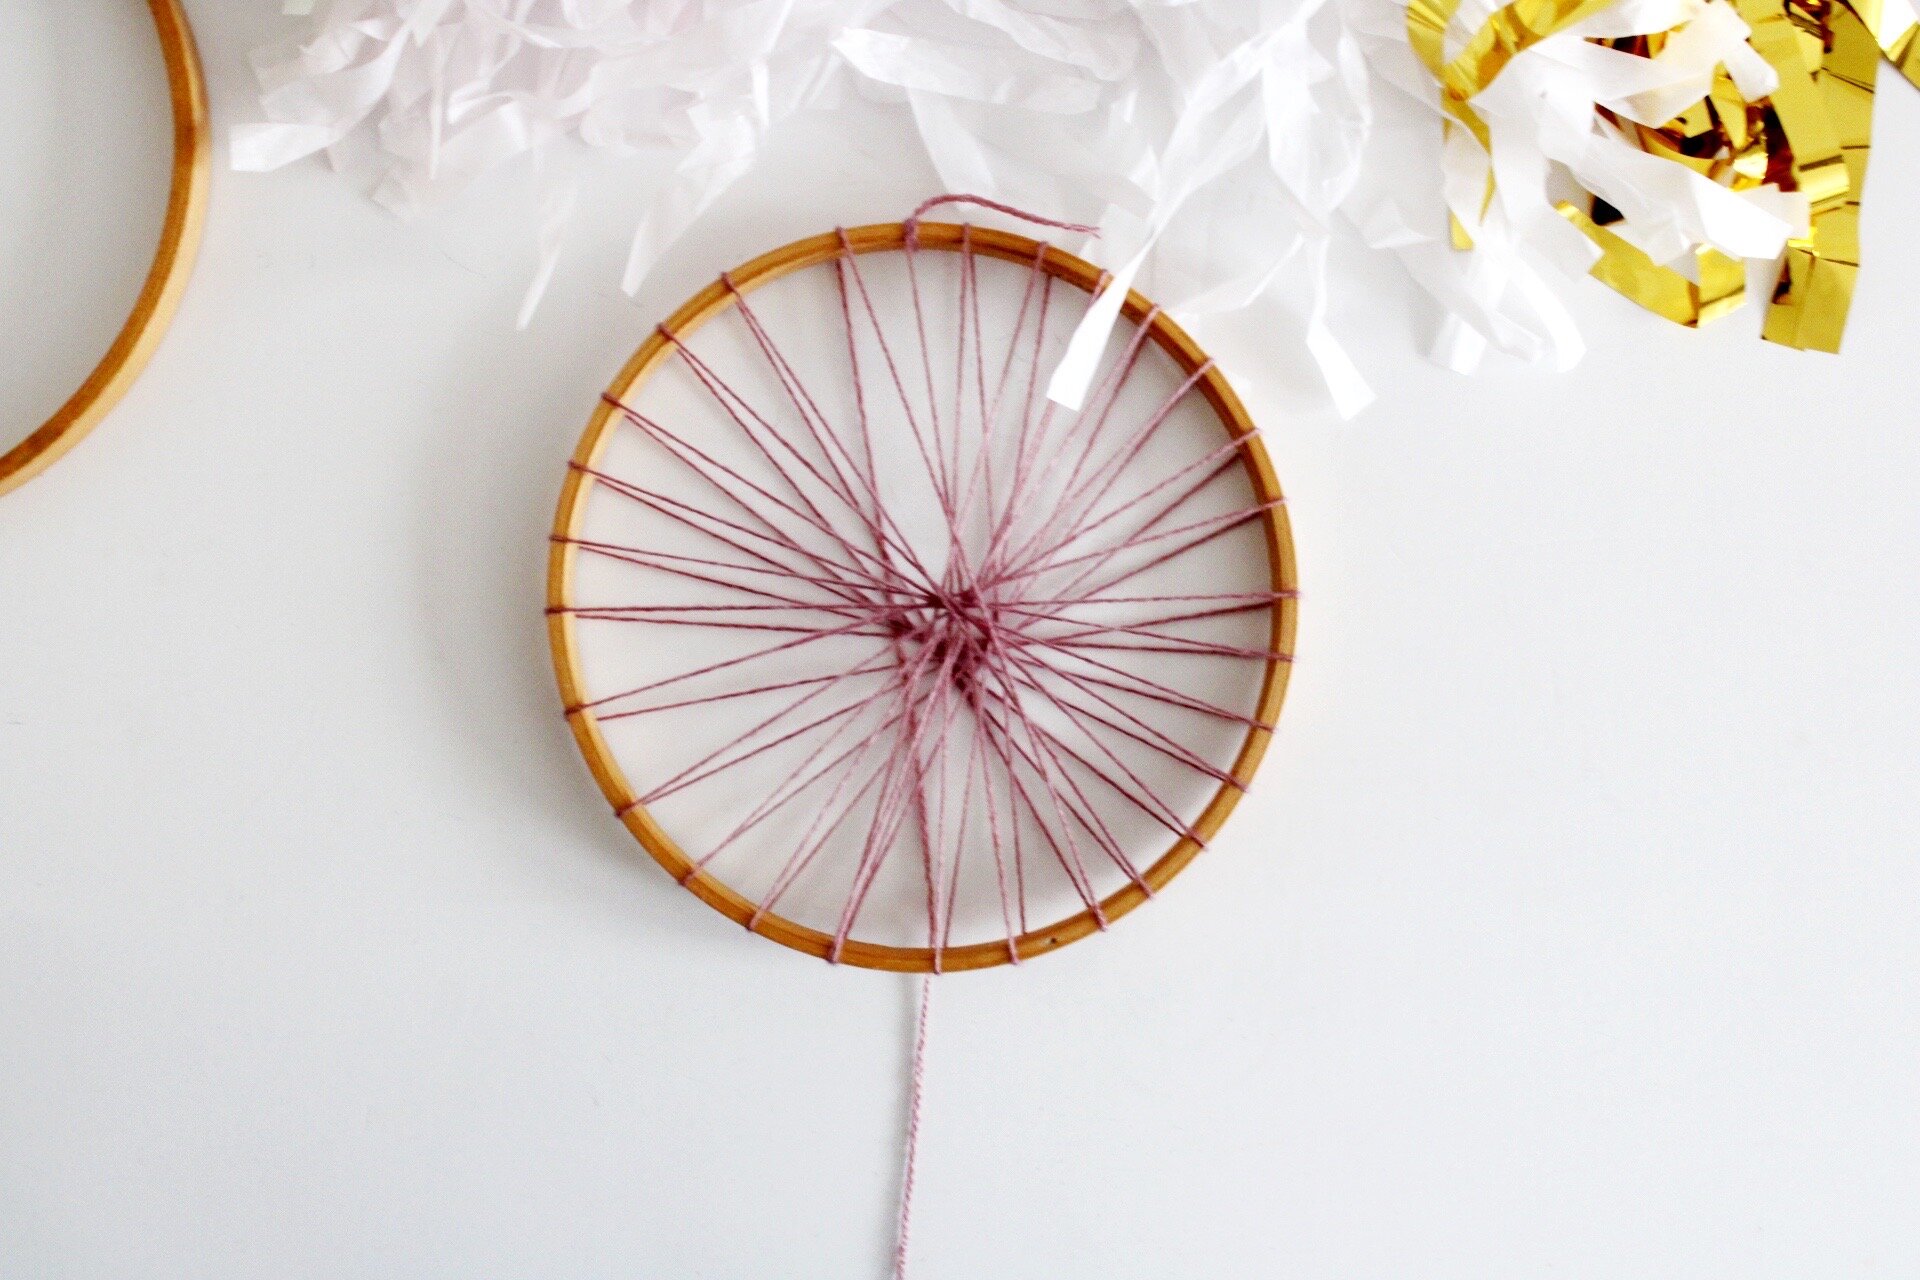
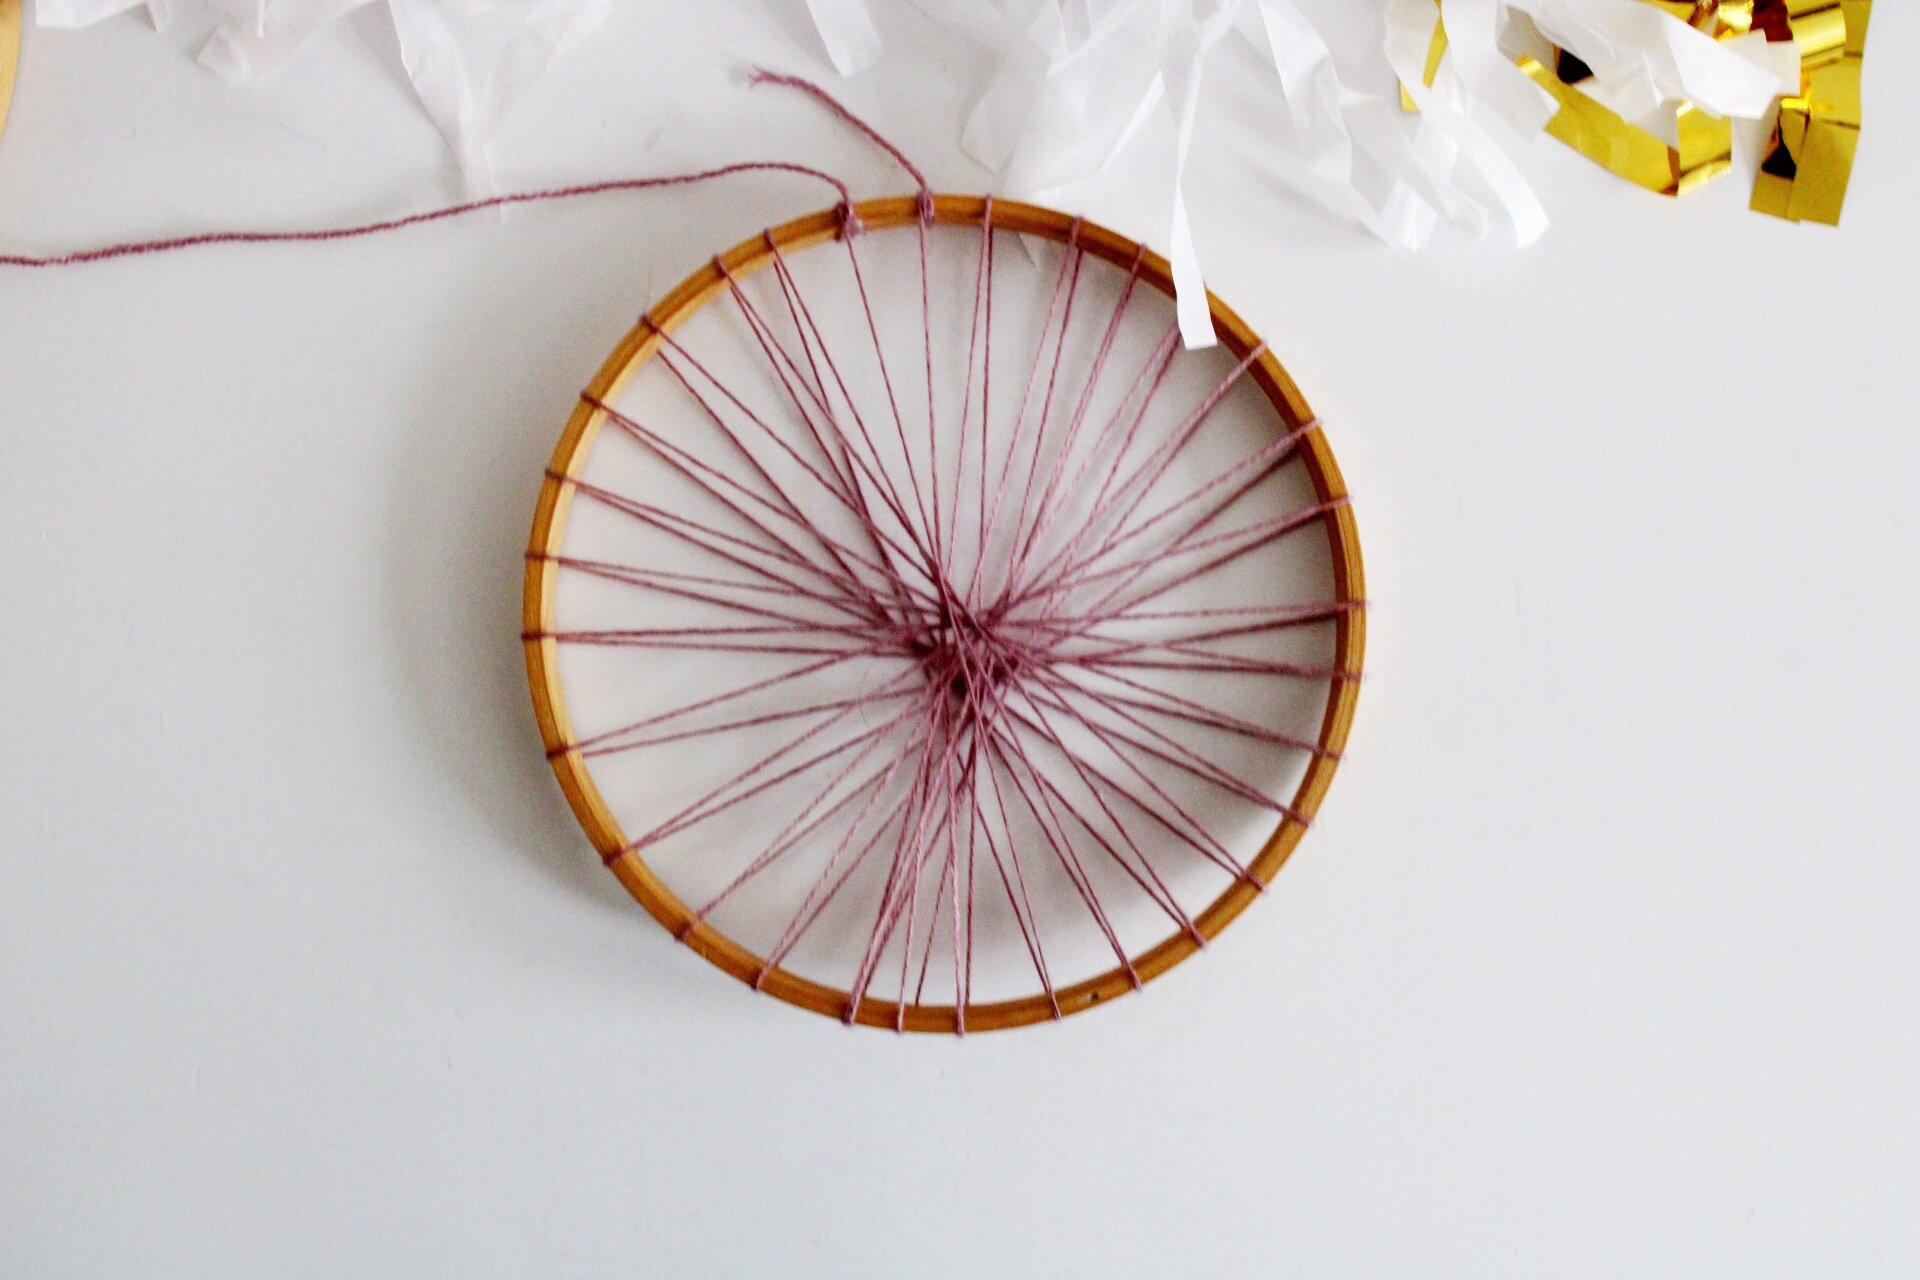
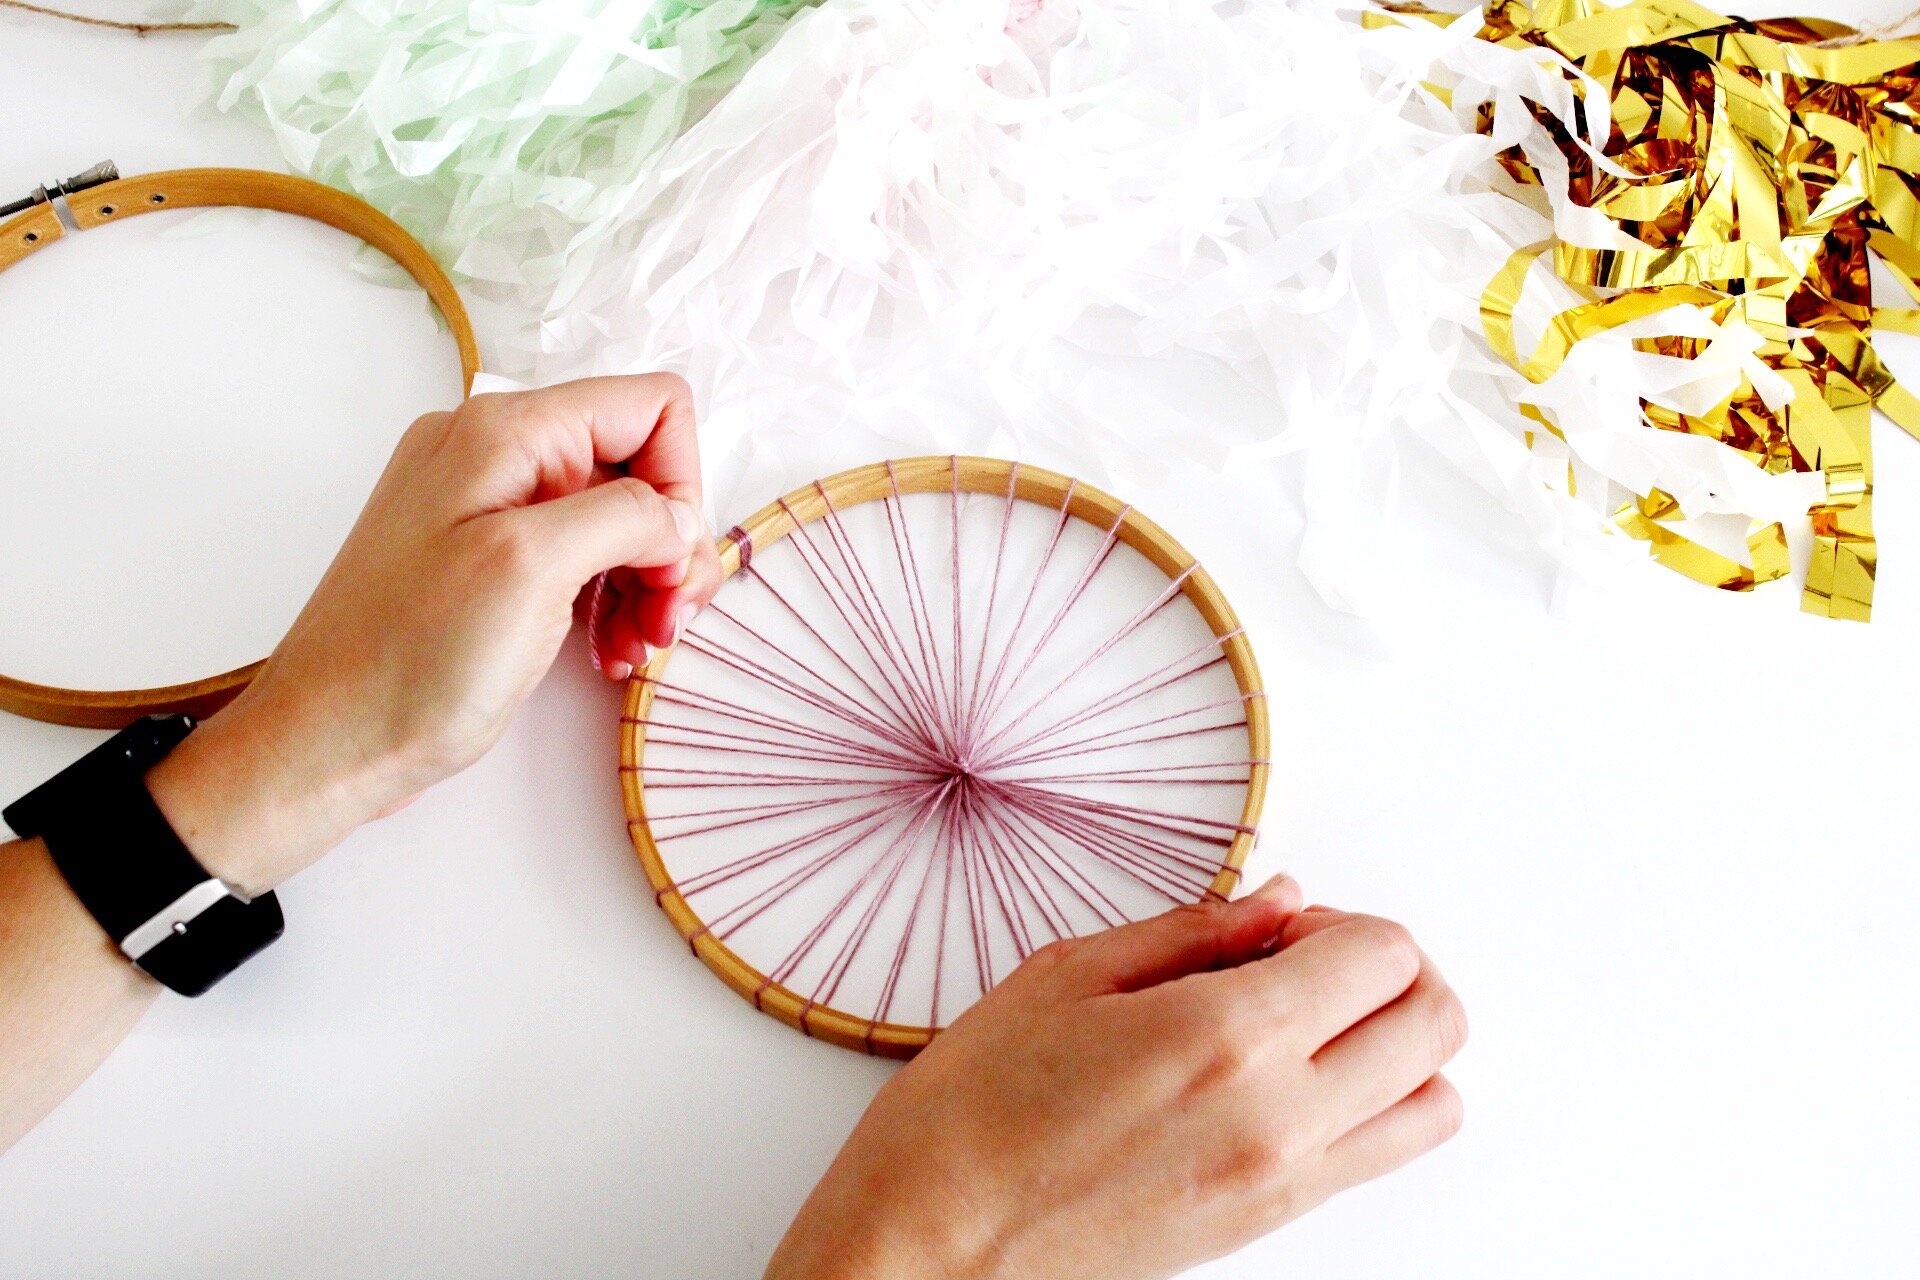
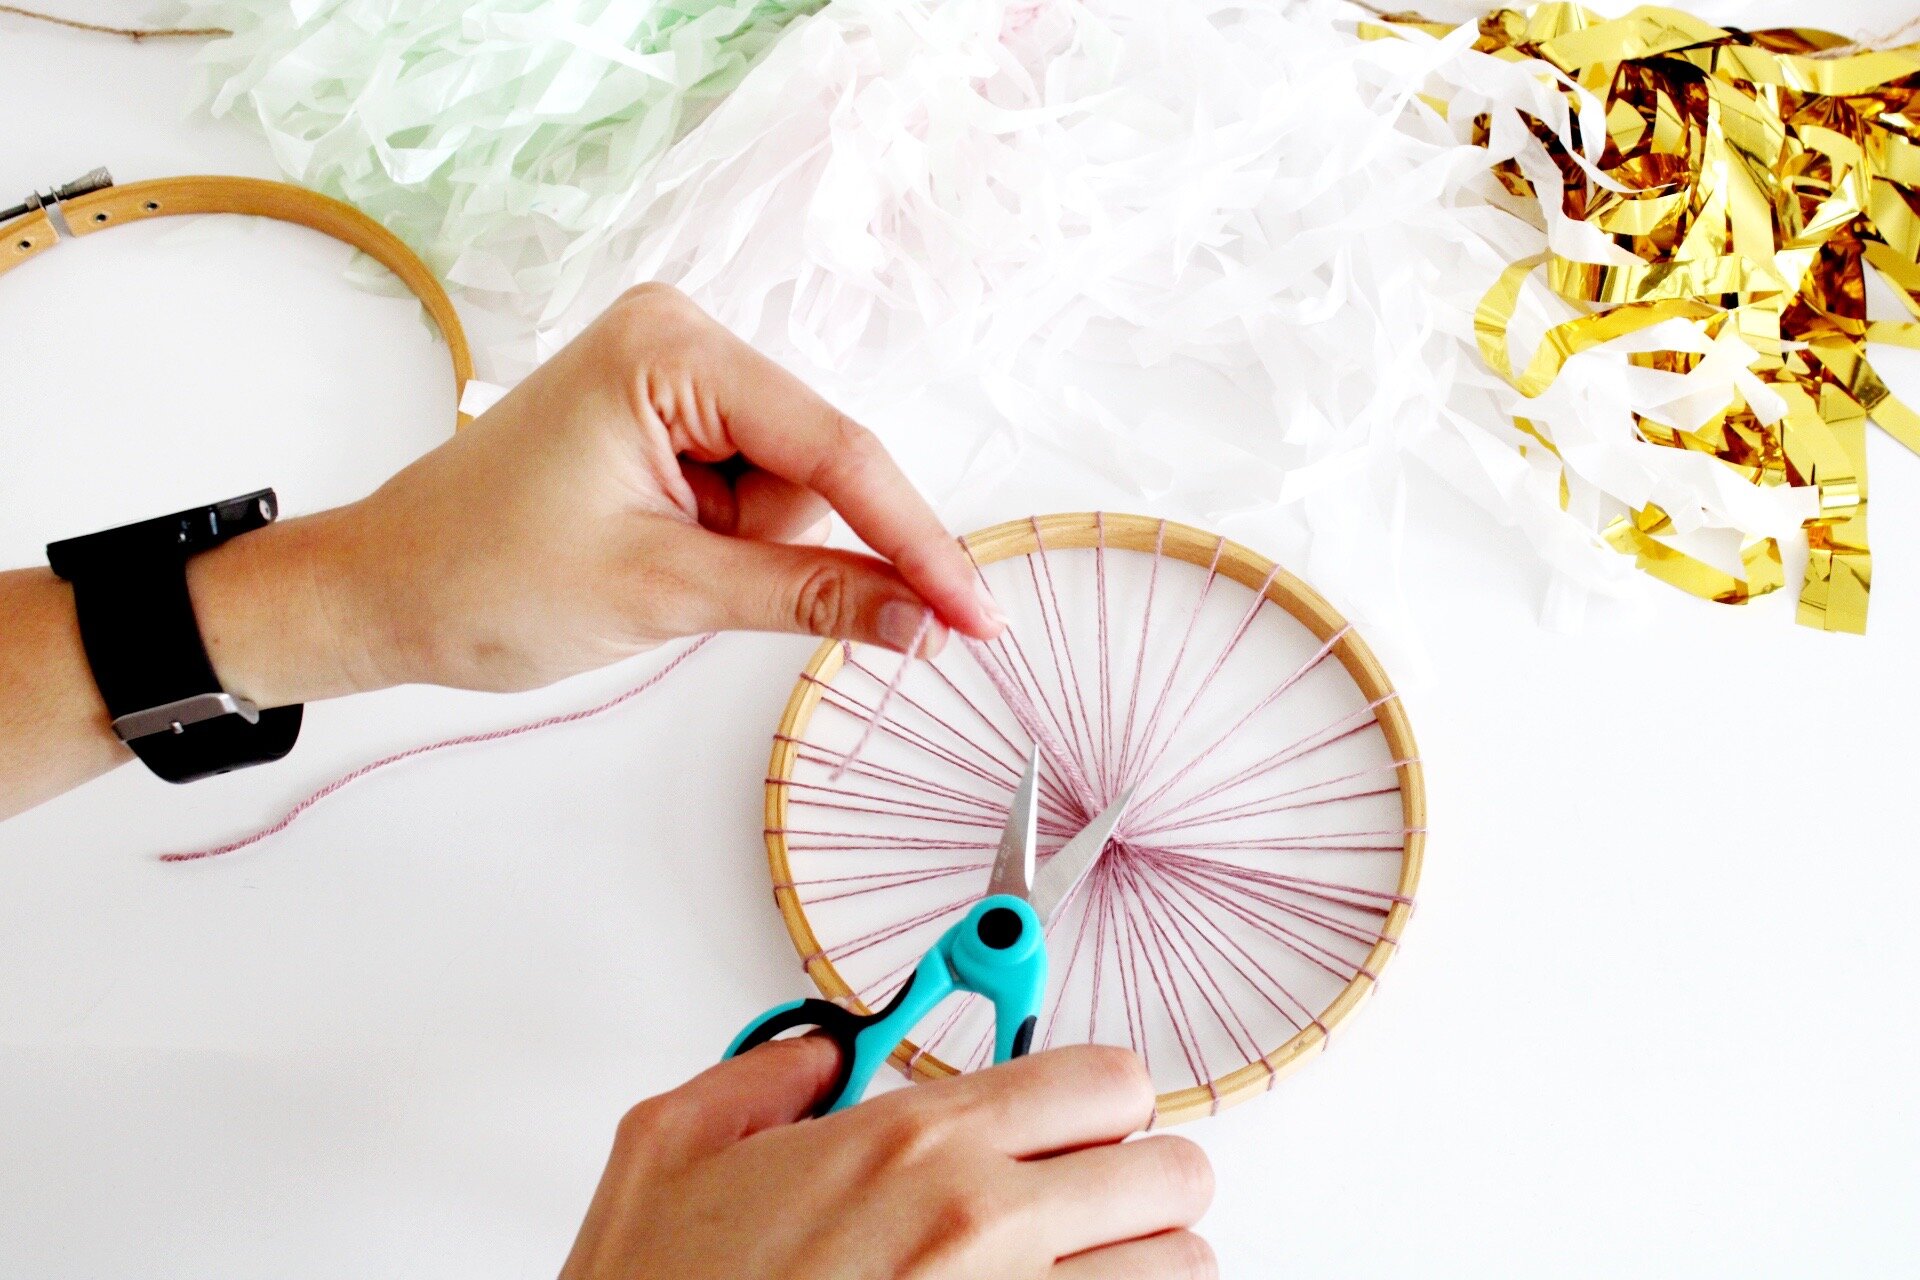
09. At this point, the middle of the loom with me a huge messy criss- cross (will make you jump, jump) of the warp threads. Cutting a smaller piece warp thread, pull it through the center, between some of the warp threads and tie a knot. All the threads will come together and create these cute little nice triangles!

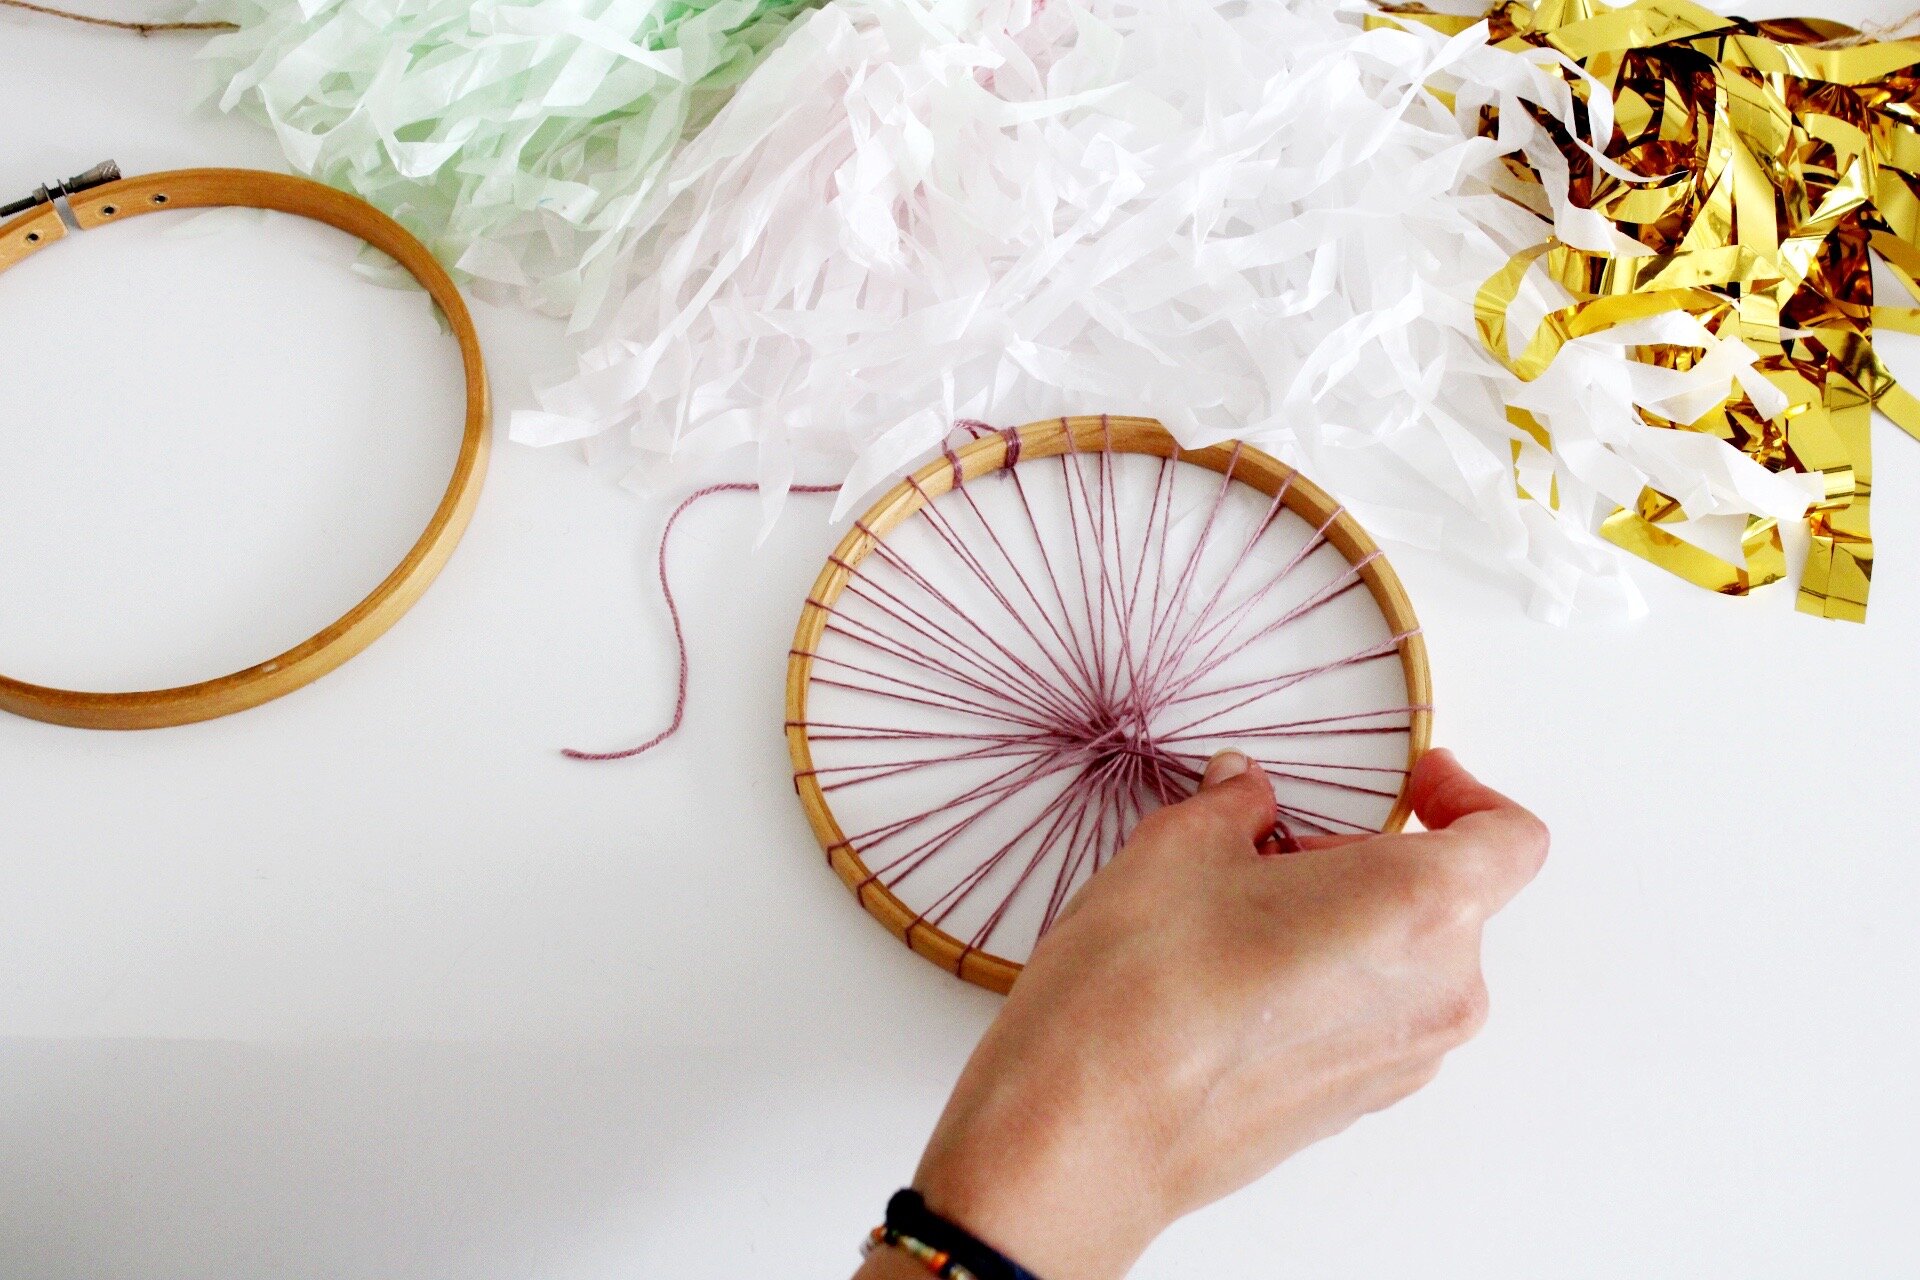
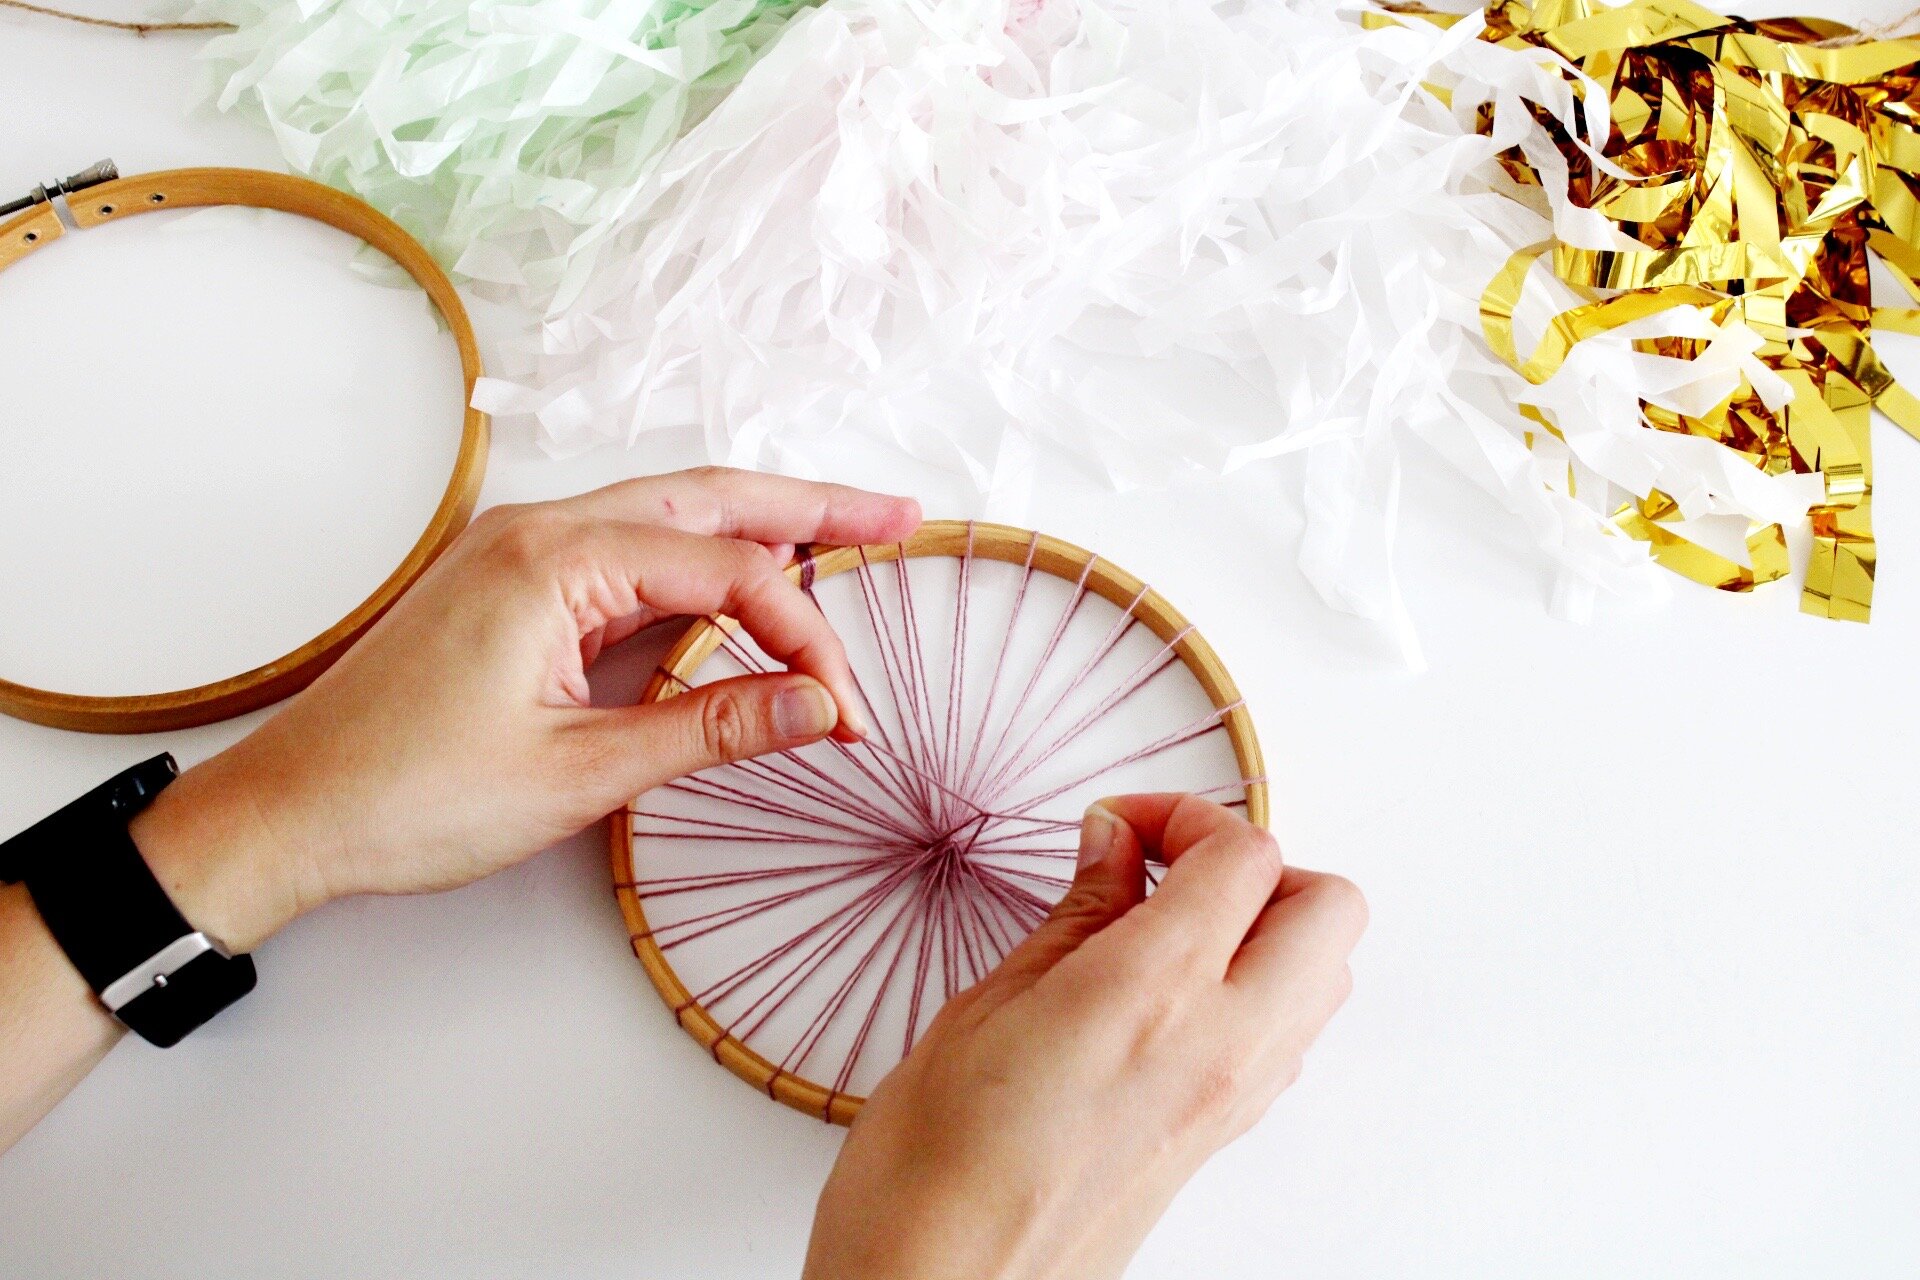
10. Wrap the thread around the center again at a perpendicular angel and tie another knot to secure the middle even more. Trim off the excess.
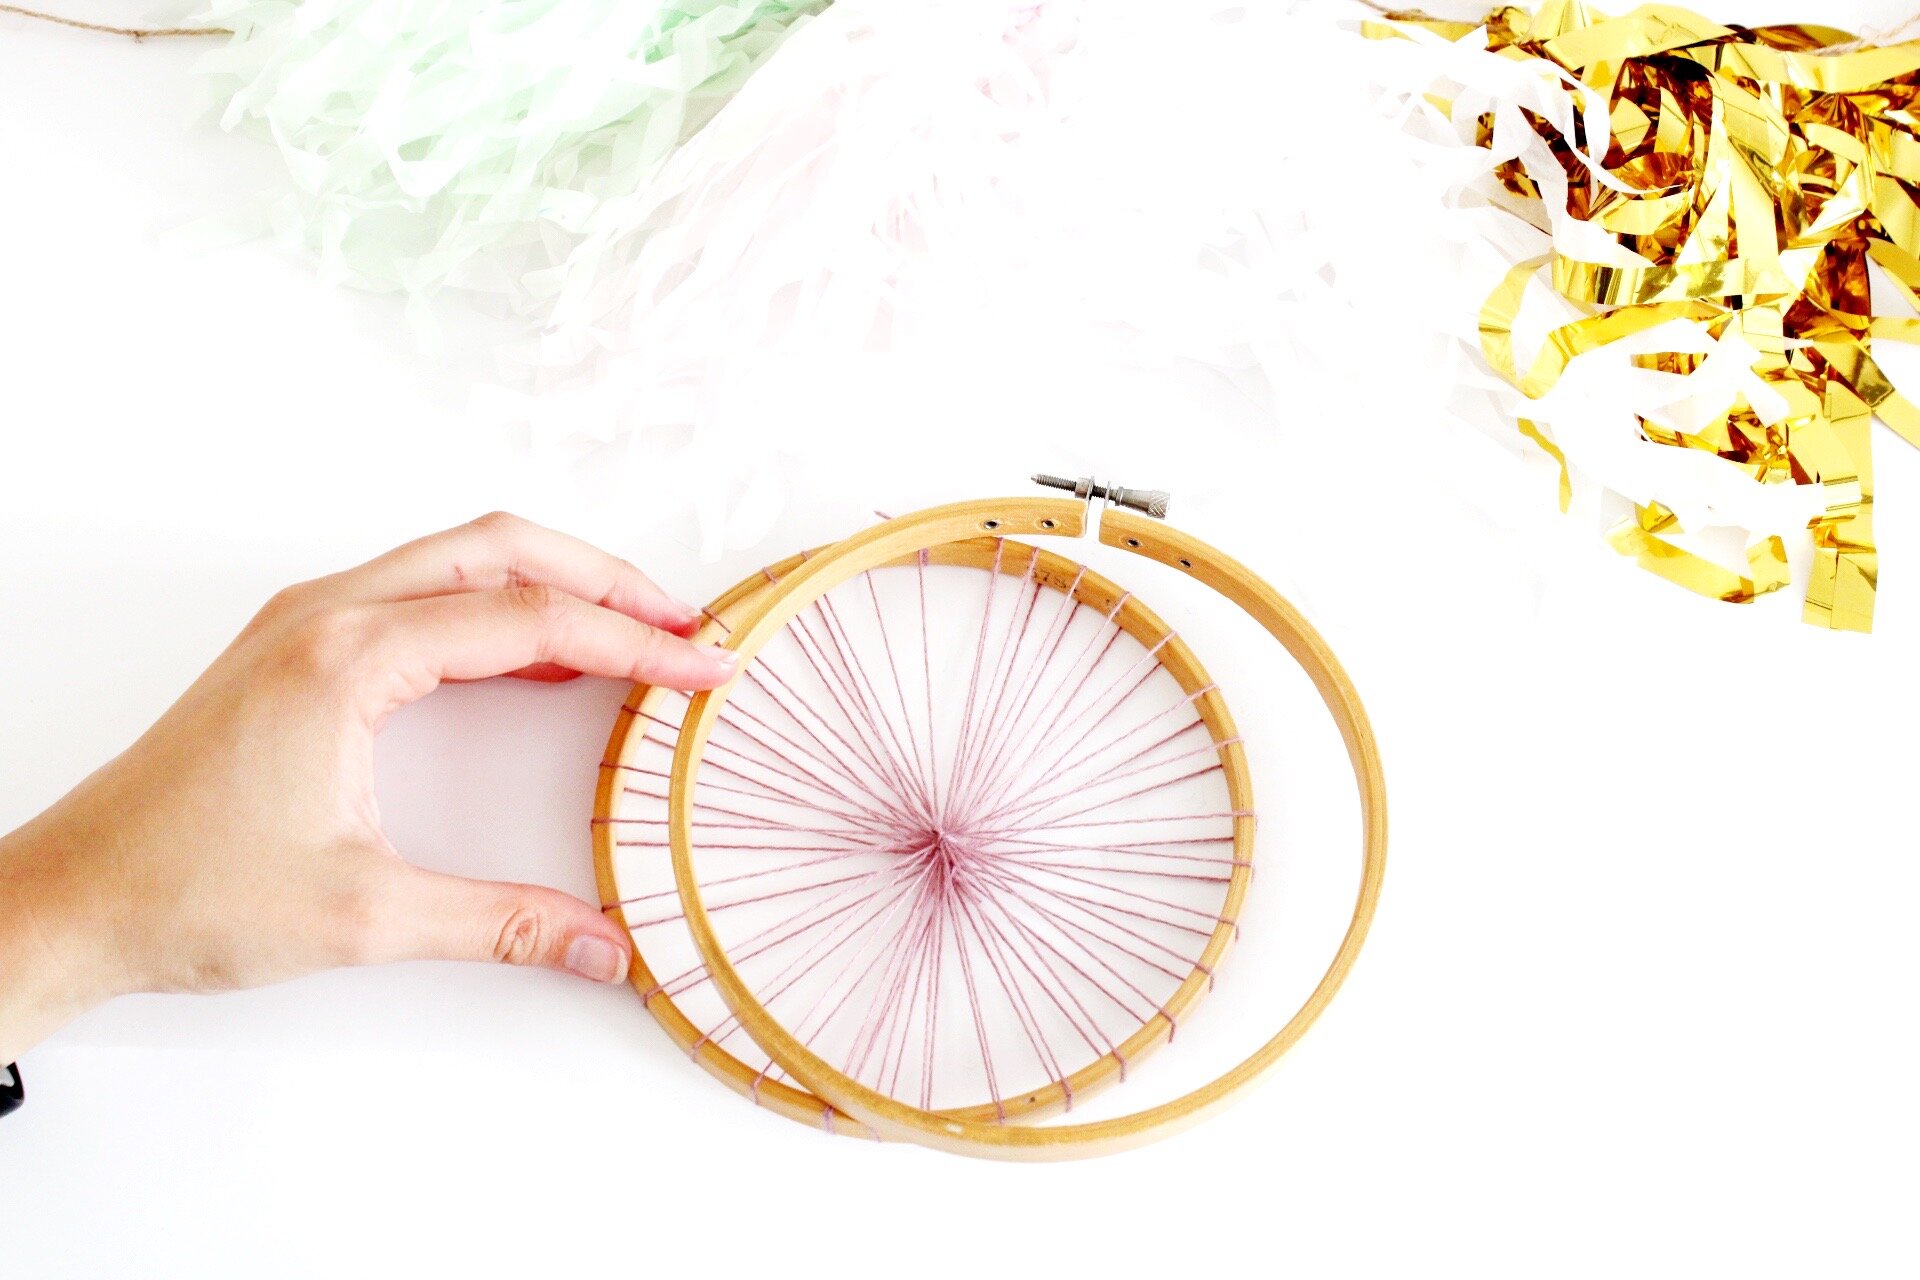
11. This is the time to put the outer hoop around your warped hoop and tighten or wrap it in yarn that way your warped threads won’t slide around!
NOW GET TO WEAVING PEOPLE! For circle weaving’s, you can easily do a tabby weave through the circle, by going under and over each of the warped threads. The circle looms create little triangles with a front and back thread, so make sure to go through each of them. You can also do my favorite stitch the rya knot, in the circle and create a very textured circle weaving. Really any stitch works in a circle weaving and you can weave in the circular shape, just going around or you can work towards weaving across the circle and playing around with it.


XOXO.