
DIY Rainbow Clay Earrings

I feel like I can never have enough rainbows in my life. To be honest I have always felt that way. I really wish the trend of rainbows being cool was when I was younger because I was constantly decked out in rainbows and people did not think it was as cute and fun as it is now. Another fun new fad is these clay earrings. They are literally all the rage and also so cute! One thing that I found out while wearing them is that they are incredibly light. You can wear them all day and not even feel them, it is amazing. With all this love for rainbows and clay earrings, I have decided to combine them and create my own pair of rainbow clay earrings!

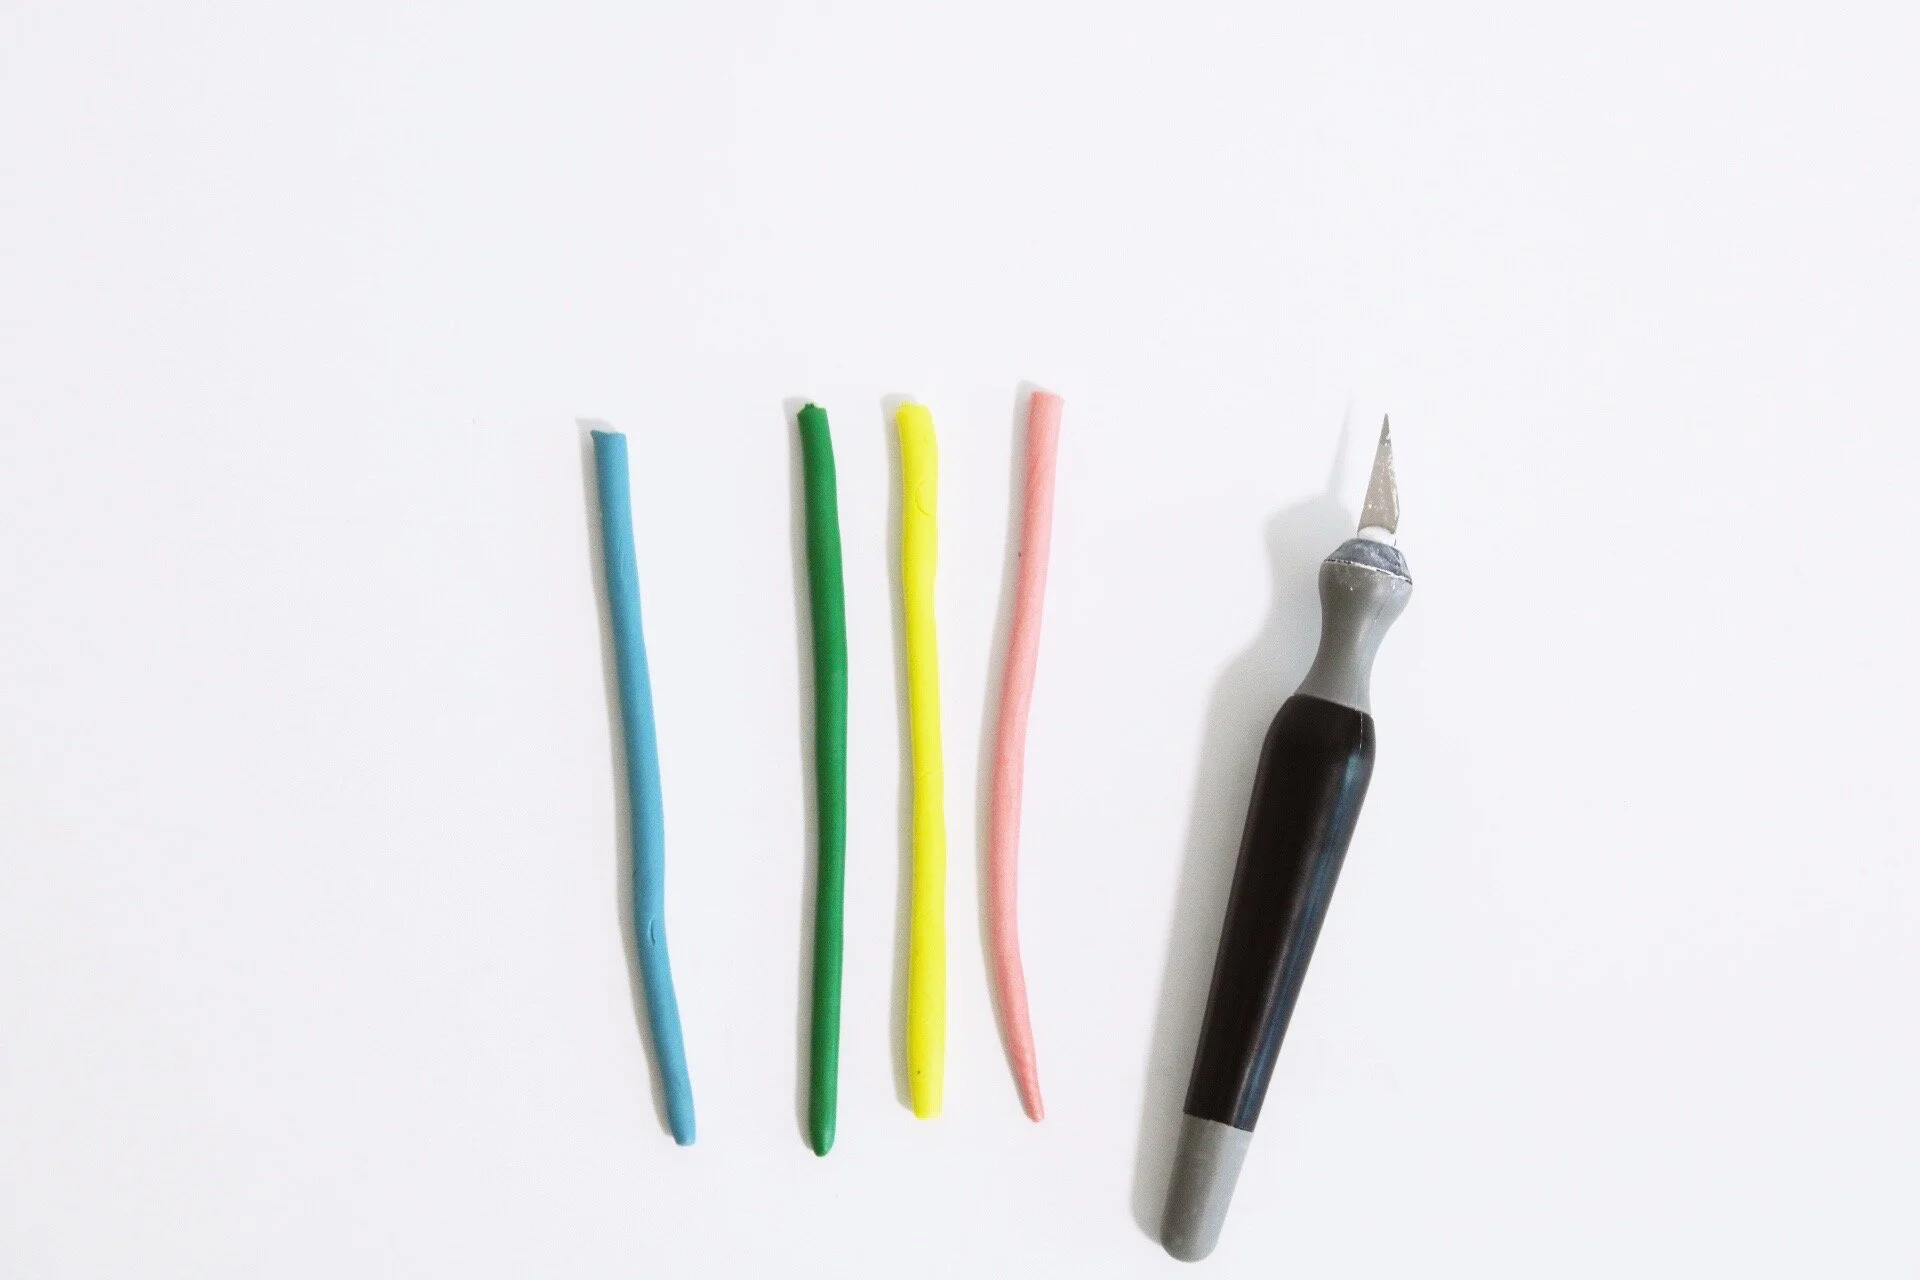
SUPPLIES
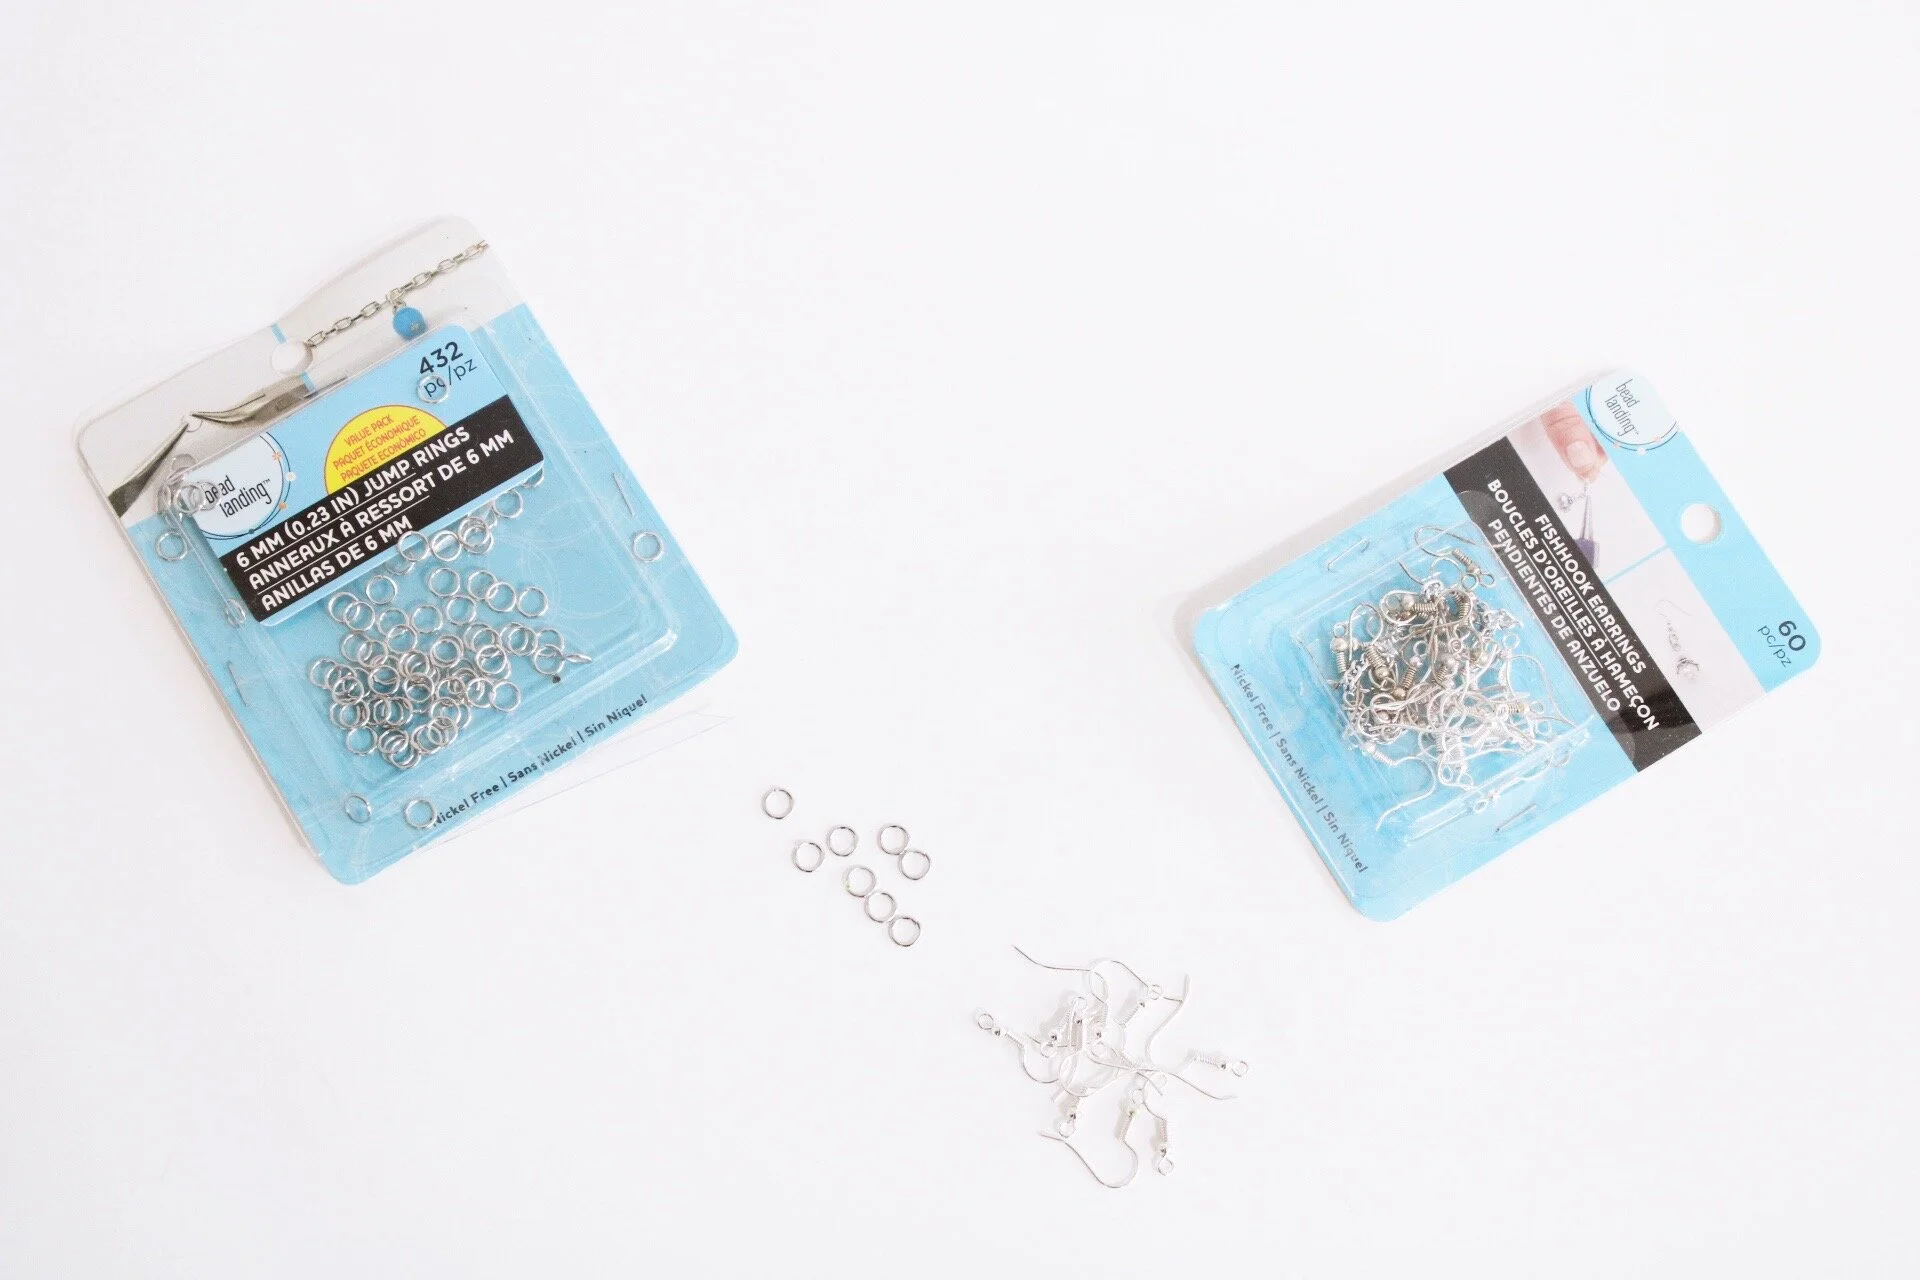
-6mm jump rings
-Fish Earring Hooks
- Nose Pliers
-Ruler
-Sewing Needle
-Exacto Knife
MAKING THE EARRINGS
Step One: Start by choosing three to five colors that you want to use to create your earrings. I used four pastel colors that I loved together. I used a yellow that was super bright and I just mixed it with white to tone it down You can also choose colors in the same family to make them look like a gradient.

Step Two: Roll out long snakes of clay in each color, make sure they are not too thin but also not too thick. You should have a medium thickness about the width of a pencil.

Step Three: Cut your clay snakes to be 5 inches long each.

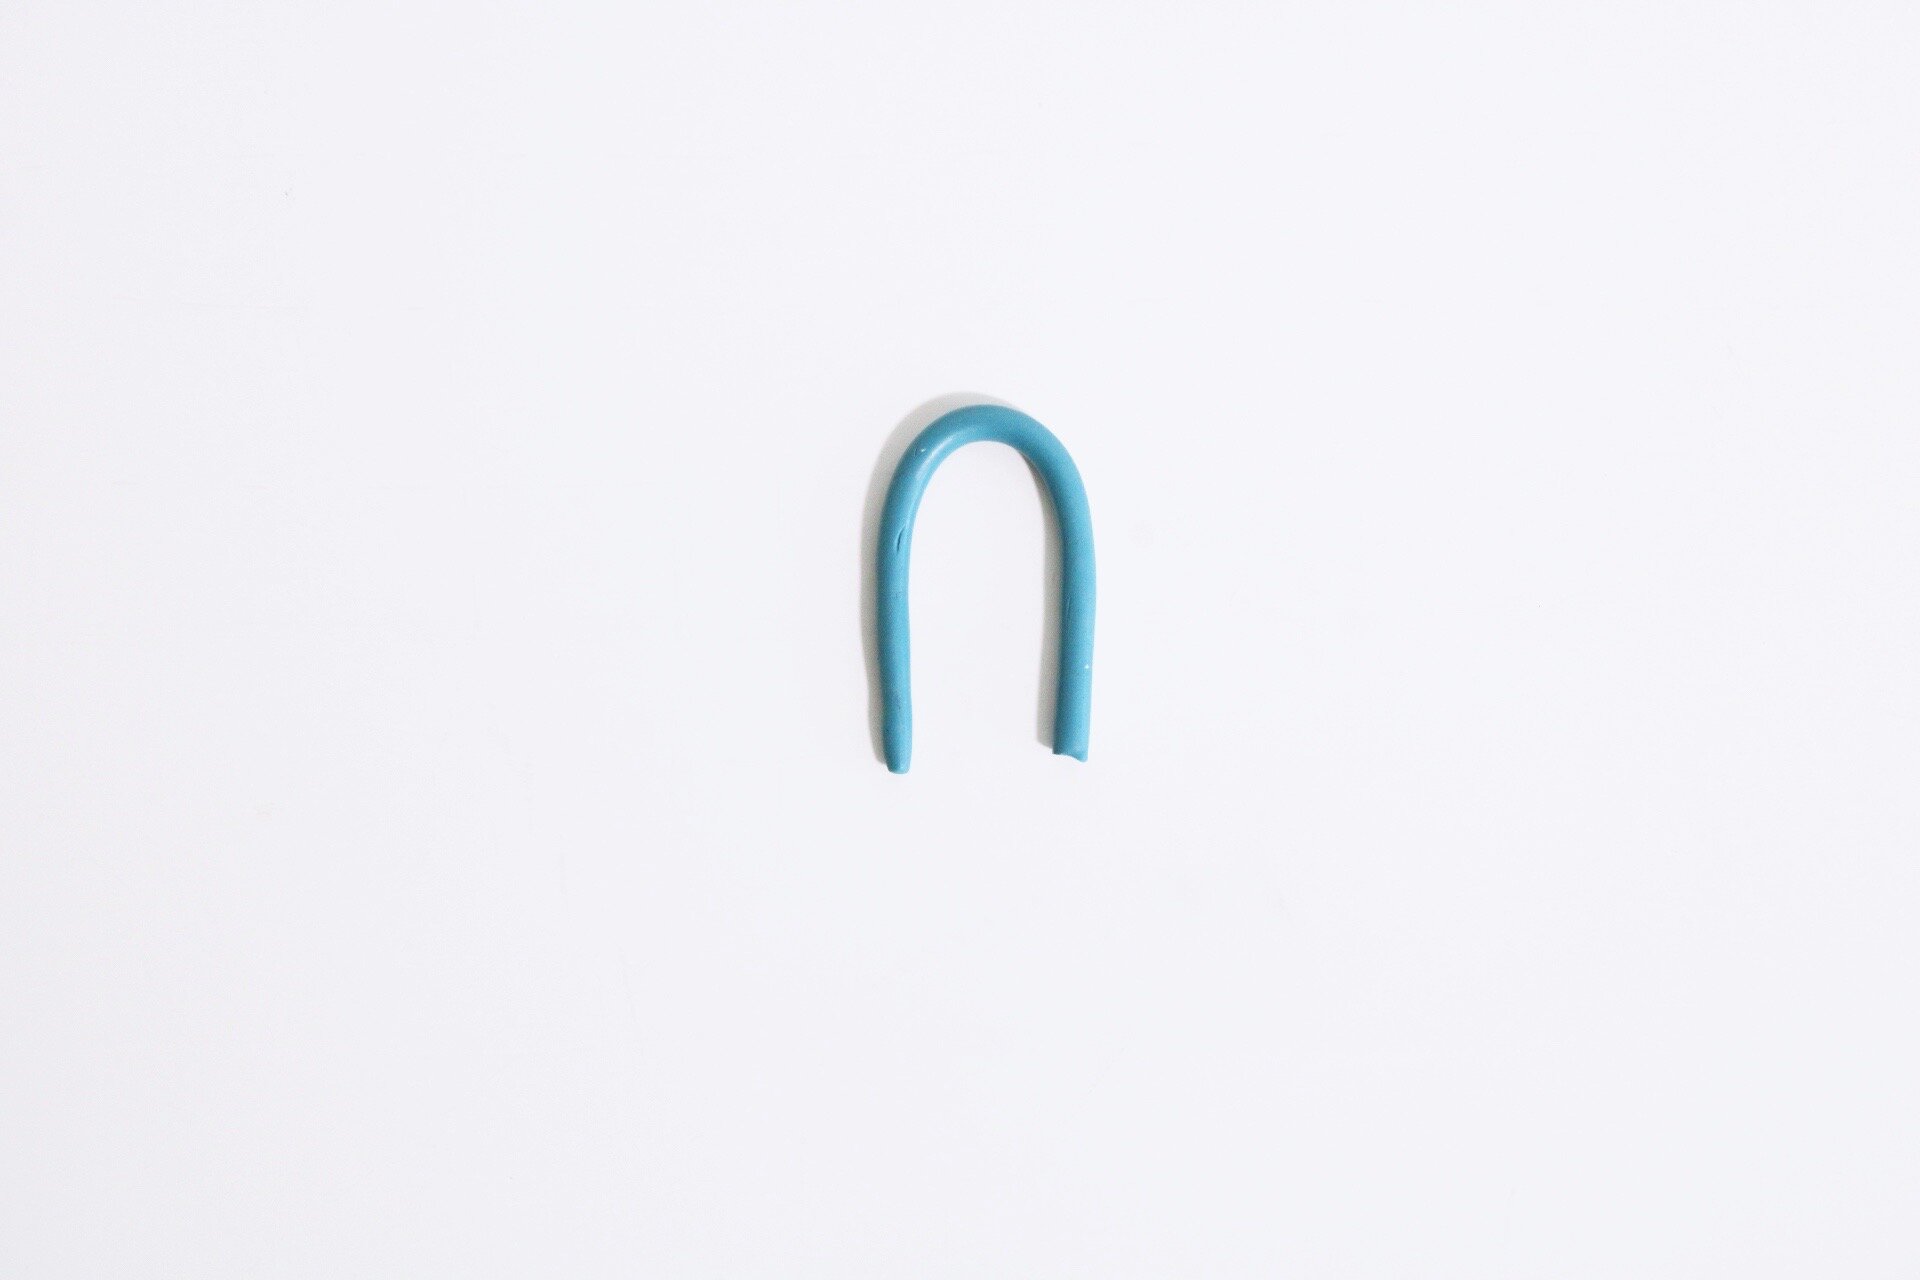
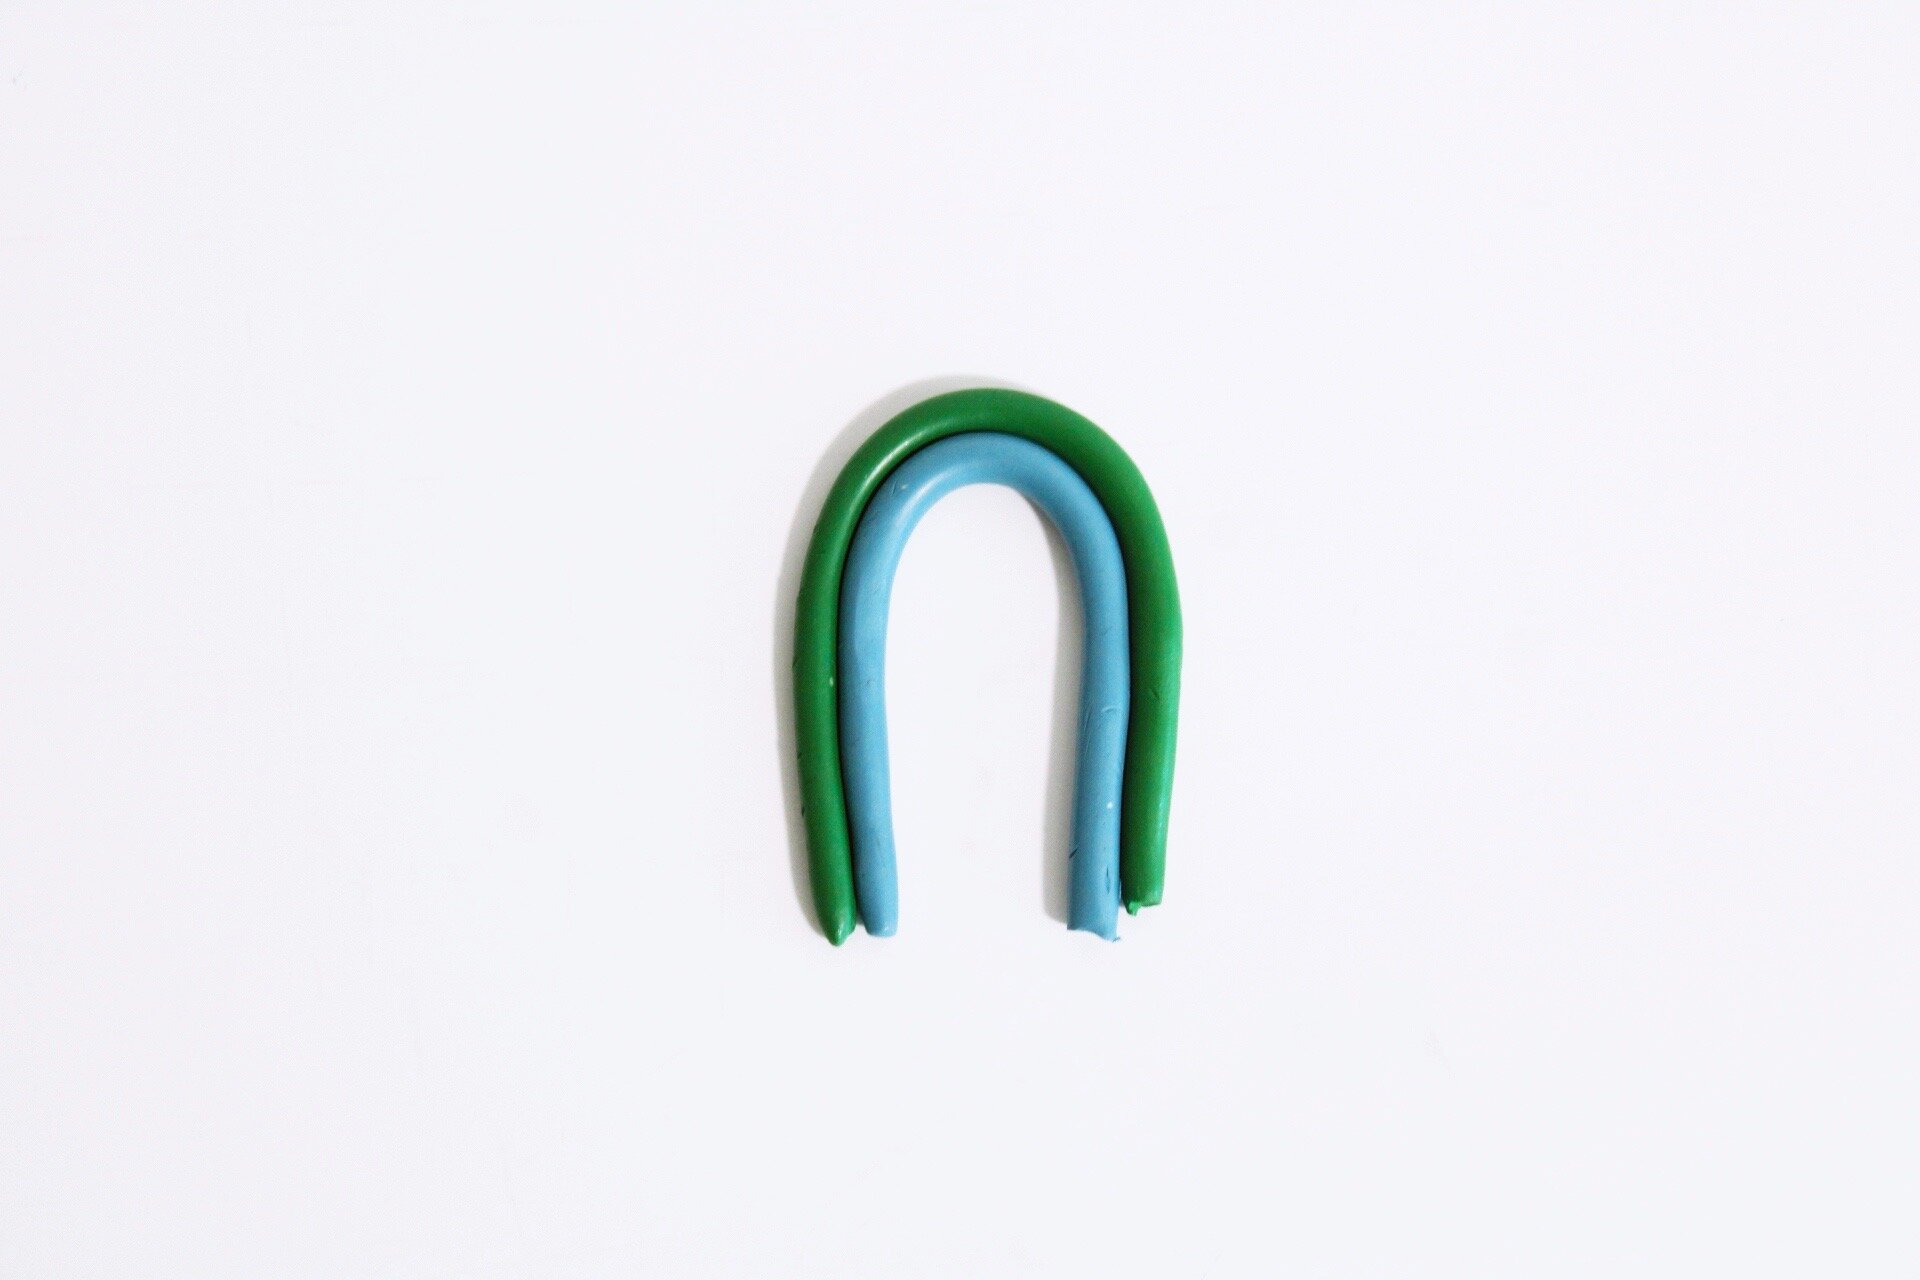
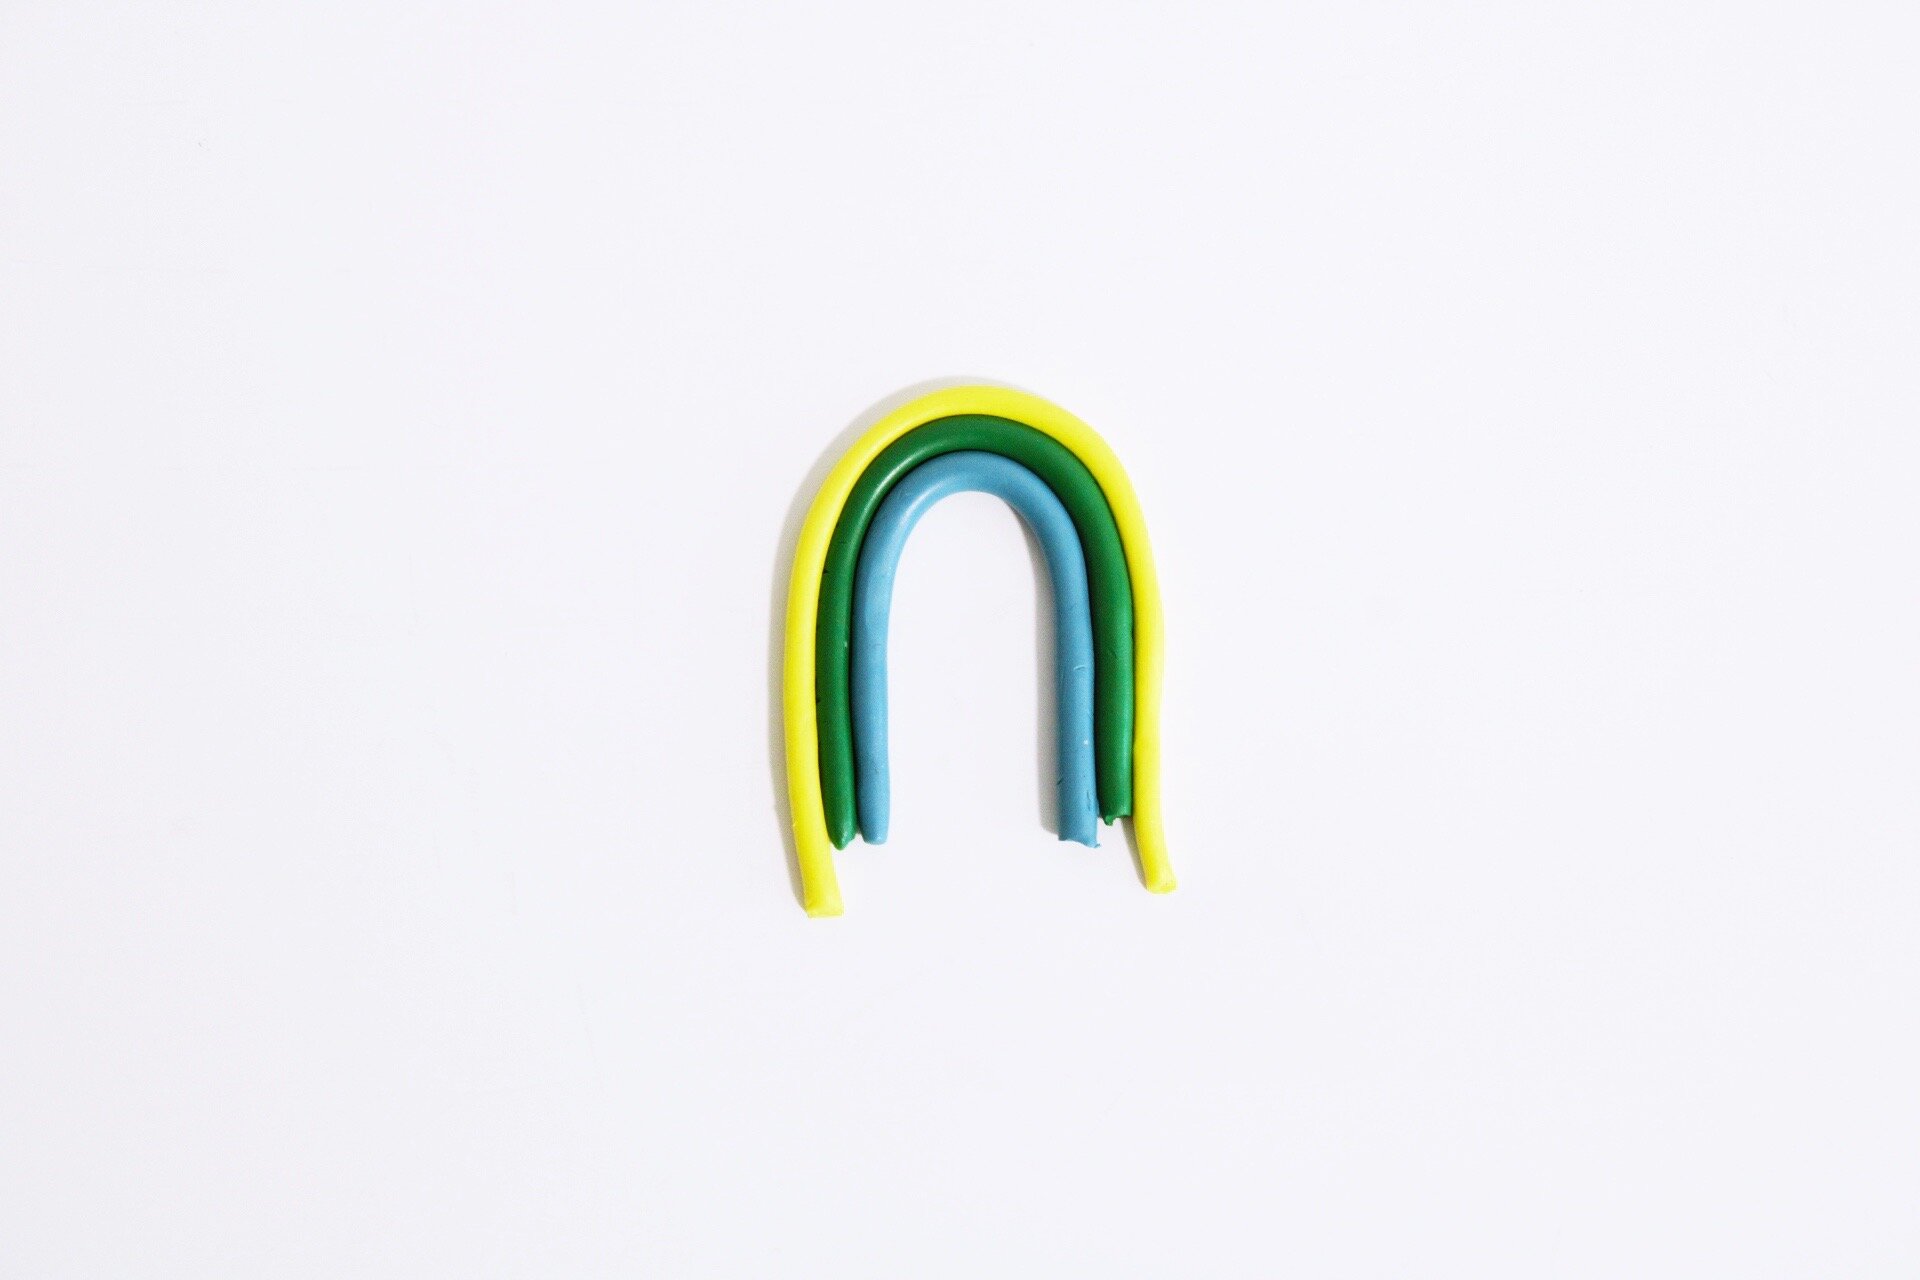
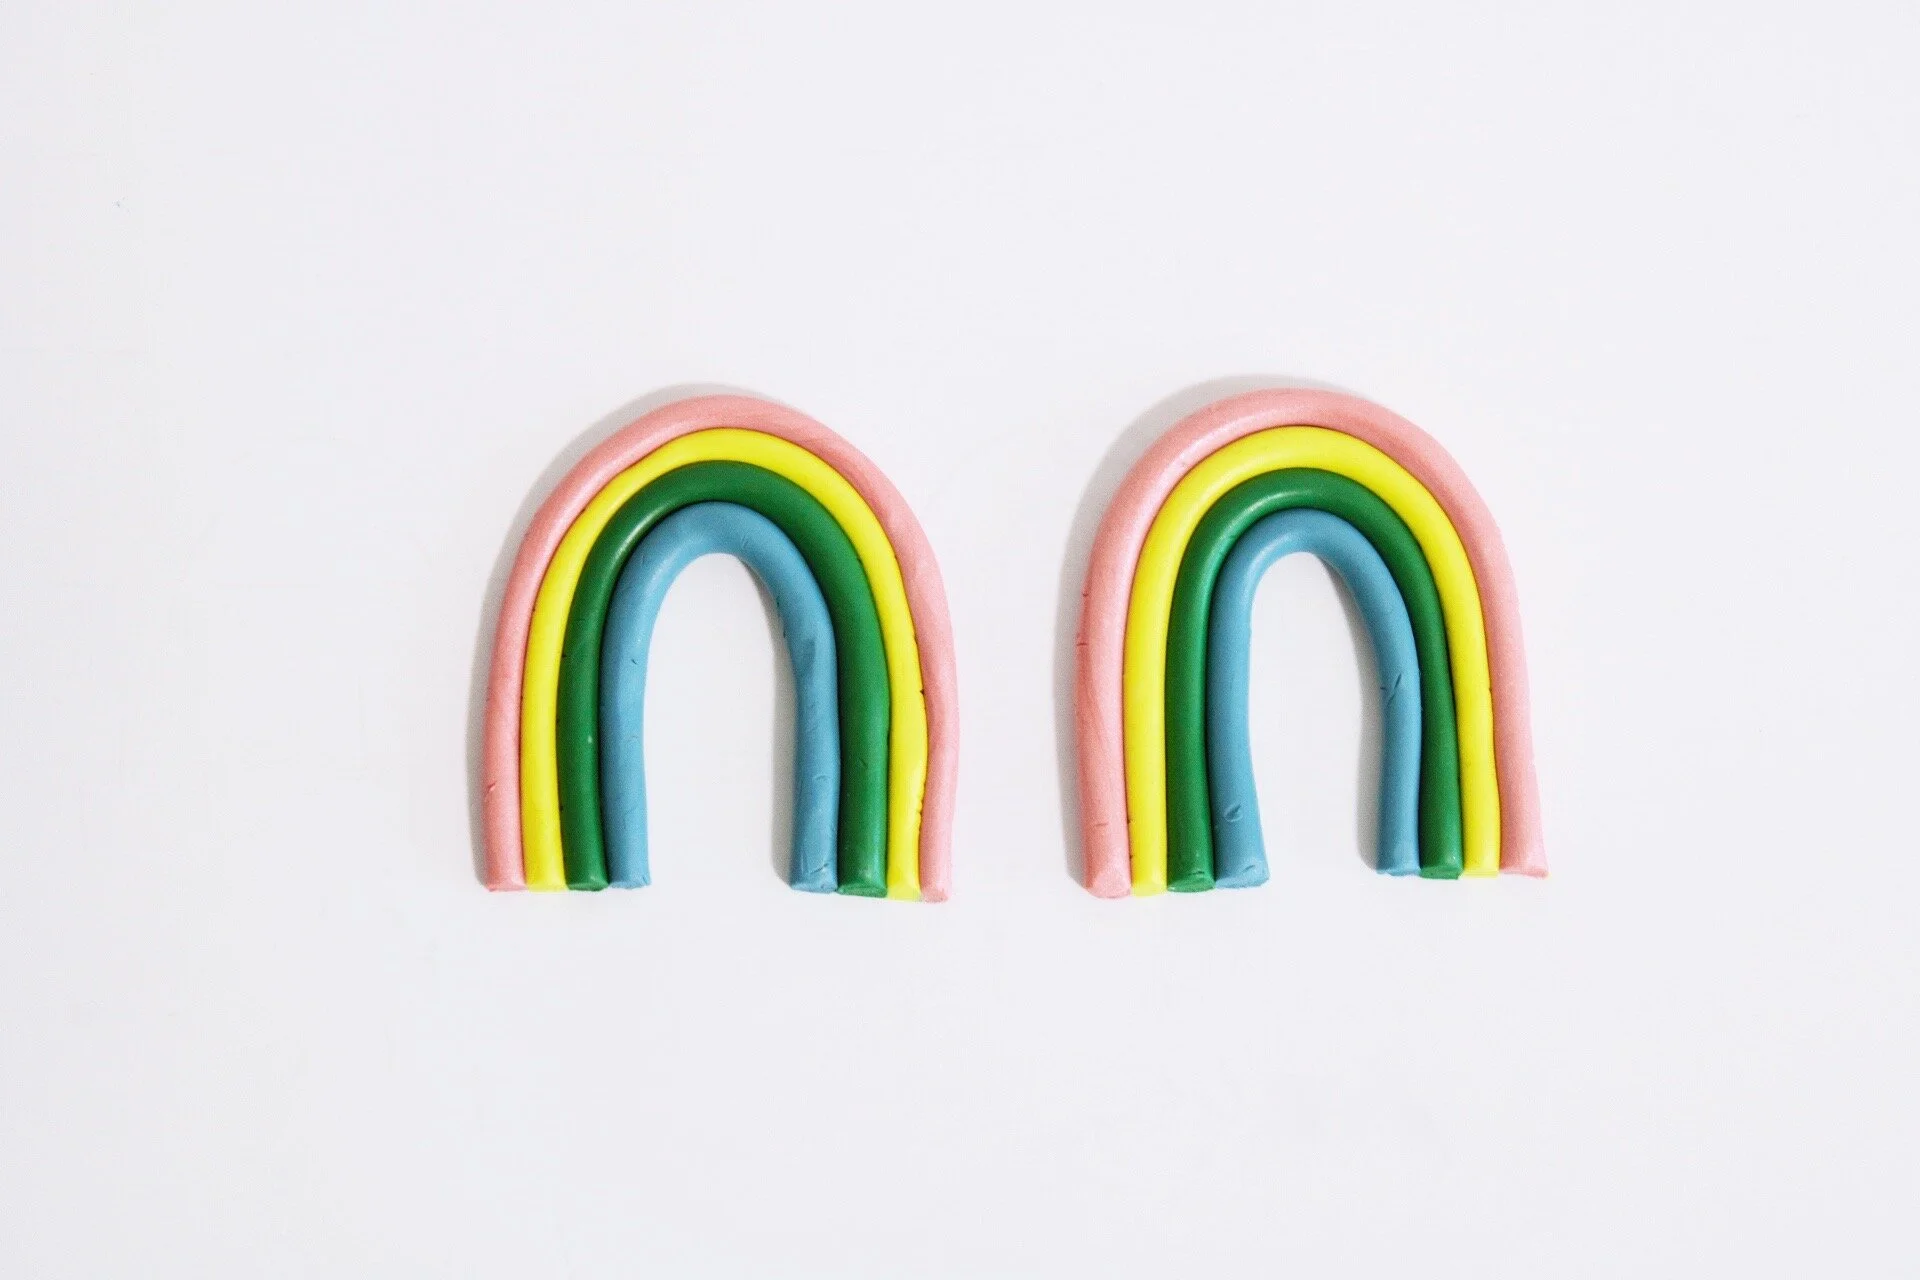
Step Four: Take the clay snake color that is going to be on the bottom (this is the middle of the rainbow, so the purple if you are thinking of a traditional rainbow) and fold it in half. It is up to you if you want the rainbow to touch in the middle or if you want there to be space. I personally like both, but I feel like when they touch in the center it is a much more 70s vibe- which is the vibe I am always looking for. Then continue to fold the other snakes on top. As you layer, you may have to roll the clay out a little longer so they fit over the arch shape.
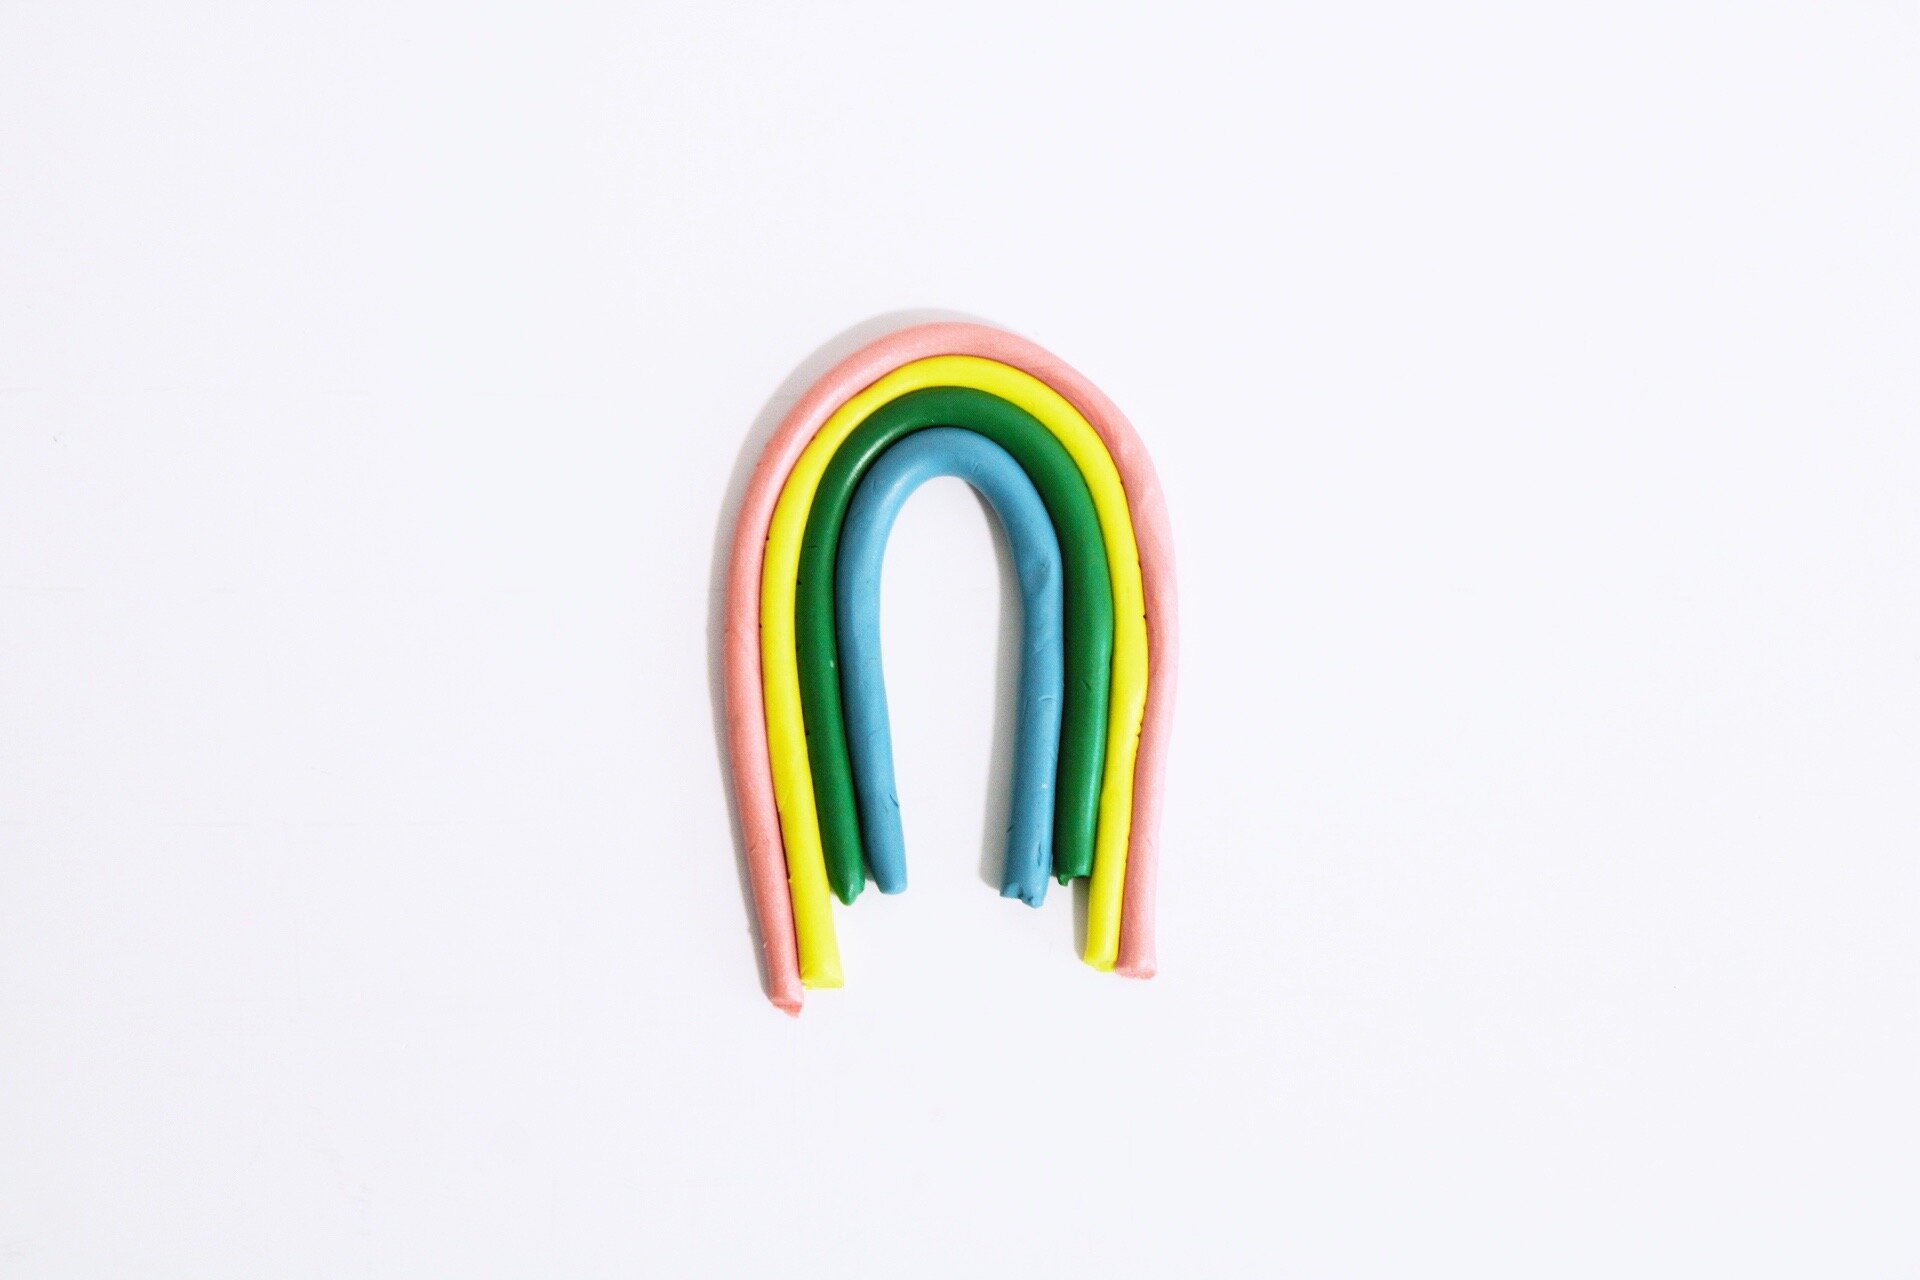
Step Five: Repeat steps 1-4 for your other earring
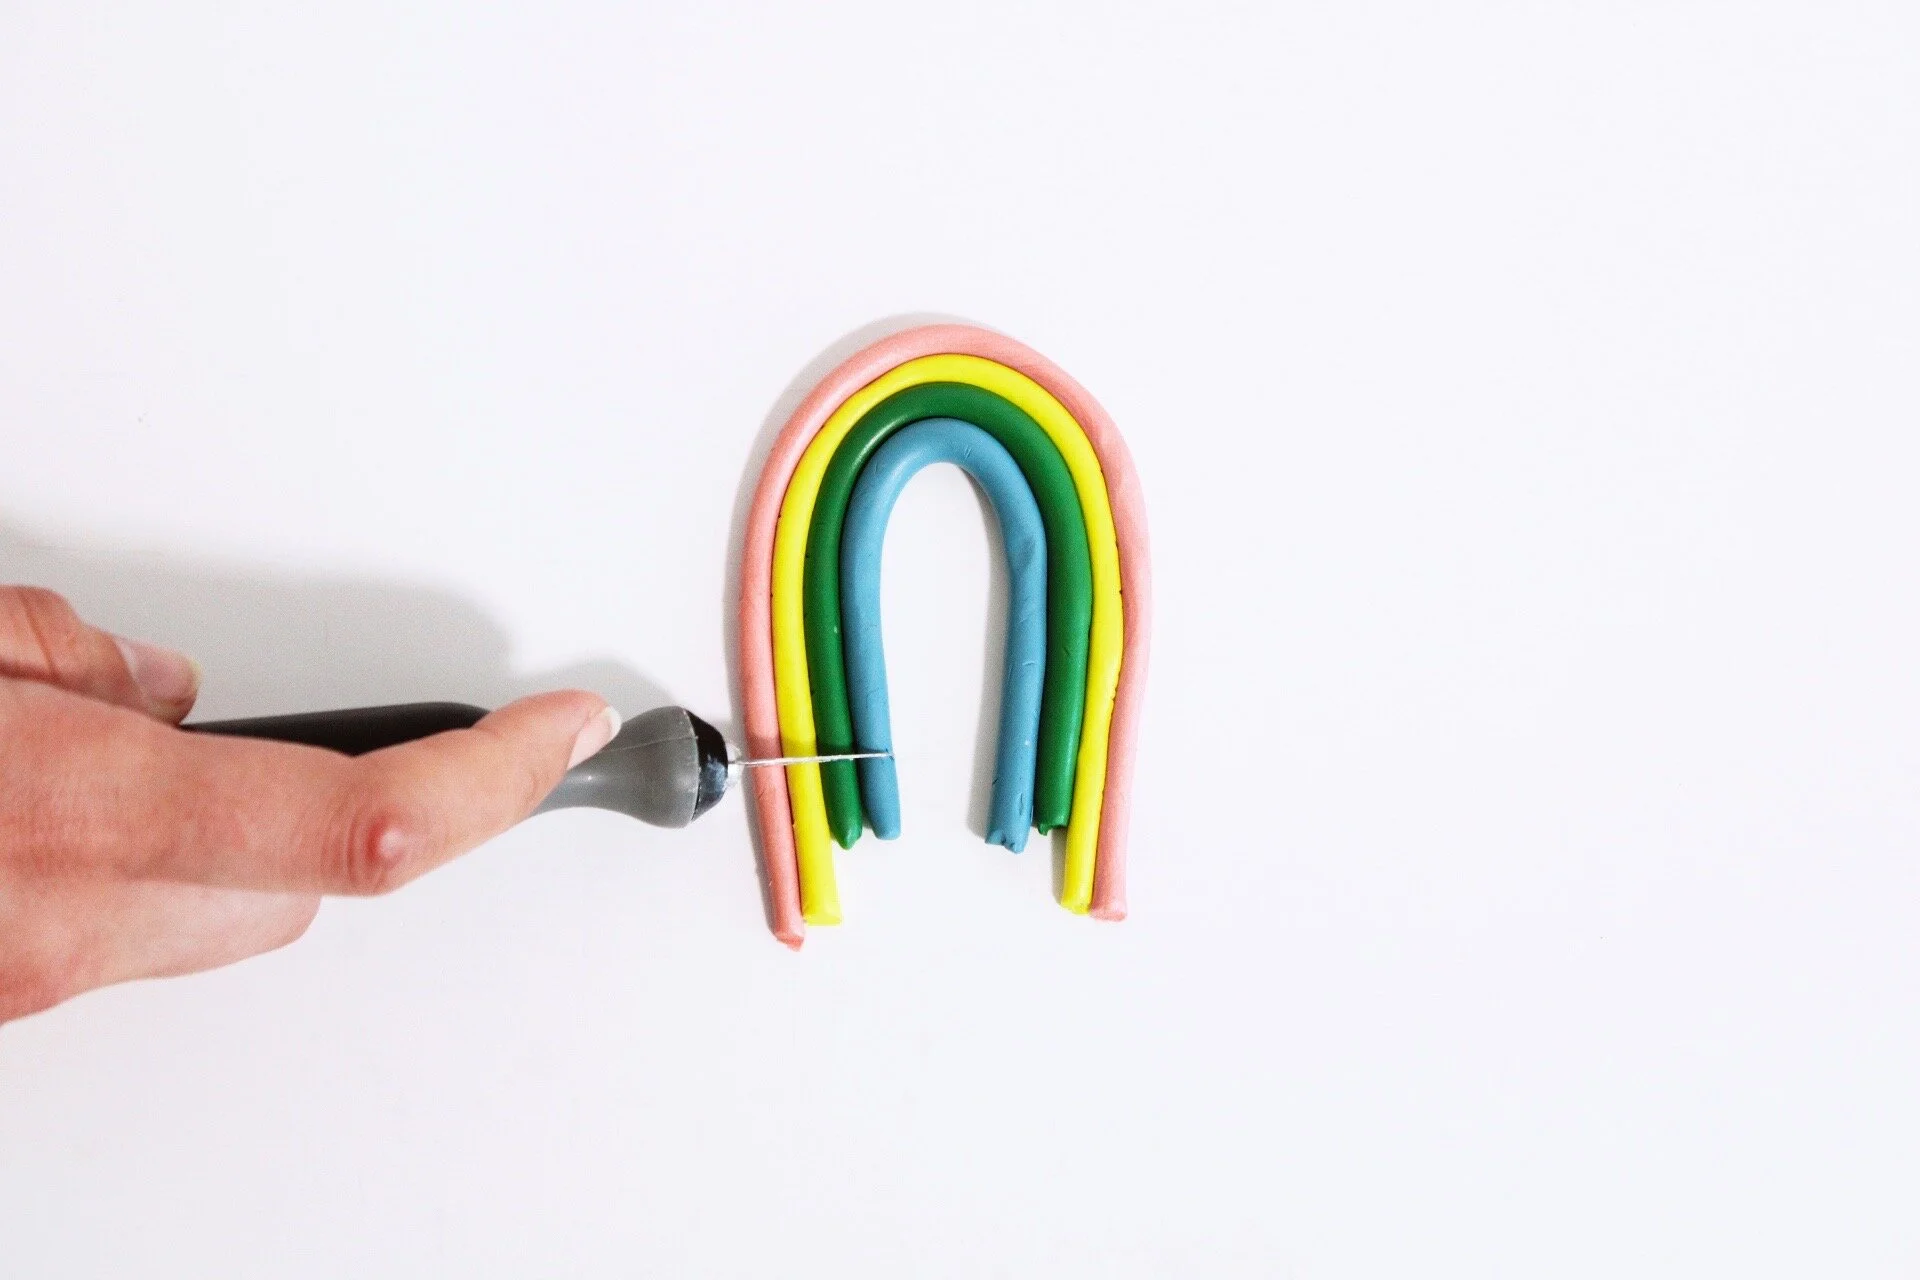
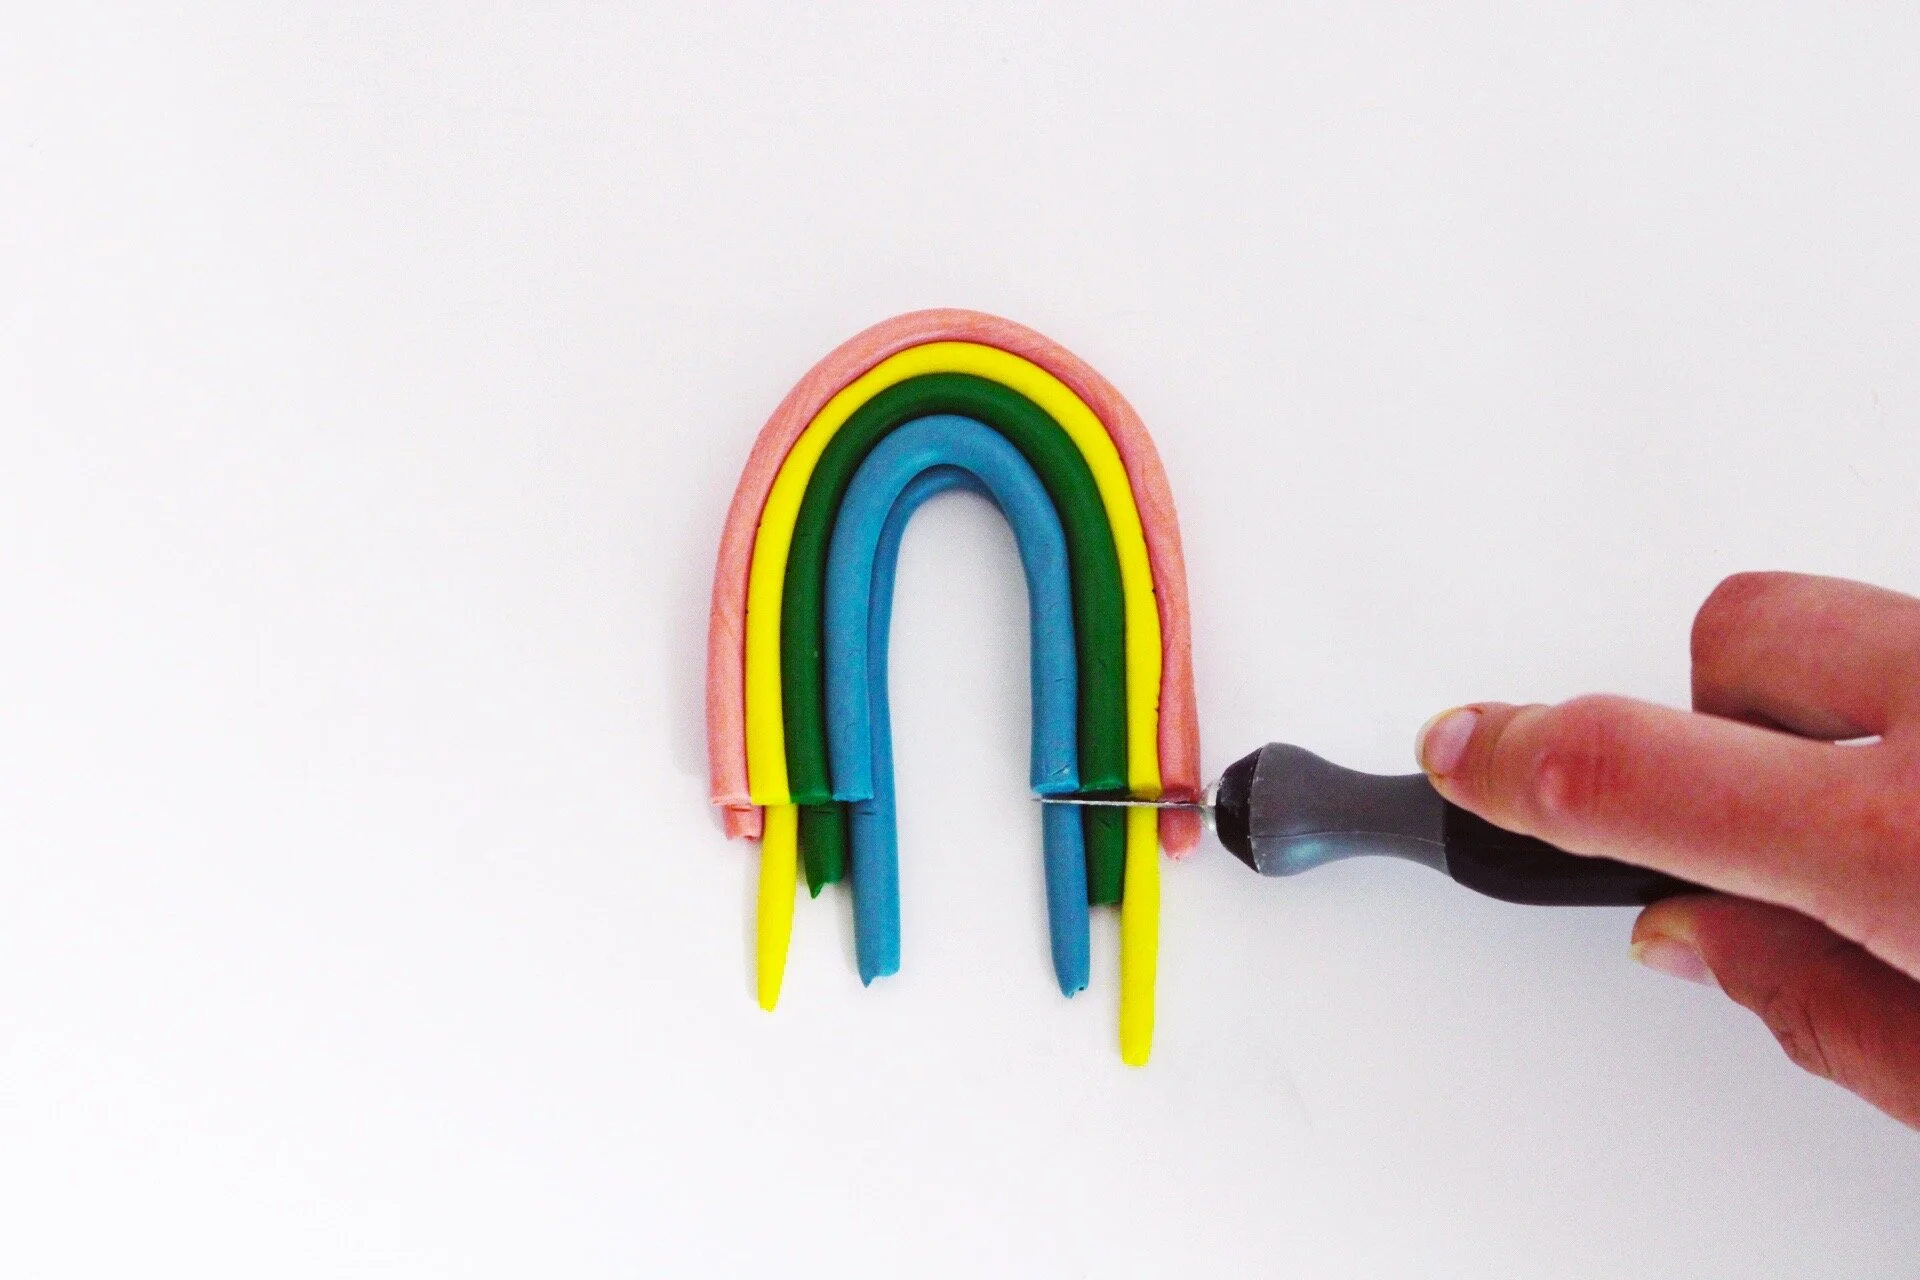
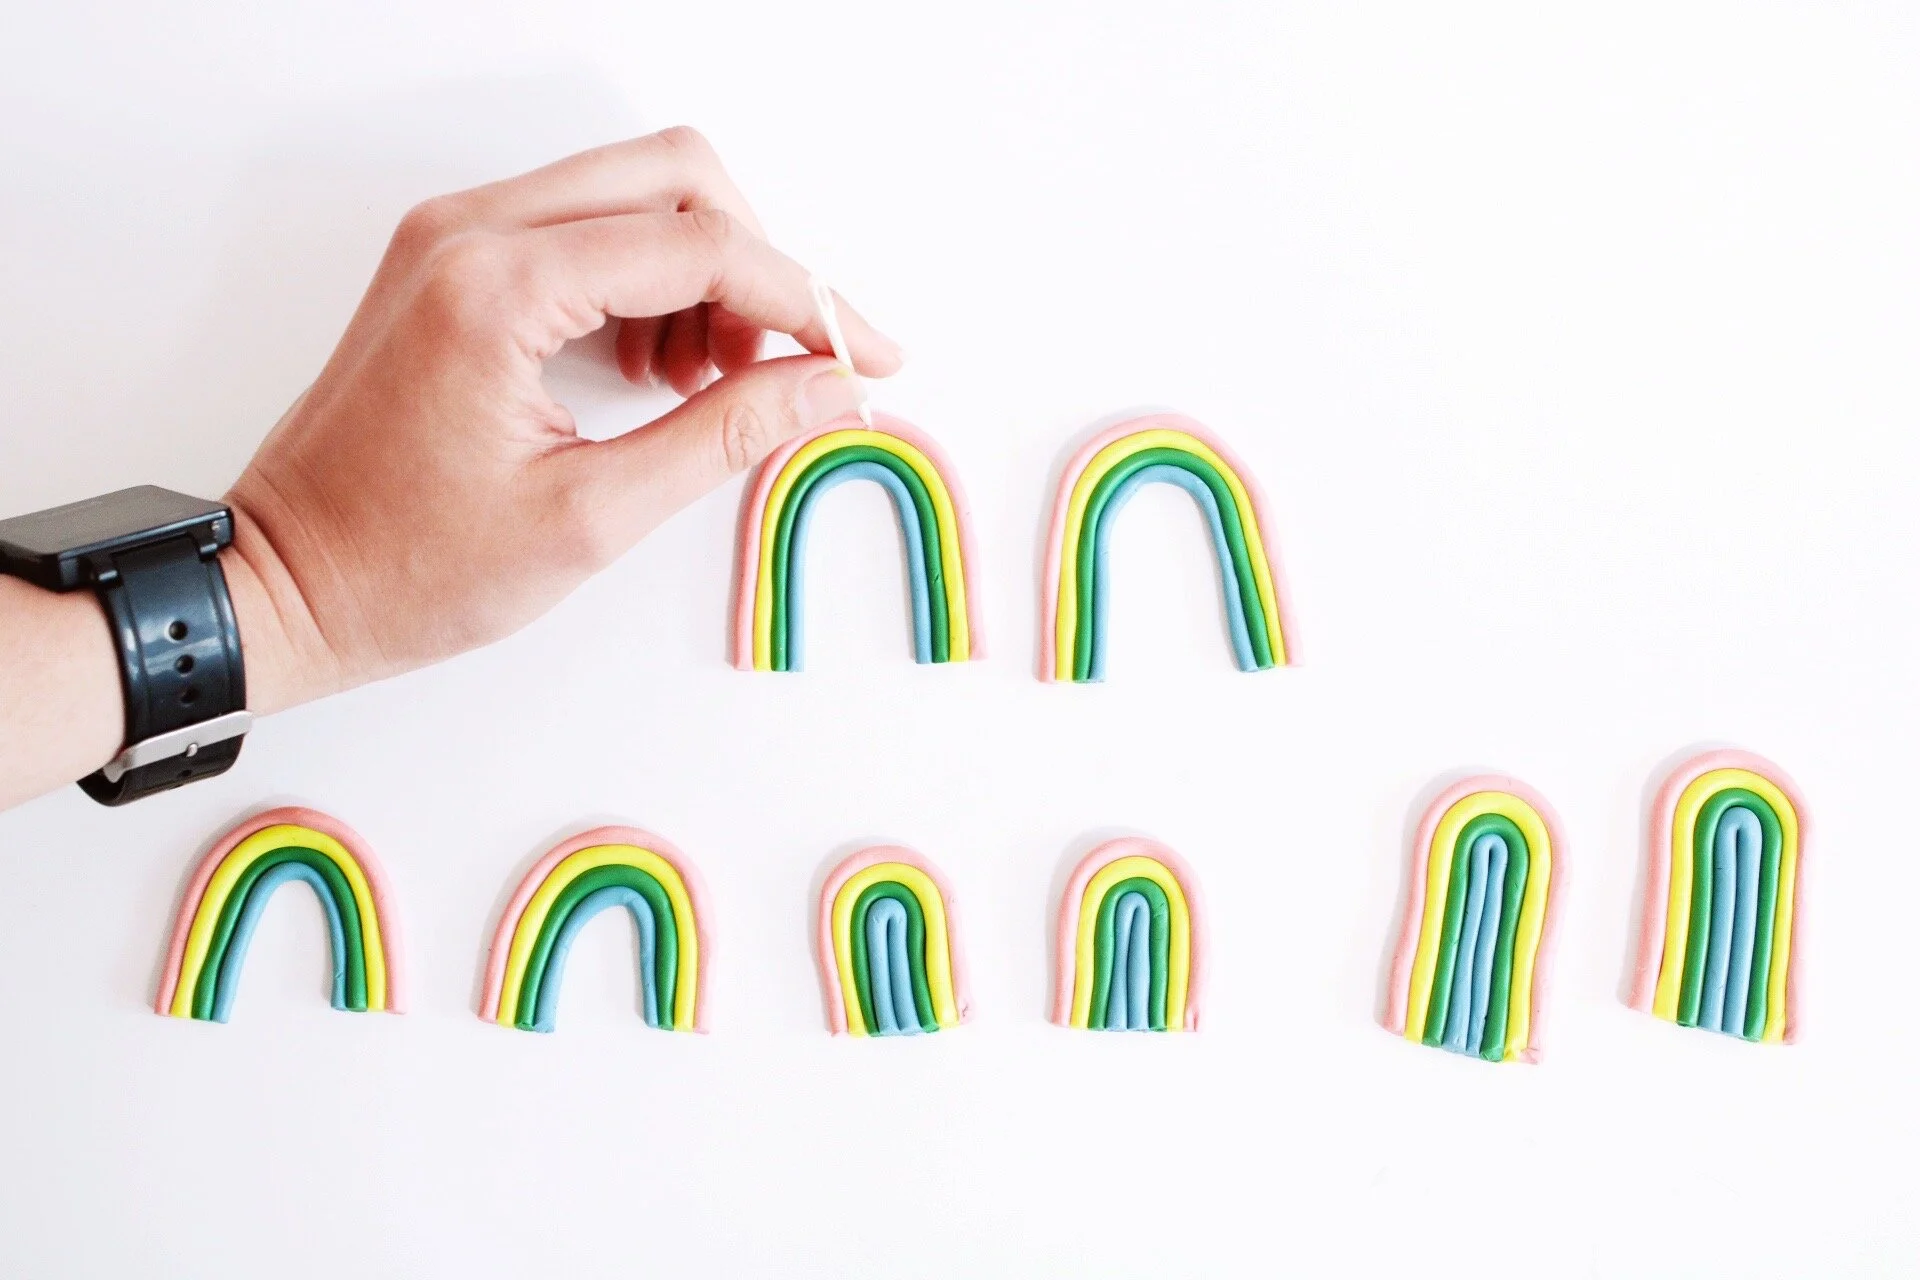
Step Six: Using an exacto knife, trim your rainbow so that it is even- you can use the ruler to make the line perfect. Then use the perfectly cut earring as a guide to trim your other rainbow.

Step Seven: Using your sewing needle, poke a hole in the top of the rainbow. You may need to stretch the hole out by moving the needle around in a circular motion, depending on how large your needle is.
Step Eight: Bake your earrings according to the package instructions. It is normally only about 10-15 minutes.

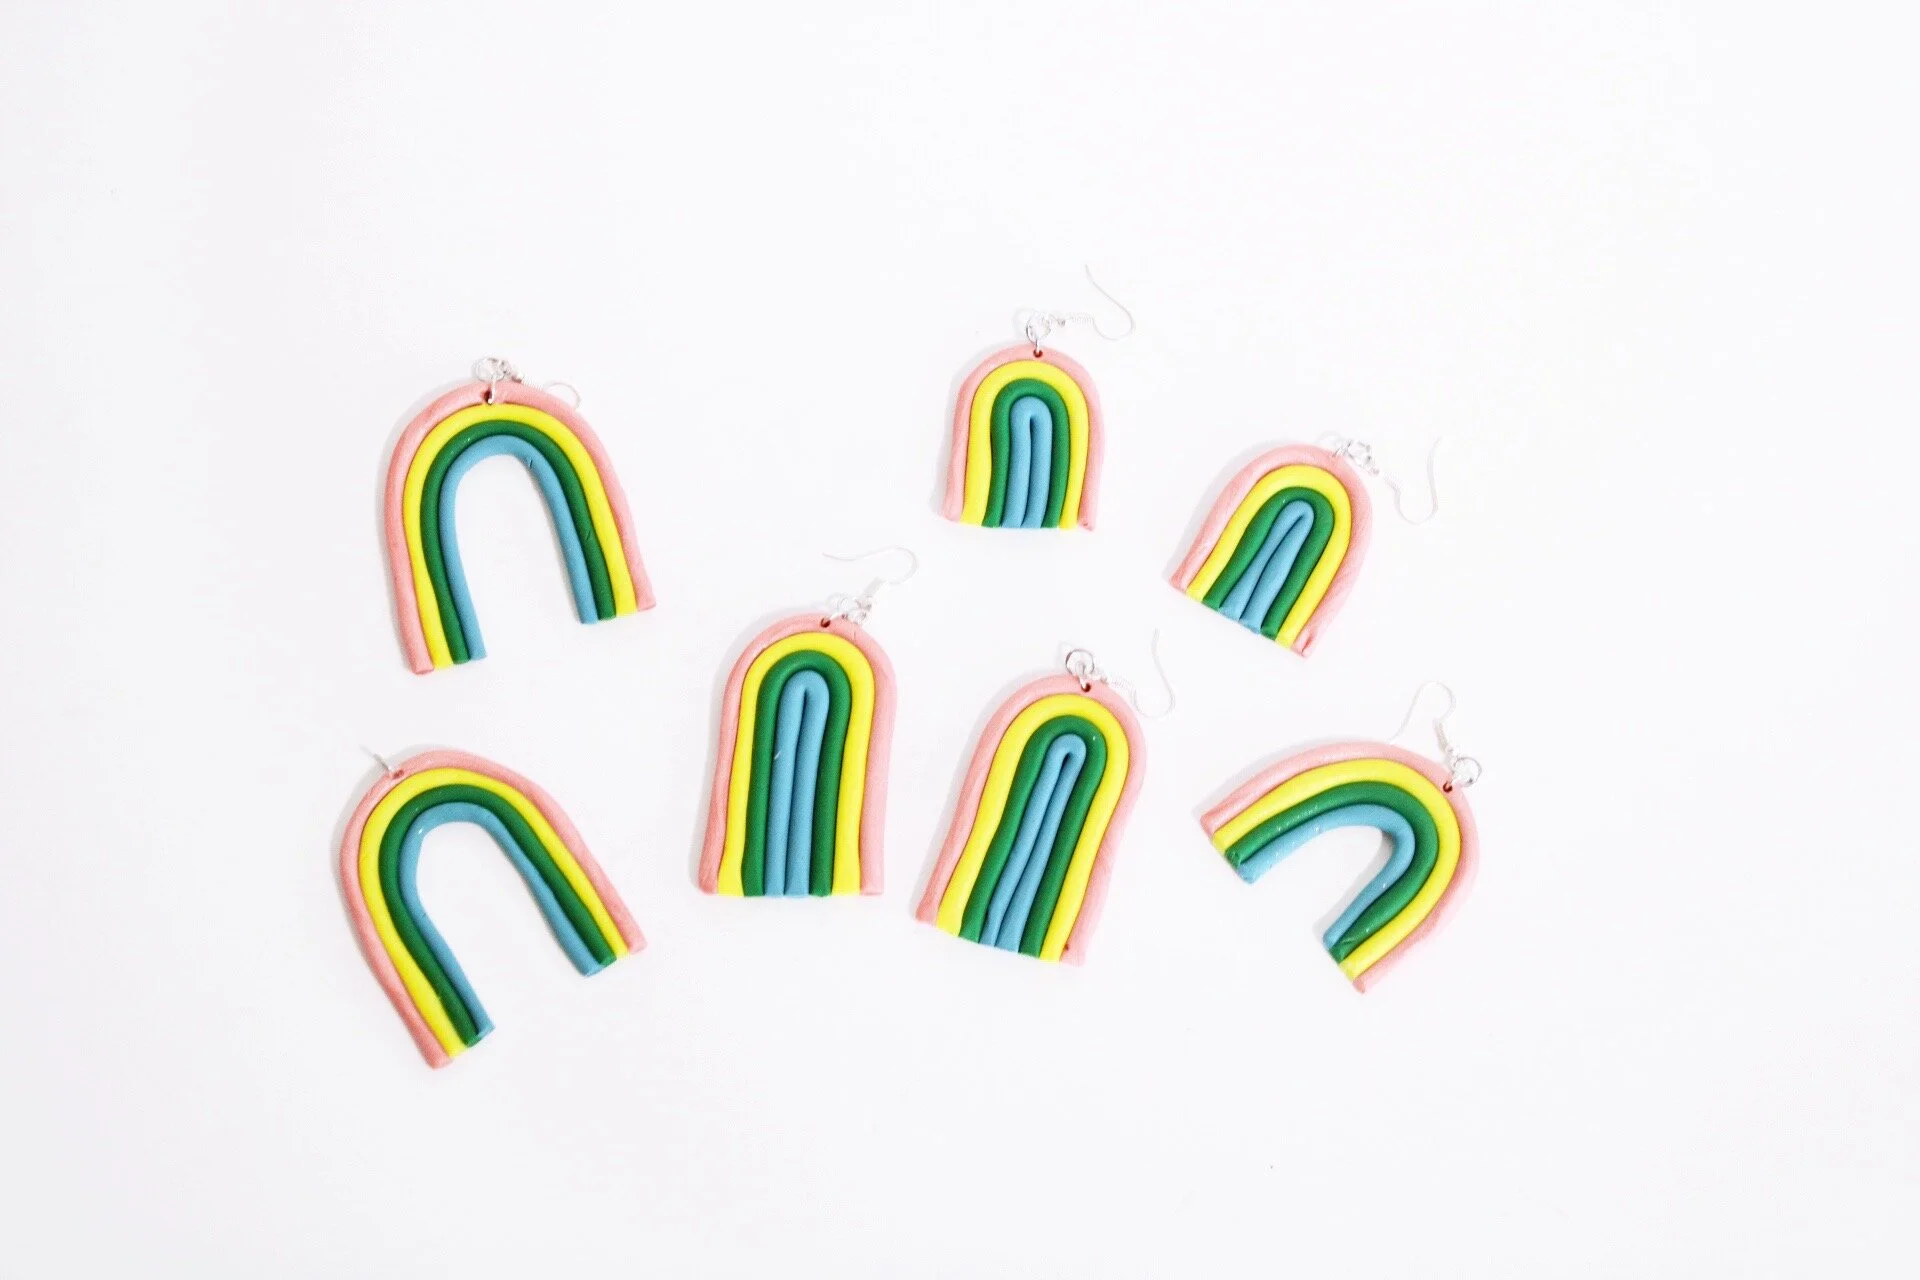
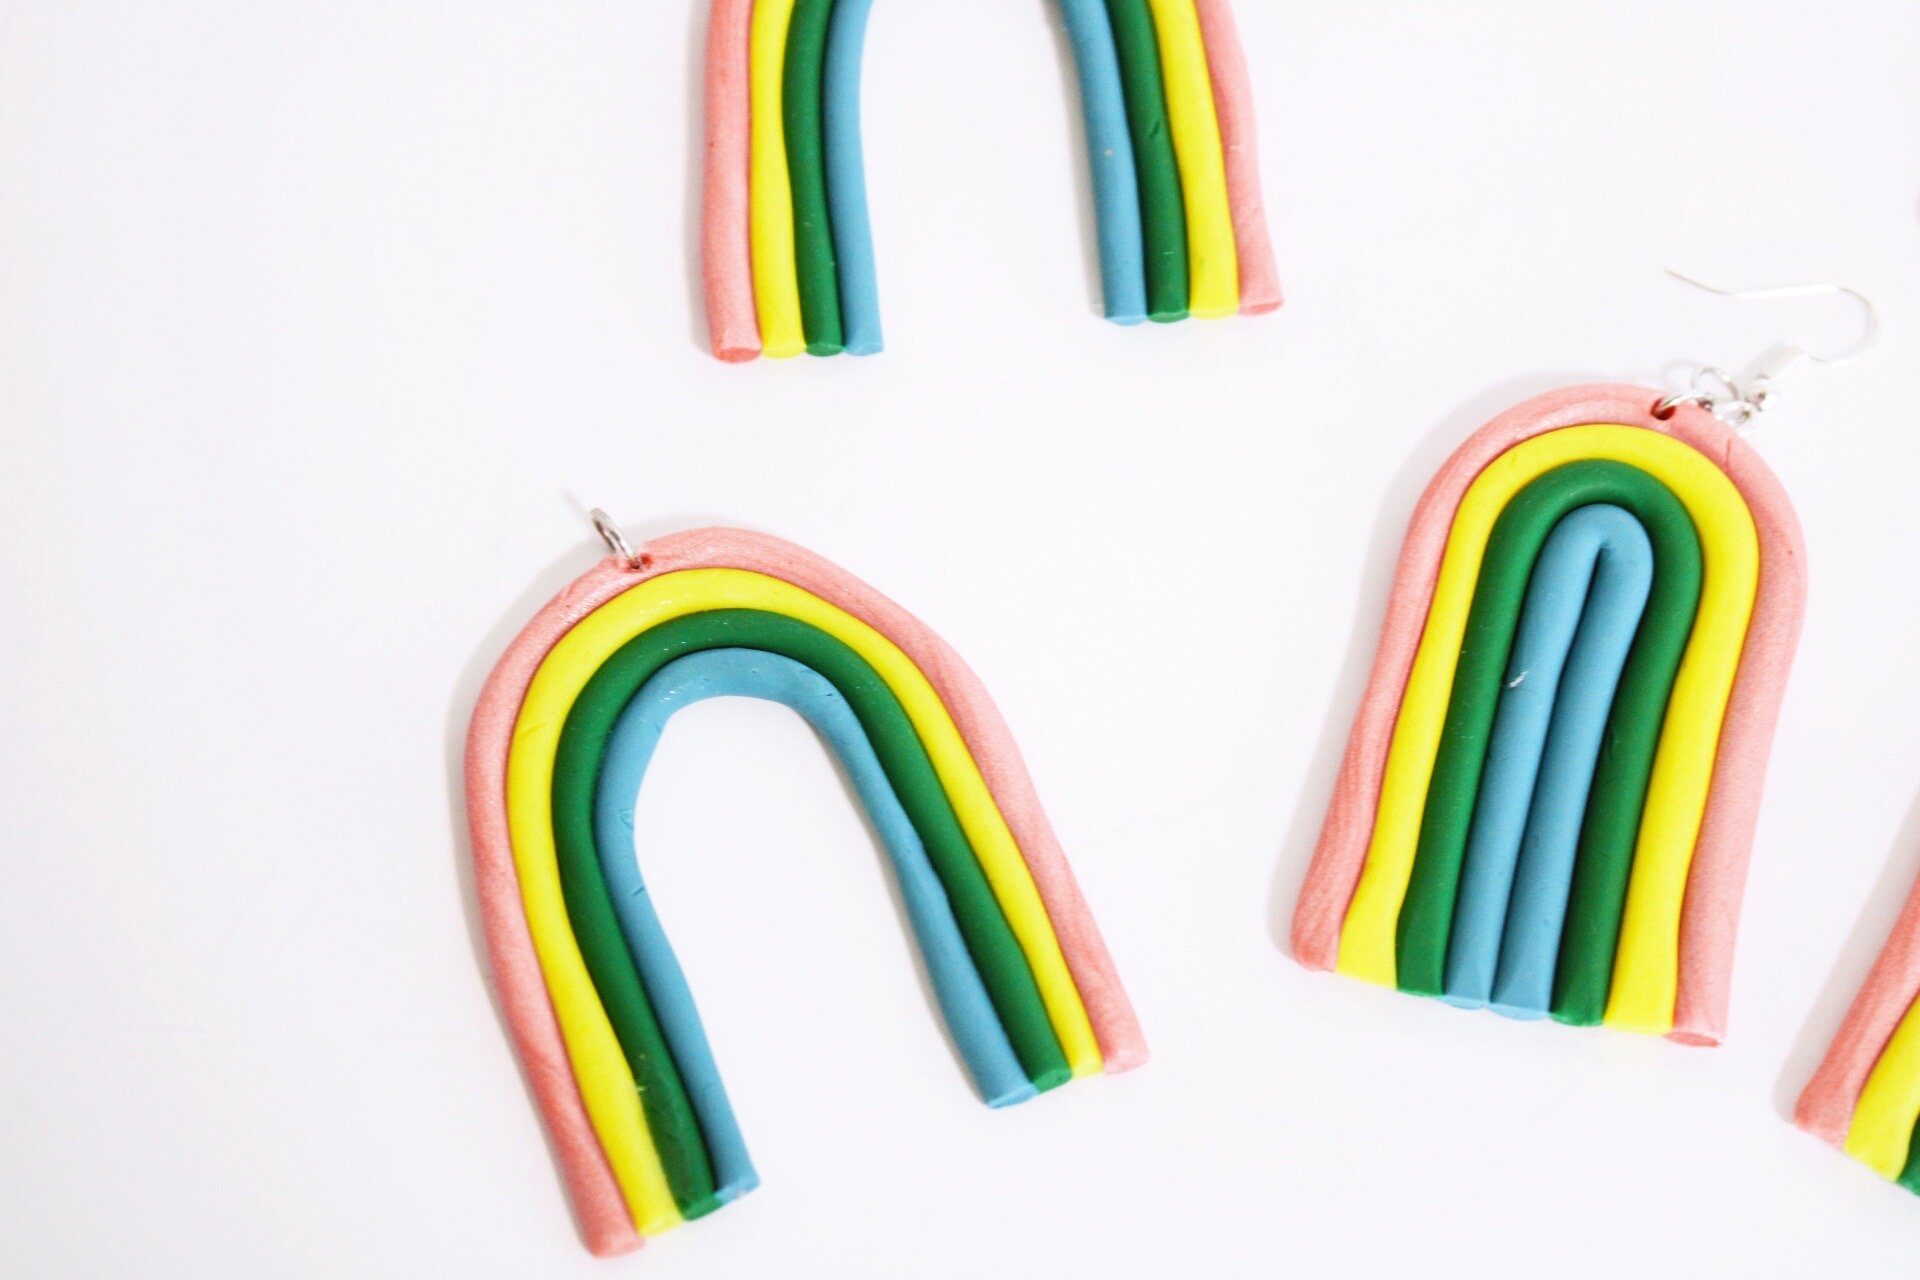
Step Nine: Once cooled, attach a jump ring to the rainbow and attach a fish earring hook to the jump ring. Repeat for the other earring.

Now you have gotten yourself a brand new pair of earrings that were really just so fun and easy to make. I really do love how they turned out because they are a perfect balance of classy and trendy. I can wear them to work or I can wear them out to dinner and I get constant compliments on them. I also love that I can make so many more of them in all different colors and they will still be amazing and super trendy. You may need to get a jewelry box just for all your new earrings that you are about to make.

I hope you love these DIY clay rainbow earrings as much as I do.

If you make this please tag #StayingHomebody and #HomebodyMakes