
DIY Weaving
A big part of who I am as an artist, is a weaver. I have been weaving since I was in college and truly loved it. The repetitive quality of going over and under was so medative to me. It quickly became my meditative practice and I was weaving all the time. When I was in graduate school, studying Art Therapy I decided to write my thesis on the therapeutic properties of weaving. From there I began running groups for children and adults to learn how to weave. Teaching others how to weave has been an amazing experience for me and I have LOVED every minute of it. That is why today I wanted to share this knowledge with you and hopefully it can impact you as much as it has me!

Supplies:
Loom (I am using the Martha Stewart Pegboard Loom which is great for beginners!)
Yarn of Different Weight
Scissors
Driftwood or a Dowel
Step One: To set up the loom you first have to decide how large you want your piece to be that way you can place your pegs. I made mine 6” wide and 9” long.

Step Two: Now that you have your desired loom size determined you will begin to set up the vertical strings also known as the “warp.”


To warp your loom you will start by taking the cotton yarn and attaching it to the first peg on the bottom left size. Create a slip knot and attach, tighten it a bit but not too much where you cannot pick the string up off the peg when needed.
Pull the yarn to the pegs at the top and going from left to right, wrap around the peg directly across from your slip knot and pull down.
Wrap around the next peg across, only this time pull up.
Repeat this pattern until you reach the final peg. Tie another slip knot and attach to the last peg. Your warp should be taut.

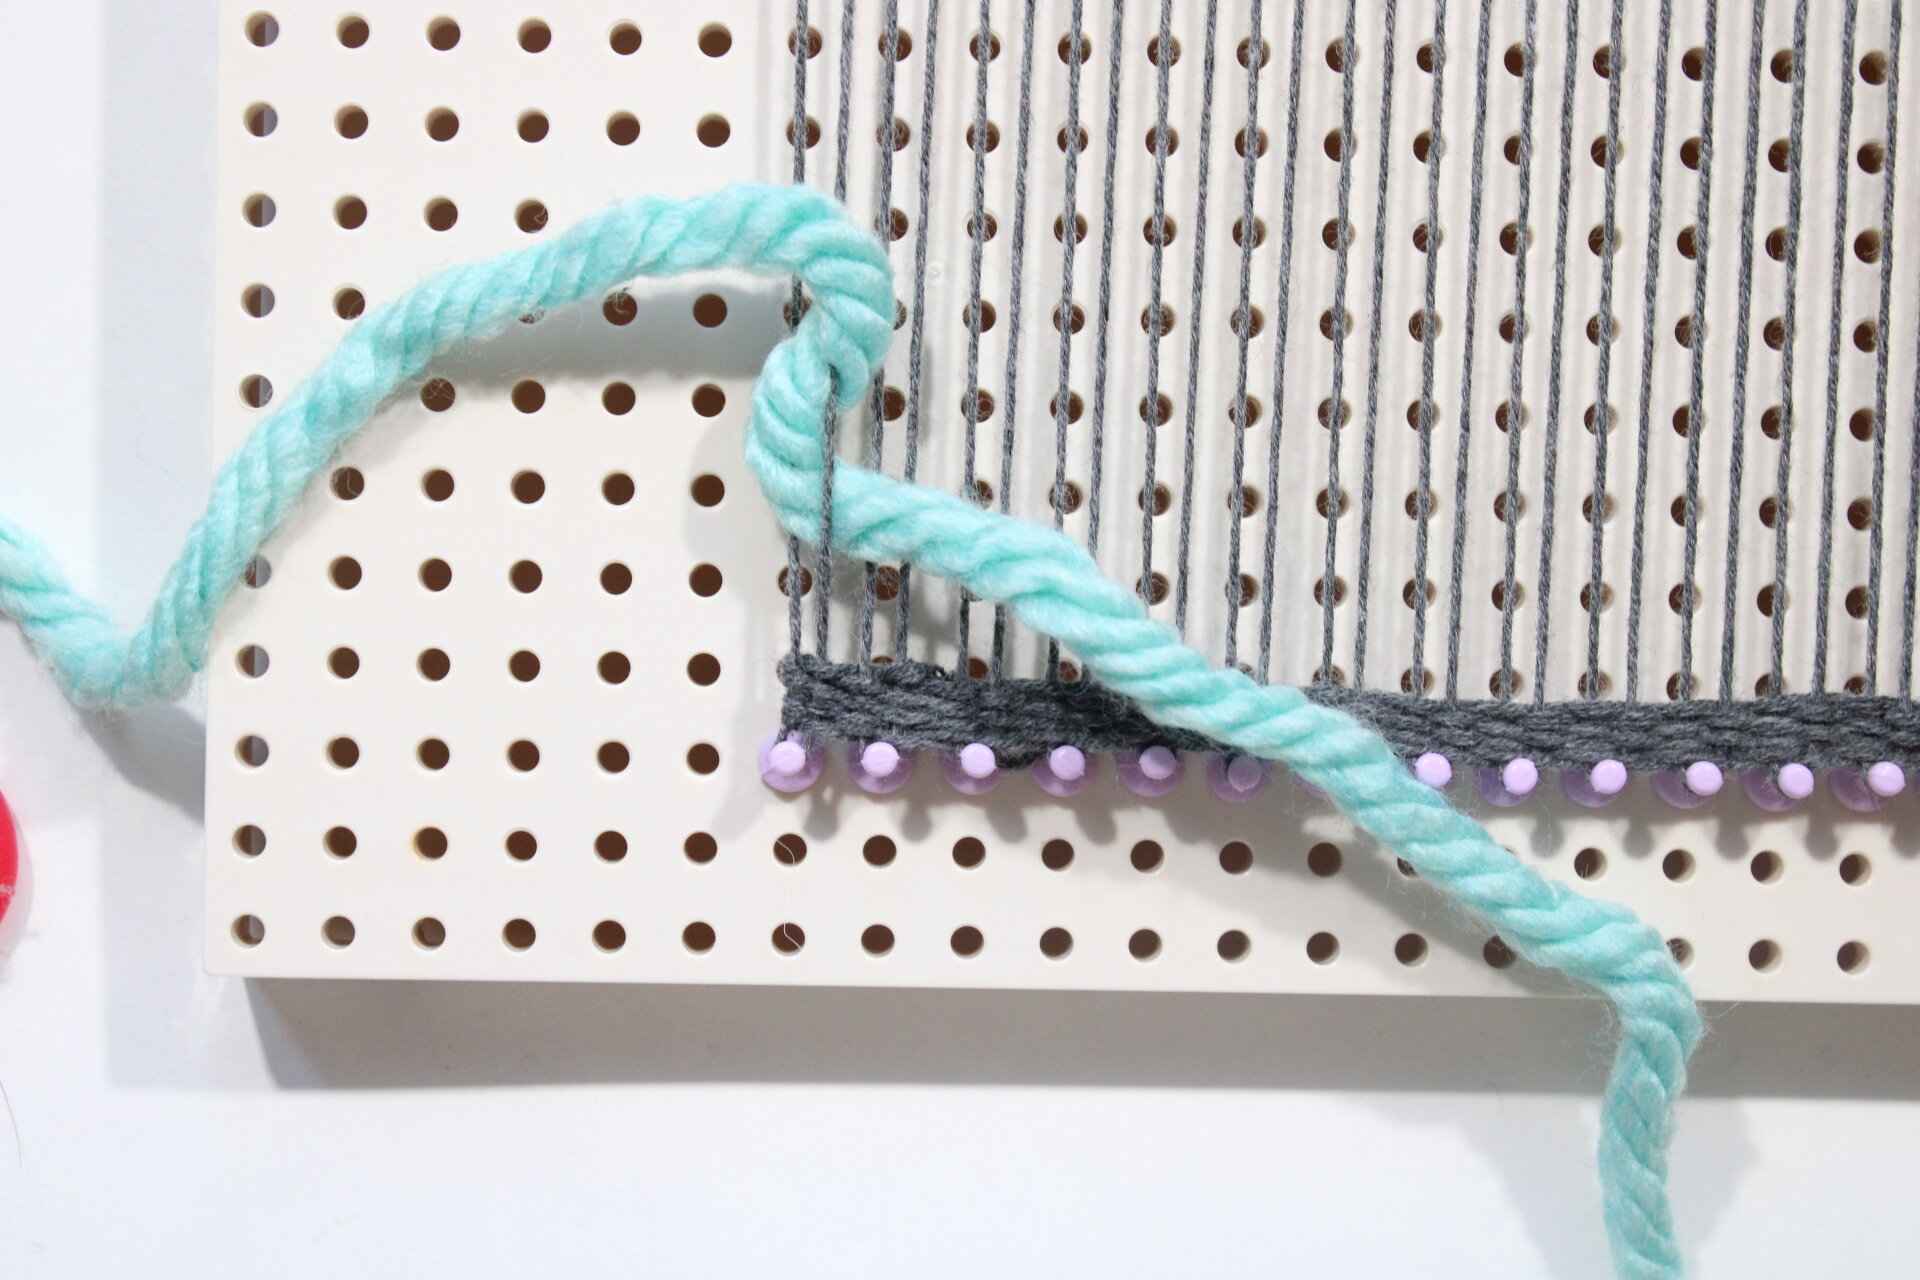
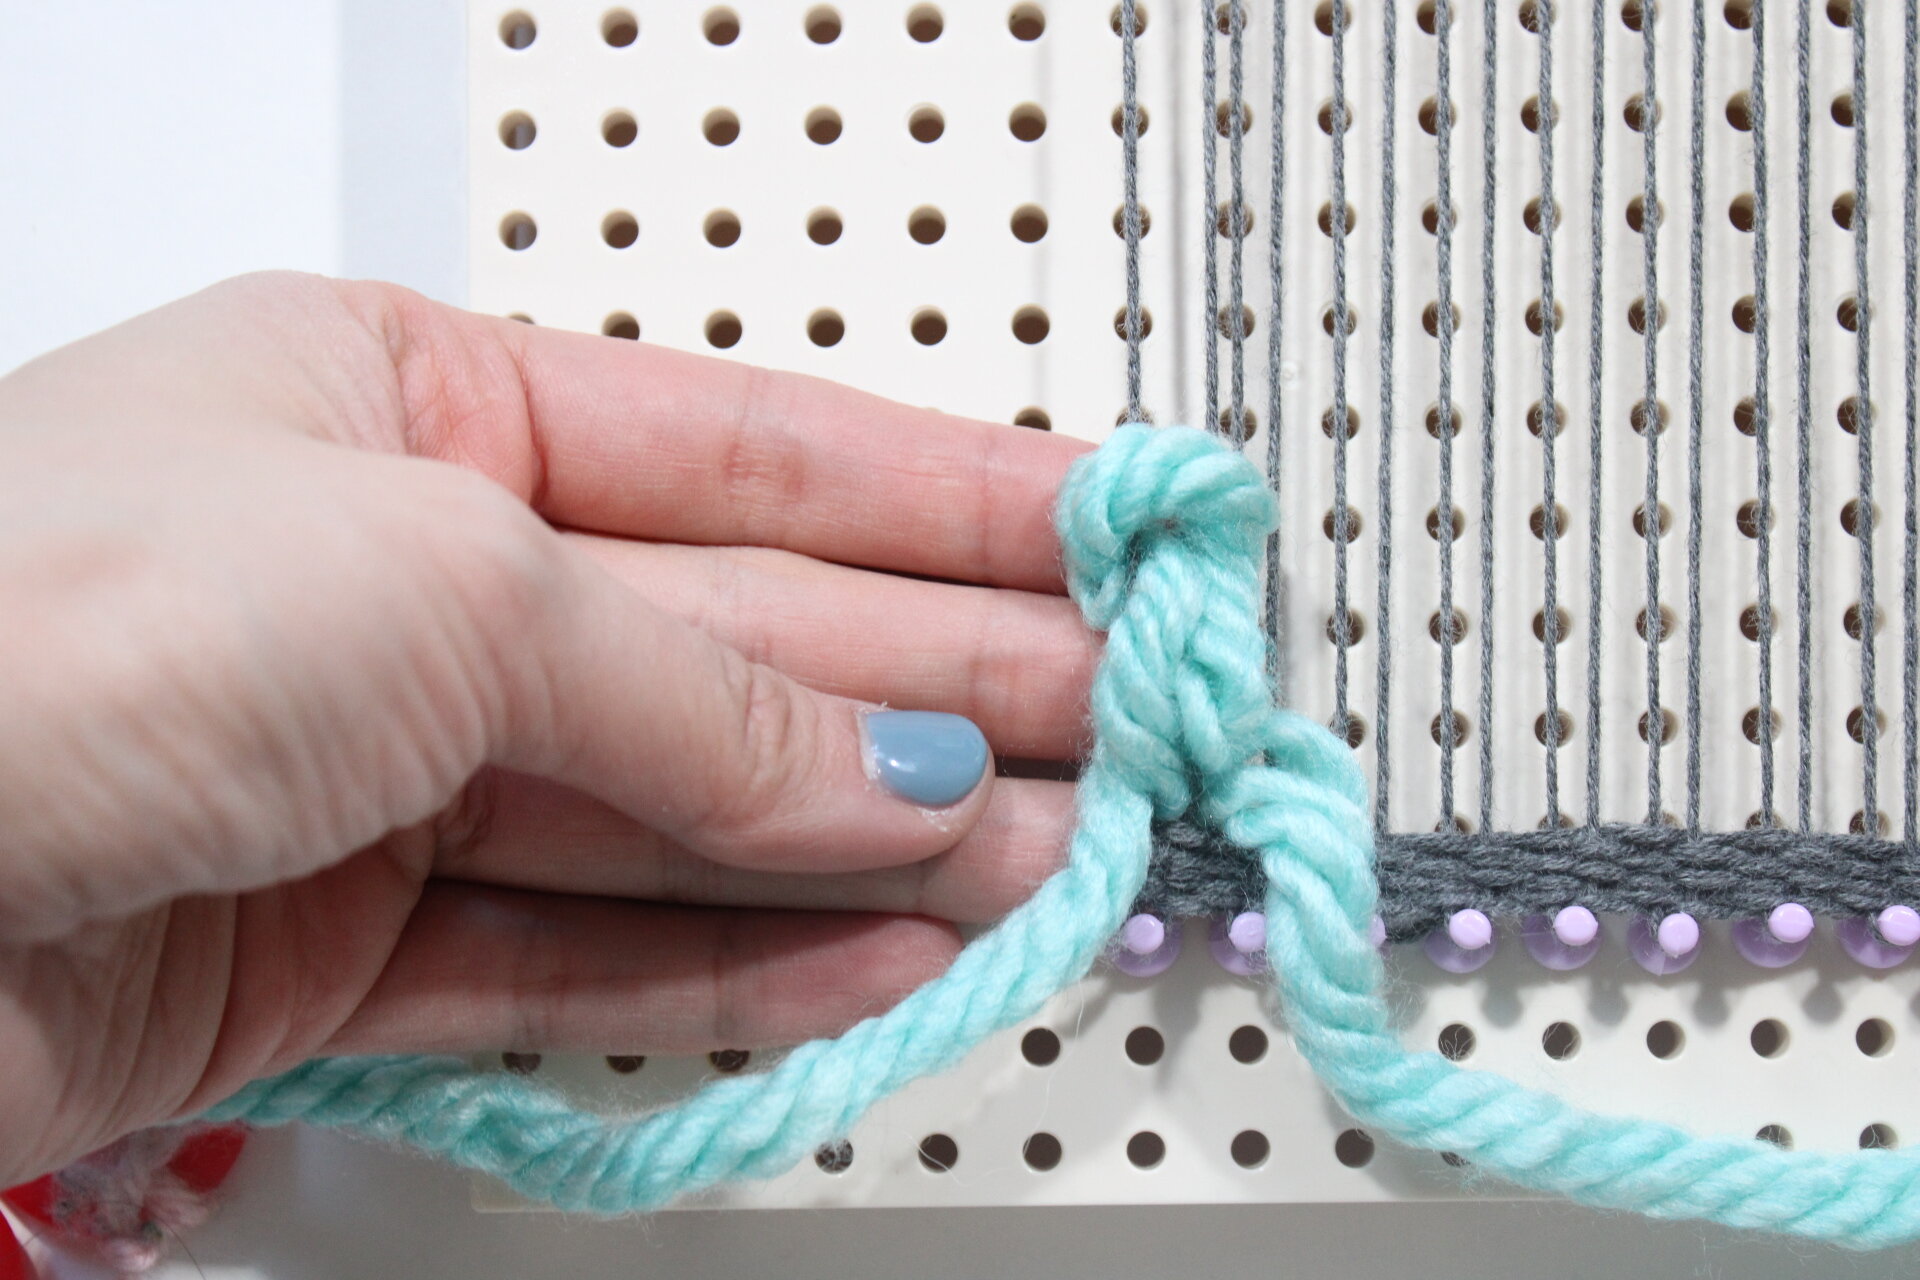
Step Three: Now the weaving can begin! You will start by laying down a few rows of “Tabby Stitch” weaving using the same cotton yarn used for the warp. These rows are an anchor for the rest of the weaving that will be made on this loom so they are very important.
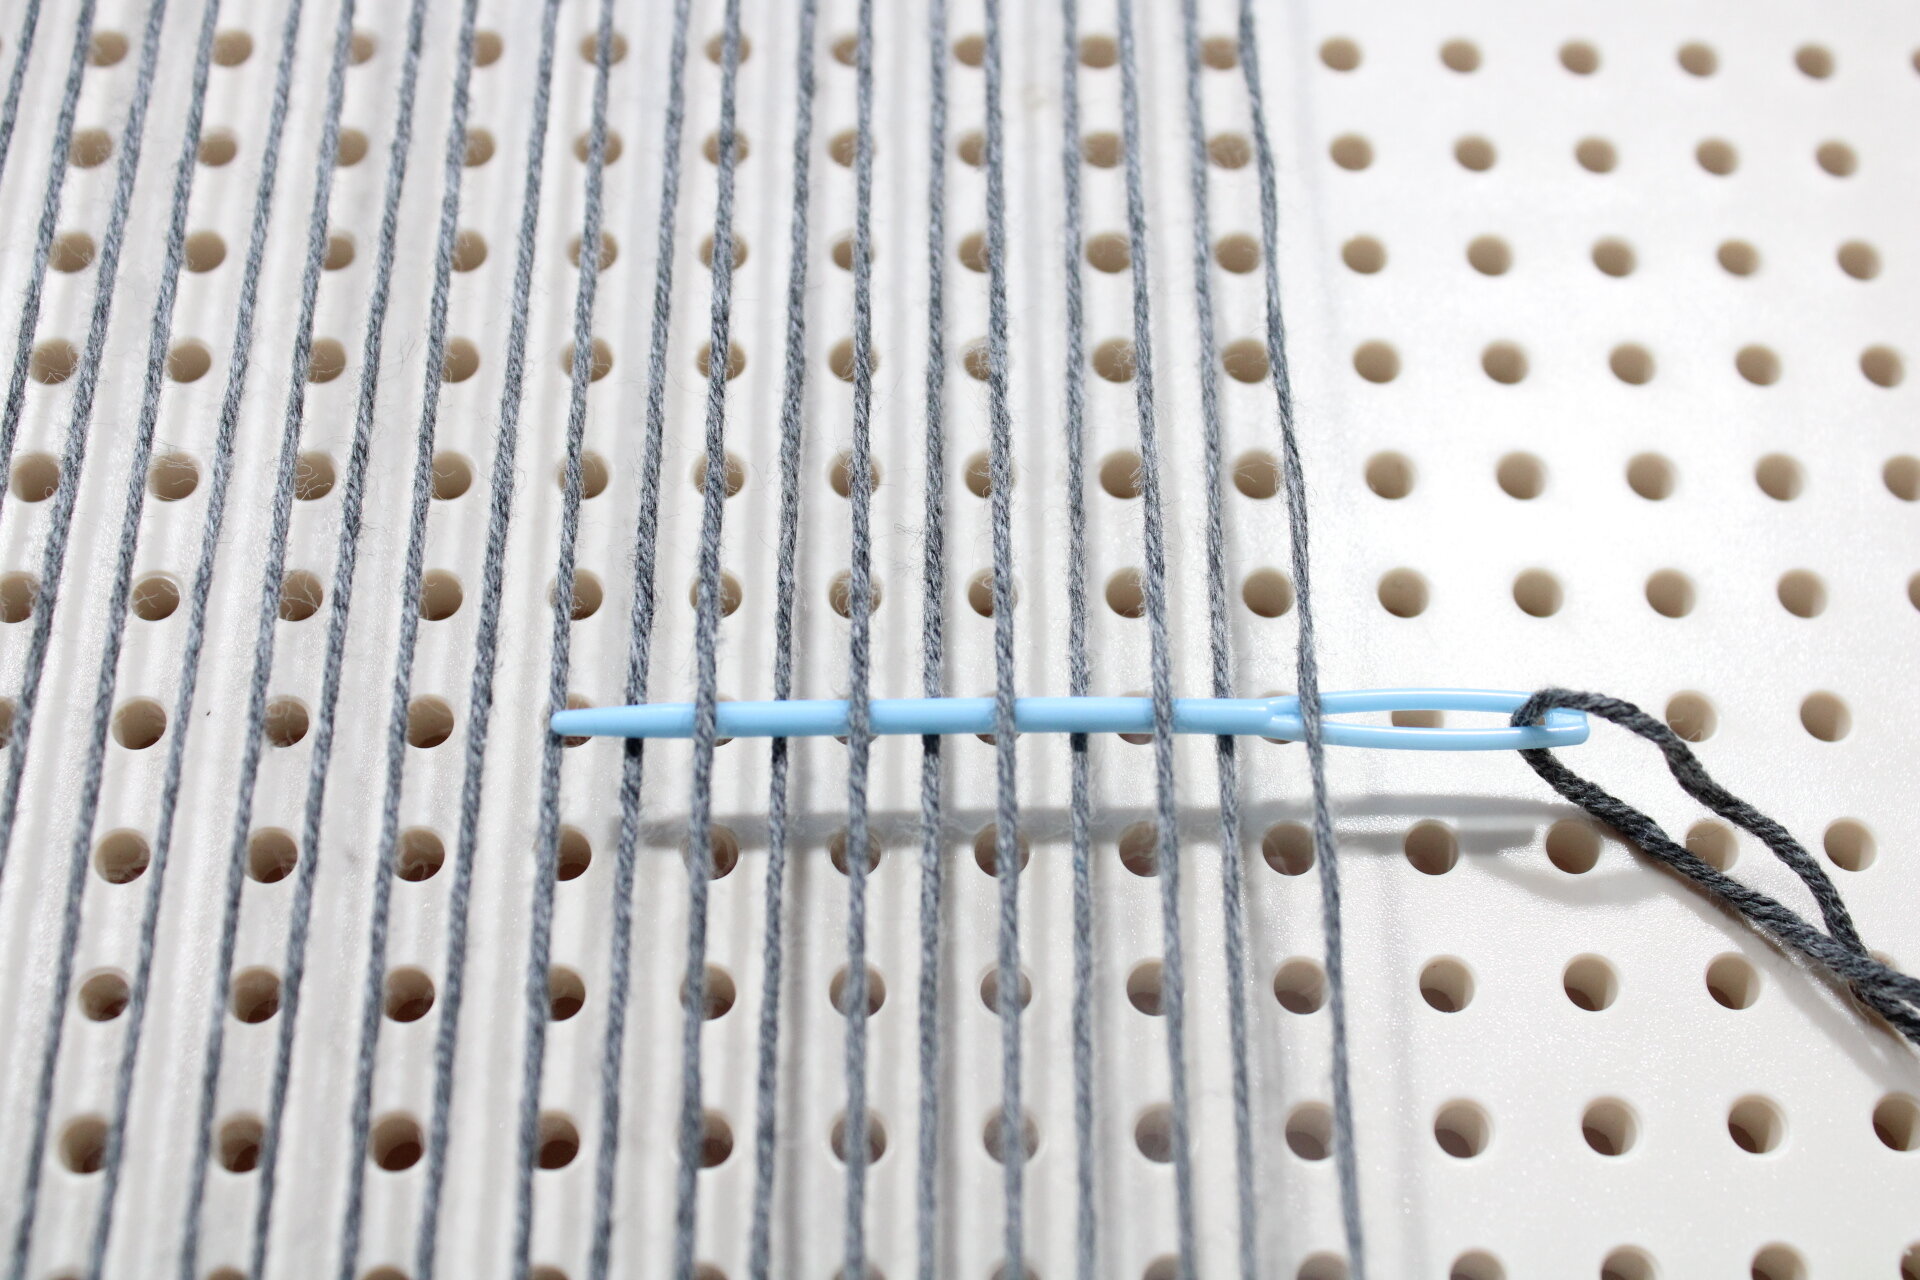
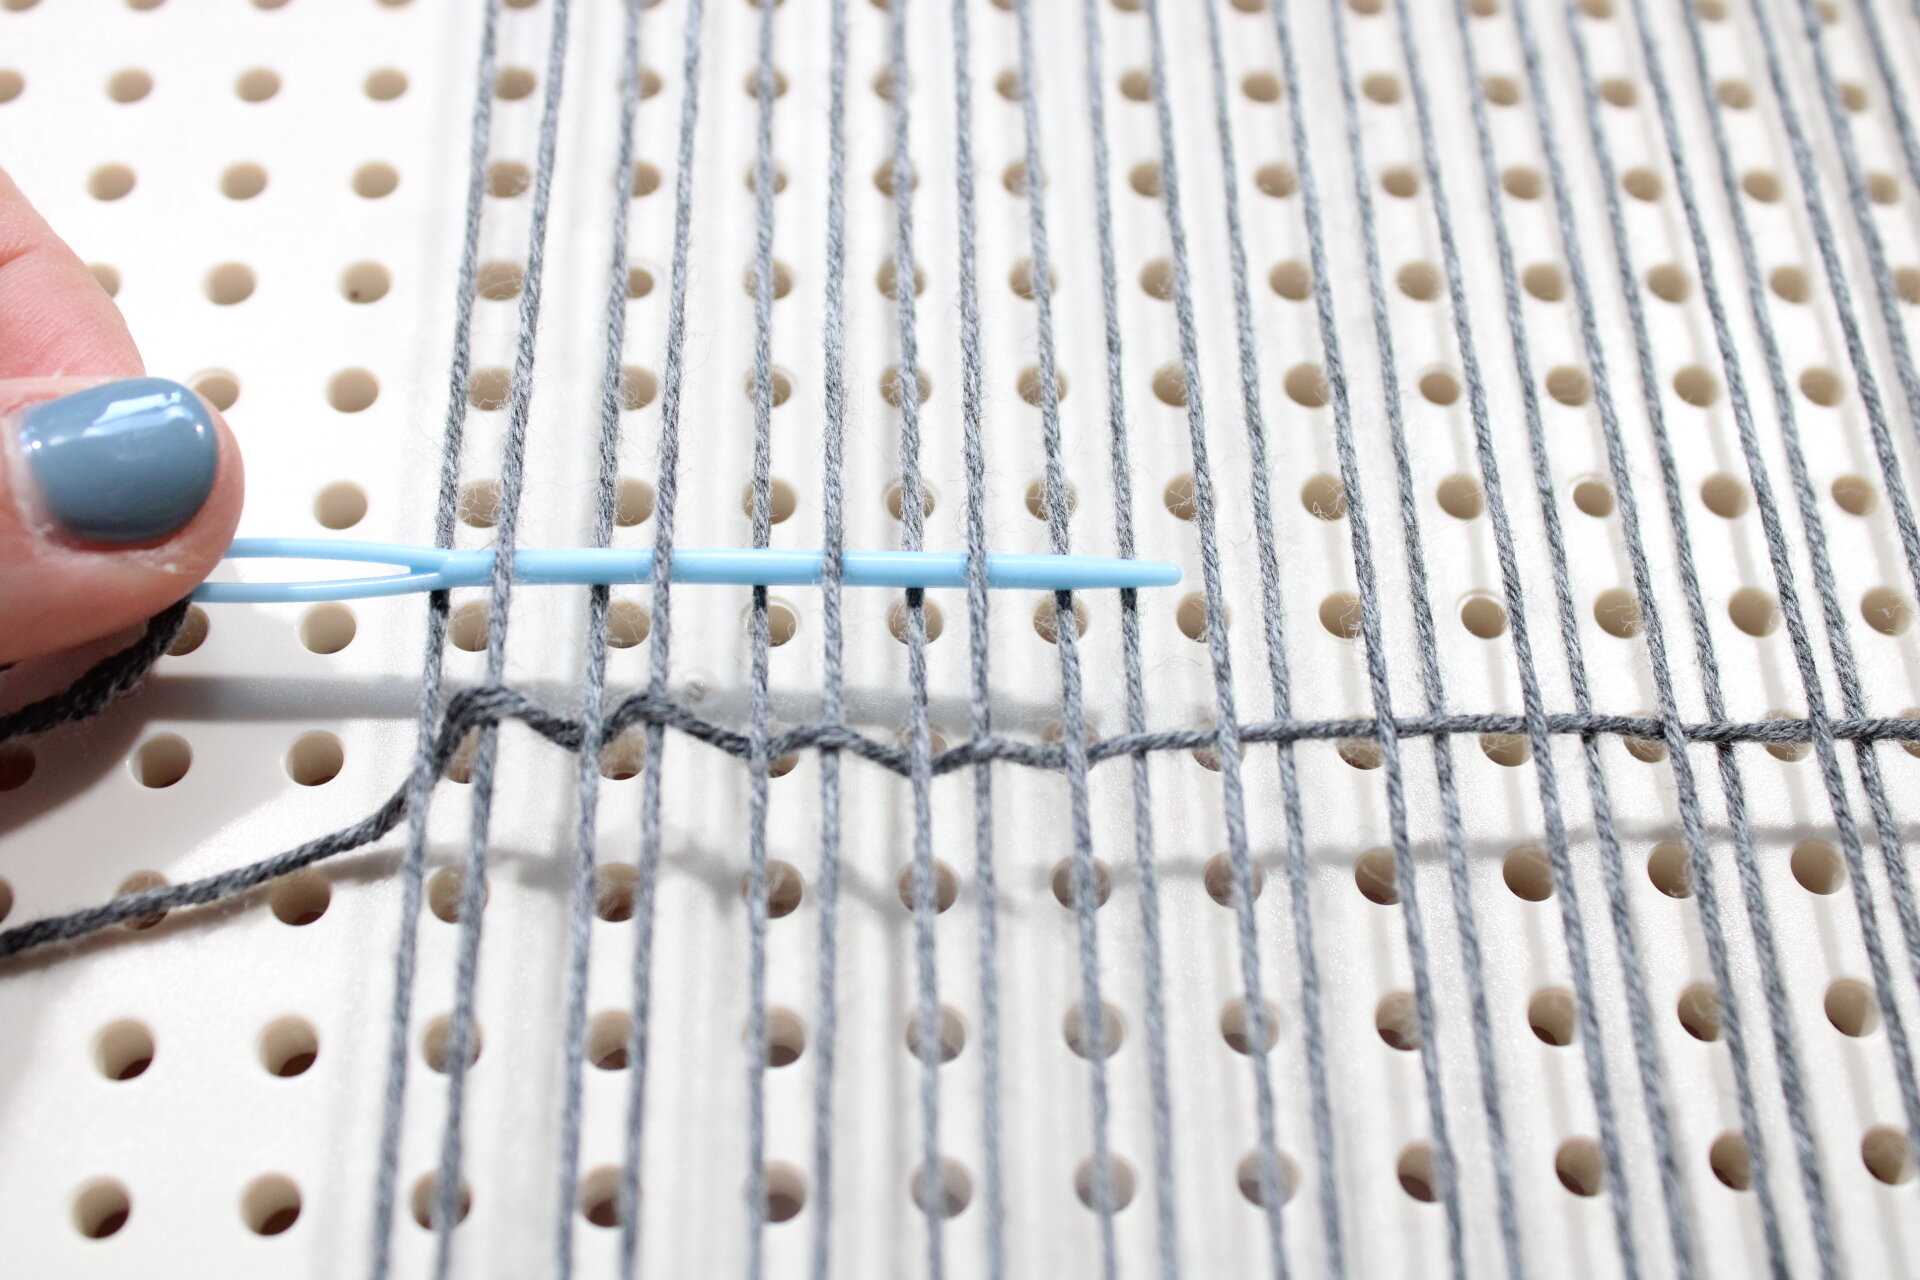
Thread your needle with the yarn and begin to weave by going under and over each vertical warp string.
When you reach the opposite side, begin weaving back towards the end you started from. When you begin a new row, always go in the opposite way that you ended on. So if you started by going under and then over, when you are turning around you will need to go over and then under. If you go in the same way you will unravel the weave, which is frustrating but happens to everyone!
Continue to weave this way until you have about 4-5 rows of tabby weave. I like to finish in the middle of a row and weave it behind, leaving the tail for later.
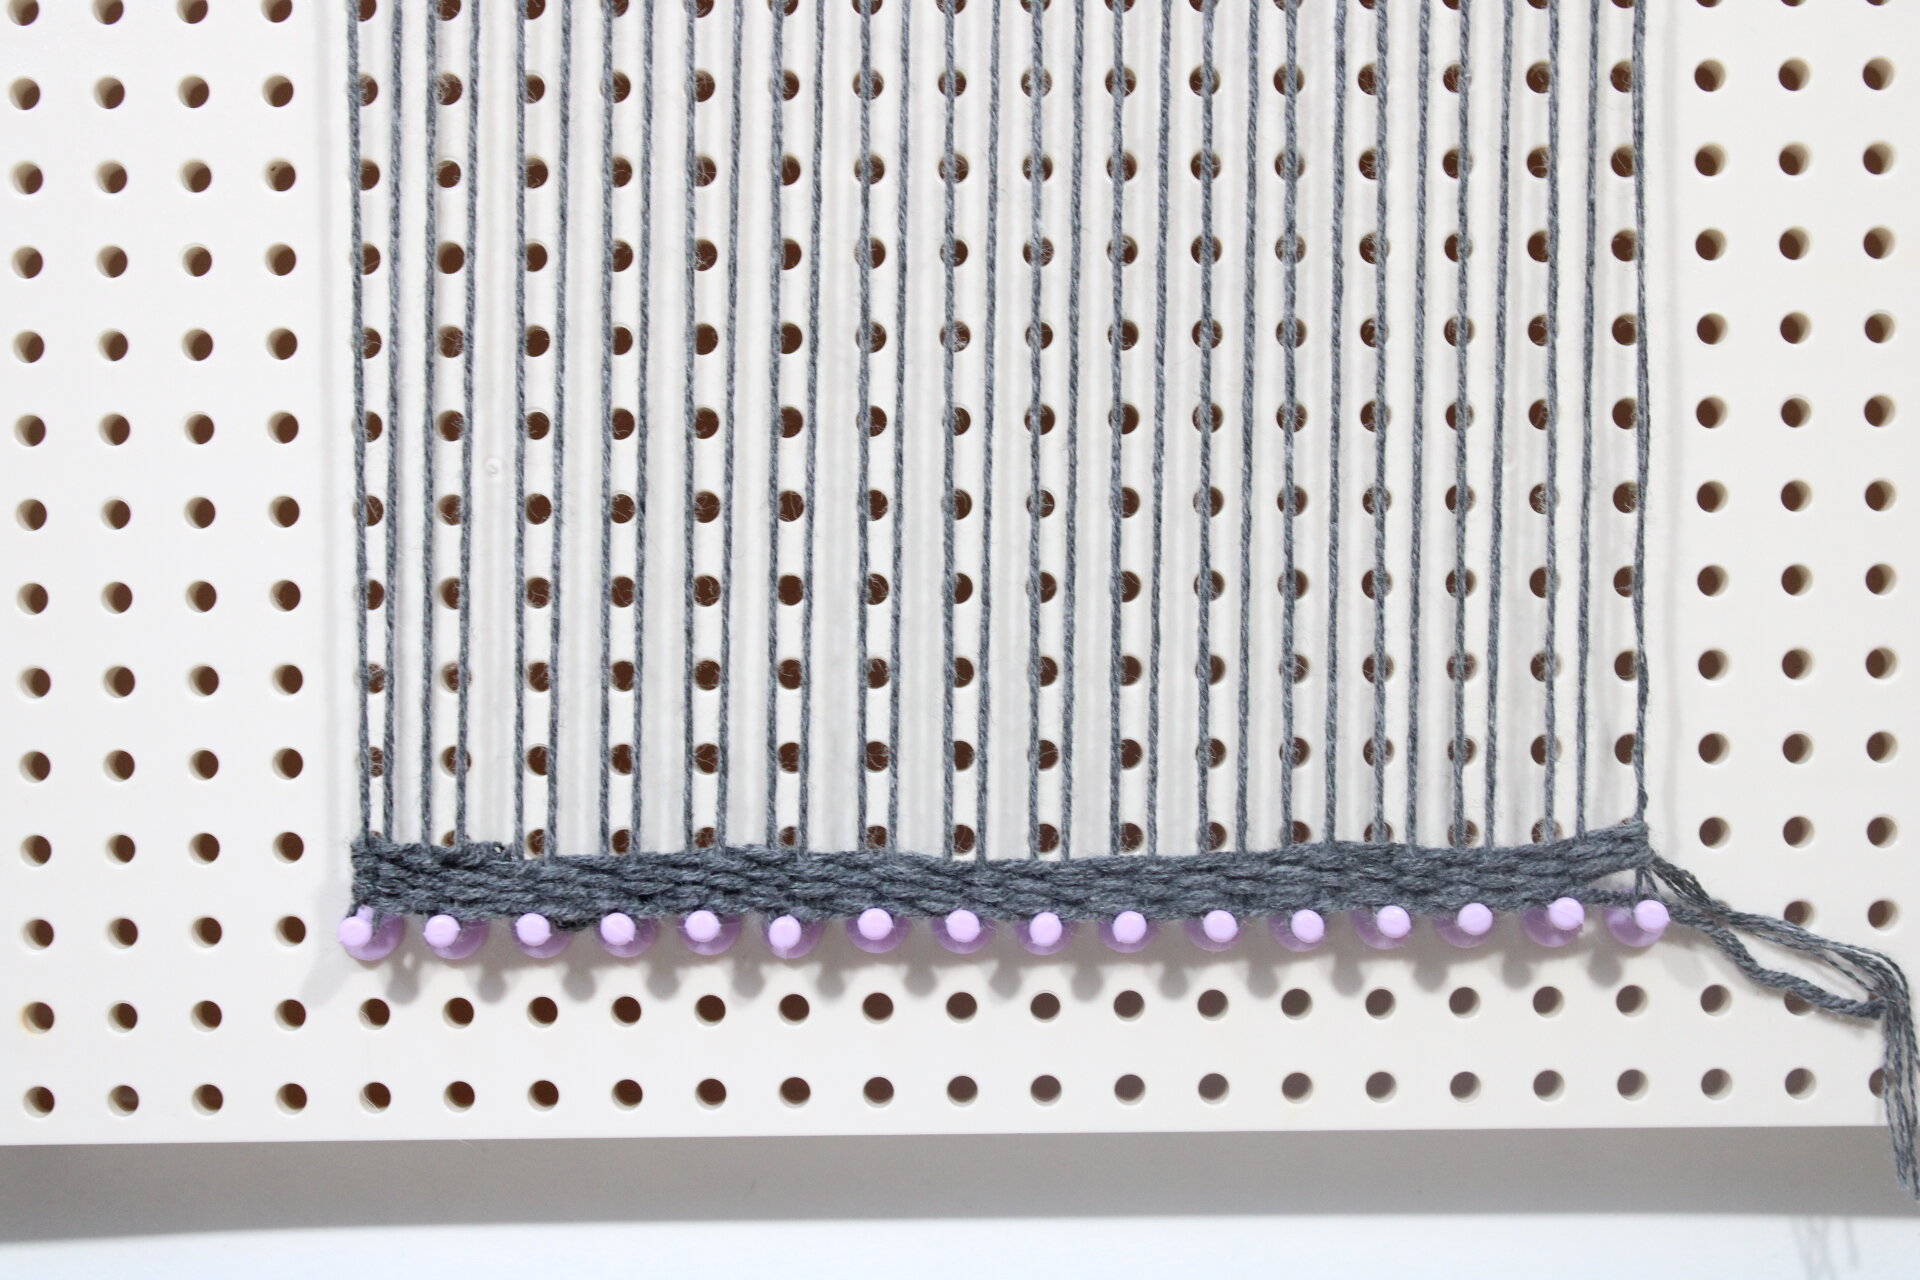
Step Four: A weaving often has some fringe on the bottom. It makes it look longer and also is the perfect place to add some texture. In order to make fringe you will create “Rya Knots.” Start by taking the yarn you would like to use and cutting it into similar size pieces. I like to wrap them around a book to get each string the same size. Now take the yarn, 1-2 pieces of thicker yarn and for thinner yarn use 3-5 pieces. Fold these pieces in half.

Lay the middle of your yarn over the first two warp strings
Push the right side of your yarn down and through the middle creating like a little bulb. Repeat that on the left side.
Pull the bulbs all the way through the middle, leaving the tails out and pull down to rest above the anchor rows.
Continue to create the row of fringe from left to right, by repeating the steps above.

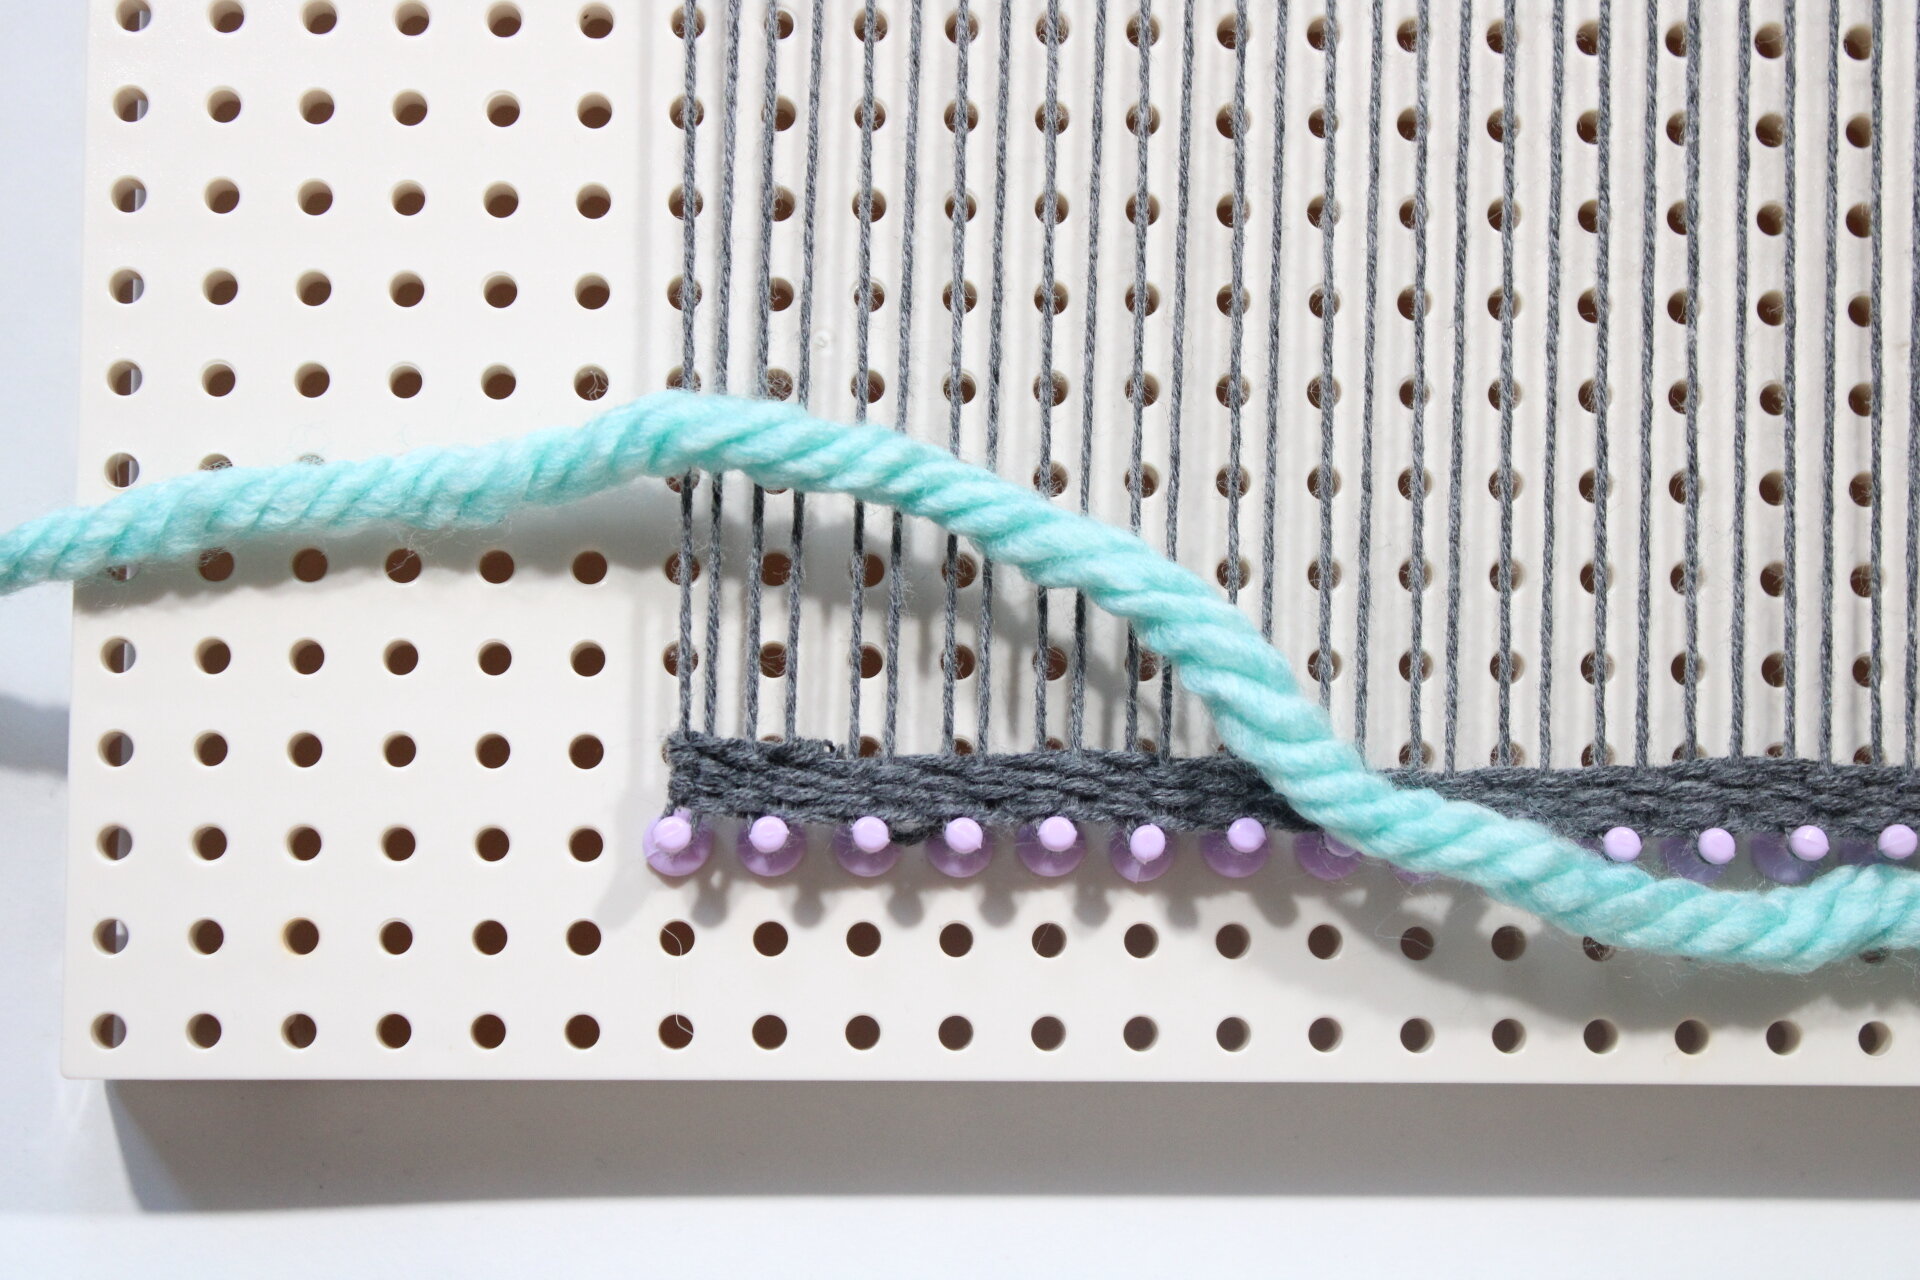
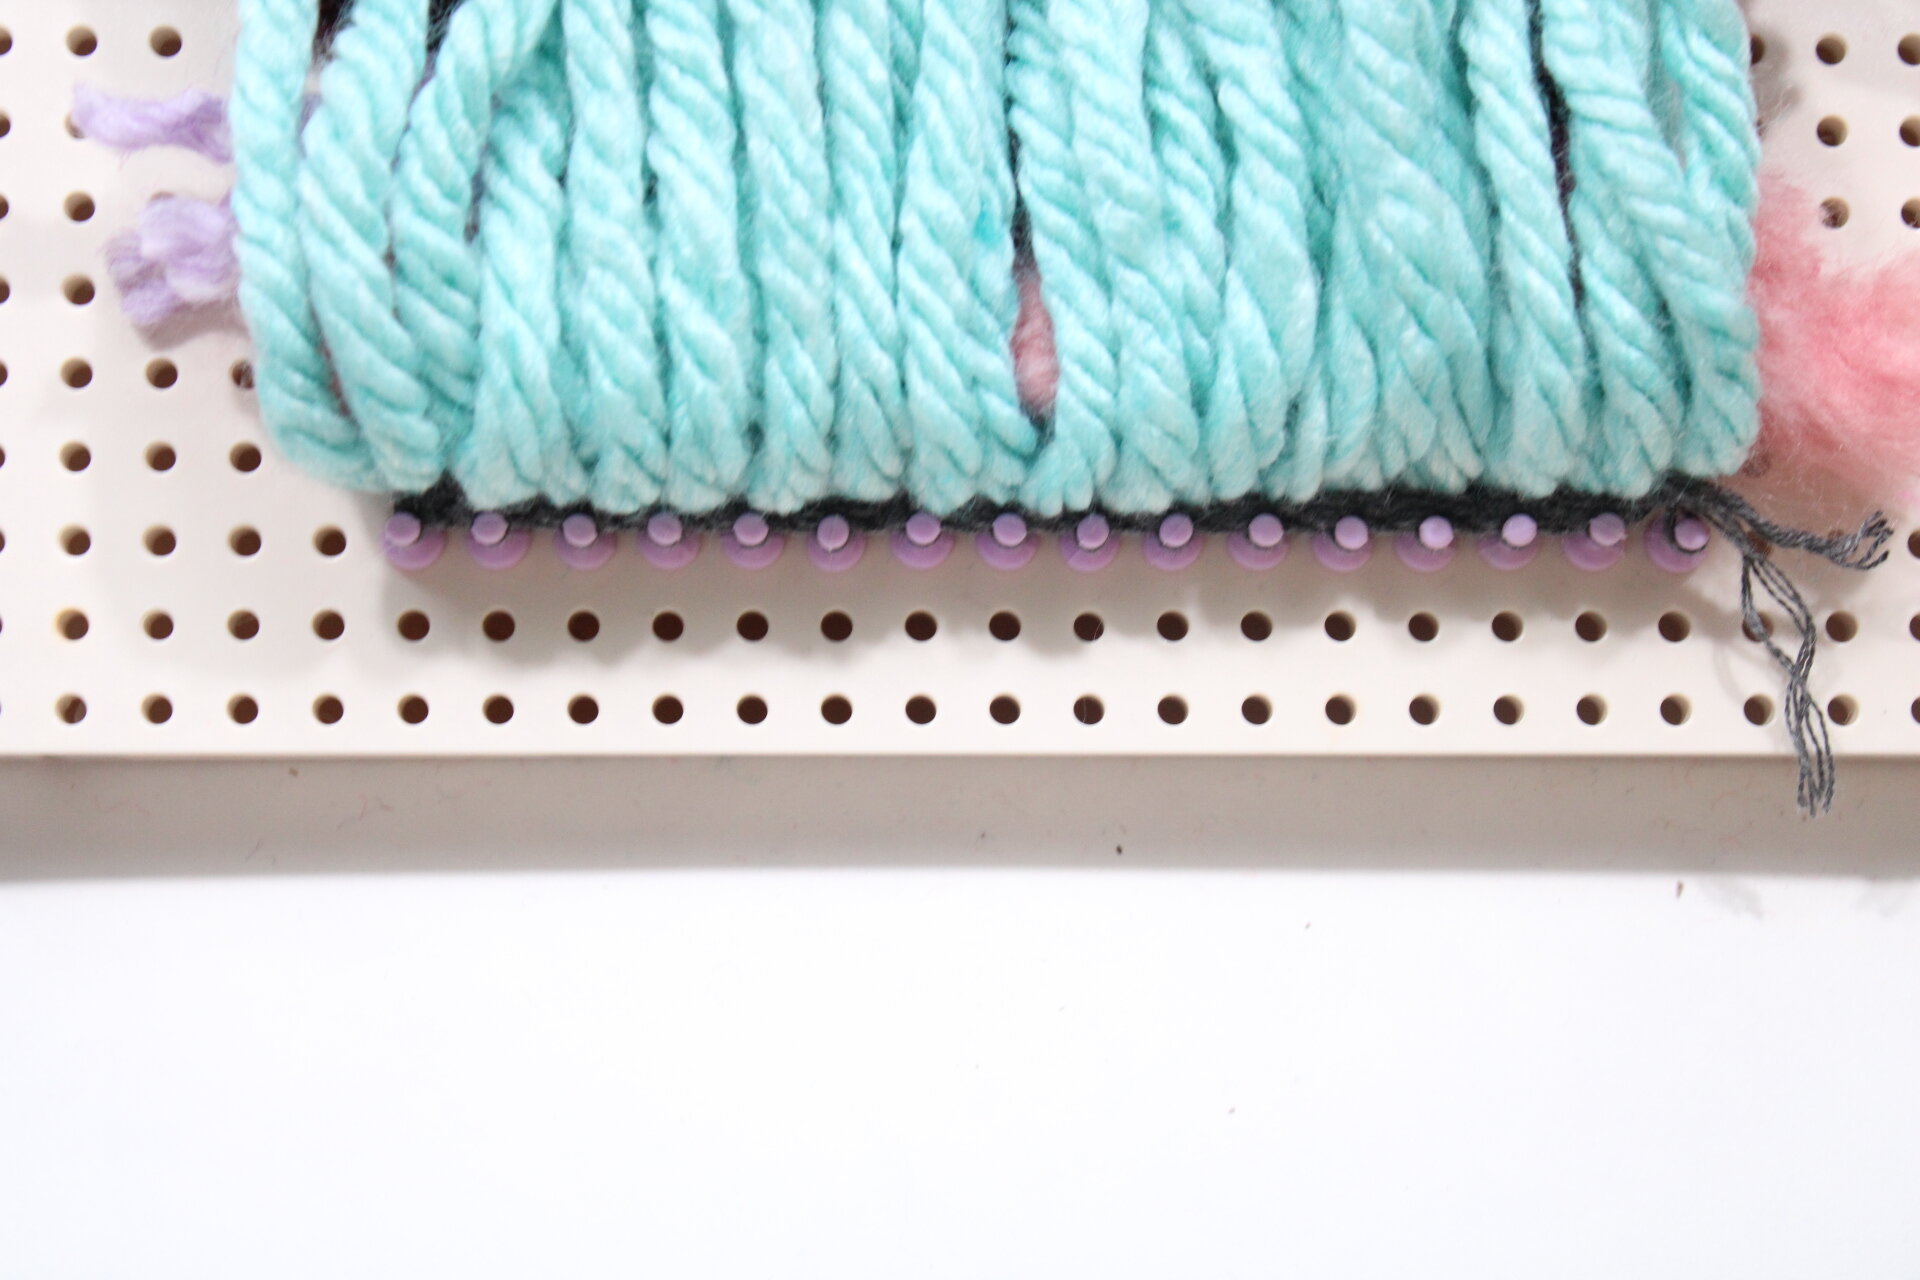
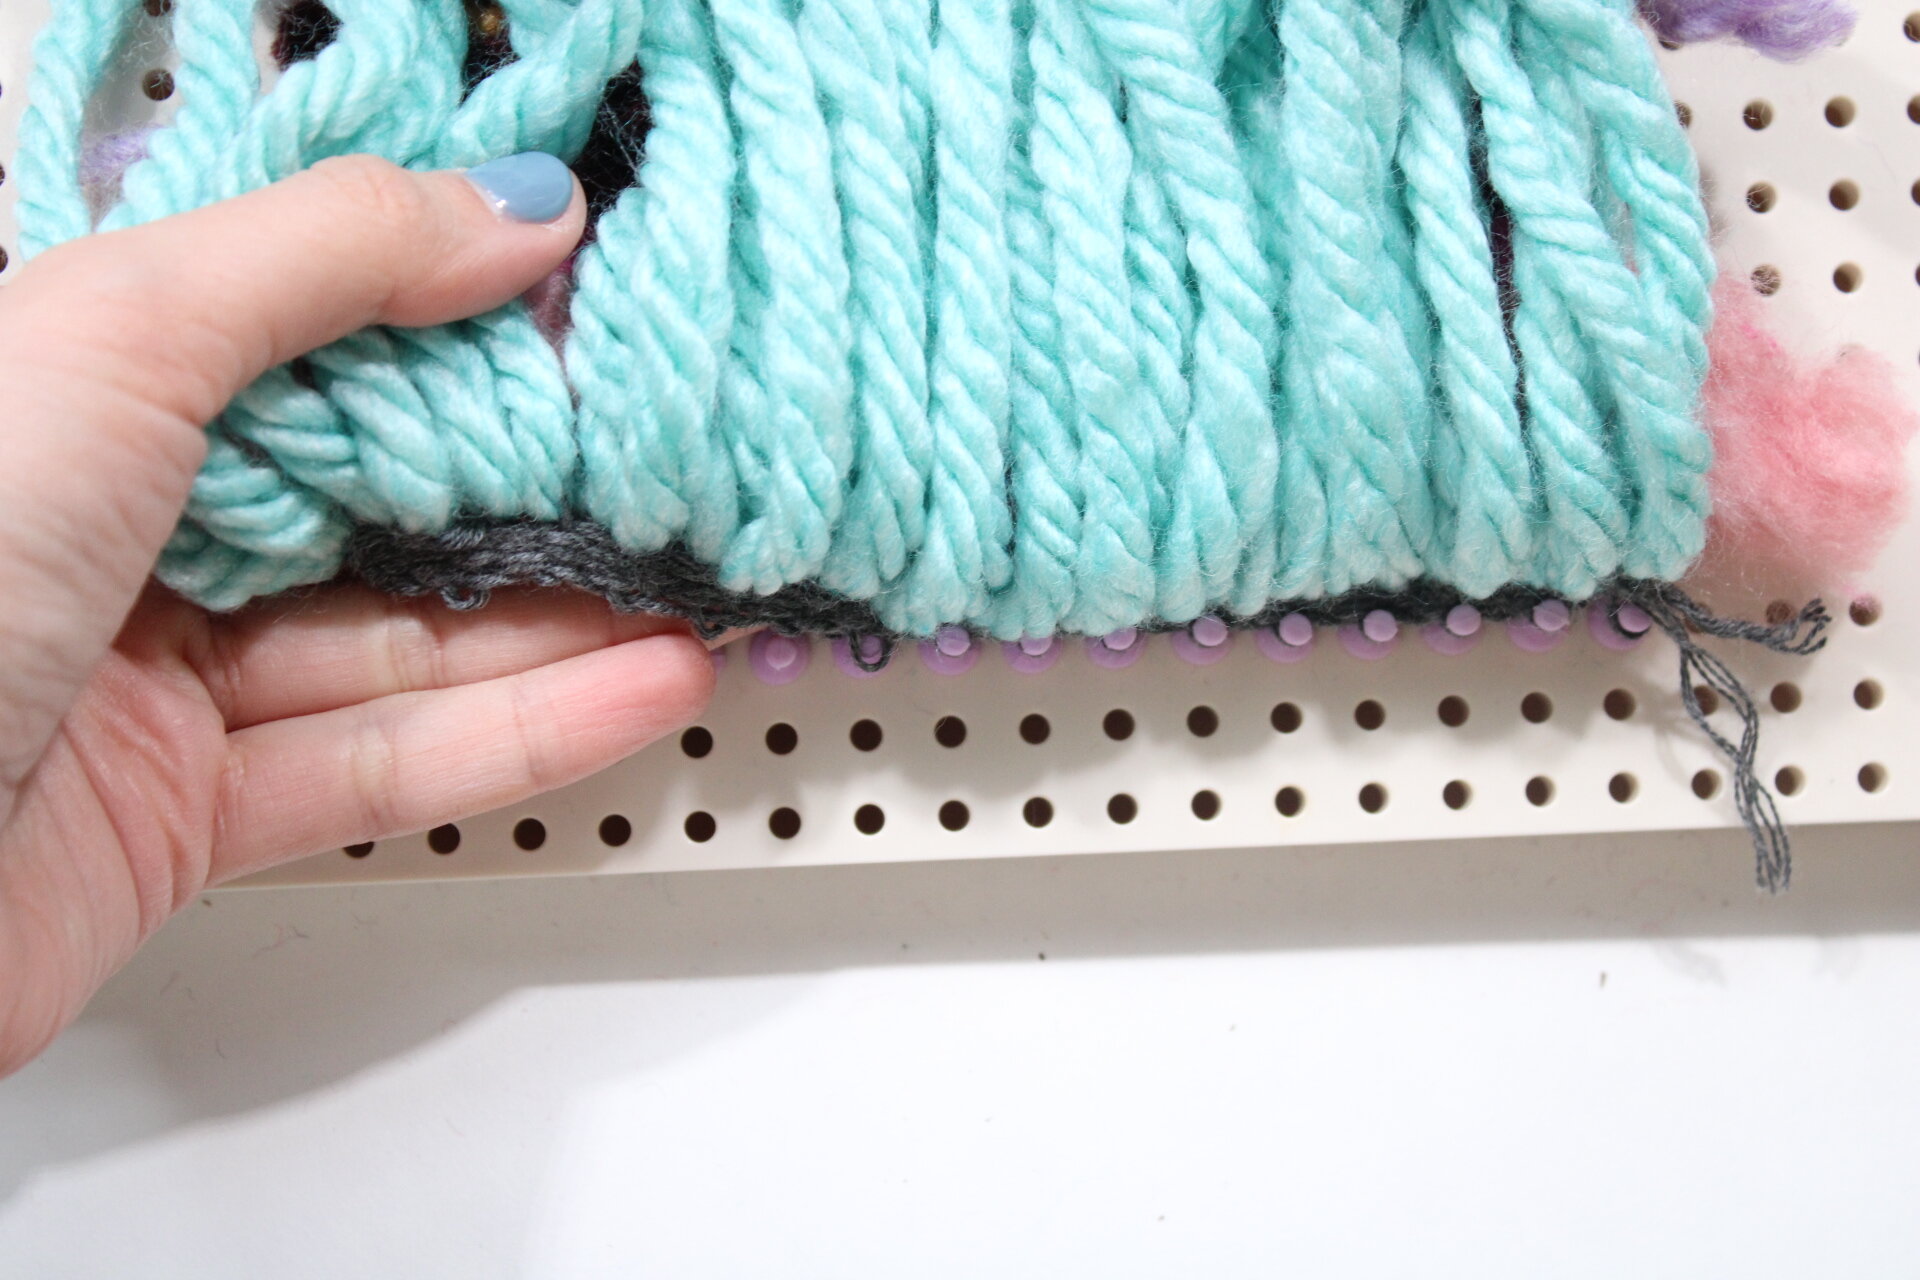
Step Five: Now that your fringe is created, you can begin weaving rows of yarn above the fringe. This weaving calls for only the Tabby Stitch and the Rya Knots that you have already learned how to do! You can use any combination of color and texture that you like. Each time you switch yarns simply weave to the middle and leave a “tail” in the back of the weaving. Start a new row with new yarn.

Step Six: This weaving is your own, so you can play with it how you want. You can continue going all the way up using just the tabby weave and different textures of yarn. I started off by using a thick yarn, to create immediate texture. I love the way that very thick yarn weaves in a Tabby stitch because you can pull the yarn up through the warp threads and create little baubles.

Step Seven: I offset the thick yarn with a thinner cotton yarn in a complimentary color, weaving a few rows back and forth and creating space.

Step Eight: I felt that it would be fun to add some Rya knots throughout the weavings so after every 2 color/ texture changes or large color block I would add a Rya knot in a complimentary color to add some more fun texture.


I followed that same pattern until I got to about 2-3” from the top of my loom. The fun part about weaving is if you get up that far but still want to add more you can use a comb or fork to push the weaving down a bit and condense into a bit of a smaller weave.

Step Nine: Now you will remove your weaving from the loom! You need to be very gentle at this point because your weaving will be a bit more fragile as you are taking it off the loom.

Starting at the top, gently slide the driftwood through the warp threads and slide the warp strings off the top pegs.
On the bottom, gently slide the warp strings off the bottom of the pegs. You will not need to tie any knots along the bottom because of the anchor rows at the bottom.
If you are using a dowel or a thin piece of driftwood, place the driftwood/dowel through the center wrap each pair of strings around the driftwood/ dowel two times securing it in place.
Step Ten: Take a piece of the cotton yarn, about 1 arm's length and tie it to the driftwood/ dowel on both sides to create a hanger at the top.

Step Eleven: To complete the weaving, trim the fridge to make sure it is all even and tie the yarn in the back together to make sure everything stays in place.

There you have it! Now you have a weaving that is ready to be displayed and completely yours! You can follow these photos, colors and textures to make a weaving that emulates what I have here or you can play with different colors and textures throughout the weaving. Weaving can seem intimidating but all you need to remember is the two stitches you learned in this DIY and your weaving possibilities are endless. Happy weaving homebodies XOXO!