
DIY Rainbow Pom Pom Tassel
It is very close to St. Patrick’s Day which means, get ready for some MORE RAINBOWS!! (say it just like the MORE COWBELL SNL sketch). I like to live in a very colorful and rainbow world. I have been obsessed with rainbows for a long time! Que high school me and my rainbow necklaces. Now that I am an adult, my love for rainbows just exists in pom poms and weavings. I have been seeing a lot of rainbow motifs in pom poms on the internet and I thought it would be fun to give it a shot. Making a rainbow pom pom is very similar to making a regular pom pom, except that there is some layering and trimming involved. It is quite simple and I felt that with an added tassel it can be double the fun! Perfect to turn into a keychain for a bag or to hang on the wall as decoration!

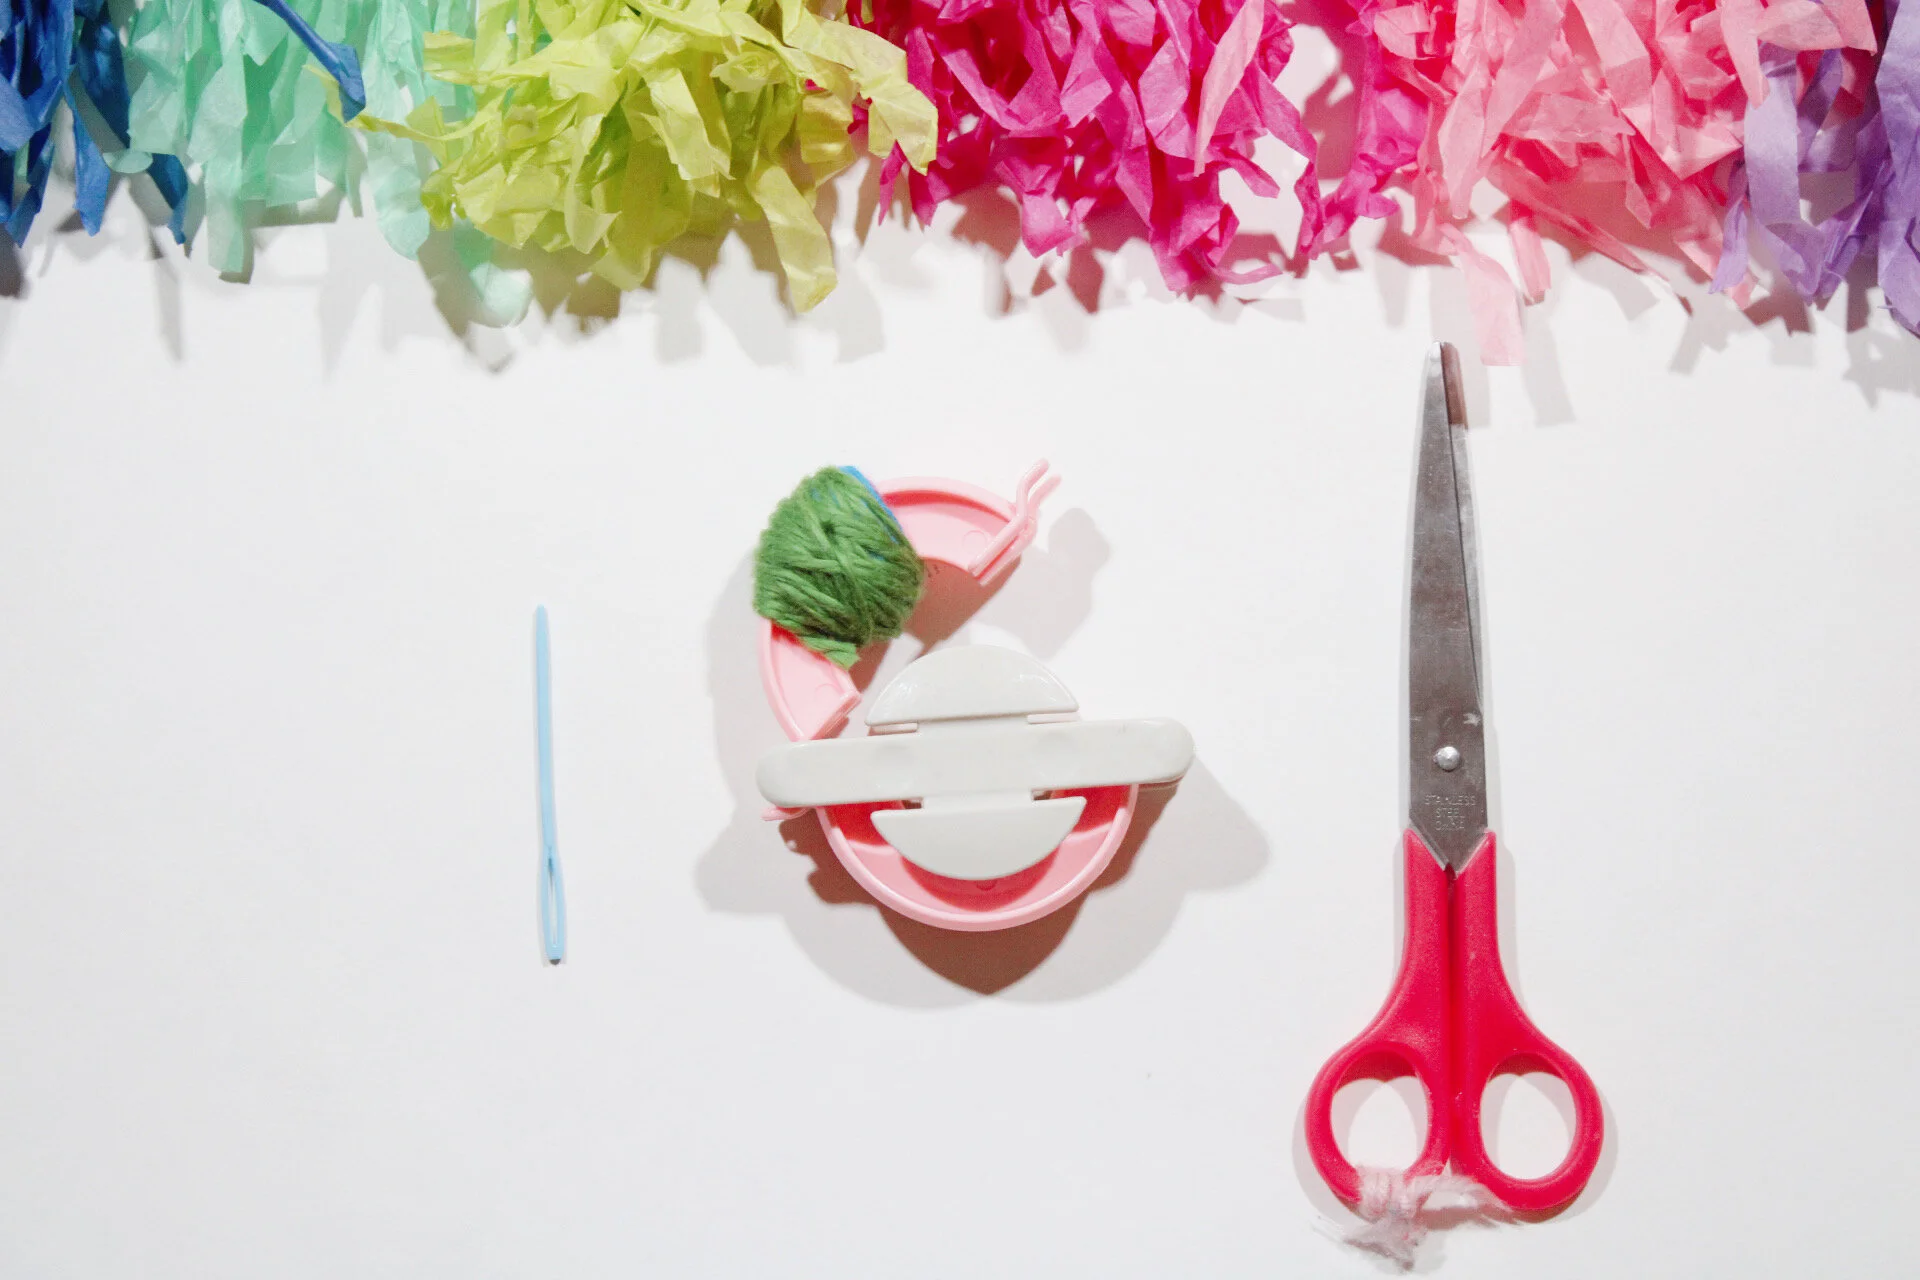
Supplies:
-Medium Pom Pom Maker
-Scissors
-Yarn in Rainbow Colors
-Tapestry Needle

Step One: Using your pom pom maker, open one side of the arms with both arches. Take the WHITE yarn and begin wrapping around both of the arms just right of the center. Wrap the white yarn about 10-15 times around, wrapping tightly and to the right of the starting point. The white yarn should cover only about one- third of an inch.

Step Two: Once you complete the white, using the PURPLE yarn start wrapping about one- fourth inch to the left of the beginning of the white yarn. Wrap the purple yarn between the gap of where the purple and the white yarn start and then continue to wrap over the white yarn and cover the white yarn completely. Stop when you get to the end of the white yarn. This will help in creating a more precise rainbow shape to your pom!

Step Three: You will repeat step two for every other color you have being used in the rainbow-- blue, then green, then yellow, then orange, then red. Make sure that you are beginning each new color of yarn just to the left off where you began wrapping the previous color. Each new color ends in the same spot.


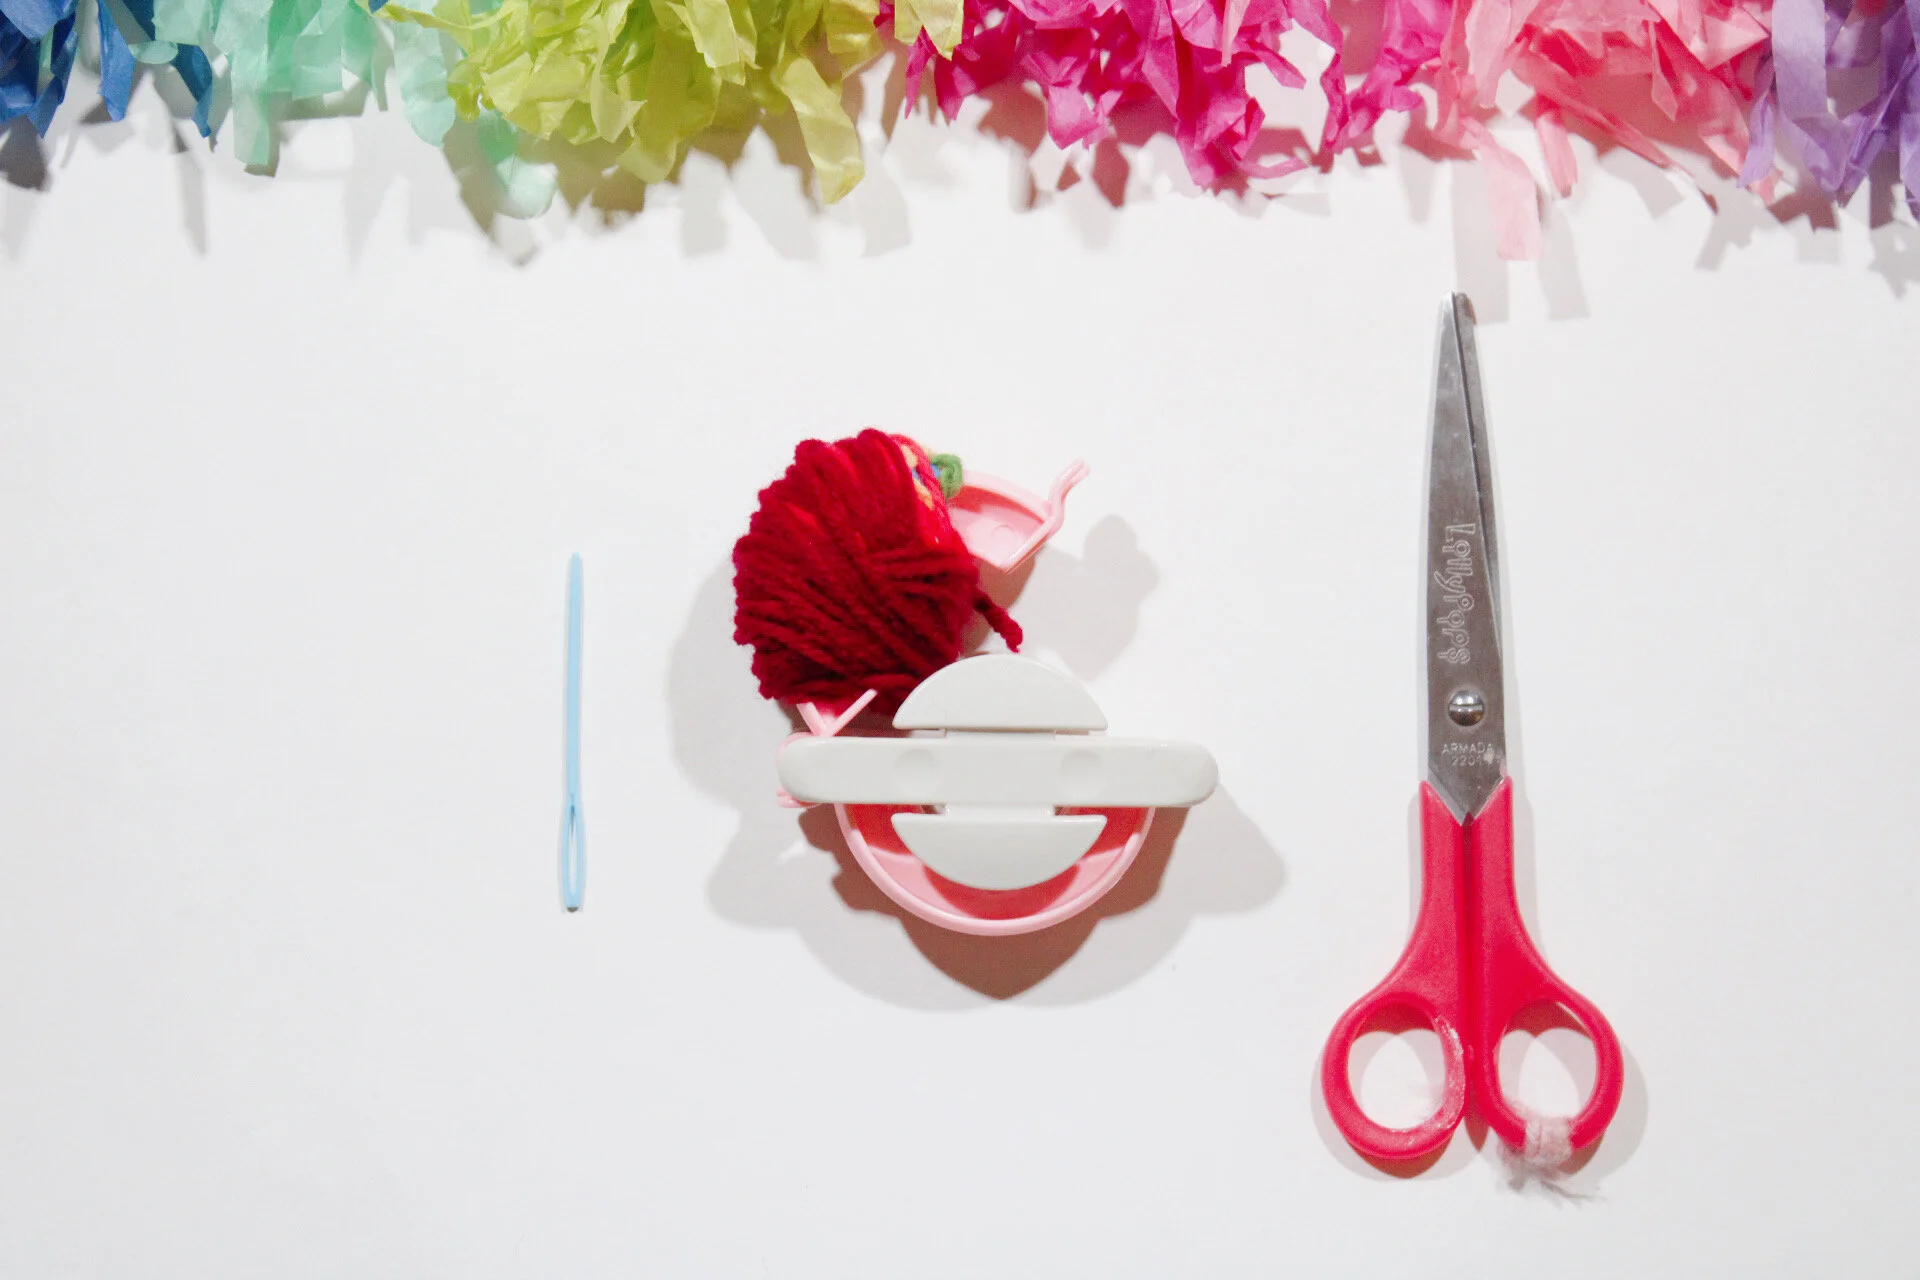
Step Four: Once you have completed wrapping all of the colors (red), you will use the WHITE yarn one more time. Wrap the white yarn to completely cover the arm of the pom pom maker. You will wrap all the way from left to right so the only color you should be able to see if white.

Pro- tip: The middle of this pom will be super dense so make sure that when you are wrapping the white yarn that is is evenly as dense from left to right. That means you may have to wrap a lot of yarn on the left and right side but a smaller amount in the center. This pom pom should be pretty dense to the point that when you close the maker it is tight.

Step Five: Now that you have completed the rainbow side of the pom pom it is time to do the other side. Open up the arms and begin wrapping the WHITE yarn throughout the maker. This side of the pom pom will be all white. You will use a lot of yarn during this time because you need the density of this side to match the side with the rainbow pattern. When you are completed wrapping, close the pom pom maker

Step Six: Now, with both sides closed to create a circle, you will start on the side that looks like a hinge and cut down the middle of the two arches. Be sure that every strand of yarn gets cut.

Step Seven: Next, cut down the middle of the two arches on the other side of the pom pom maker.
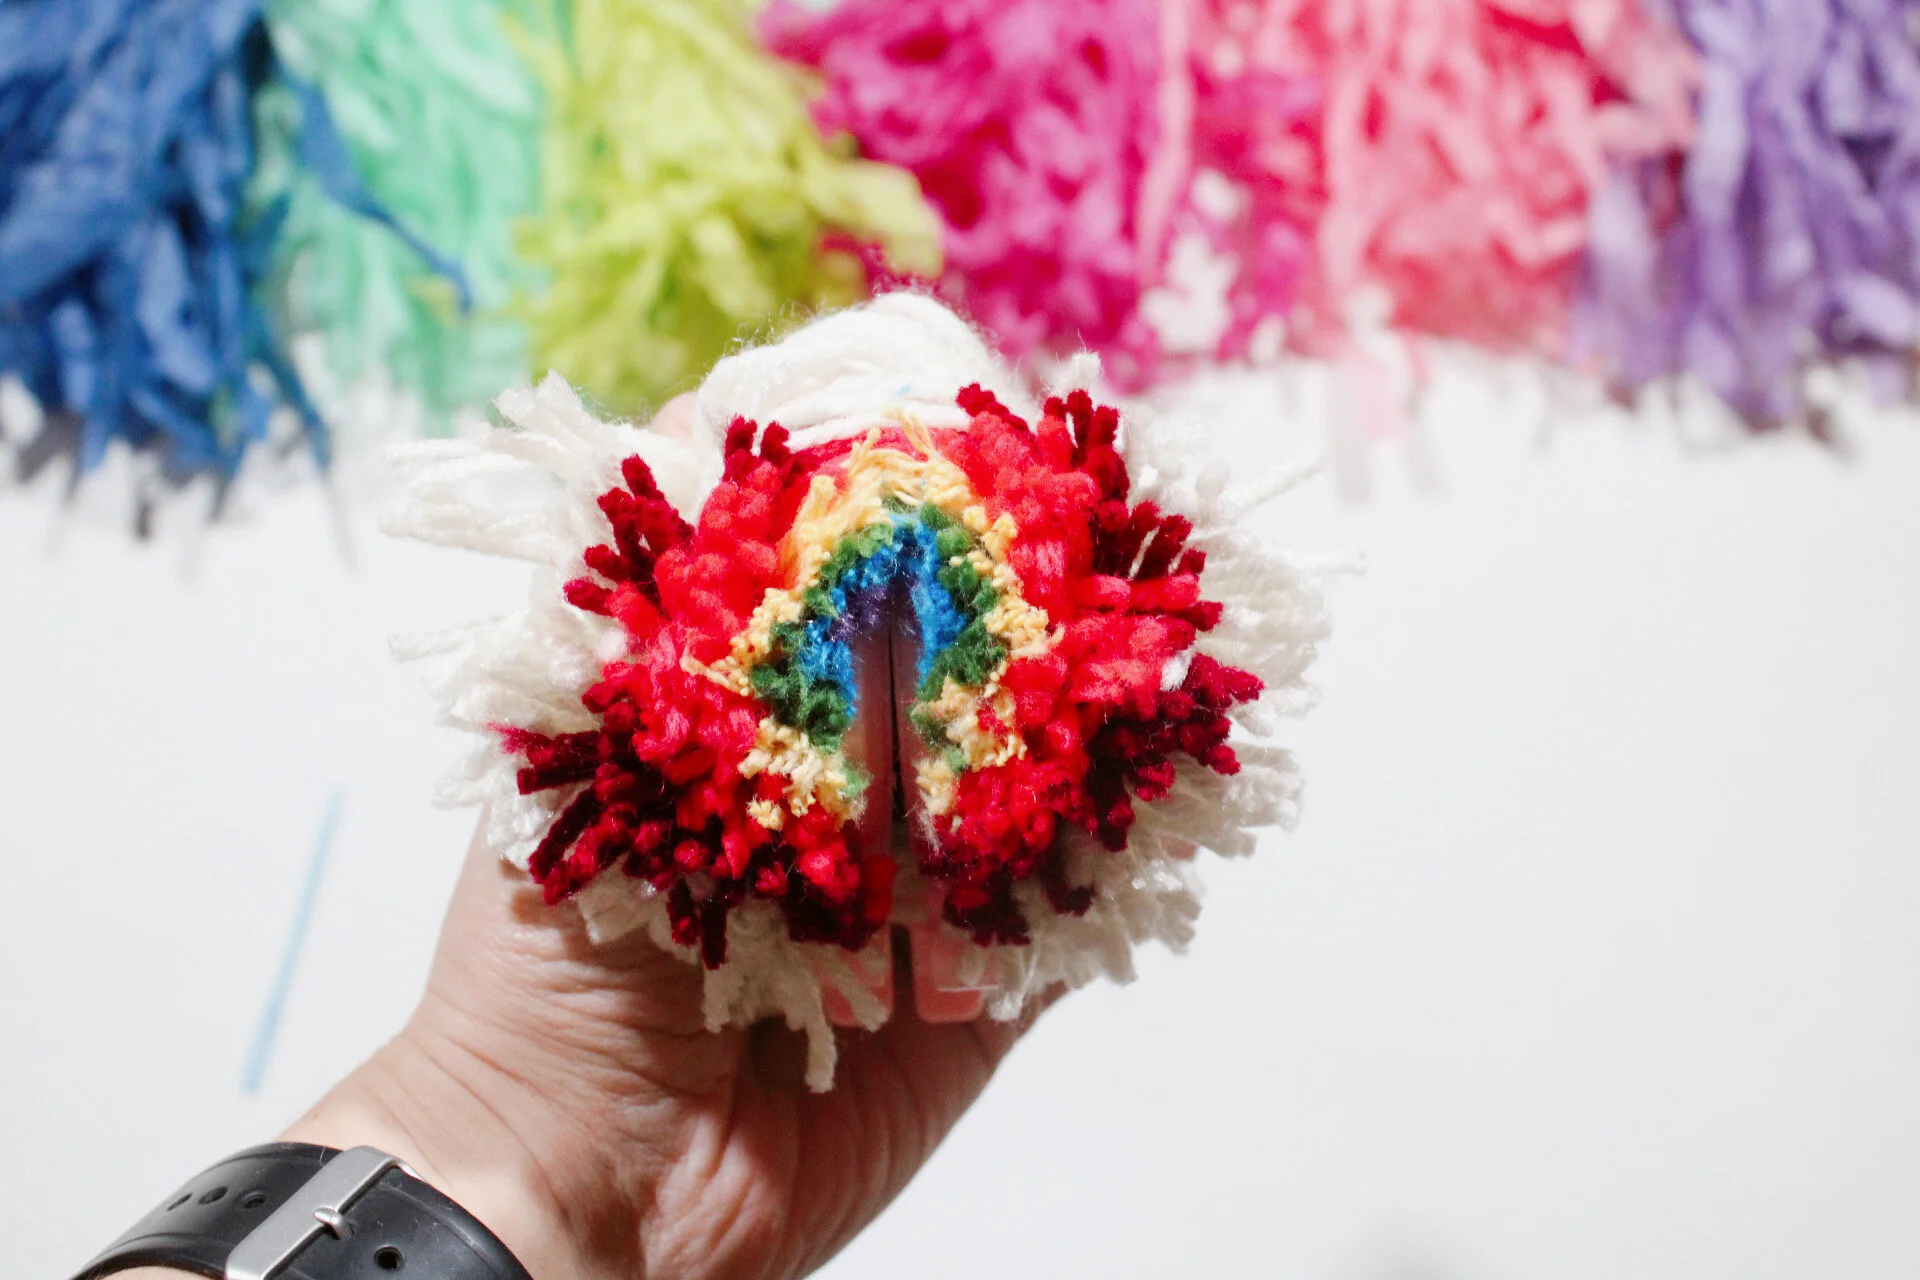
Step Eight: Holding the pom pom maker together, take a piece of white yarn about arms length and wrap it completely around the pom pom maker. The yarn will go through the center of the arches where you cut the yarn. Tie the yarn in a DOUBLE knot around the pom. Be sure to tie the knot at the back of the pom that way you can trim it in the end.
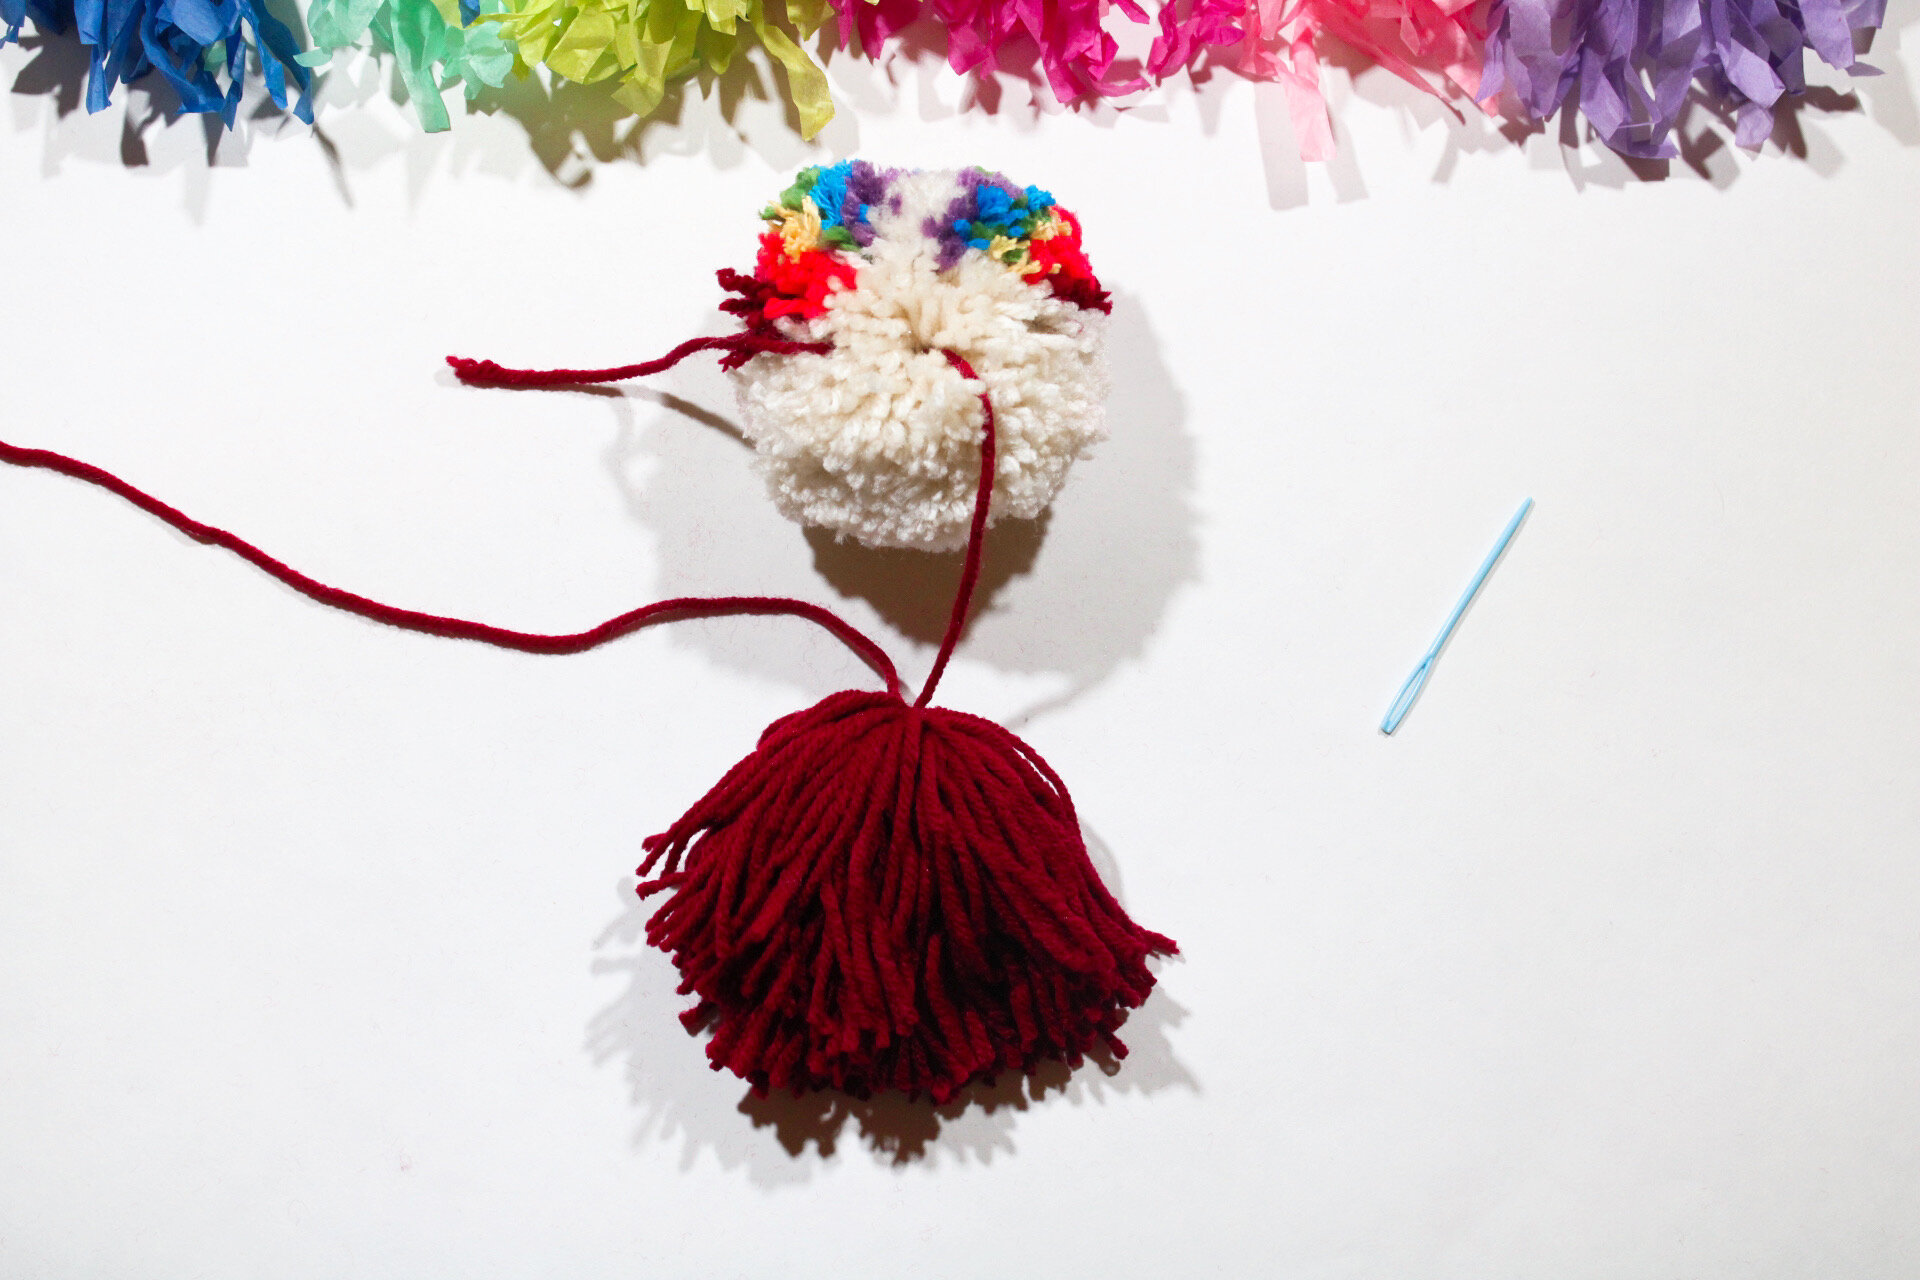
Step Nine: Once the knot is tied, open up the pom pom maker and remove the pom pom, yay! You can take some time to trim here and make the pom pom more spherical.

Step Ten. Now it is time to make the tassel, you will need no tool for this part. Start by choosing the color that you want the tassel to be. Take that yarn and begin wrapping it around your outstretched hand with your fingers fully separated. Wrap the yarn until you have a desired thickness. I like to wrap about 40 times around that way the tassel is equally as thick as the pom pom.

Step Eleven: Take the yarn off your hand and it will look like a little pillow. Find the center of the pillow and place a string, about arm’s length through the center. Tie a DOUBLE knot at the top.
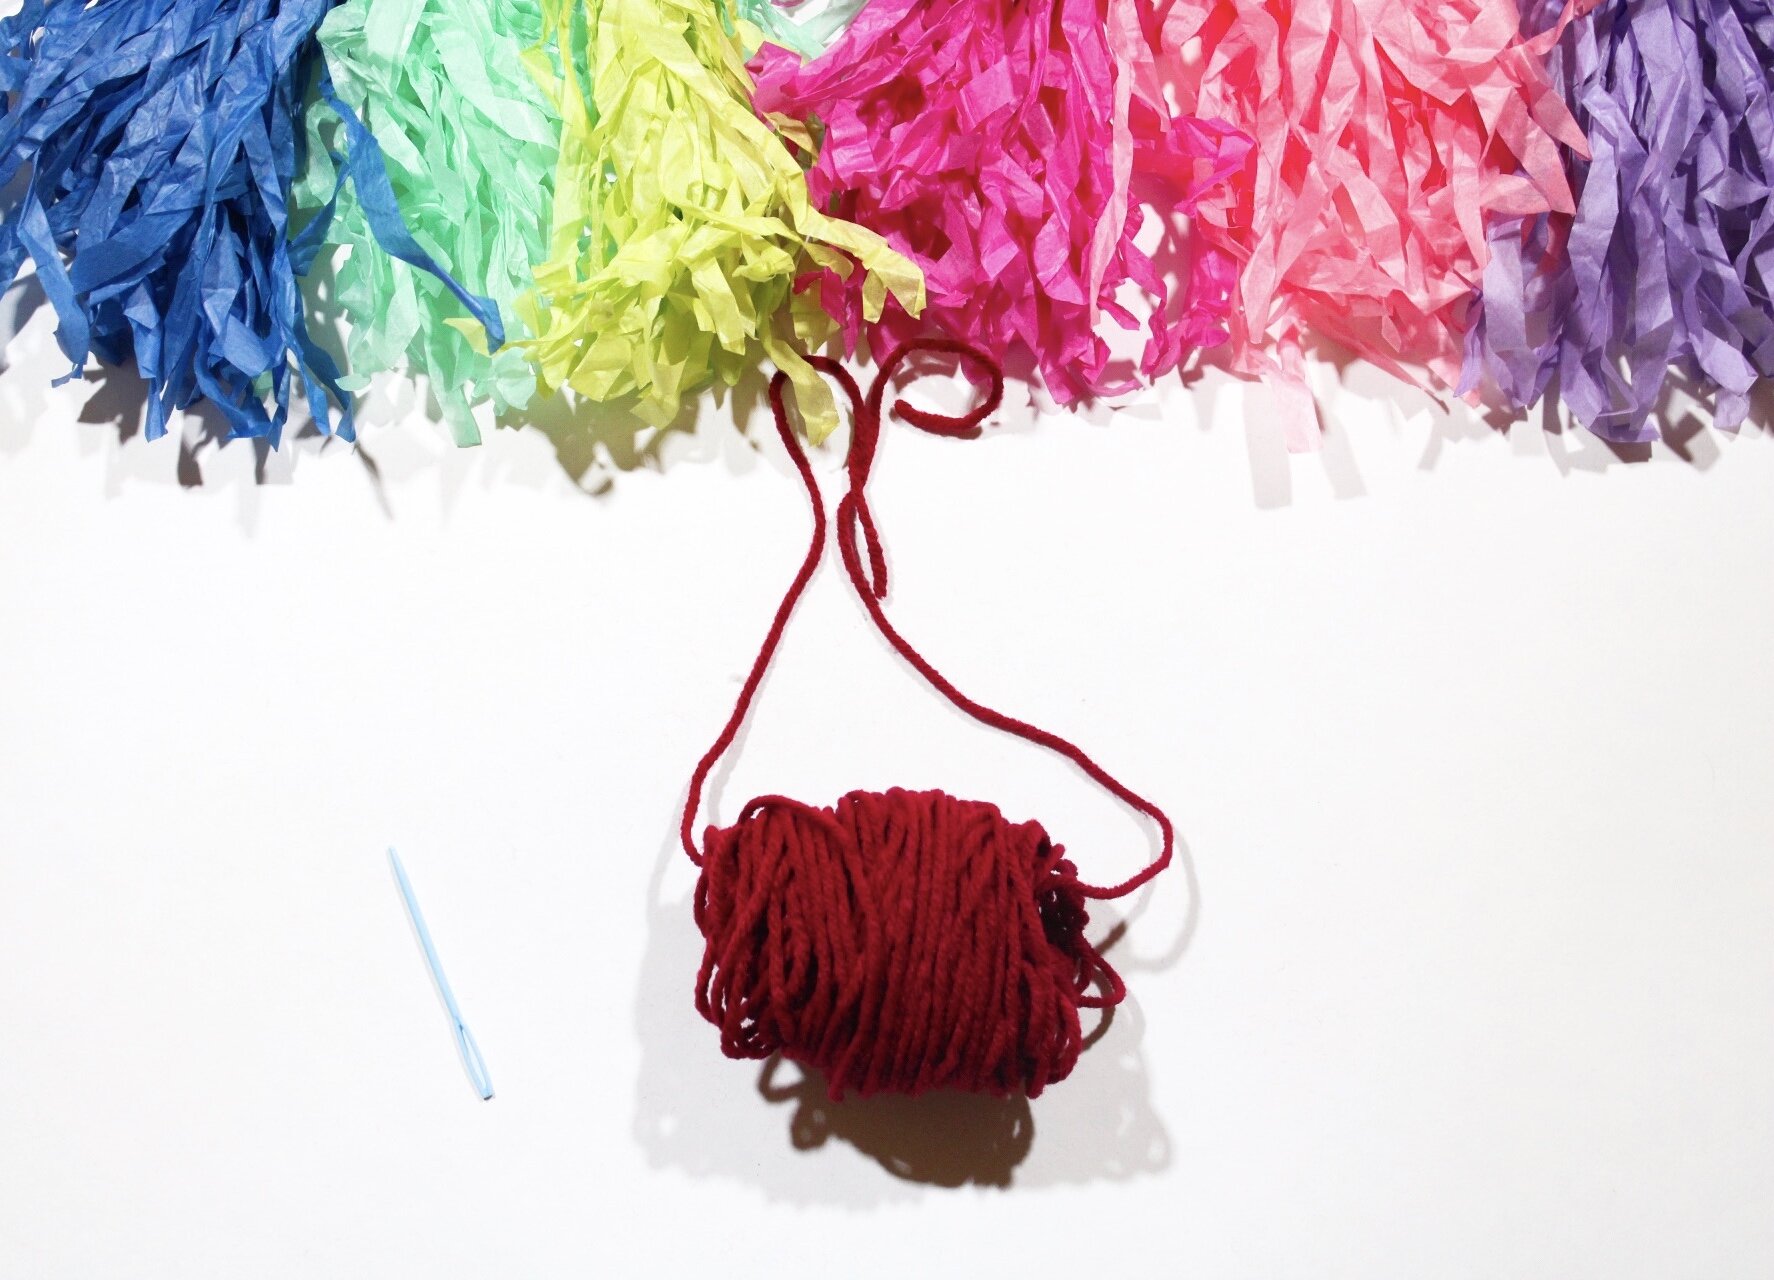
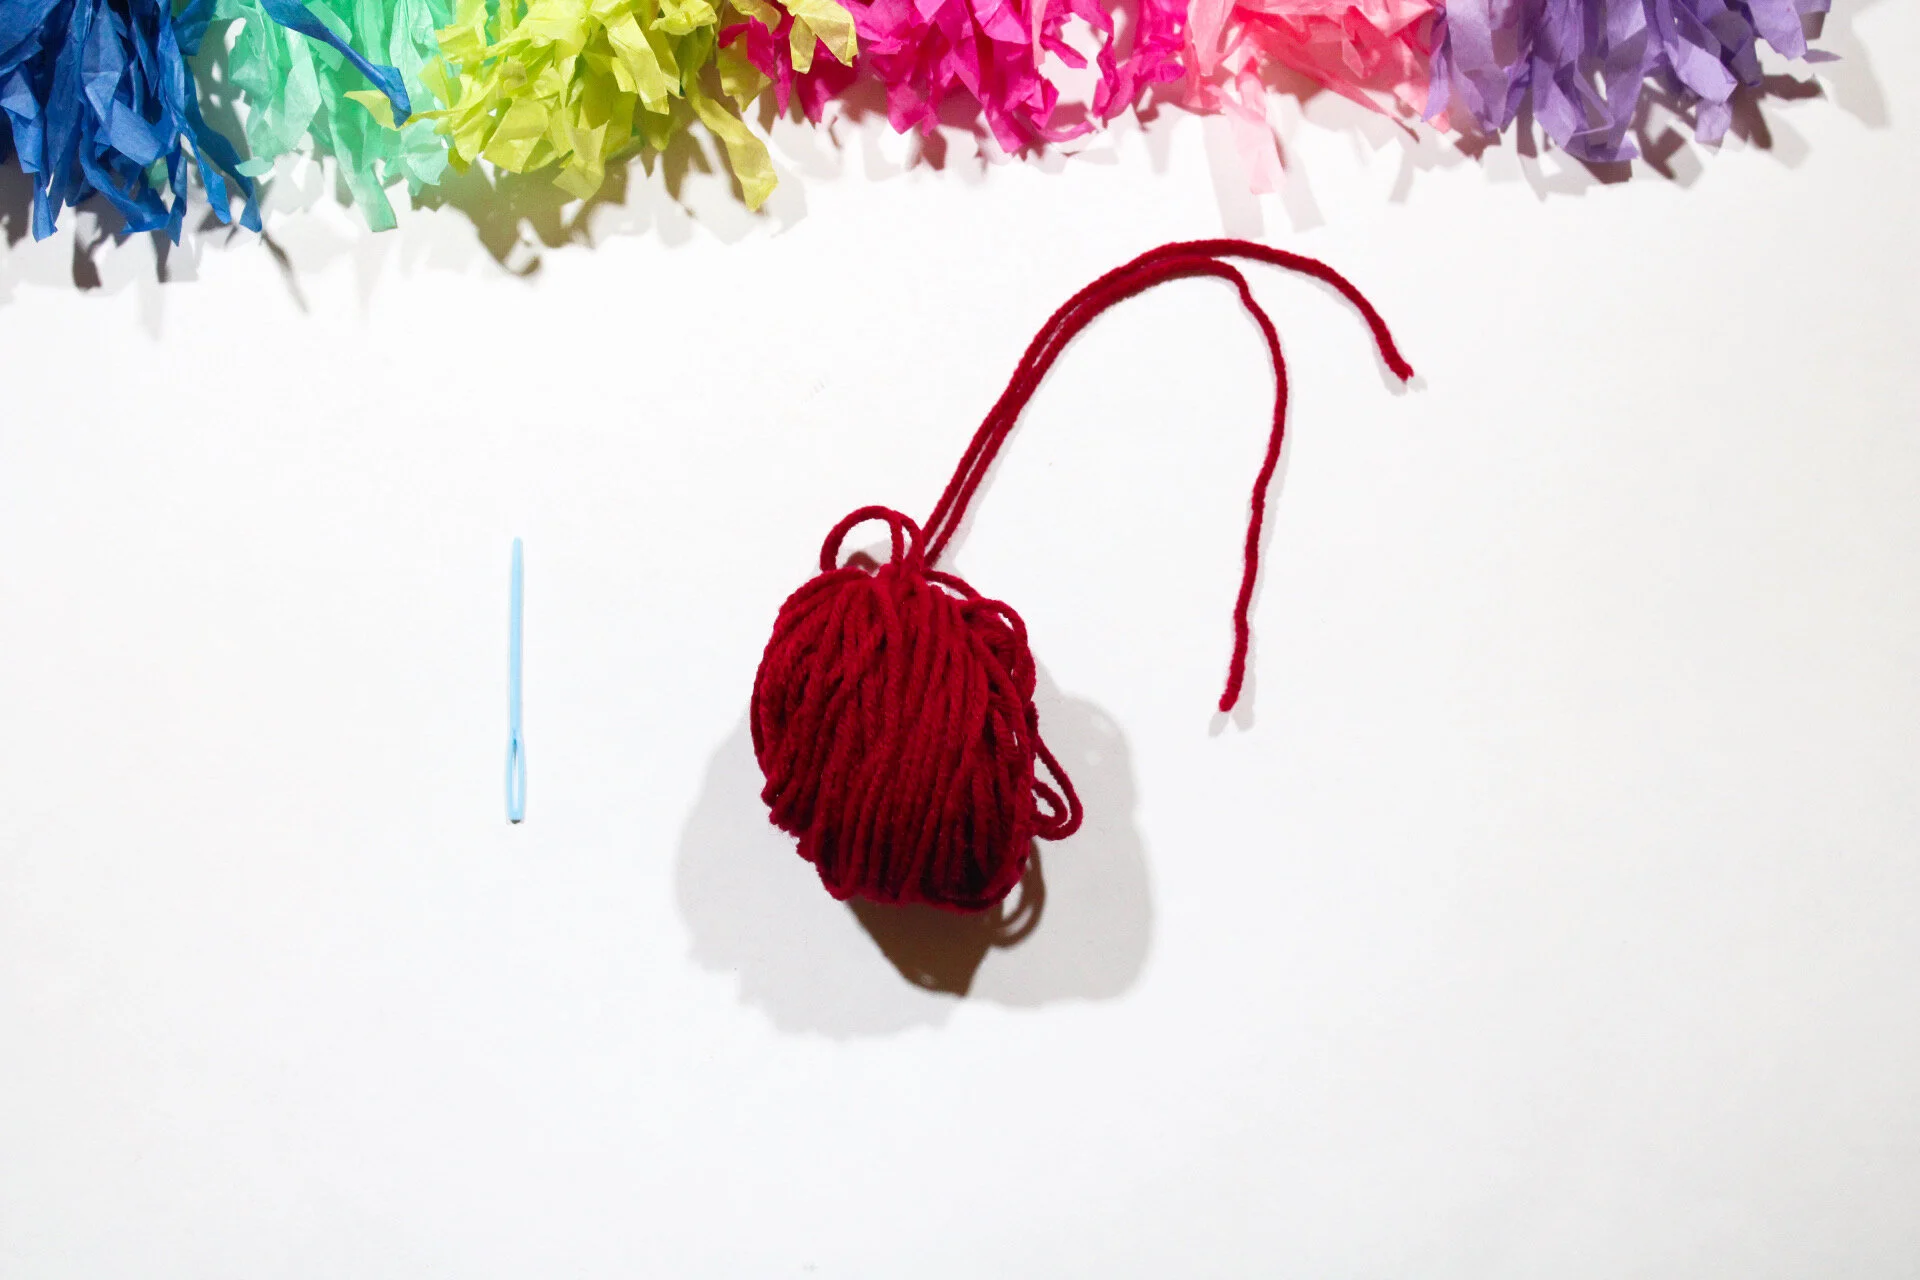
Step Twelve. Cut through the center on the opposite side of the knot. Trim the tassel so that it is even. It does not have to be perfect, but you want it to look like it is all even.

Step Thirteen: Attach the tassel to the pom pom through the bottom of the pom. Using a tapestry needle bring the string knotted at the top of the tassel through the center string holding the pom pom together. Cross the tassel strings and tie another DOUBLE knot.
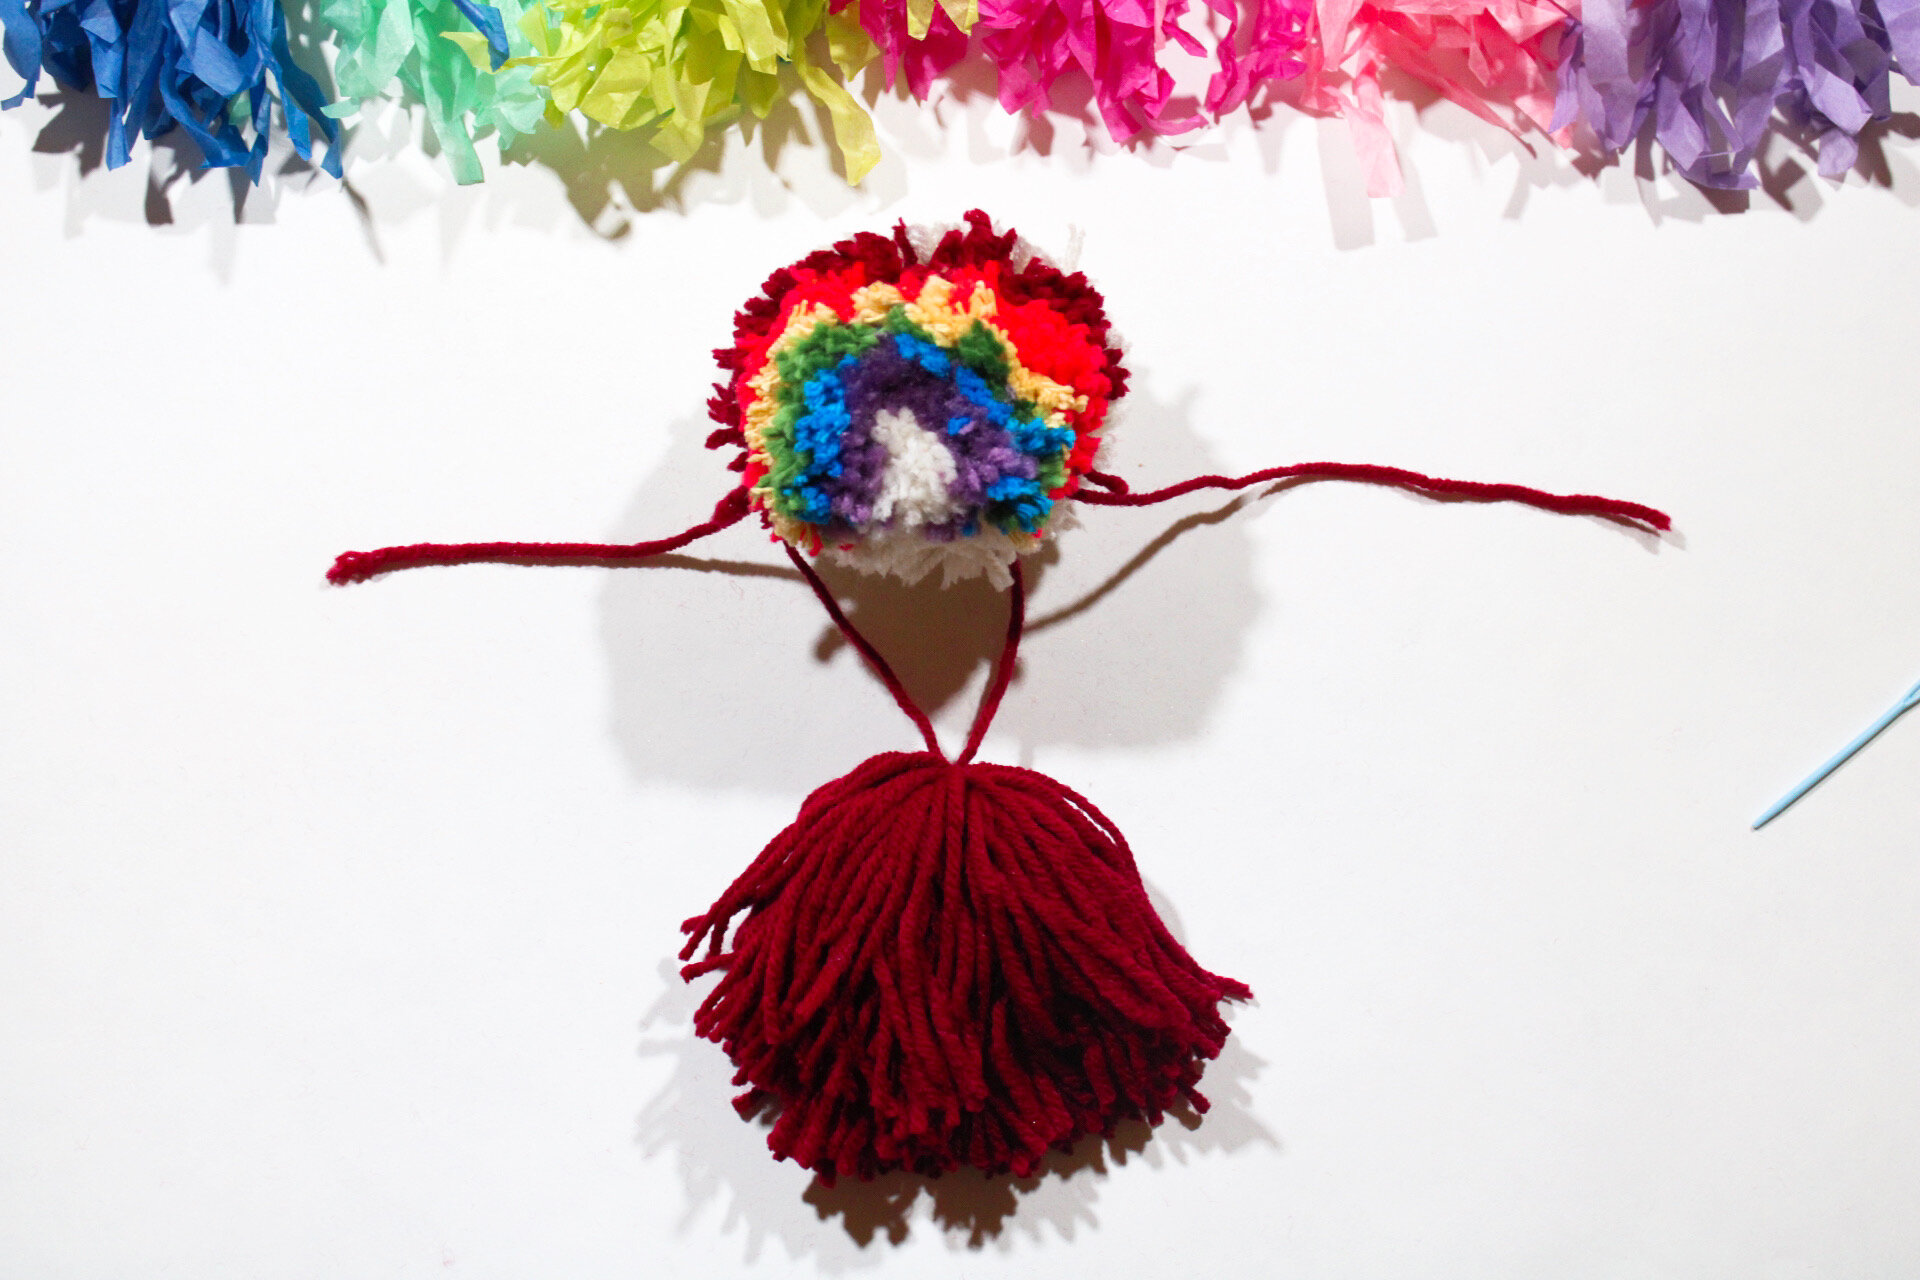
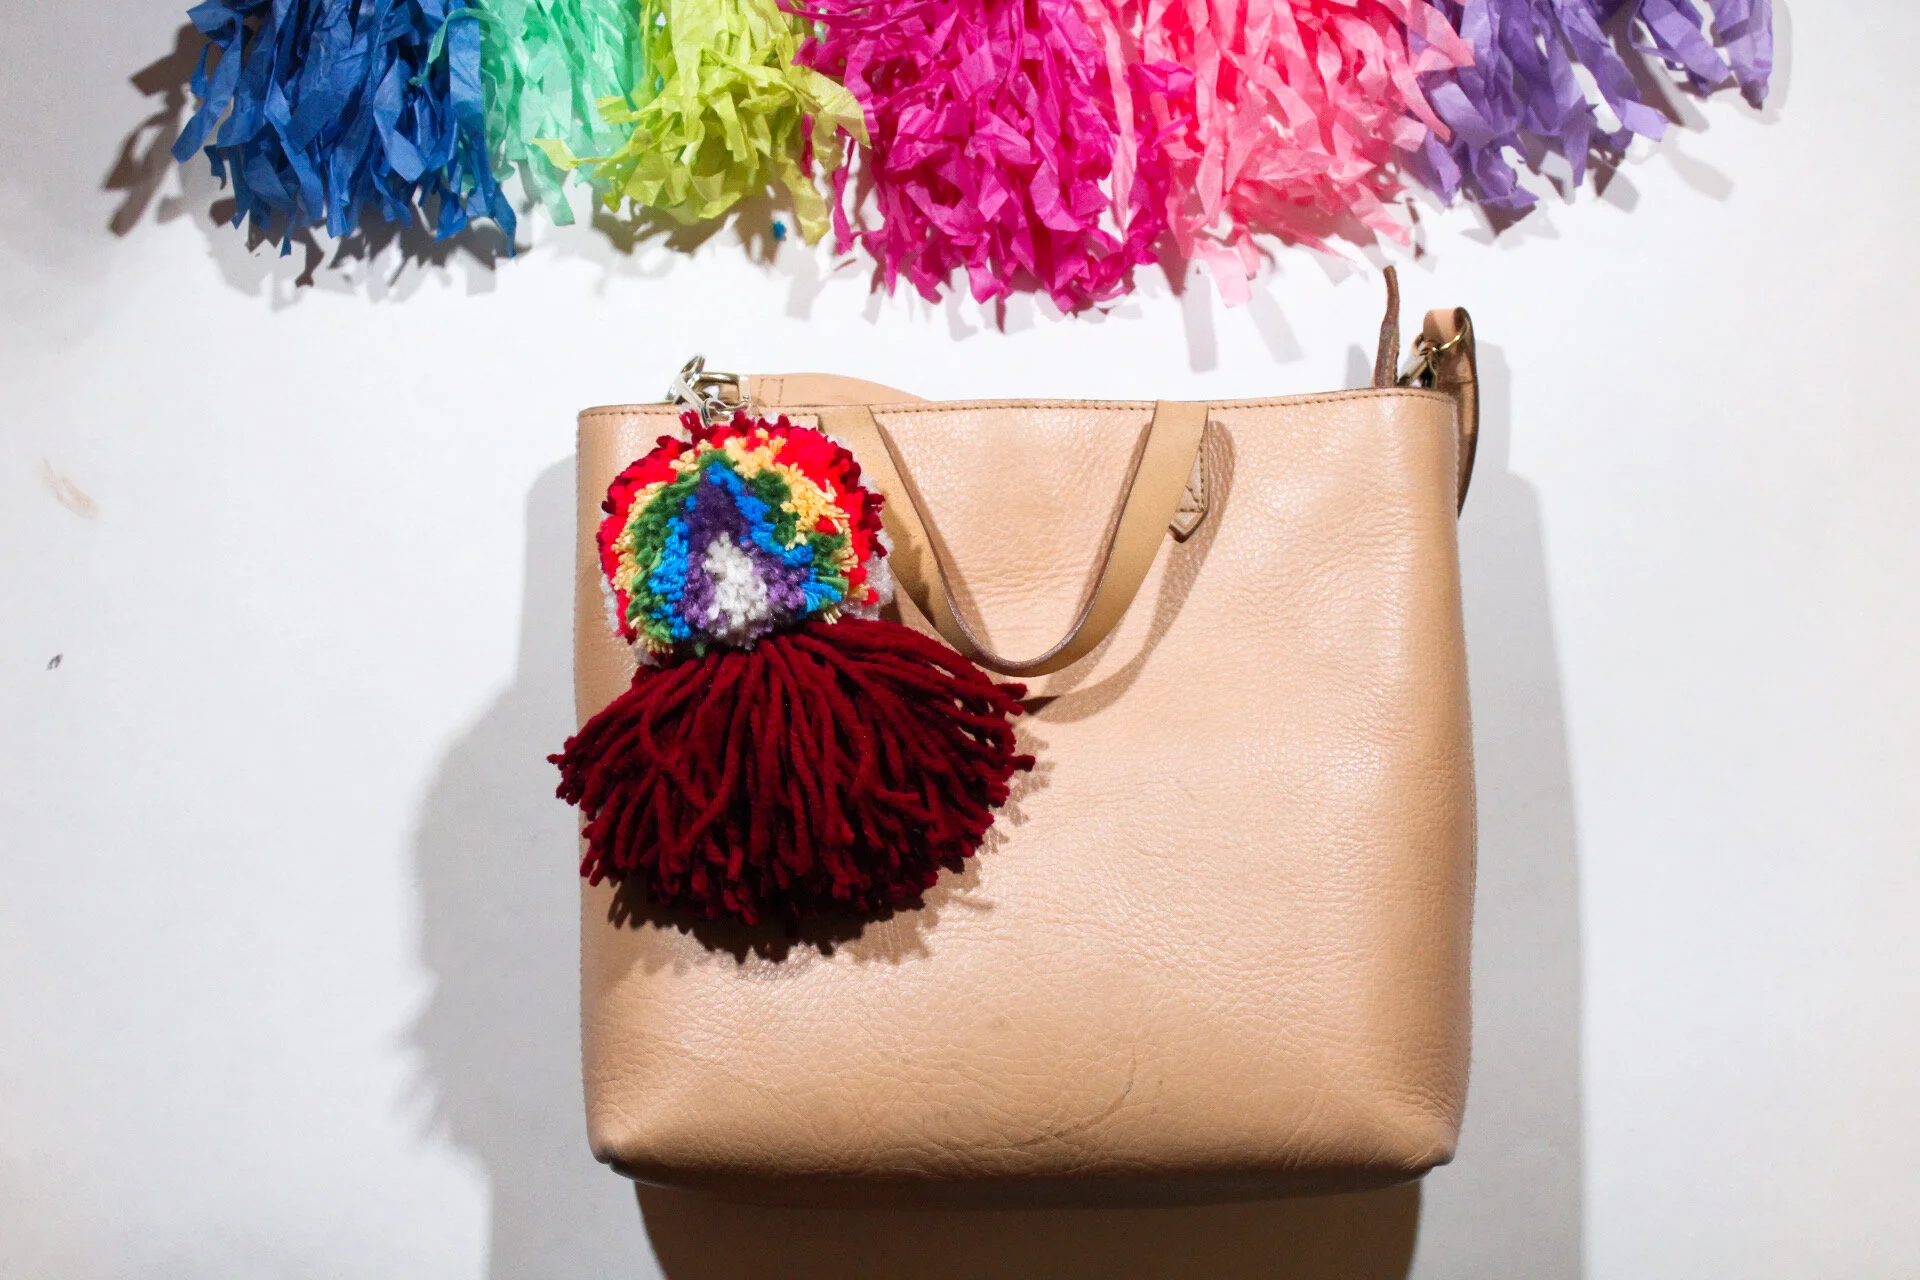
Step Fourteen: I really wanted to make mine a keychain for my bag. I had recently lost mine. Attach two jump rings to each other and attached them to the center string holding the pom together. Then add the key ring to the top jump ring, creating a keychain! You can also just take a piece of string and sew it through the center of the pom pom to create a wall hanging.

There you have it! These pom poms are the perfect addition to your home or your purse to bring more rainbows into your life! You can also use many different colors and make different rainbow poms. I also think it could be super fun and festive to make these pom poms into a pair of earrings as well!
If you make it, we’d love to see it. Tag us with #HomebodyMakes or #StayingHome